|
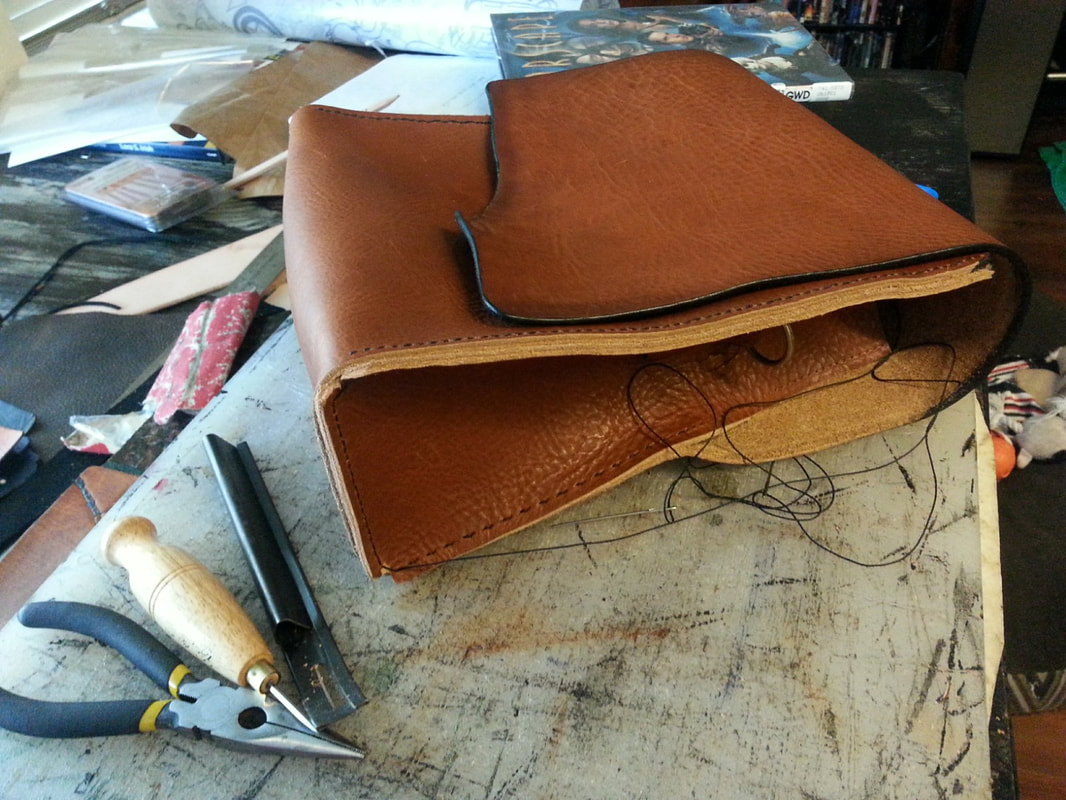
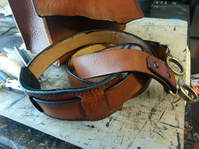
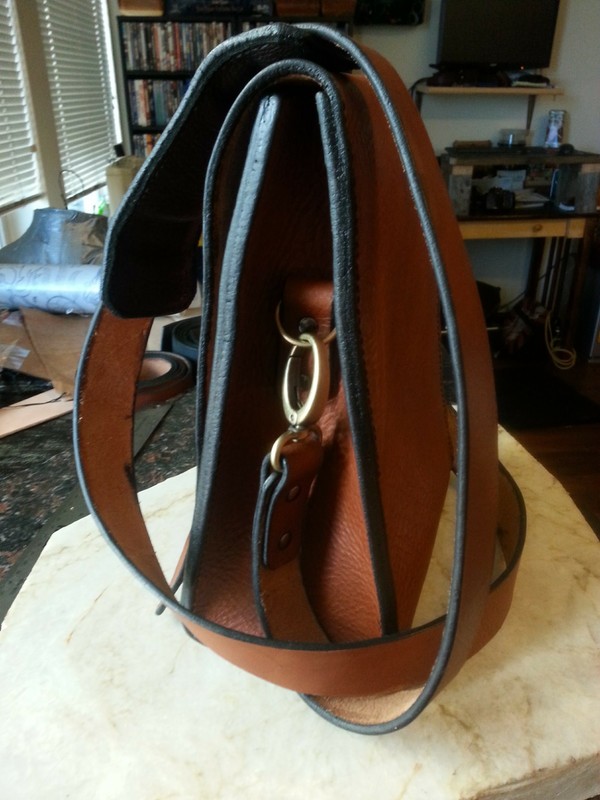
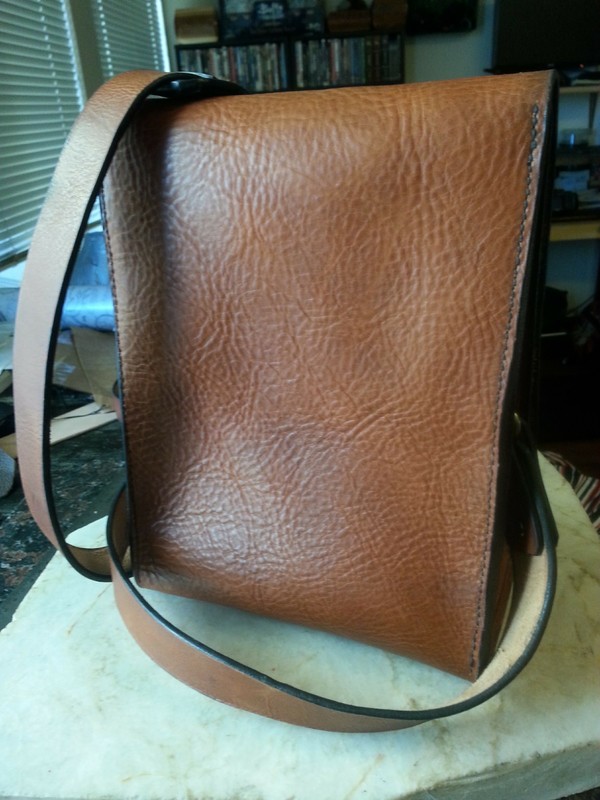
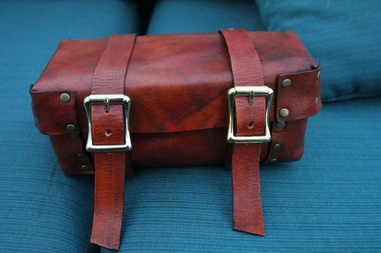
by Willow Enright 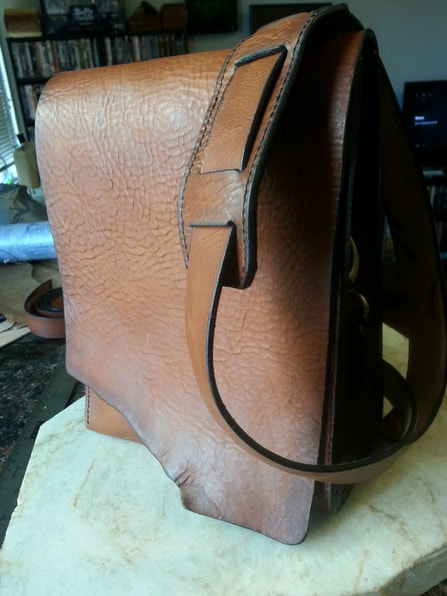 Finished Leather Satchel I’m a huge fan of leather tote bags, satchels, and messengers, and I’ve always wanted a leather satchel of my very own. I happened to have some beautiful leftover hide from an 8-9 oz Chestnut Austin Double Shoulder that was just the perfect size for creating my satchel. Since I was using a leftover bit of hide my satchel bag size was limited, but perfect for me. It was big enough to allow me to fit two large novels into it, so that was a good size for me. This particular style of satchel is pretty simple since it’s basically one large pocket, essentially a long piece of leather with two sides and a shoulder strap.
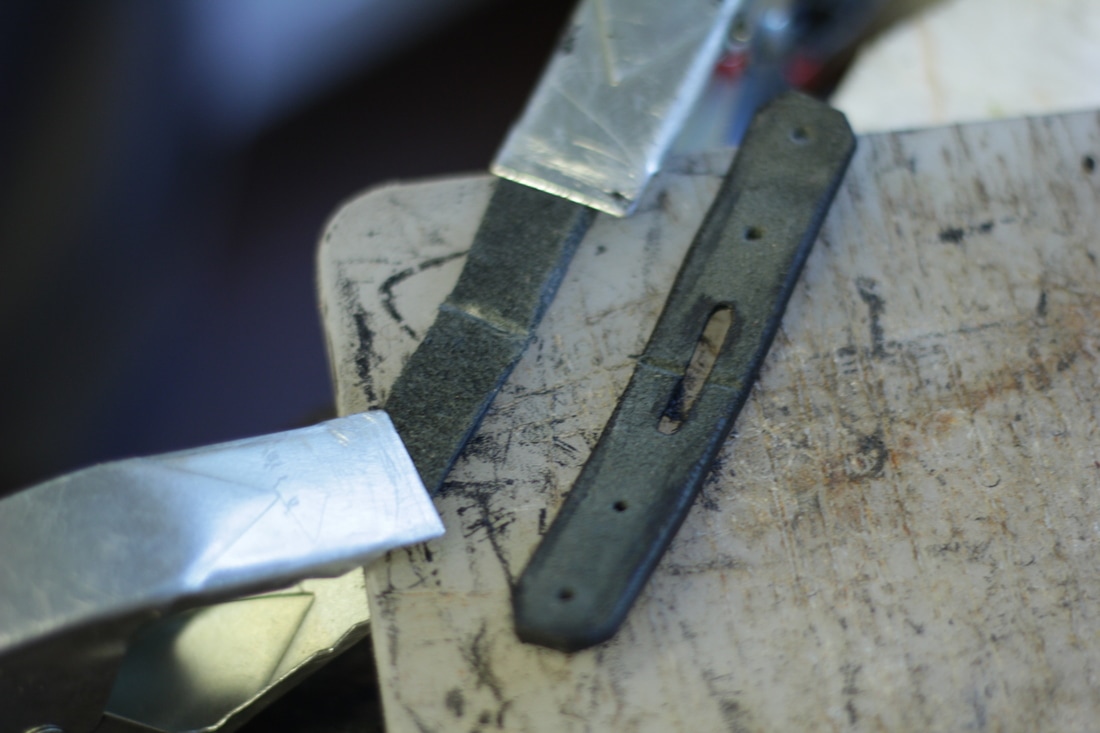
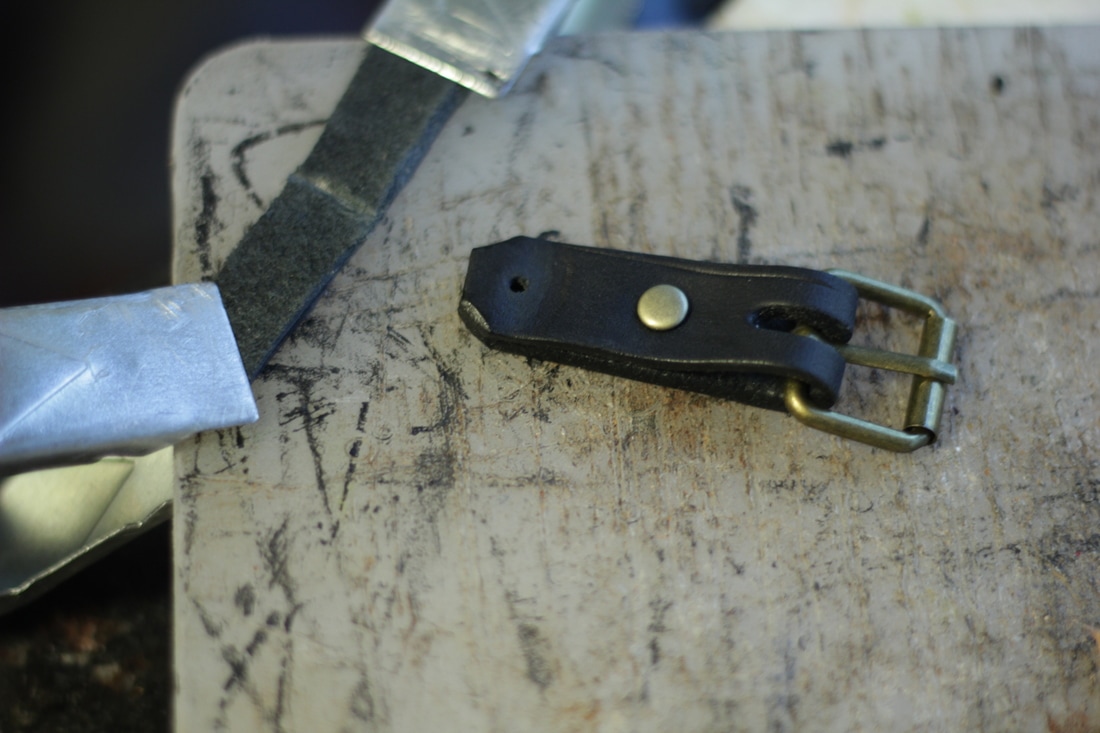
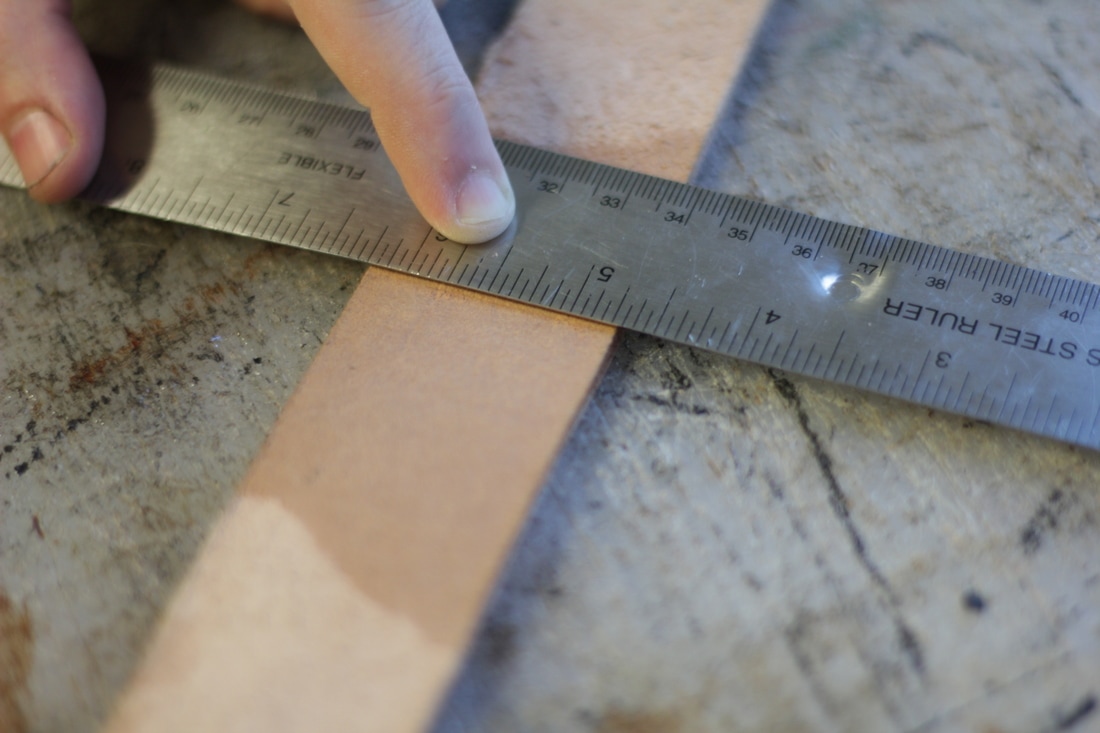
I measured 10” for each side (20”) and 4” for the bottom, with the top flap at 9.5”-12” respectively due to the natural edge. Each side piece is approximately 4.5” wide and 10” tall. The shoulder strap is 50“ x 1.25” with a 2 ⅛” x 6.5” shoulder pad lined with a 4-5 oz black deerskin. Each end of the shoulder strap has an Antique Brass 1" Metal Egg Swivel Clasp, and both sides have a 1” Antique Brass D-ring and all rivets are medium double capped black.
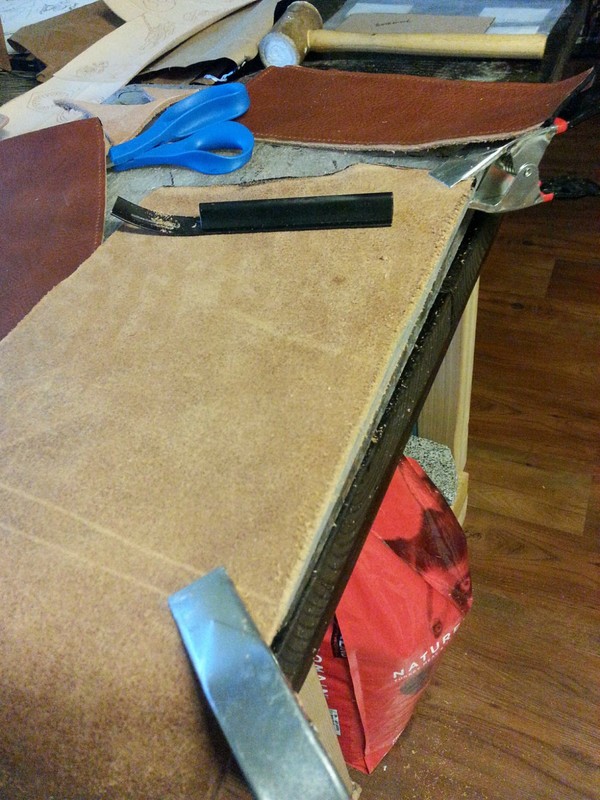
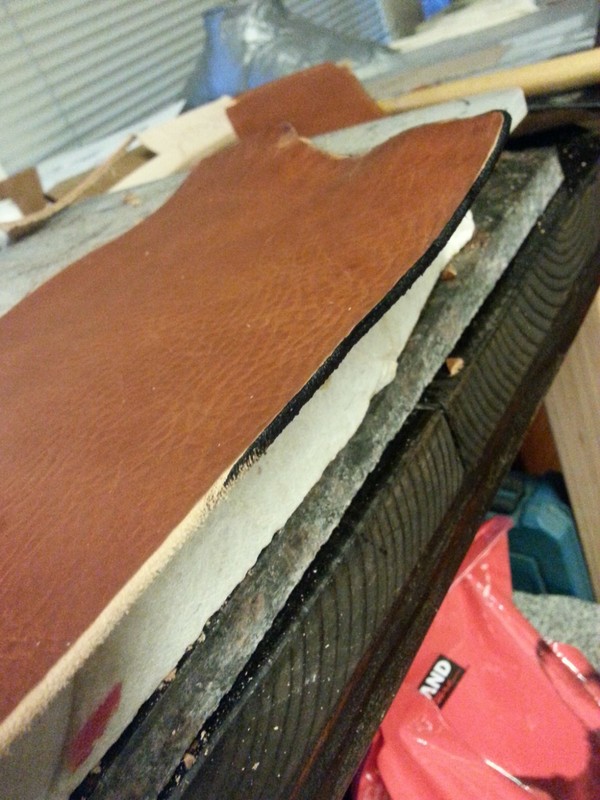
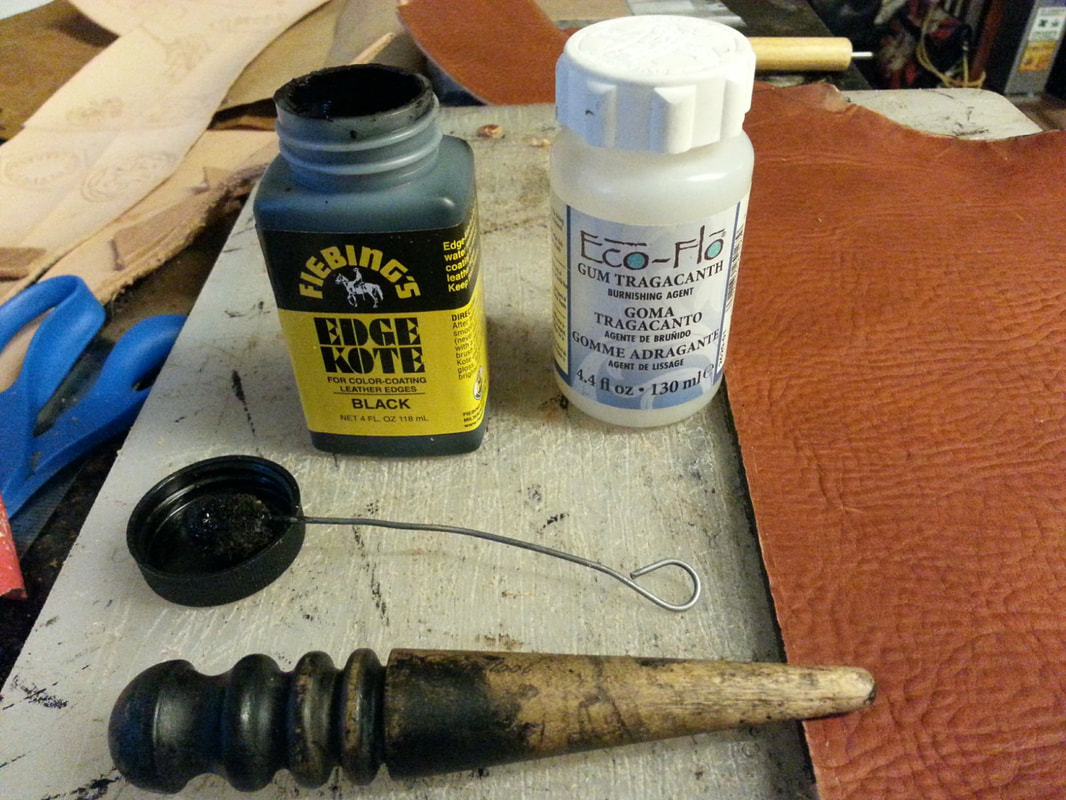
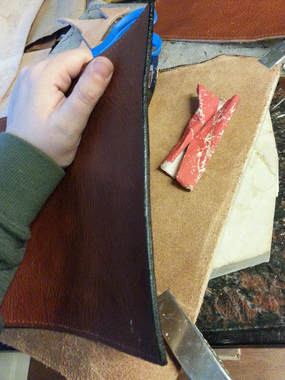
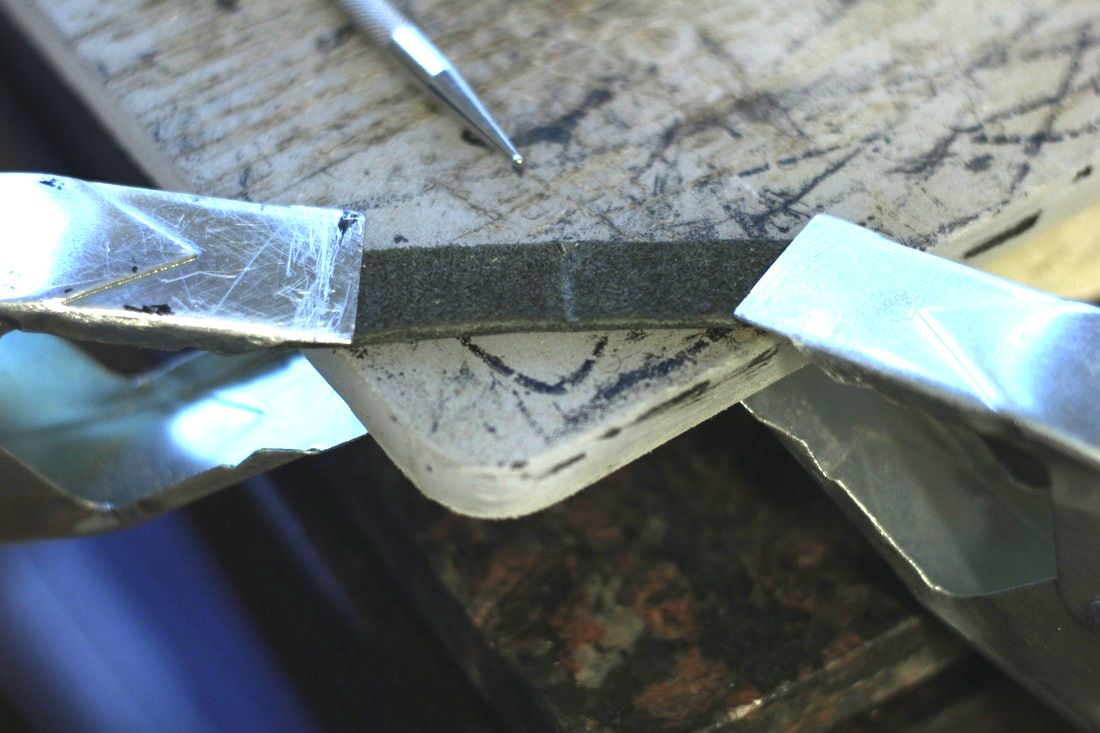
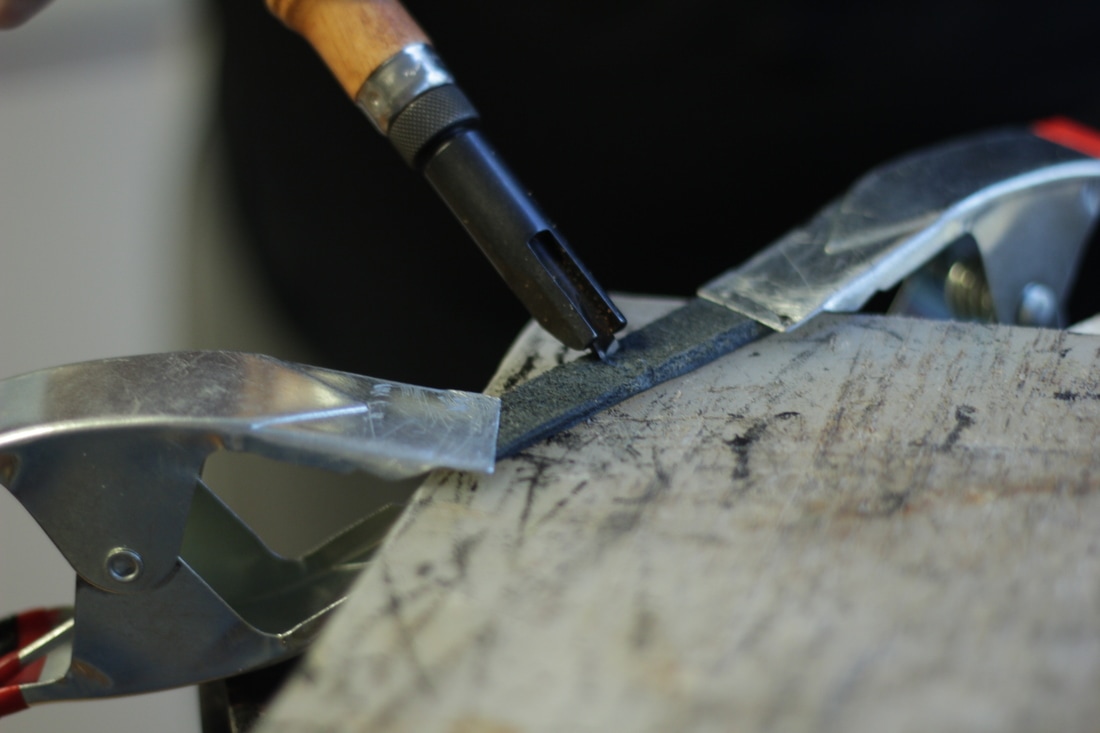
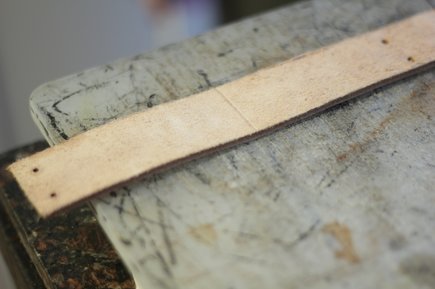
Once my pieces were all cut to size I went to work beveling and sanding all of the edges. For the technique used please reference, Those D@m# Edges. All of the non sewn edges, including the shoulder strap, were completed with burnishing while the sewn edges were left raw until after they were sewn together. A stitch grover was used to make a line approximately ⅛” from the edge, and then holes were punched with a 6 prong stitch hole punch along both sides and the bottom.
The thread used for sewing was a black waxed nylon thread with a harness stitching needle. The length of the thread for each side was 5 lengths of the area sown, and at the end the knots were burned with a lighter before being stuffed between the two layers of leather. I chose to sew the sides with them slightly concave. The d-ring pieces were riveted to the side pieces before the sides were sewn to the main leather section. This was followed by Those D@m# Edges also being beveled, sanded and burnished.
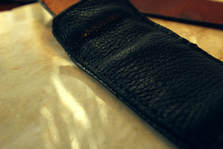
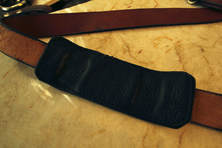
The shoulder pad has four straight cuts to create the two sections that has the strap threaded through, and the 4-5 oz black deerskin is sewn onto the back to keep the strap from rubbing against your shoulder. The shoulder pad is also sewn with black waxed nylon thread at 3.5 times the length of the area being sewn, and is slipped onto the shoulder strap before the end clasps are attached with medium black double capped rivets.
To finish off this lovely satchel I used Aussie Leather Conditioner, rubbed into the leather and then buffed off with a cloth. Followed by Chamberlain’s Leather Milk no. 3 to penetrate and protect the leather from rain and grime. Now, I have the perfect companion for that trip to the library!
1 Comment
by Willow Enright 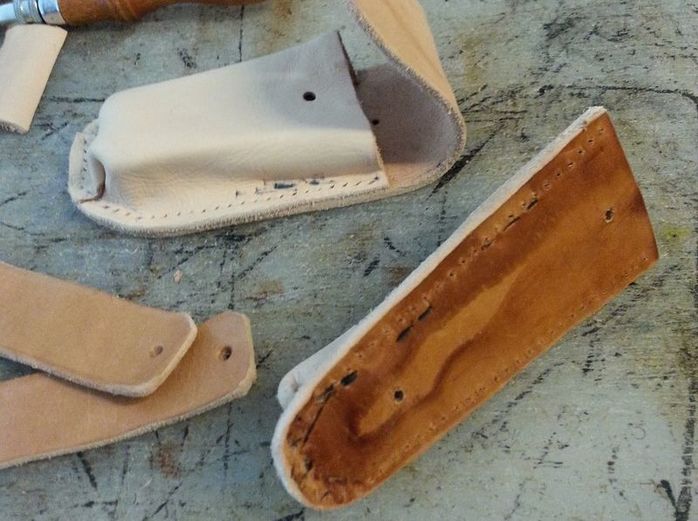 Glued, Wet Formed, Beveled, Sanded and Hole Punched Leather pouches. Supplies: Water Based Contact Adhesive (Eco Weld) Leather Plastic Knife or Glue Tool Clamps Paper Towels Wax or Parchment Paper Wet Work Cloth Stylus or Pencil 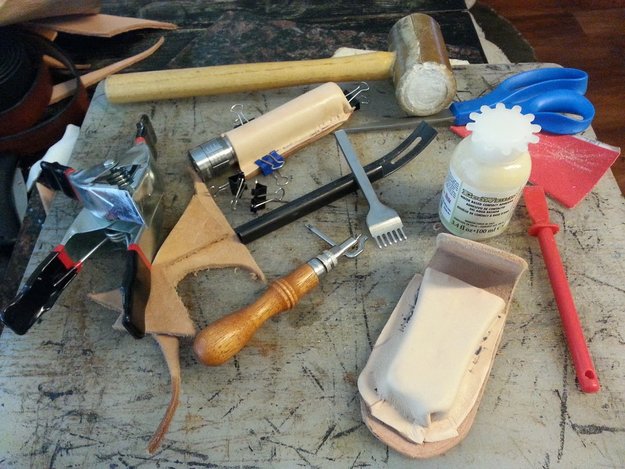 Water Based Contact Adhesive, Glue Tool, Clamps, Stitch Groover, Safety Bevel, Scissors, Mallet, Sewing Hole Punch When you first start working with leather you don't always see the benefits of doing something like gluing your leather before sewing it. Only, sewing thick pieces of leather together can be really tough. Especially trying to match up your holes in opposite pieces for the needle. However, there is a helpful technique of gluing your leather before punching holes that makes sewing thick leather much more enjoyable. The best part is that it's actually rather simple! 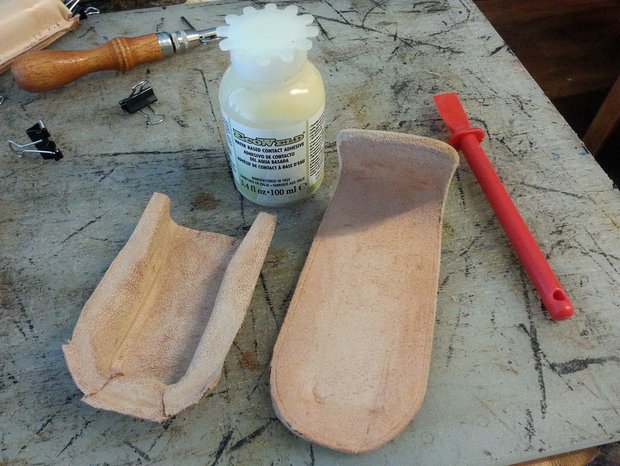 Water Based Contact Adhesive, Glue Tool, and Leather Project Start with your leather cut into the shape you want for your project. If you are simply gluing two thicker pieces of leather flesh side to flesh side (this is the side of the leather that would be pressed against the muscles of the animal) then you won't need to do much to prepare your area for gluing. However, when you are gluing the flesh side of the leather to another grain side be sure to use some sandpaper on the grain side of the leather to rough it up to ensure maximum gluing capabilities. The glue needs something to bind to and the grain side of the leather is simply too smooth to stick well. You can also use a sciver or safety bevel to rough the grain side up some. If your corresponding top piece will be wet formed over your object before gluing then check out my Wet Forming blog here. 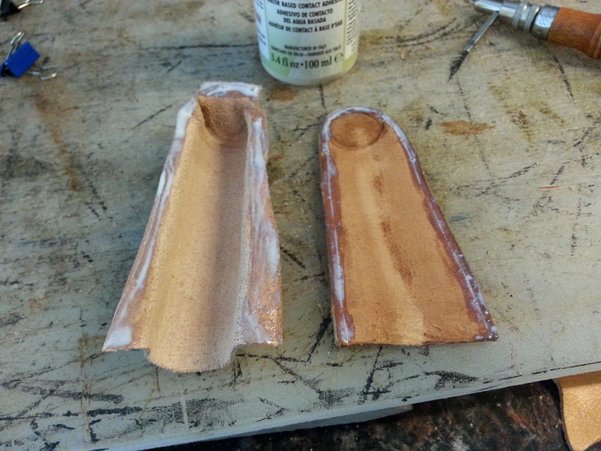 Contact Cement applied around leather edges Once you have your leather pieces ready to be glued, measure along the edge where you want to apply your glue. I use my stitch groover to mark where I plan to punch the holes for sewing. Then I apply the contact cement at least a quarter inch (1/4") on either side of the stitch line. Apply it to both surfaces and let it air dry until it is sticky enough to bond to itself and stay on its own. You can use wax or parchment paper to mark your cut off line which will ensure that you don't over apply the glue, or you can wing it with a pencil mark if you are comfortable. Either way, just be sure to not get any glue on your grain side of the leather. If you do then your leather won't absorb oils, waxes, dyes or stains in that place leaving a permanent blemish where the leather won't accept anything. I keep a wet work cloth handy at my work bench in case I get any glue on my hands. 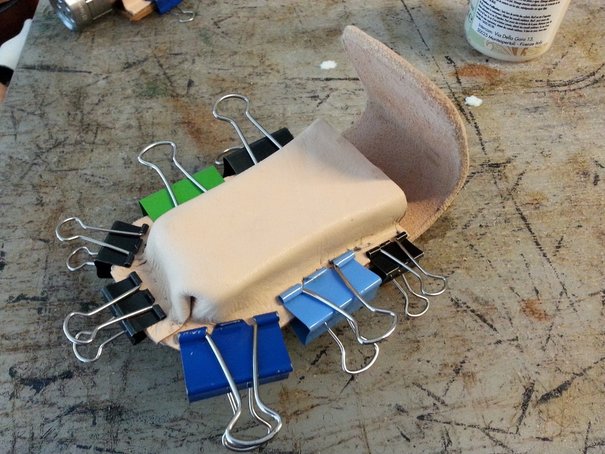 Clamped Leather pieces. I didn't use a cloth or paper towels to buffer my clamps since this project is for my girlfriend who doesn't care about markings. Once the glue has been applied to both sides of the leather it's time for clamping. If you want to keep your leather free of clamp marks, then use paper towels, scrap leather or a work cloth to keep your clamps from making marks in your leather project. Be sure to line up your leather pieces before you press them together, you only have a few seconds to move it before it starts to set. Use your cloth or paper towels to buffer your clamps and set them as evenly around the project's edge as you can. If you don't have enough clamps, spread them out as best as you can and then just rotate them every 5-10 minutes along the edge to ensure even pressure. 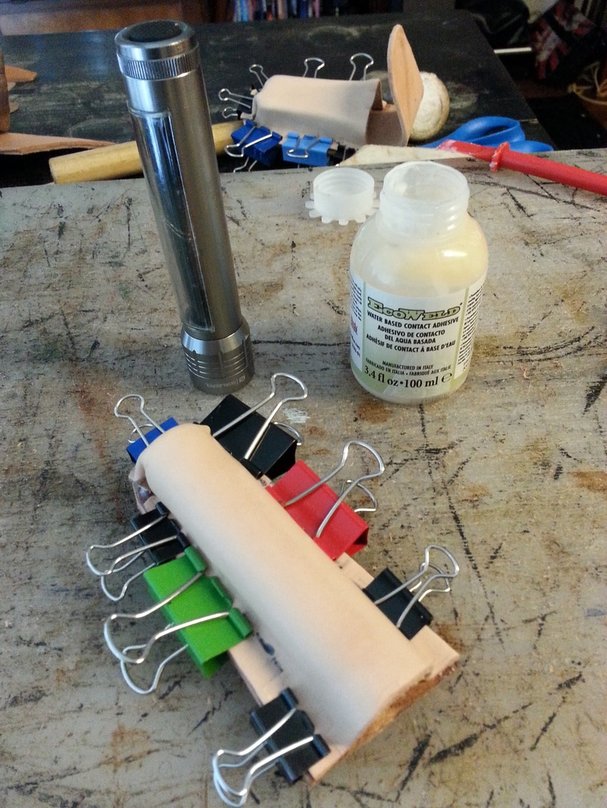 Clamped Flashlight Holder with Contact Cement. Leave your project clamped for a minimum of 30 minutes before removing the clamps, and then leave the project for 24 hours to completely dry. This will give the glue it's maximum adhearing potential. If you can't wait a full 24 hours before punching your holes then be sure to wait at least 6-12 hours for the bond to have started. Since this is a contact cement it is possible to punch holes as soon as 6-12 hours later, but for optimal bonding results it is recommended to wait a full 24 hours. Once your project is dry you can trim and bevel your edges for a nice smooth transition!
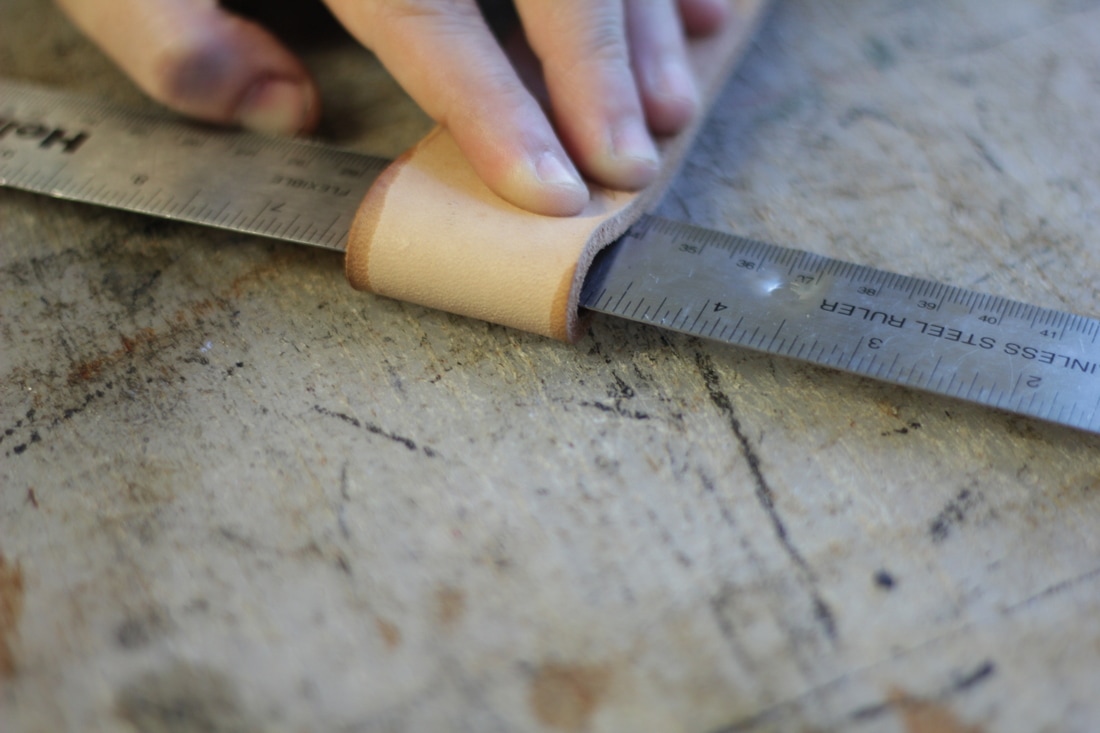
by Willow Enright 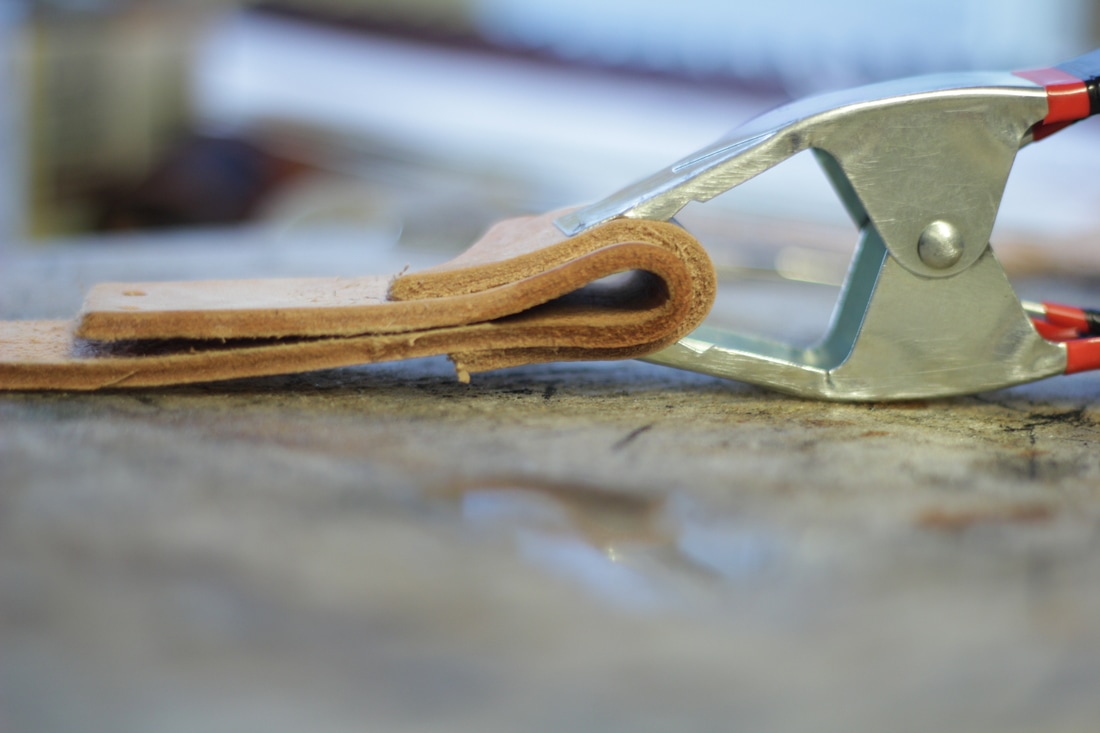 Wet Folding Leather using metal clamp and scrap leather. SuppliesCutting Board Clamps or Stack of Heavy Books Spray Bottle Scrap Leather Pieces and your Work Piece of Leather Stylus V-Gouge 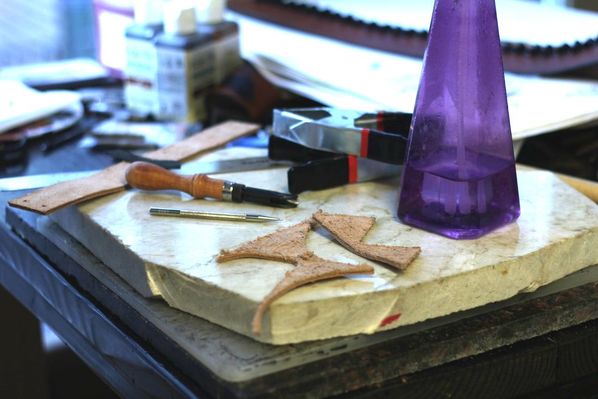 Supply List: Cutting Board, Clamps, Spray Bottle, Scrap Leather, Work Leather, Stylus, V-Gouge There are times when you need to fold your leather to get the best results. Making belts, wallets, art book covers, journals, or whatever else you might fancy. There are more than a couple ways to fold leather, however I'm going to cover folds with V-Gouging, and folds done by wetting the leather. One of the ways you can fold thicker leathers is by using a V-Gouge tool. You want your leather to be a minimum of 5-7 oz to use this method, otherwise it will compromise the integrity of the leather where it is used. The V-Gouge tool can be helpful when using a 8-12 oz leather with buckles, or making a satchel or messenger bag. The buckle area doesn't recieve extra wear so it's not as compromised. The satchel or messenger bag are meant to be glued and then stitched and gouging can allow pieces to fit together better while they are reinforced by the glue and thread.
To V-Gouge your leather figure out where it needs to fold and mark it with a stylus. Then using clamps and a cutting board, secure the leather on either side of your fold before using the V-Gouge tool. You can adjust the V-Gouge width and depth to ensure a smooth fold. I recommend trying it on scrap leather first to ensure the size of the gouge that you need.
When you begin the gouge, place the tip of the V-Gouge a few millimeters away from the edge of the leather and be sure to stop the V-Gouge a few millimeters before reaching the end of the leather. This will help retain the integrity of the leather at the fold despite being gouged. If you are using this method for buckles, V-Gouge before you use an oval hole punch for the tongue of the buckle.
The other method for folds in leather is by wetting the leather. You can use this method for all ounces of Vegetable Tanned Leathers, plain or colored. Depending on the thickness of your leather, your folds will require different amounts of attention. Either way you will need a spray bottle, clamps or several heavy books, a scrap piece of leather, and a ruler or bone folder. Thinner leather will fold quite nicely while thicker leather is more work. Start by creating a line on the underside of the leather, or the flesh side. Spritz water from the water bottle along the line until the wet begins to soak through to the grain side, or front of the leather. If you are folding thinner leather 5 oz and under you can simply line your ruler up on the drawn line and fold the leather over the ruler. Use the scrap leather to create a barrier between the wet leather and your stack of books, remove your ruler, and leave it until the leather dries.
When you are folding thicker leather, 6 oz-11 oz, it is likely that you will need clamps to hold the thick leather in place better while it dries. Place a scrap piece of leather around your fold before applying the clamps or they will leave marks on the leather, but use as many clamps as you need to achieve the fold. Just make sure that your fold is clean and straight, otherwise it will dry in the wrong position. You can also use a combination method of a V-Gouge with a wet fold for the extremely thick leathers, 12-16 oz.
Regardless of which method you use, folding your leather can give you clean straight edges that don't require sewing. It will also place less strain on your rivets and let your buckles sit more flush. Using the wet forming method takes advantage of the leather's natural capabilities, and leaves you with a brilliant edge!
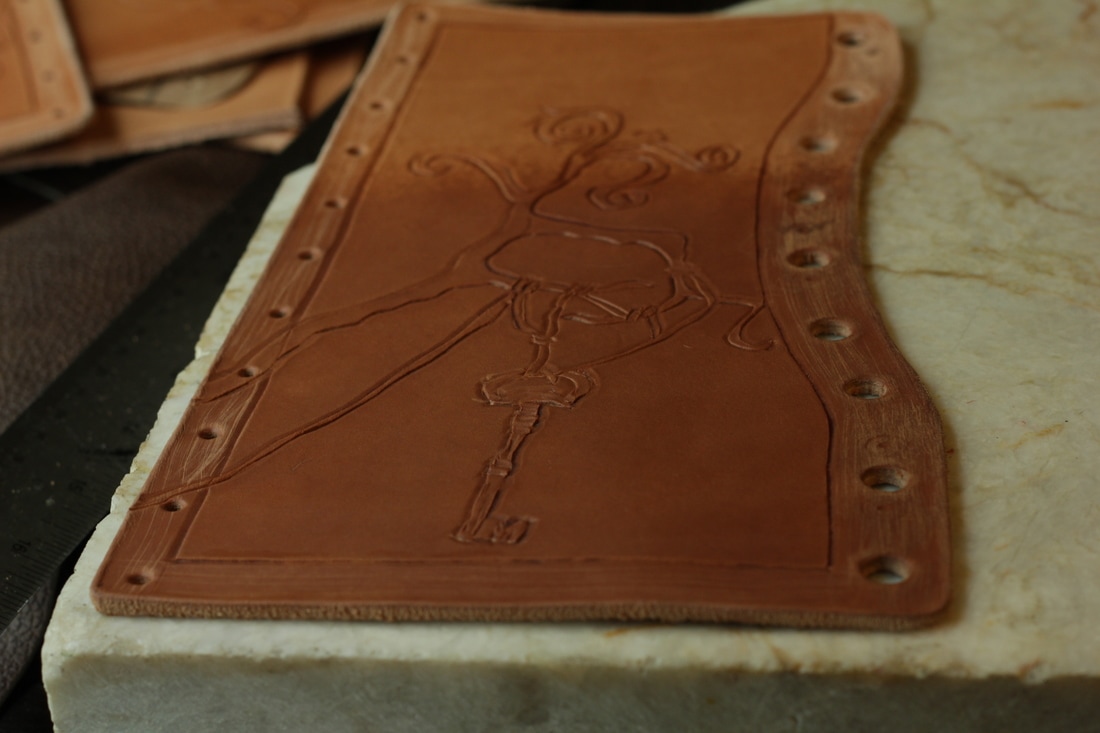
by Willow Enright 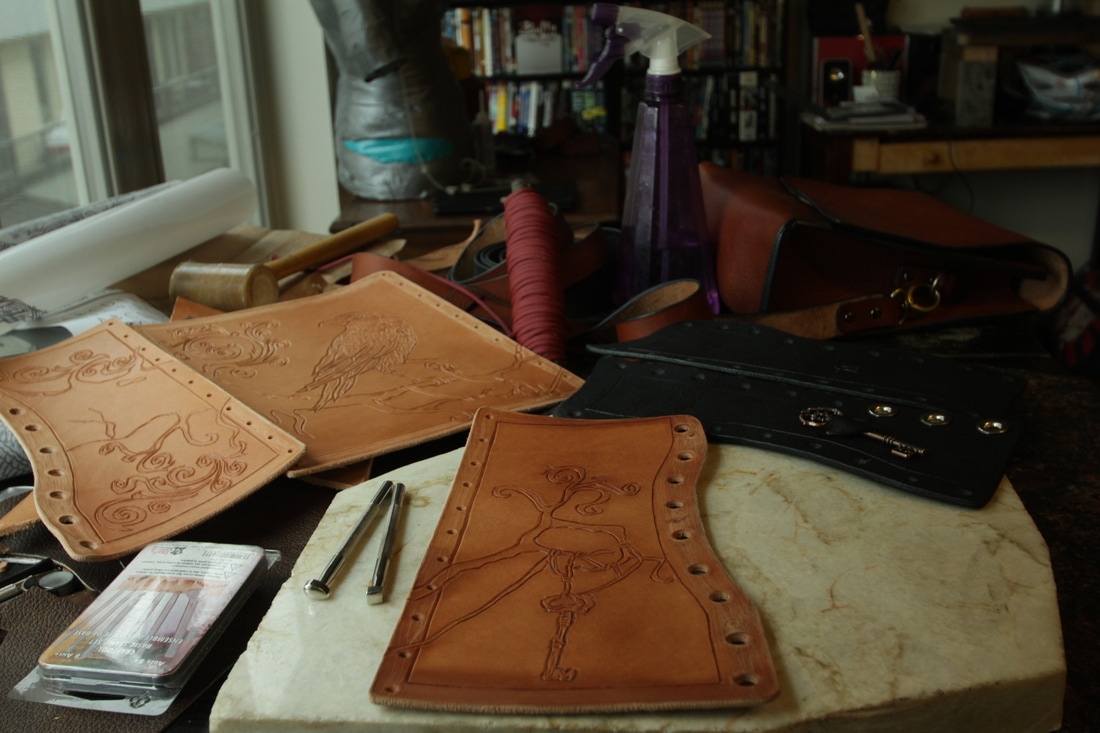 Leather waist cincher out of 7 oz Vegetable Tanned leather, carved and quick cased for tooling. Leather workers have different ways of achieving similar techniques when it comes to working with leather. On the subject of casing your leather prior to tooling designs into it you will find a variety of opinions on which method is preferred. Some say that you can only do it one way, others utilize what suits their style and needs. I'm going to cover what I refer to as the down and dirty method of quick casing.
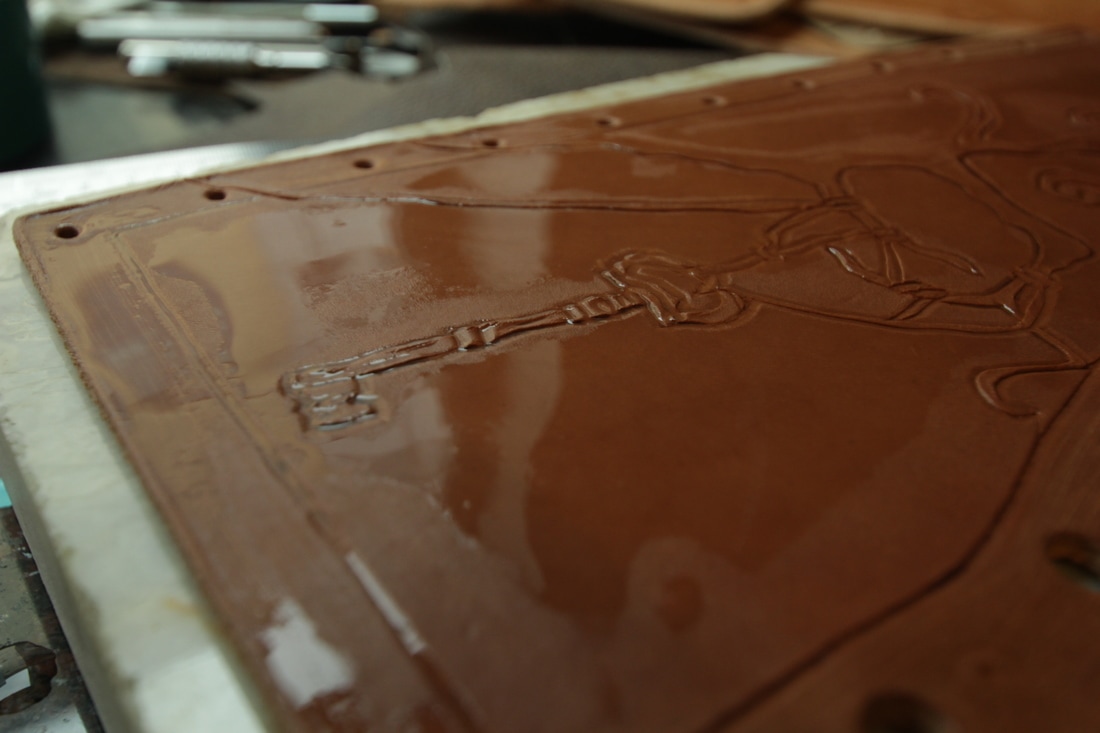
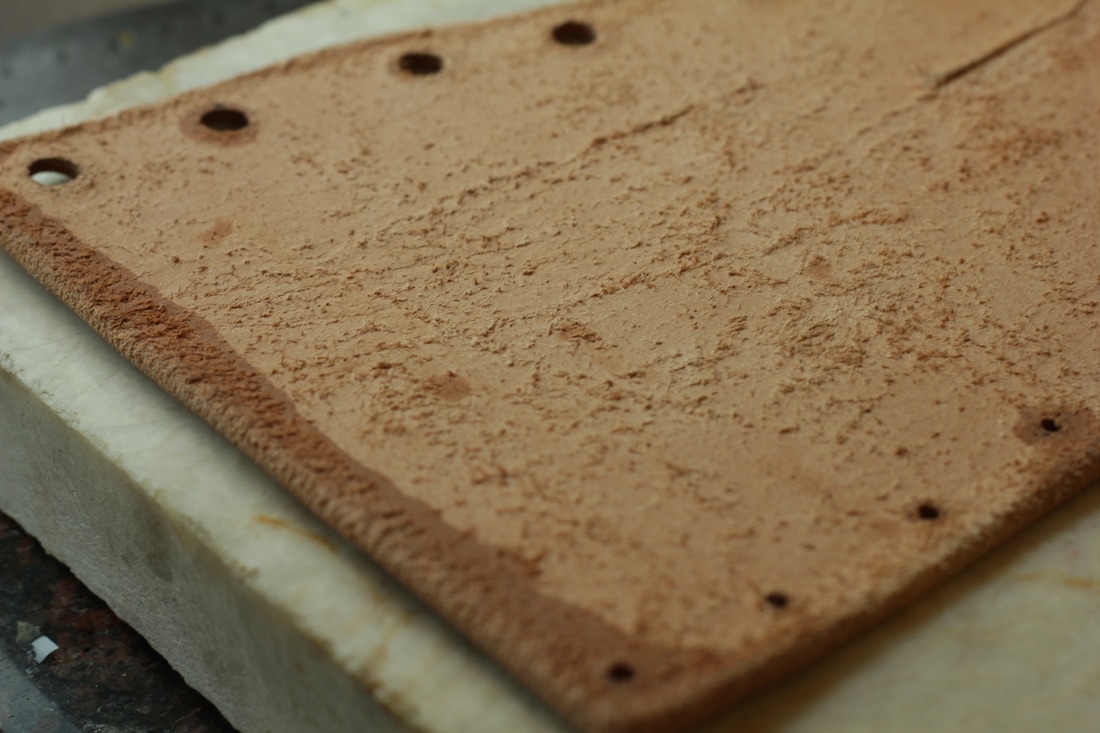
Leather casing is basically the process by which you prepare the leather hide for stamping, carving, or tooling of designs into the hide. To do that you introduce moisture to the dry leather in order to open up the pores in the hide making it more malleable. The trick is to get the leather the proper amount of wet, and this is where the variation in opinions occurs. Proper casing takes an extreme amount of dedication time-wise, and most people don't want to wait overnight before working on a project, hence the down and dirty method.
Using a spray bottle spritz your leather evenly until the entire piece has stopped absorbing the water, or little puddles begin to form on the leather's surface. Once that starts to happen flip your leather piece over to see if it has begun to soak through to the other side. As soon as you see that it has, stop spritzing and leave the leather to partially dry again. The amount of time necessary varies on the leather being used or the thickness of the piece. Basically, wait until the leather appears to have lightened in shade again but is still slightly damp to the touch. Once the leather is slightly damp but appears to be dry again either trace your design onto the leather with stylus and tracing paper, or free hand draw with your stylus. Use a swivel knife for better control over curves, and an exacto knife to get fine details, both will carve your design into the hide. I prefer the swivel knife because you can get a nice petina along the cut line if you hold the knife at a 45 degree angle and press hard as you carve. If your design is small or simple you should have time to continue to the next step without rewetting your leather. However, if your project is detail oriented or large you'll likely want to stop at this point in the process to respritz your hide as previously discribed, before waiting the appropriate amount of time again for it to achieve proper moisturization. 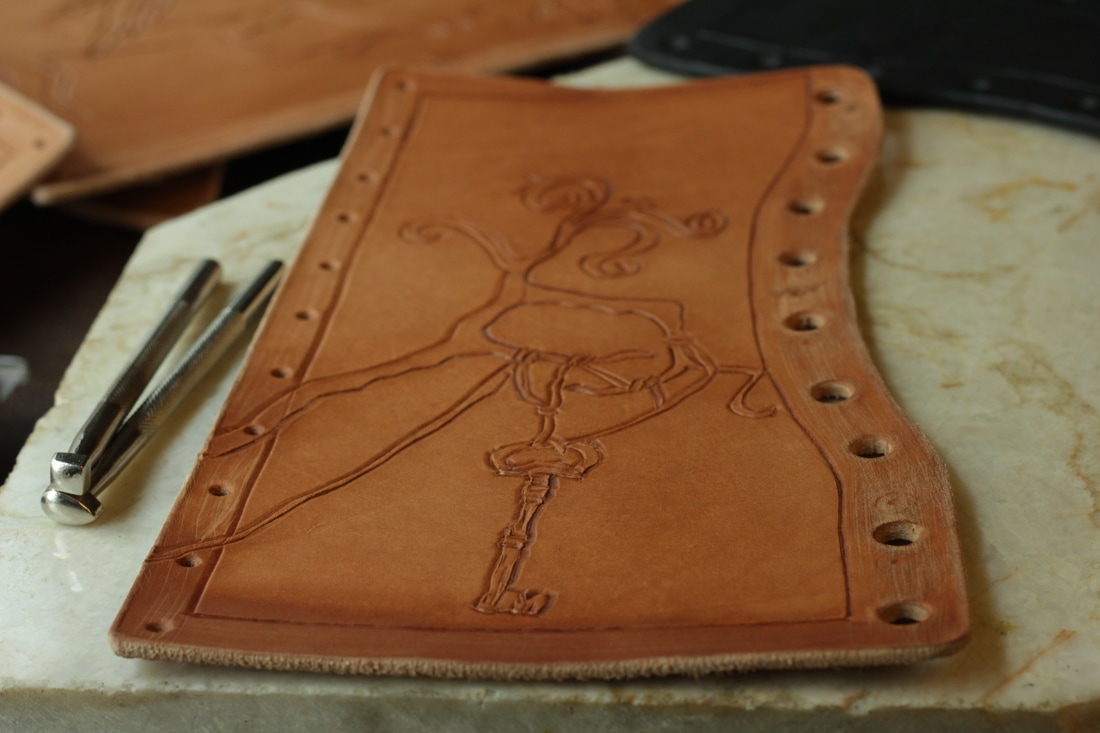 Leather almosts looks dry again, but is slightly damp to the touch. Now, you can tool away! Last but not least, tool or pound out the design, this can be done with a variety of tools depending on the outcome you want to achieve. I mostly use the square beveler and small background stamp from the Tandy 6 piece Craftsman Tool set. There are stamps with designs and letters, embossing rollers, and a whole plethora of inividual tools for flower viens, backgrounds, edges, ect. A lot of awesome tooling work can be done with the 6 piece set. The square beveler is great on any edge where there is enough space to fit the tool, and the small background stamp tends to be good in the places too tight for the square beveler. Again, the tools used depend on what you want to do. 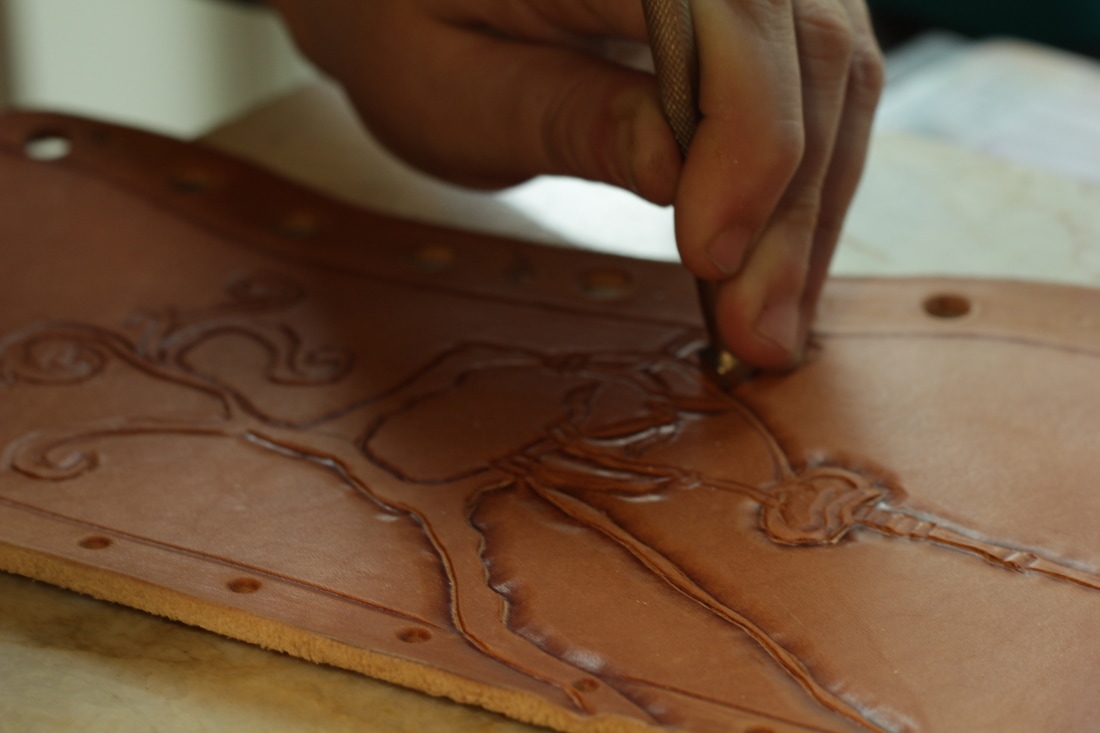 You can see the lovely patina starting to appear around the tooled edges. by Willow Enright 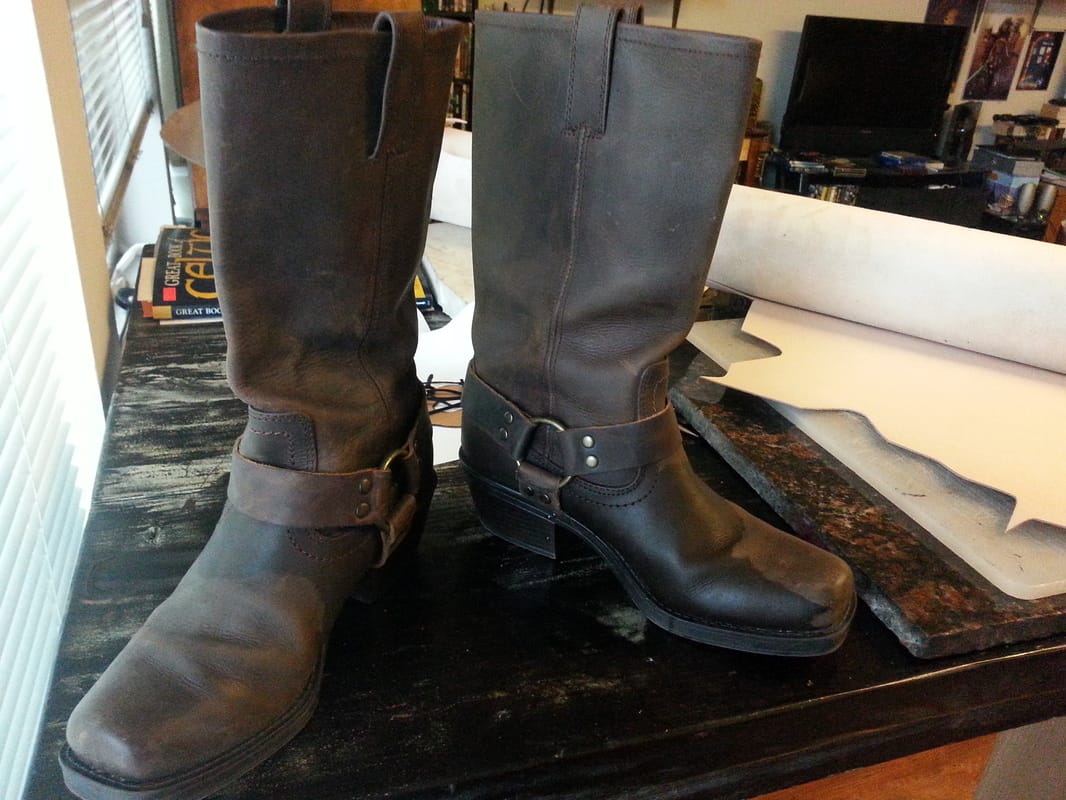 My pair of leather boots You got a new pair of leather boots for Christmas or Hanukkah, but they are just a wee bit too tight. Now what? Spend hours in line trying to return them since you can't exchange them because they have sold out? Nope. Don't do that, instead try this simple boot hack to make those new boots more comfortable. Supplies:Boots 2 extra large freezer ziplock bags Water Freezer 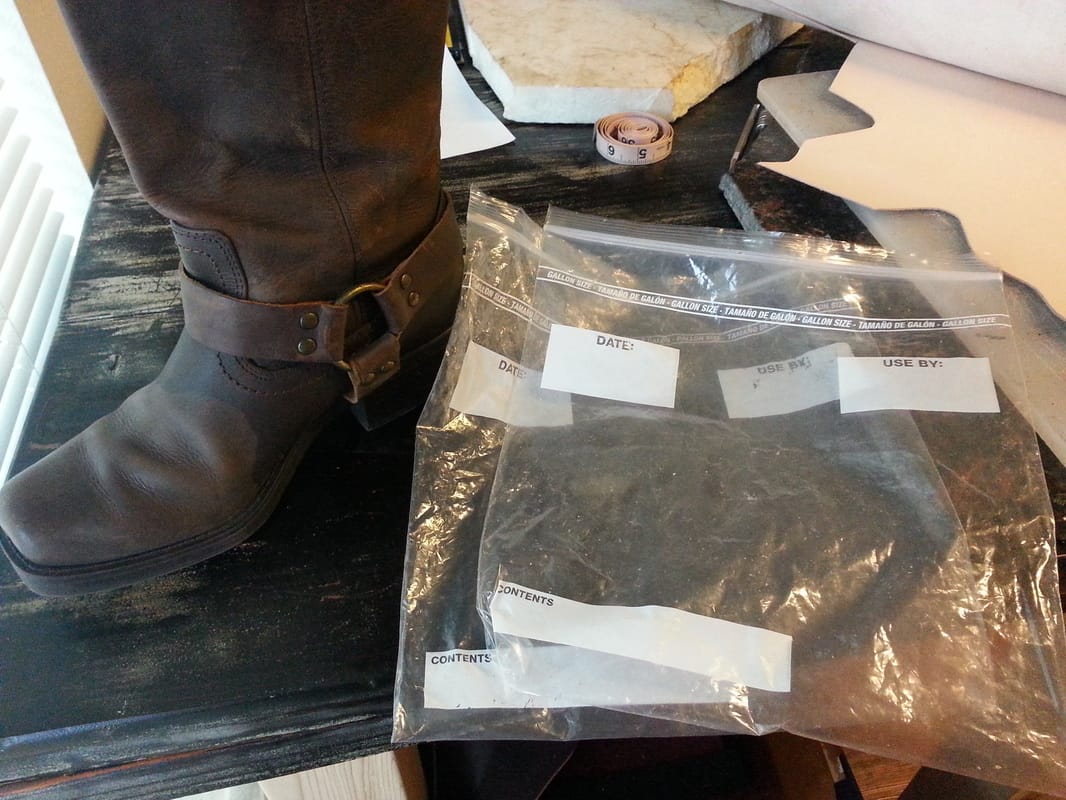 Use 2 large ziplock freezer bags for this boot hack. 1.) Get your leather boots, and head over to the sink. You want to fill two of the ziplock bags about 1/4 of the way full, making sure to squeeze out the air as you close the ziplock bag. Then place your water filled bag inside the second ziplock bag, seal this bag the same way ensuring air is not in the bag. 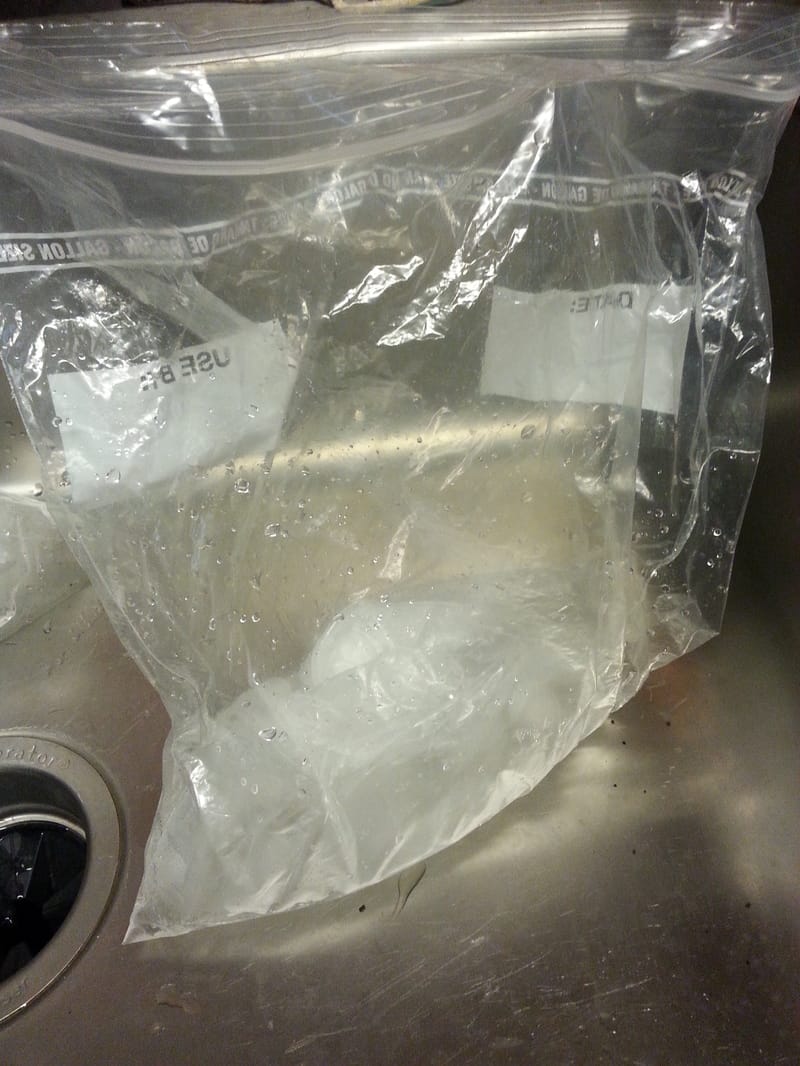 2.) Stuff the ziplock bags deep into your leather boots so that the water essentially fills the toe and heel of the boots. Be sure that the bag gets into the boot far enough so that the next step will work better. 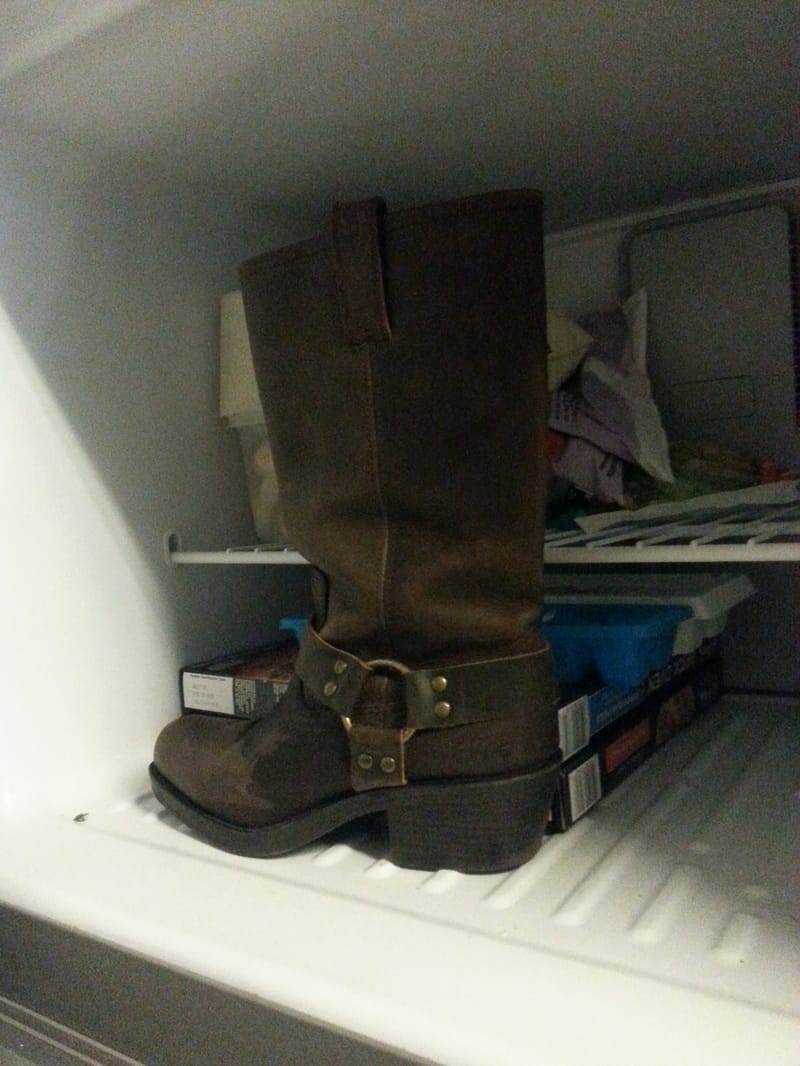 Boot in the freezer. 3.) Put your boots into the freezer overnight. 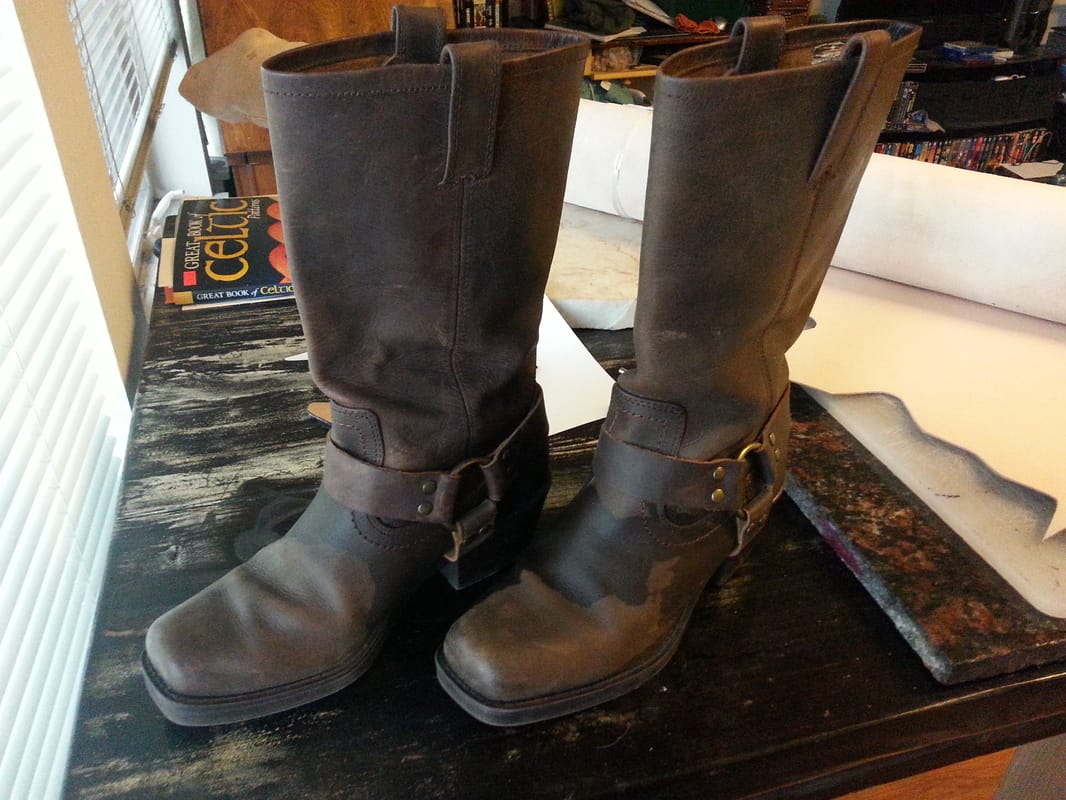 My Leather boots after they came out of the freezer. 4.) Take your boots out of the freezer and leave them to thaw in the sink for a few hours before trying to work the frozen ziplock bags back out. If you still can't get them out, no worries, leave them a bit longer. Leather boots will not be ruined by getting wet. 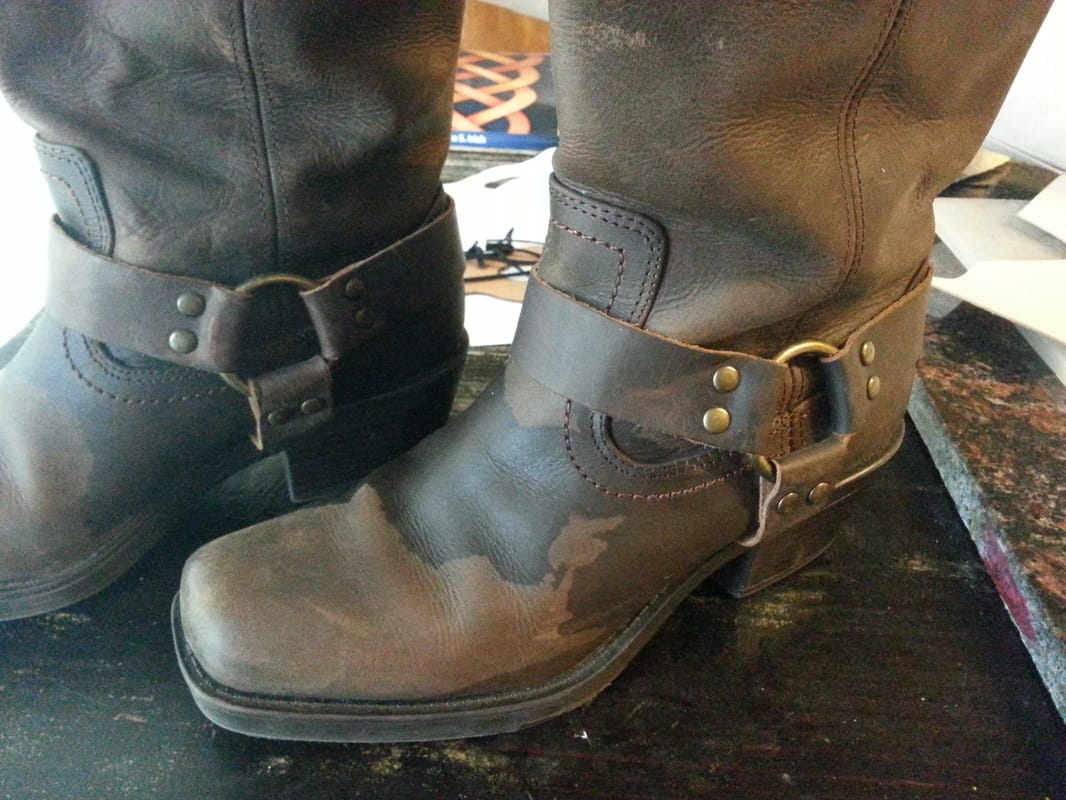 Boots drying naturally on my work table. 5.) Leave them to dry naturally, but go ahead and try them on and see if they are more comfortable. If they are still too tight, wait for them to fully dry and then repeat steps 1-4.
Leather is naturally flexible to a certain degree, so filling the boot with water via a bag that you then freeze allows the slow stretching out of the leather boot as it expands during the freezing process. Since the freezing takes place slowly it allows the leather time to stretch without too much strain. In the end your boots won't be so darn snug, and you can simply enjoy your gift! by Willow Enright 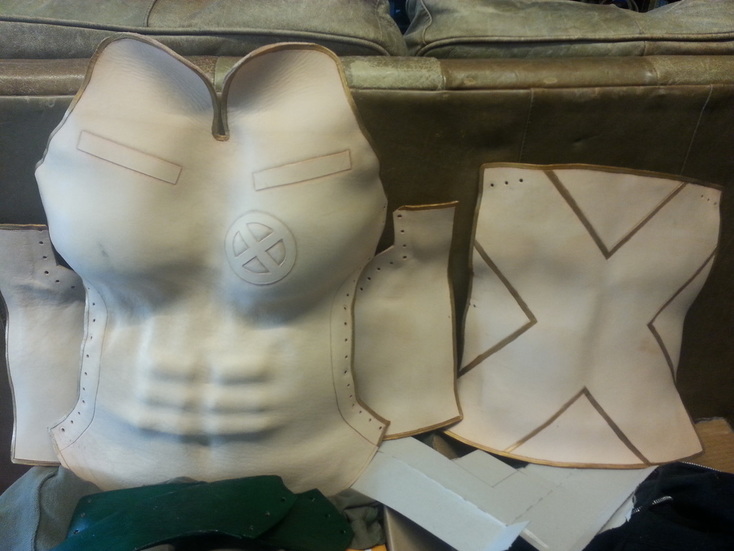 Rogue Body Armor front and back chest plates wet formed over a duct tape body double. When I first started working with leather I discovered that there are many different ways to work with the versatile material. One of the best aspects of working with leather is the ability to wet form mold it into different shapes. You can wet form bags, boxes, pouches, armor, masks, mugs, and sheaths. Sharing the time old secret to wet forming is simpler than you would think. The best leather that works well to wet form mold is the vegetable tanned leather. With a wide variation of thickness veg tan leather serves well to create a vast array of durability based on the wear of the item. You can wet mold wallets and pouches with a thinner veg tan, or masks and boxes with a medium grade, and sheaths and armor out of the thicker hides. Figure out what leather you’ll need for what you want to make then choose your mold. 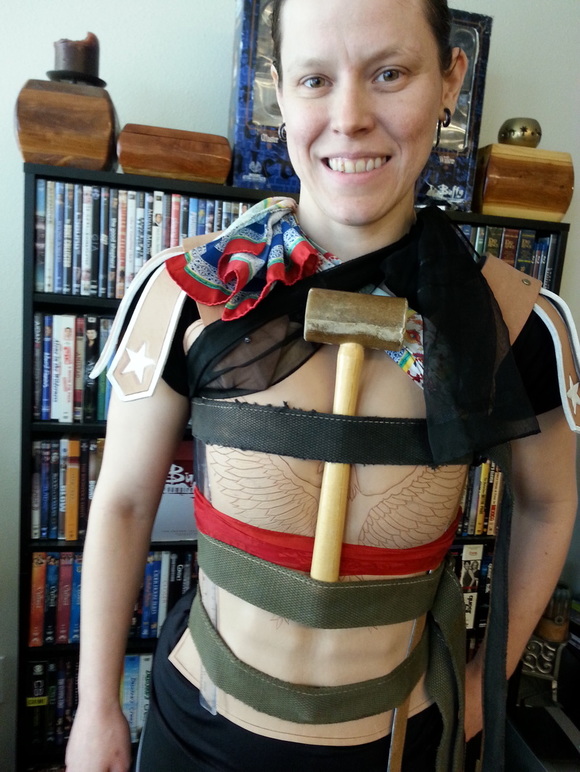 Wonder Woman wet formed over live subject. Wet form molding can be done with multiple items, but creating wood molds are the best. The wood absorbs the moisture and lets your mold dry faster, but you can use whatever is handy. I like to use jars, plastic items, wooden boxes, and emptied food containers such as coffee cans. It’s important to know what you are going to use to form your leather before you start preparing it. 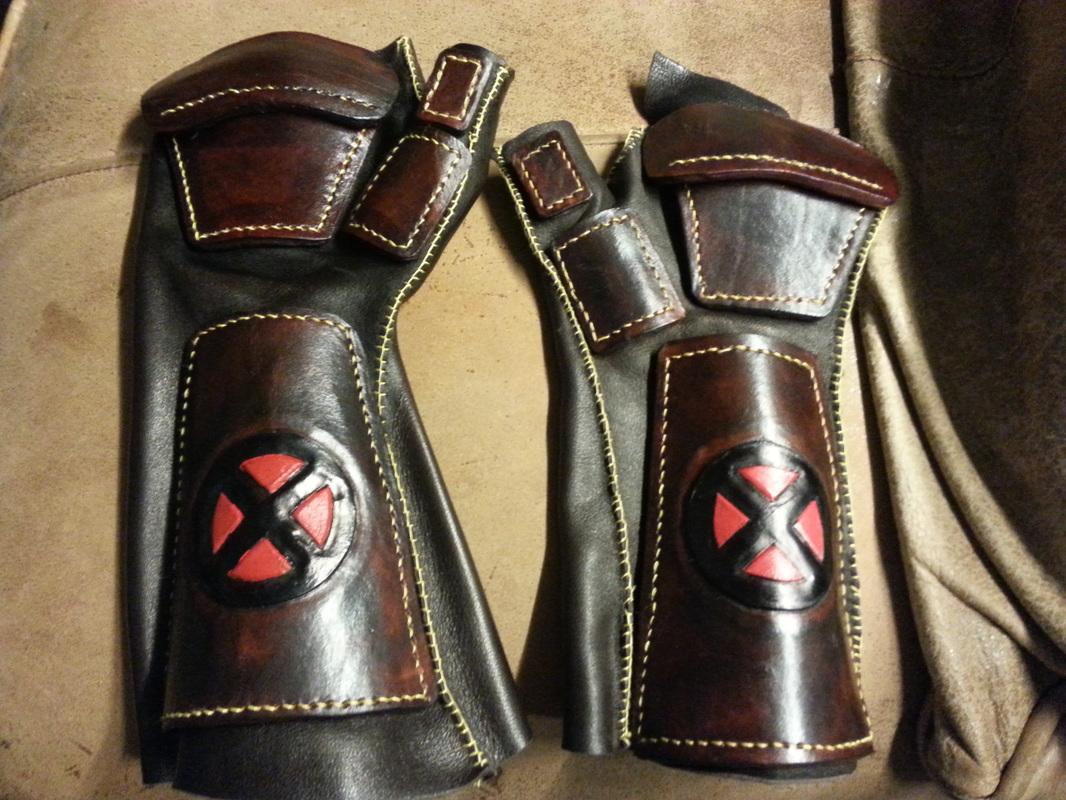 Rogue armored gauntlets shaped with wet forming. It’s rather simple to prepare your veg tan leather for wet forming. You need to cut the leather large enough to stretch or fold over your mold. Cut more than what you think you’ll need because you can always cut off extra, but you can’t add to the leather. Then fill the kitchen sink with water for smaller pieces and the bathtub for larger ones. Leave your leather to soak for about 10-15 minutes. This will change the fibers of the leather making them elastic and pliable so that you can mold away! 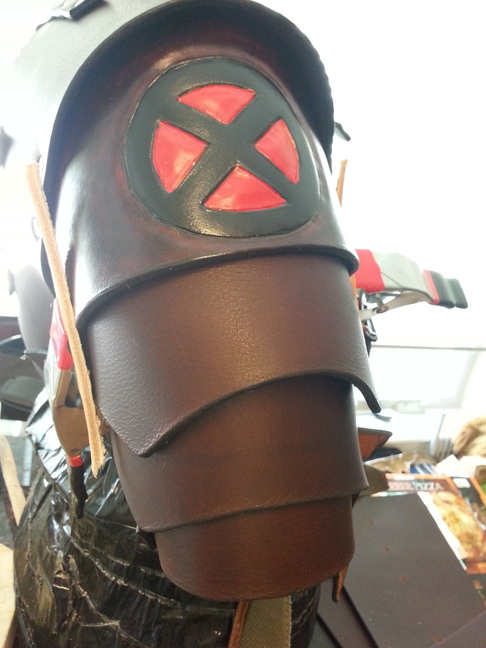 The piece of the pauldron with the X-Men symbol was also wet formed. You’ll need to leave the leather on the mold as long as possible, or until it is dry to help it retain the shape you want it to have. Sometimes you will need to pin the leather down, or create a press down wooden mold. I use sewing pins for thin leather and tacks or nails for thick leather. I often use scarves or canvas belts to help the leather hold shape, and I have a duct tape body double for doing chest armor. Once it is all dry, presto! 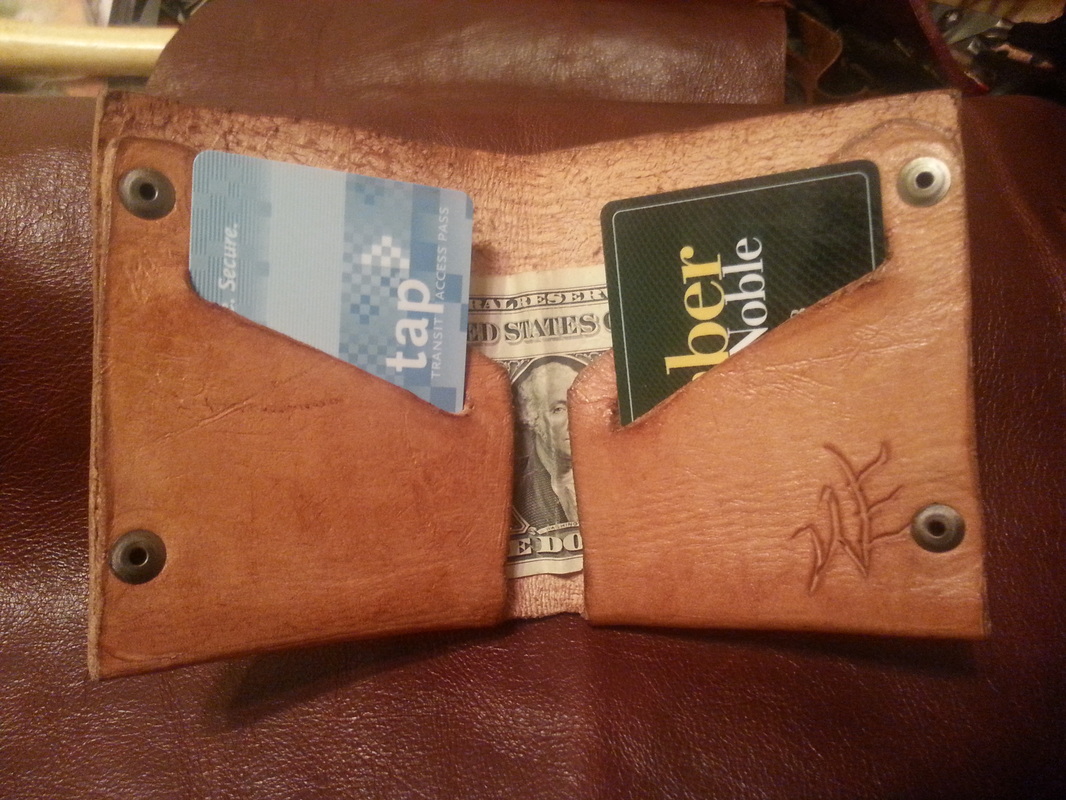 Wallet done with wet forming. So that’s it, determine the thickness needed, cut to size, submerge it in water, and you can mold it to your desired shape. This is just a part of the leather working process. If you need to rivet or sew the leather to other pieces this can be done either before or after. You’ll need to determine whether you should do them before or after, this is a personal preference based on the project and skill level. Don’t wait forever, once the leather is dry it’s harder to cut, puncture, and stretch. I prefer to sew before hand, and rivet while it’s still a little damp.
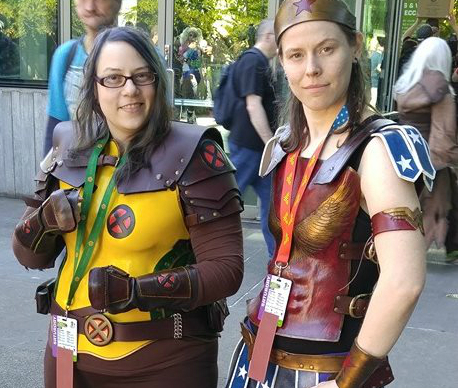 Rogue and Wonder Woman armor molded with wet forming technique. by Willow Enright 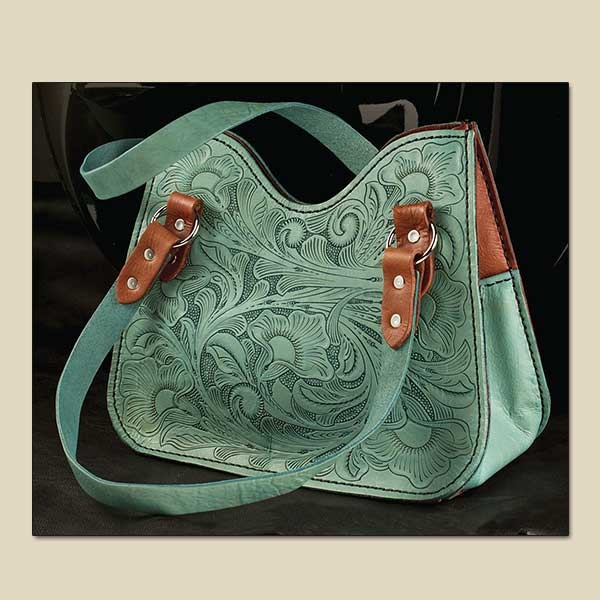 This is the Sophia Handbag Kit #44314-00 from Tandy. Don't be fooled into thinking you'll get the pattern for the bag layout, you will only get the tooling pattern for free. One thing that I have been asked for in the past few weeks is for patterns. “Where do you get your patterns?” “Can I have that pattern?” “Do you have a pattern for that?” Most of my patterns aren’t directly taken from one place or another, nor do I start off with a perfect pattern when I craft them myself. I will do more research on how to transfer my original cardboard patterns into digital copies that can be shared around the world, but for now I will share a few sites that have free downloadable patterns that you can start downloading and making, today! First and foremost Leather Craft Library, this site is brought to you by Tandy Leather. Most of their free downloads have to do with the tooling patterns that they show on an item, and aren’t a layout for how to construct the item. That being said they show you what tools it would take to duplicate the process, this means that in order to perfectly copy the pattern, you have to go out and buy a bunch of Tandy tools. I see what you’re doing Tandy. A.k.a. feeding my leather addiction, and creating new fuel for the fire that fills my soul and empties my pocket book.  This is the LC-521b pattern from Outside the Box Pattern. Outside the Box Patterns is a great way to look for free patterns. They tell you how large the image is, and what is the best item to place that tooling pattern on. You can open the pattern on a new tab on your browser then click the download button, it’s that easy. No wondering if that checkout chart will let you get away without paying a dime. There’s no tricking me into thinking that your messenger bag pattern was actually going to give me a layout pattern for said bag, only to give me the tooling pattern on that bag instead. What you see is what you get. I like this straight forward method of sharing. Elk Tracks is a nice one if you want to create buffalos and other western themed tooling patterns. I downloaded a few. I really like how they show you the pattern then the finished tooled product for a side by side comparison. I learn really well this way having to look and study at what’s happening and then experiment and try something, leaving me to figure it out on my own. I learn best this way, but this may not be the way you learn to each his own. 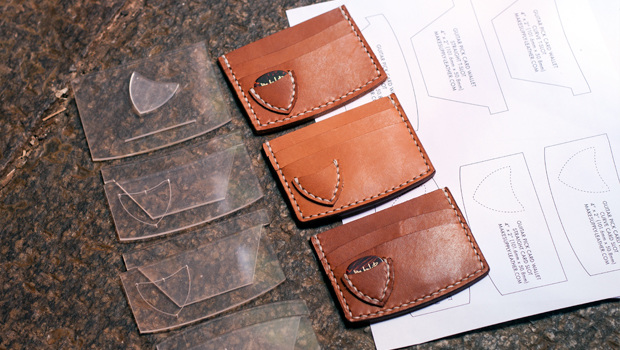 This is the Leather Guitar Pick Wallet template, pattern, and finished product from Make Supply. If you are a beginner Make Supply is a great place to start making wallets. Not only are the patterns free, but they have video tutorials that compliment those patterns. For those that want a more permanent template that will hold up to repeated use you can purchase the acrylic templates for a fee. One site that really caught my attention is Leather Craft Pattern, but this site isn’t the greatest if you’re only searching for free patterns. I went onto this site found many free patterns that I would like to look at with a more in depth eye, only to be asked for payment greater than $0.00 at check out. Meaning you have to buy something in order to get the free patterns.  A screen shot of Leatherworkers.net forum for free templates. I would stay away from pattern sharing forums like those on leatherworker.net. More than half of the links listed on this forum are so old they are dead ends. If you are up to challenge then this site is fine. I find it to be more frustrating than helpful. Don Gonzales Saddlery doesn’t have a great selection, I liked the skull pattern. This site is much like Outside the Box Pattern, with its straight forwardness. 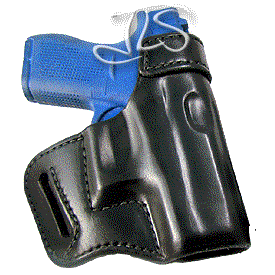 This is a finished Glock 42 Avenger Holster Pattern from JLS Leather. If you are looking for patterns for your 2nd Amendment support piece, aka a gun then, JLS Leather is the site for you.
I hope that this list of resources is helpful to you, and will fuel your creativity. I look forward to seeing what you make with this knowledge and hope that you share by leaving a comment below. The inspiration for creativity should always be free, and leather crafters need to share their knowledge. by Willow Enright 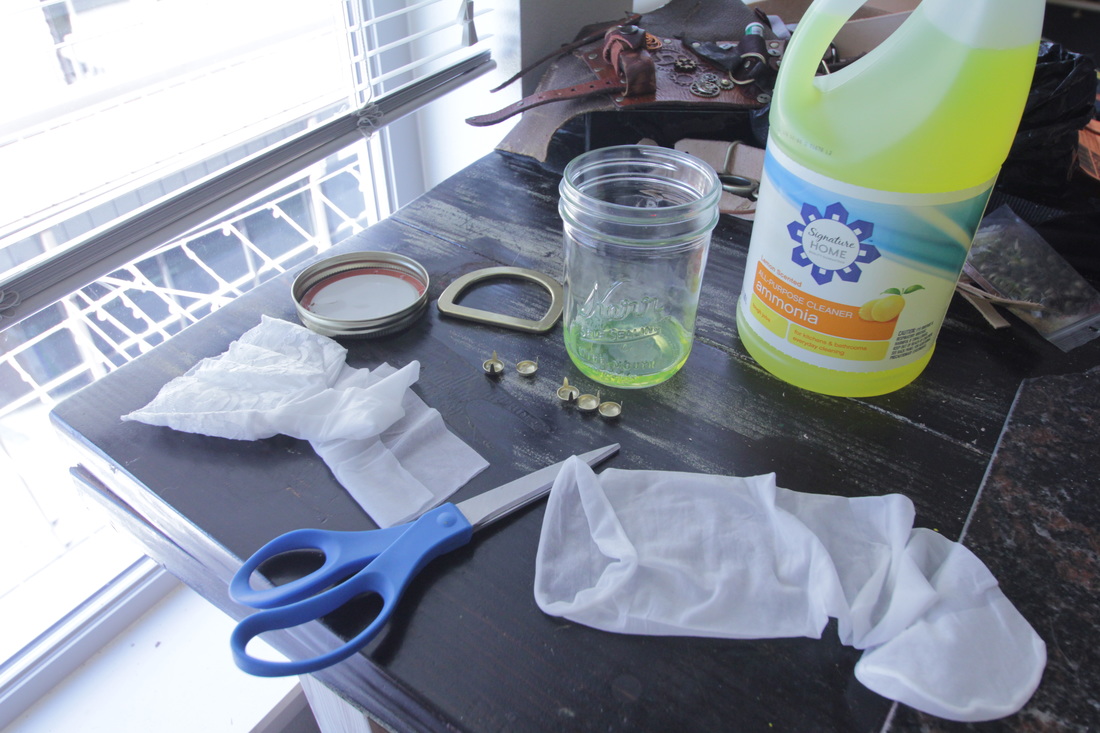 All the items needed to antique brass: ammonia, a mason jar with lid, nylon pantyhose, and of course your brass items. Please read the following article with a posh British accent: Creating Steampunk accessories can be difficult, especially in today’s society where everything is made with machine perfection. While shopping for antiqued brass items I ran into a problem, they only had brass. Steampunk costumes aren’t necessarily supposed to be new and shiny. They are supposed to have a more lived in feel where you believe that this is something that gets worn on the regular, well kept but worn all the same. What is a retro-futuristic fan to do? Buy the brass, and distress the frak out of it. Now the question is...how? I found one out of several ways to distress brass. This particular way didn’t specify time or whether it would work with solid brass or brass plating. The only item that I had to buy was ammonia, which was tricker since no one in the stores had any knowledge about the cleaning agent. You might have to buy a pair of pantyhose, or a mason jar with lid, but those three items are all you need. 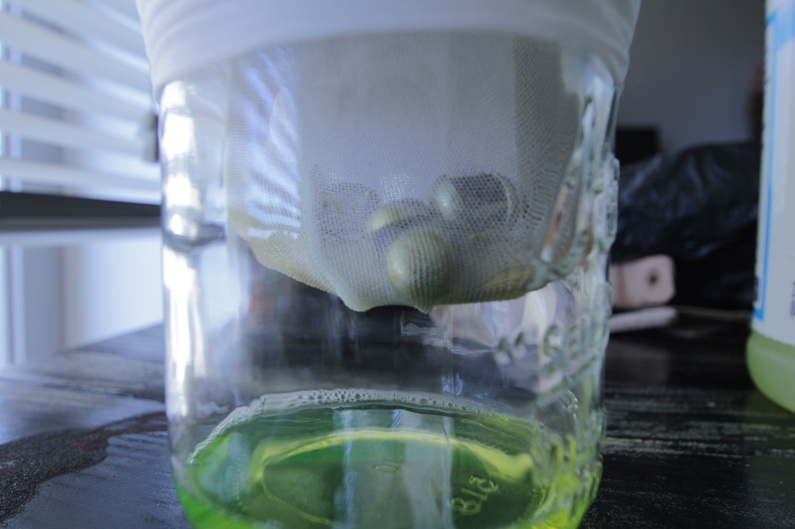 Brass plated spots and solid brass D-ring suspended over the neon green ammonia. Pour a small amount of ammonia (a thumb width) into the bottom of the mason jar, make sure that your pair of pantyhose and brass items aren’t touching the ammonia. Once you have your brass suspended over the liquid, grip the pantyhose to keep from slipping, then place the lid over the odorous substance. You’ll thank me for this step, once you stop reading this article and try it for yourself. 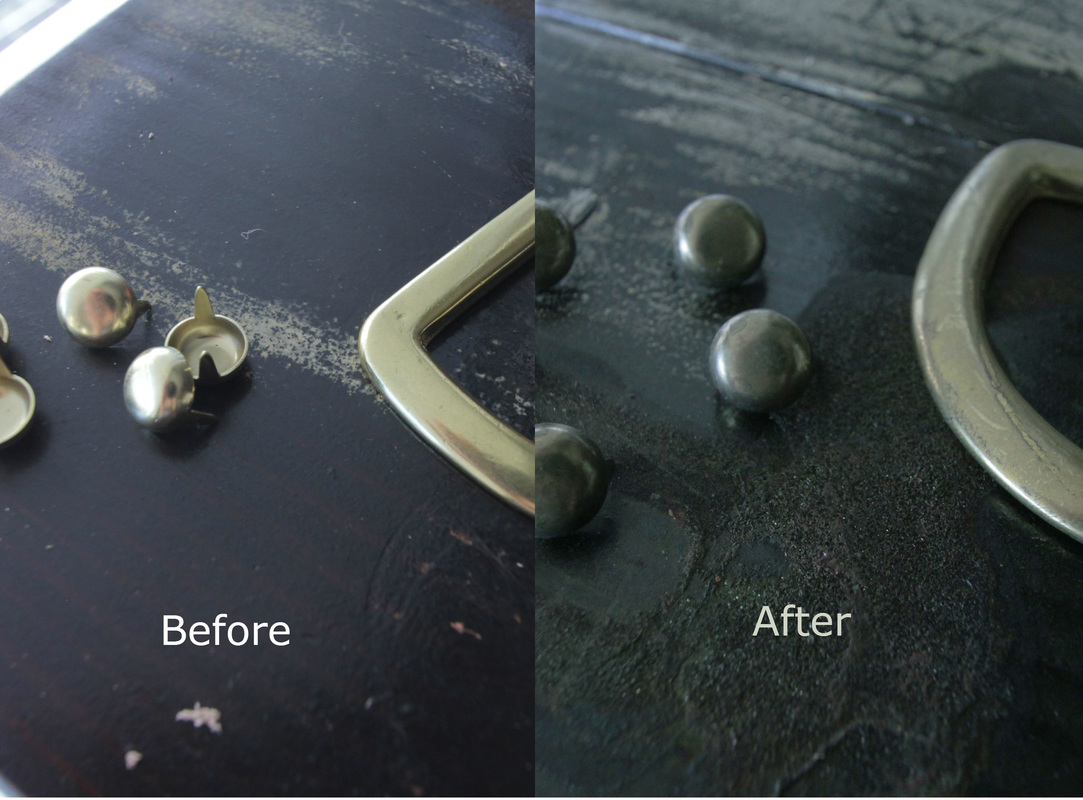 Spots twenty minutes in the ammonia filled environment. The D-ring took an additional two hour and forty minutes. I will now break down the differences between solid brass and brass plating. You’ll notice from the above photo that just after twenty minutes in that ammonia filled jar, that the five brass plated spots were done. I later learned that not all brass plated items are created equal. I wanted to duplicate the results from the spots, with a pair of buckles, unfortunately one of these buckles shed the entire brass plating, creating an antiqued nickel buckle. Another surprise came when I tried to use the same ammonia the next day on fifteen brass spots. Apparently ammonia looses it’s potency after oxidization and fifteen takes longer five, approximately an hour and fifteen minutes. Now as for the solid brass D-ring, you’ll notice from the photo below that the antiquing process on the solid brass D-ring isn’t as pronounced and it spent 3 hours in the jar to achieve the final result. 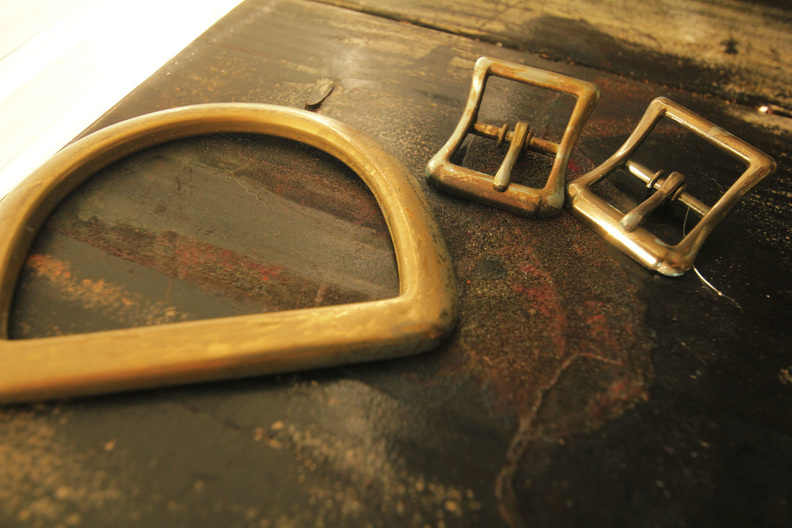 The final look of the D-ring and brass plated buckles. What can we conclude from this? Well, you’ll need fresh ammonia for the more dramatic results, solid brass needs to spend more time in the ammonia filled environment, and the antiquing process is not an exact science. My advice is use five to ten minute increments depending on the amount of control you want to use over the variation desired for brass plating. For solid brass check on it every hour. You’ll also need to take into consideration how large your item is, larger items will take longer and smaller items will be done quicker. And if you have read this whole article in a British accent congratulate yourself, you’re ready to live in a world that Jules Verne would have been proud to create! 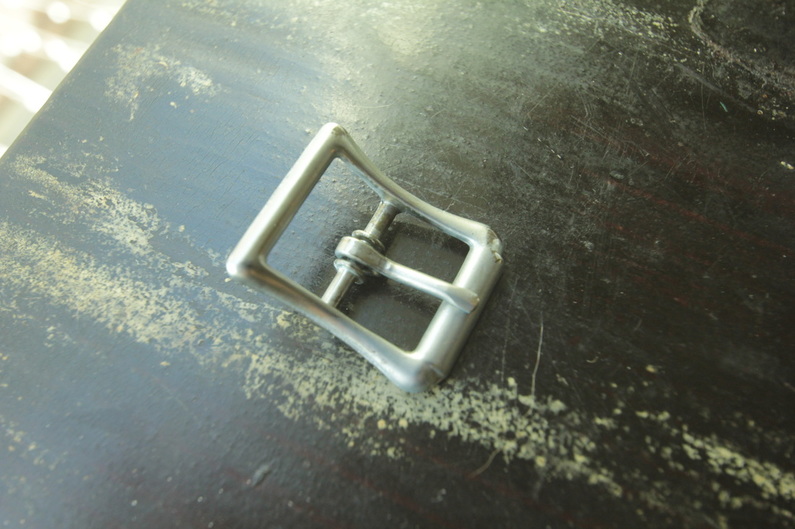 The antiqued nickel buckle formally sold as a brass plated buckle. 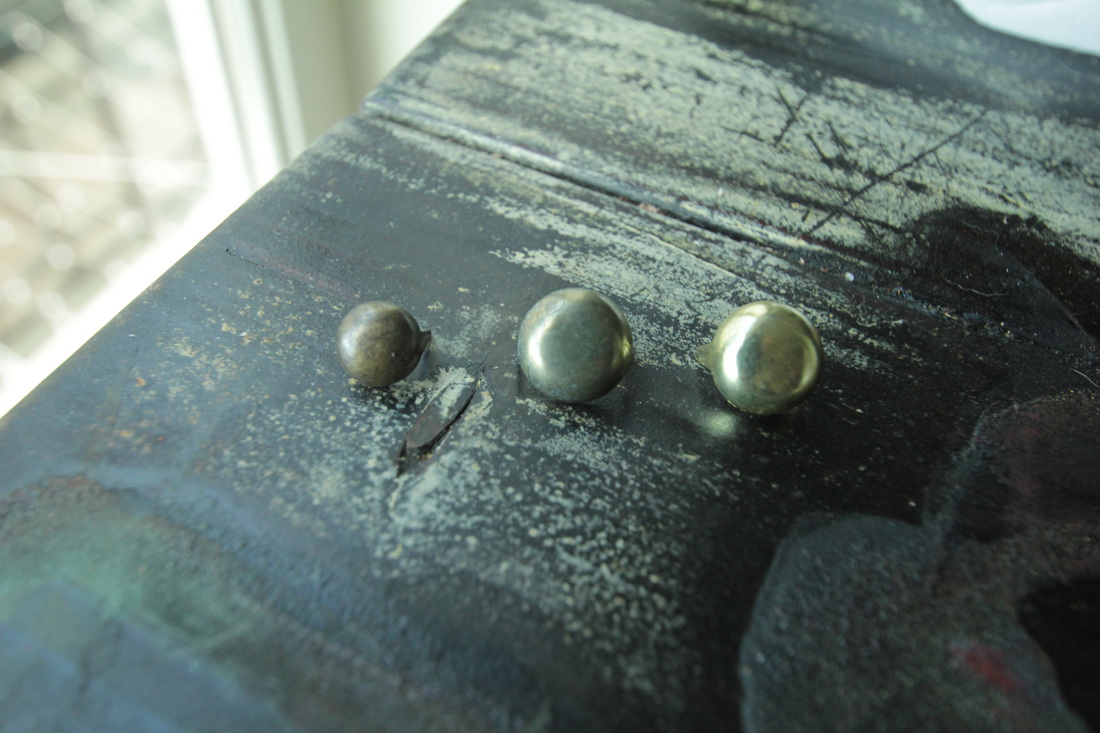 From left to right: store bought antique brass spot, our antiqued brass spot, and the original brass plated spot. |
Willow EnrightI started crafting out of leather in 2011, and now I am making it my life's work. I am writing this blog to help myself remember some of the small steps in past projects, sharing my triumphs and failures, as well as my love of leather. Archives
November 2017
Categories
All
|

|
Cosplay DIY (Blog) |
 RSS Feed
