|
By Willow Enright  Lexa and Clarke (The 100) http://data.whicdn.com/images/173347757/original.jpg Supplies:
Research Equals ObsessionIf you love cosplay you probably find yourself obsessing over the littlest costume piece of your favorite character’s wardrobe. Especially, when you plan on building complicated, barely documented recreations of something a costuming department made from scratch. The movie magic behind wardrobe can be frustrating, and usually, your only options are front angled photos, exhibits, and the actual TV show or movie. I like to use several reference photos, and sometimes I pause shows or movies on the character so that I can sketch design patterns.
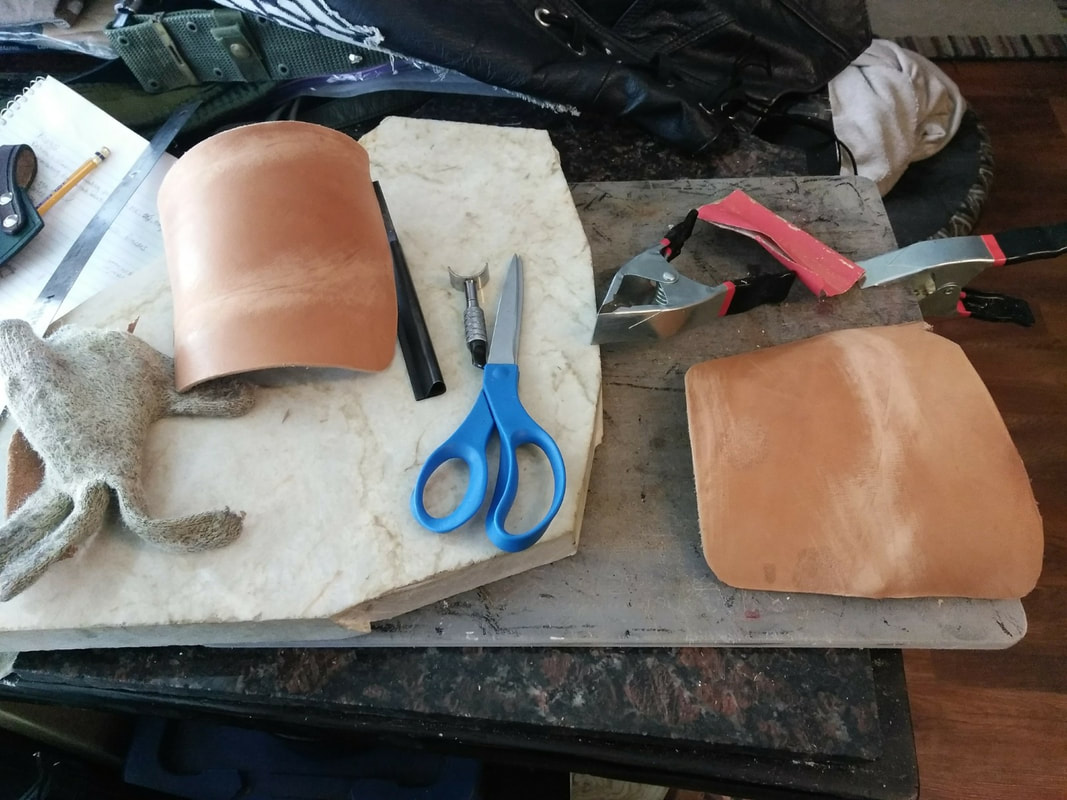
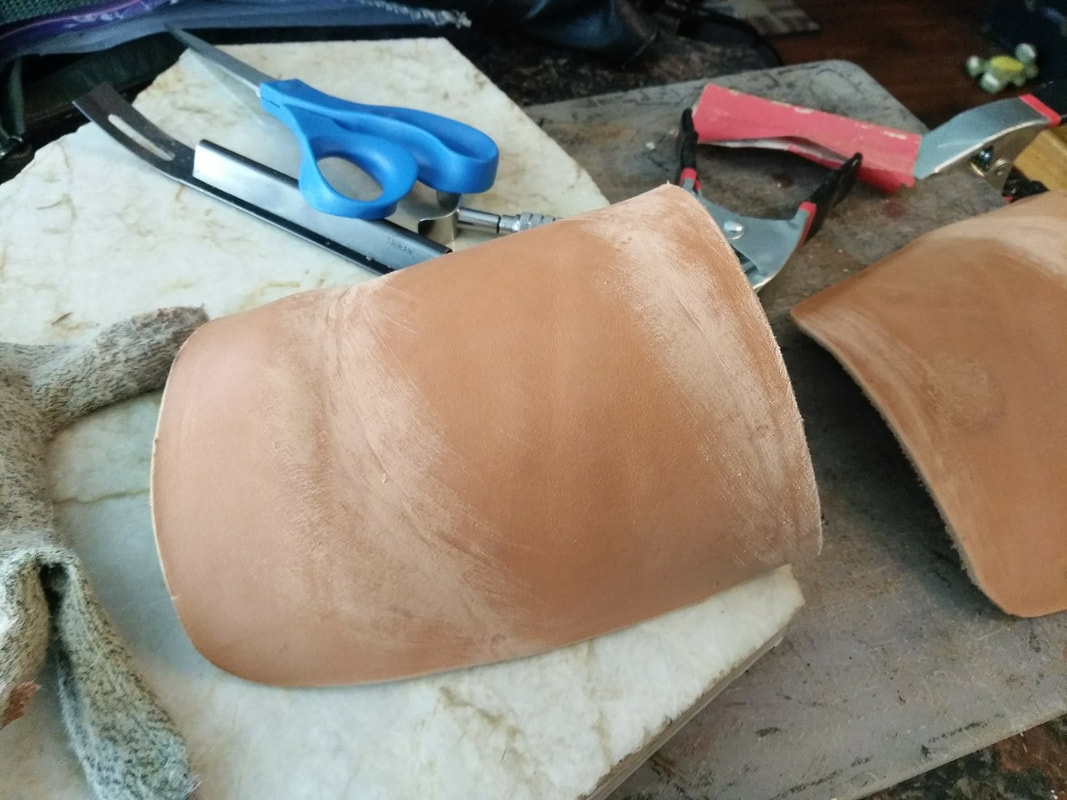
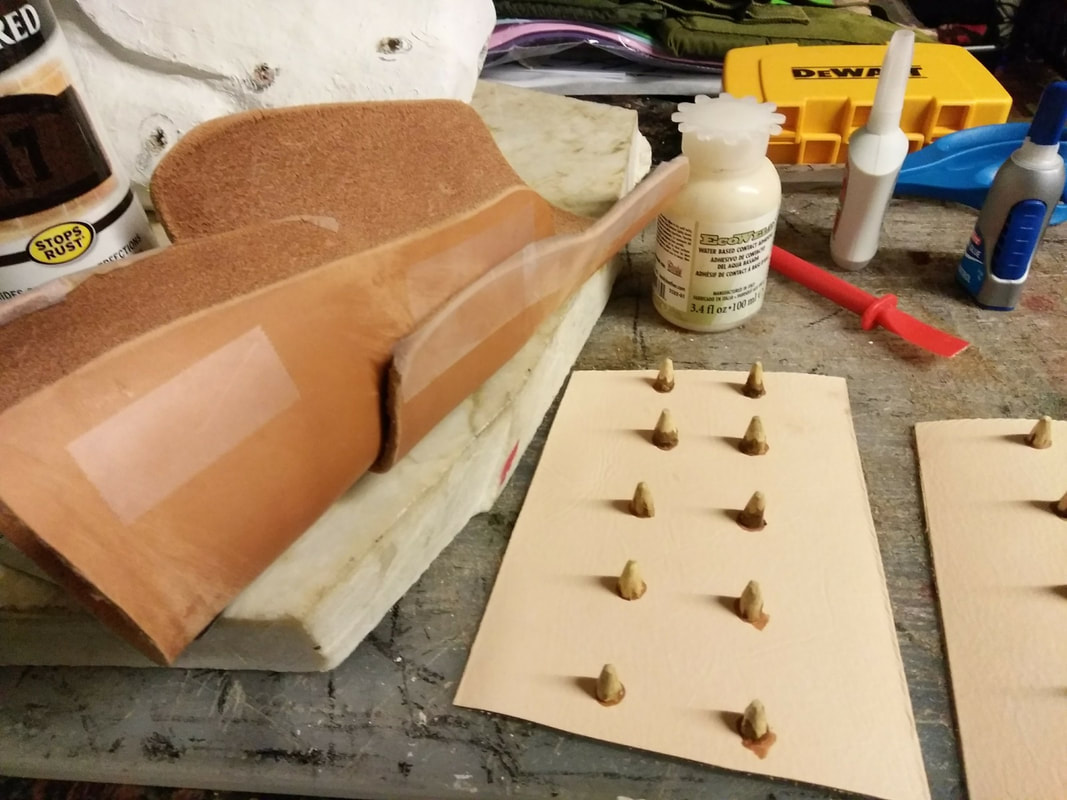
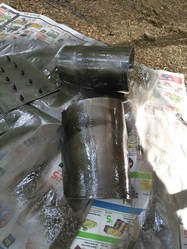
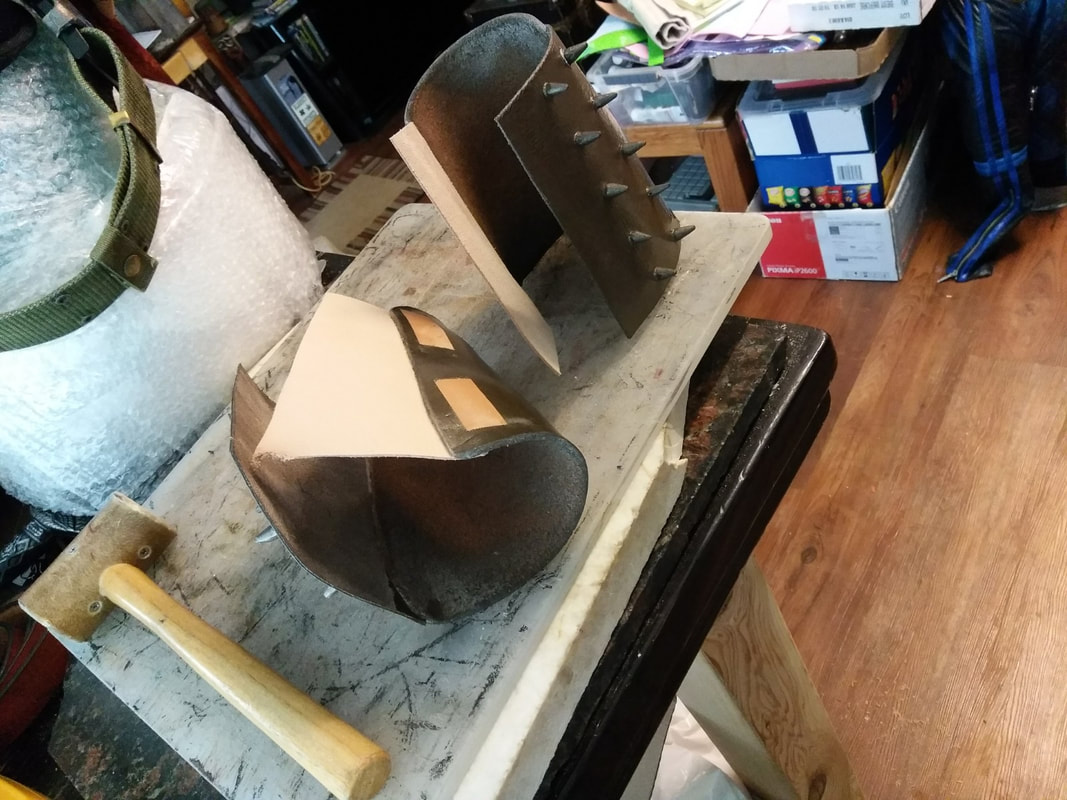
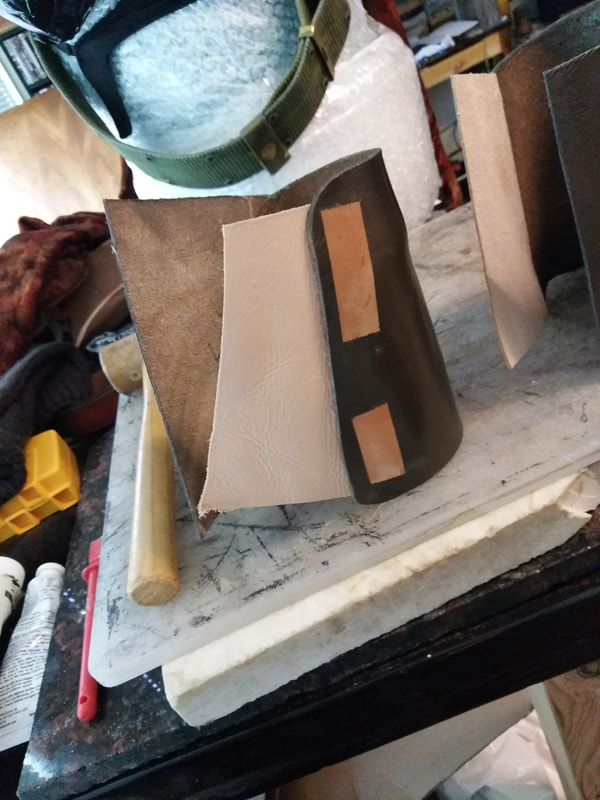
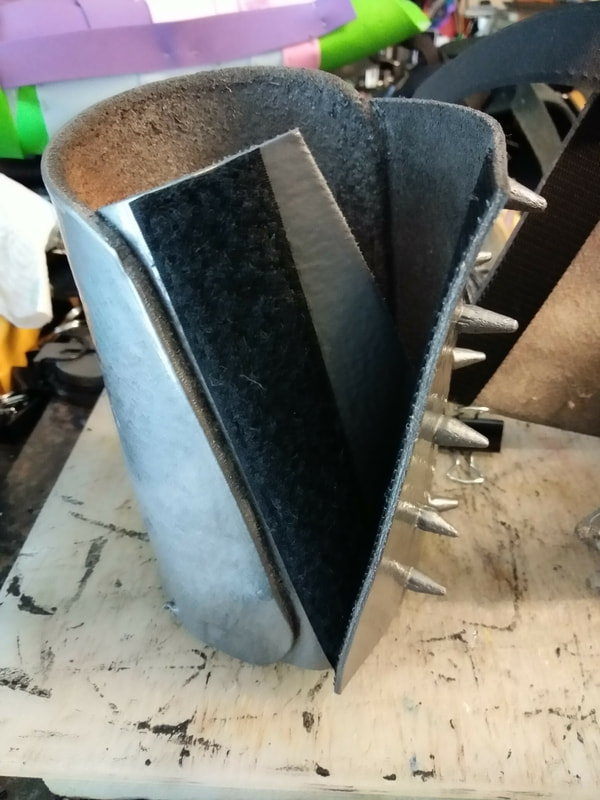
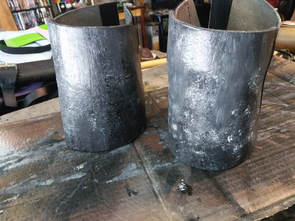
When making armor pieces I prefer to use a vegetable tanned leather, usually 7-12 oz depending on the armor and its use. For cosplay armor using a 5-9 oz veg tan is good. For Lexa’s bracers, I used an 8-9 oz section of veg tan leather that I got in trade from a friend who had wet formed them. She used some strapping which left some marking on the leather, so I had to sand and cut the pieces before they were the right size for the back section of Lexa’s bracers. The top flap and under flap were made with a 3-4 oz vegetable tanned leather since they would be overlapped and have velcro attached. I measured my forearms and cut the pieces according to my measurements, but I originally forgot to account for the thick under layers of my costume and had to add the under the flap to give a larger circumference. Needless to say, always wear as much of your costume as possible when measuring.
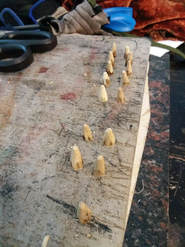
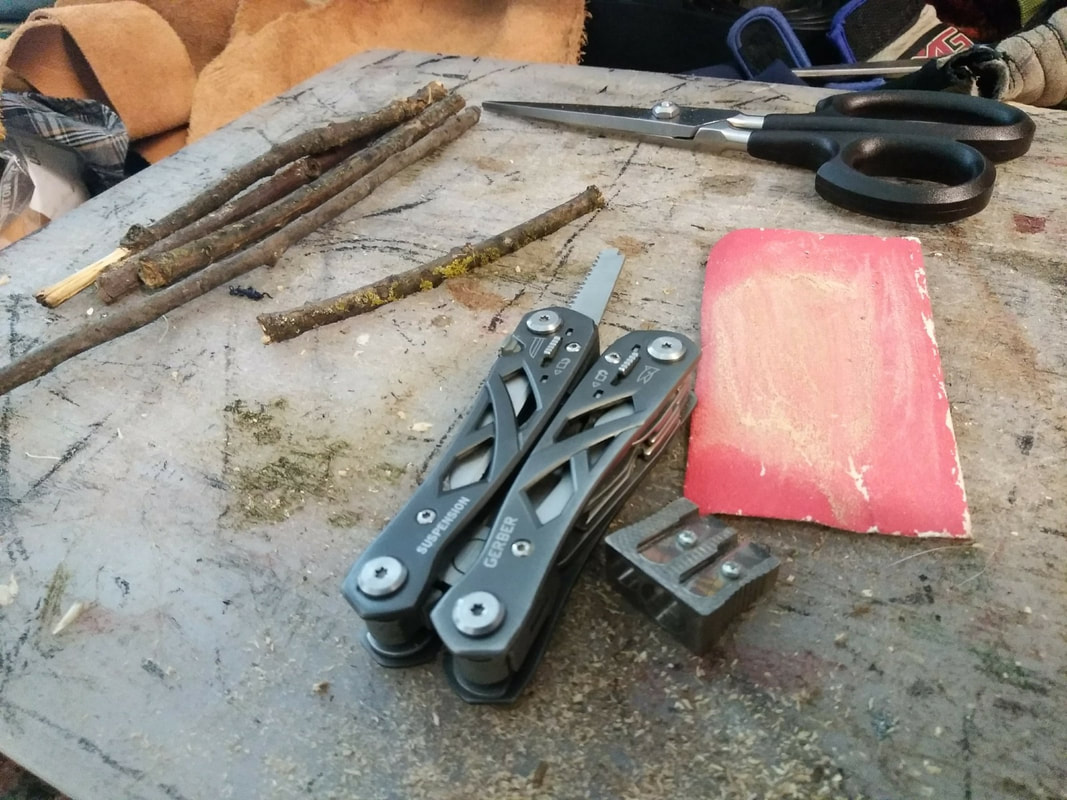
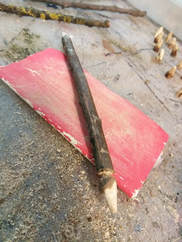
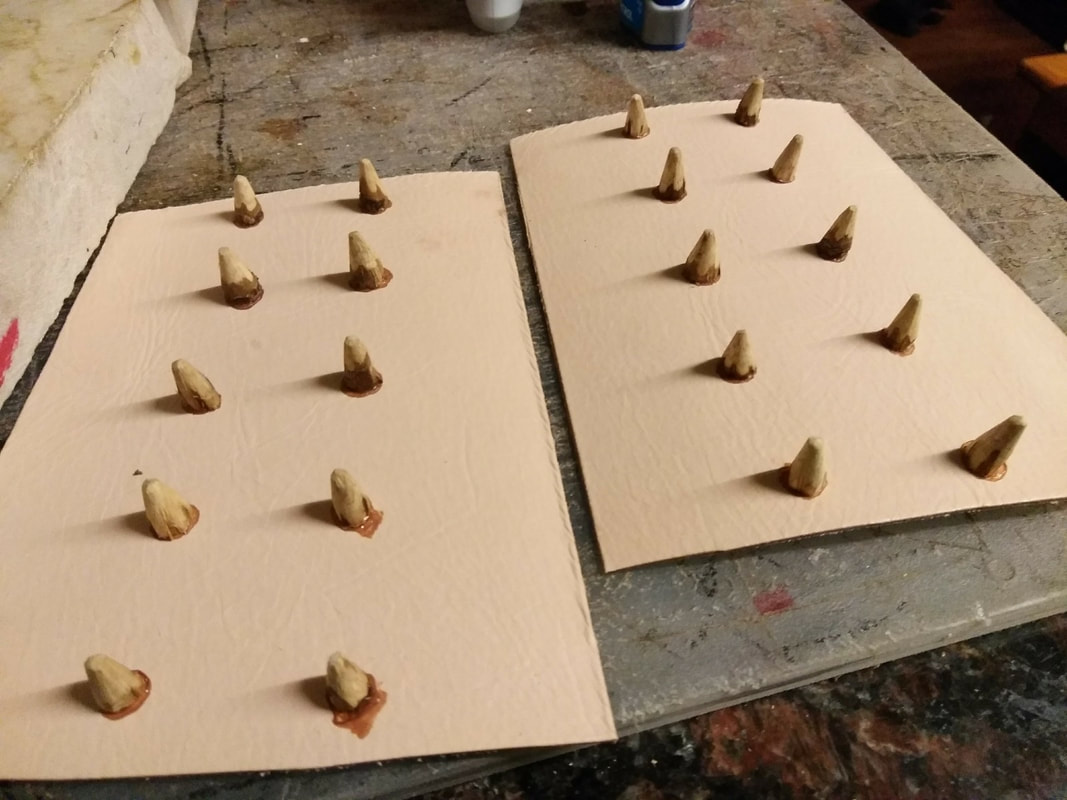
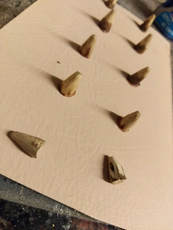
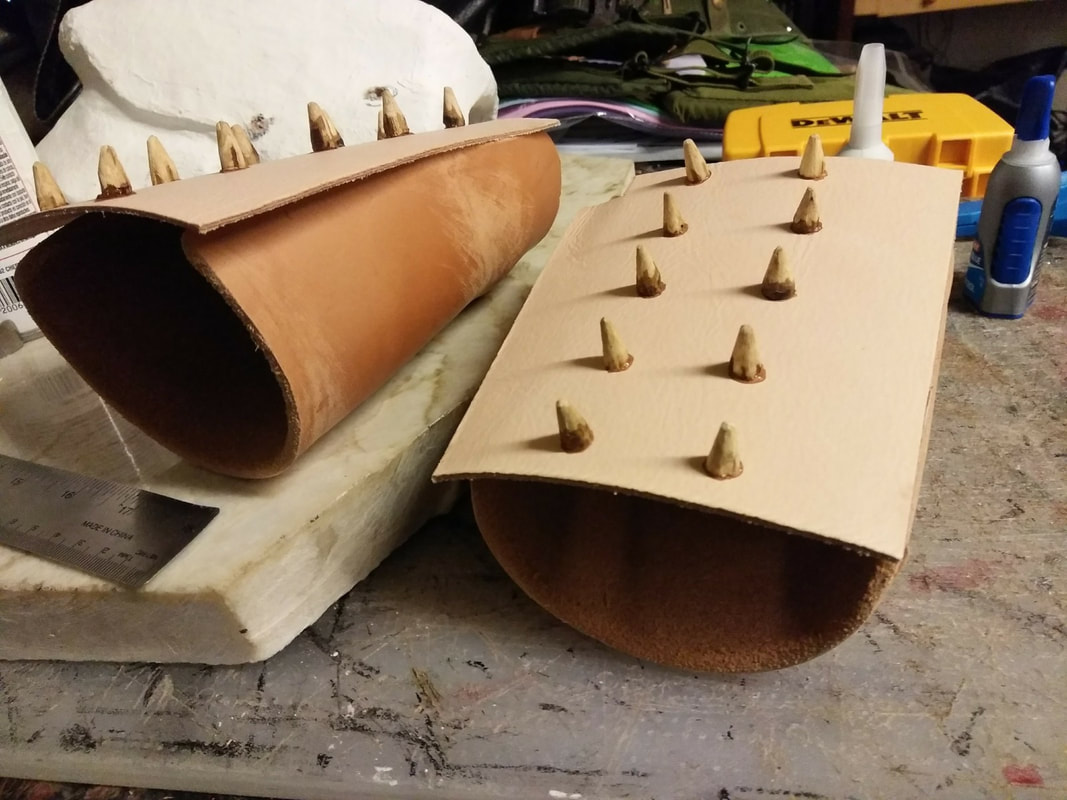
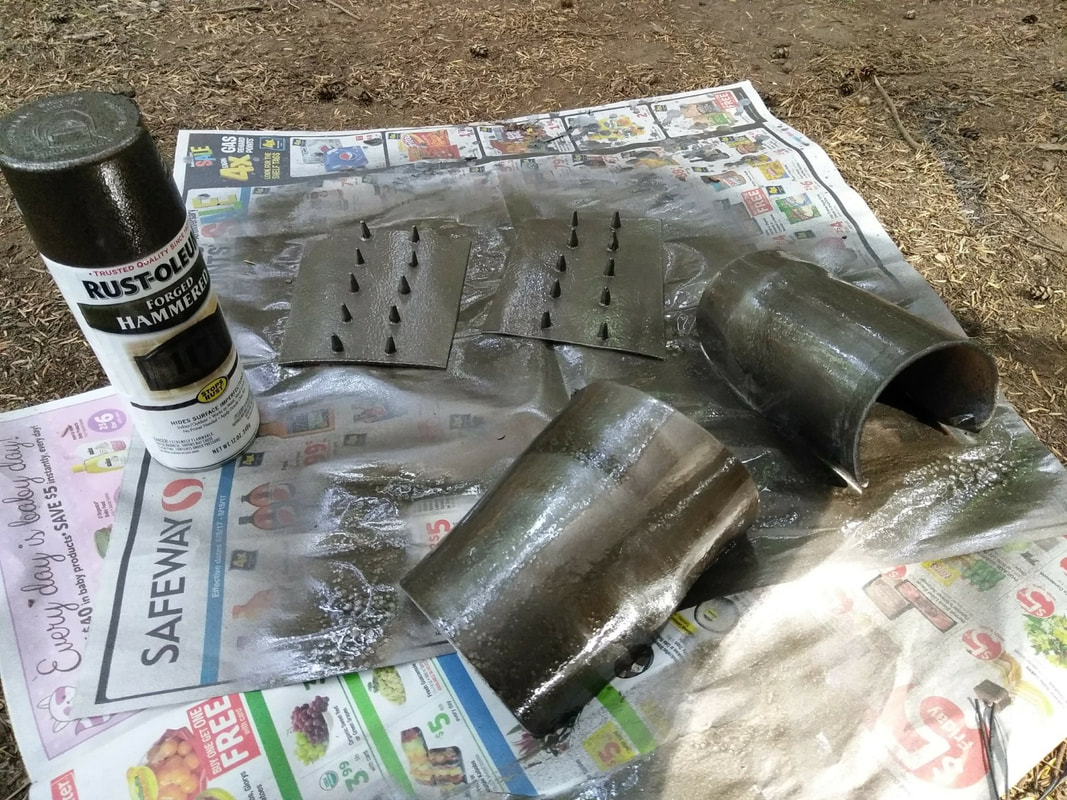
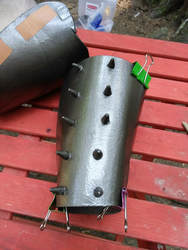
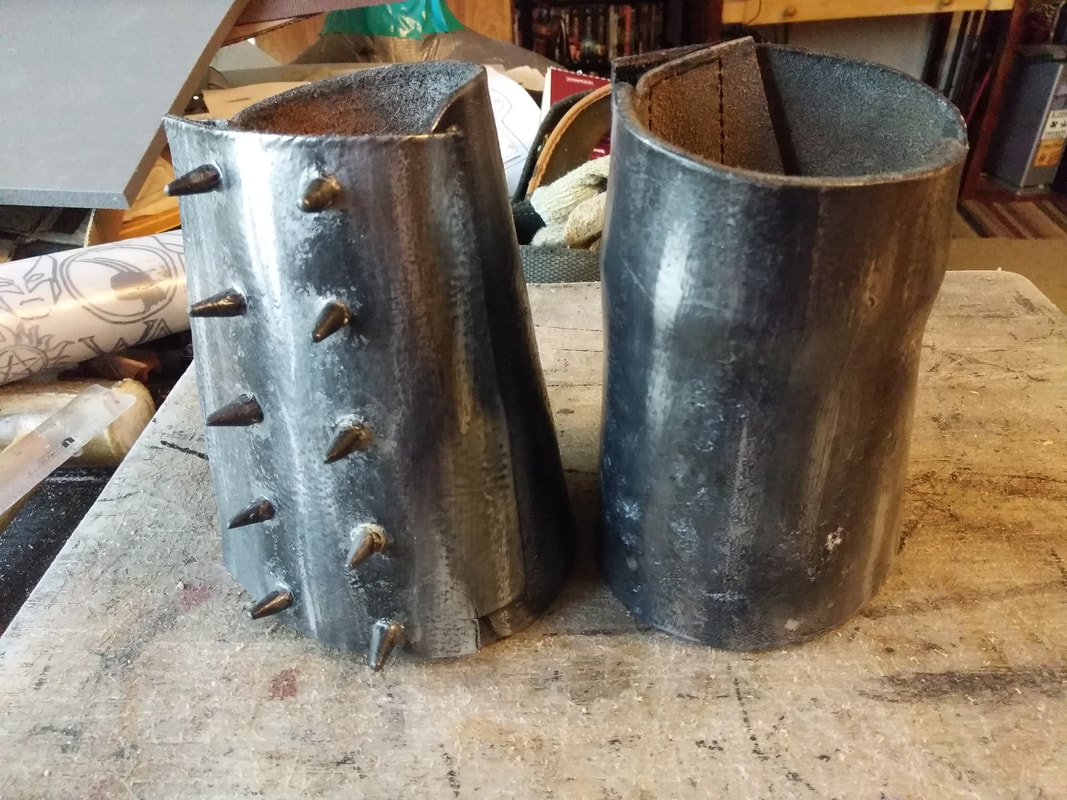
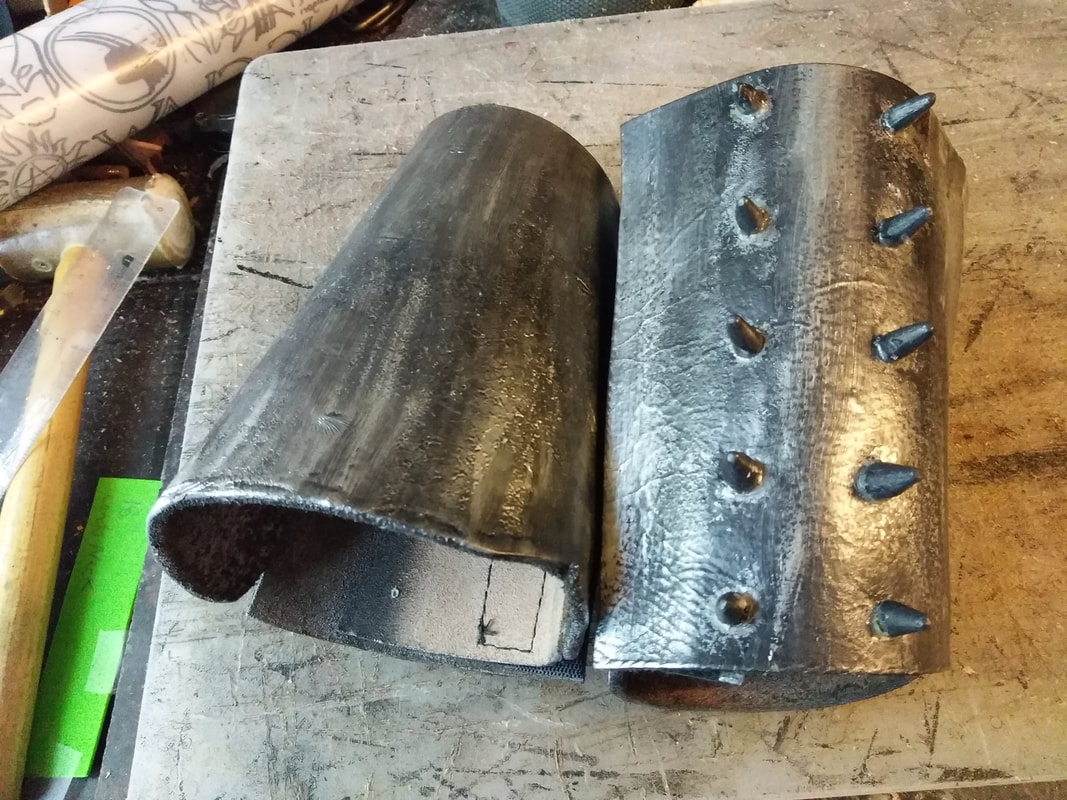
Lexa the Vampire SlayerThe little spikes on the top section are made from twigs roughly the size of pencils in diameter so that they would fit into the pencil sharpener. I sharpened each end and then used the saw on a Gerber to cut them off. I repeated this process until the twig was too small and in the end, I had twenty little wooden spikes. I then used the 100 grit sandpaper to smooth the spikes, especially on the bottom where they would glue to the leather.
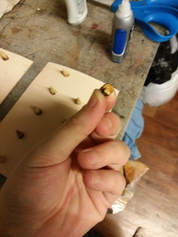
I originally tried to use super glue on them. However, the leather pieces flex so much the wood spikes would pop off and I had to reglue them with Eco-weld leather cement. This gave them a bit more flexibility.
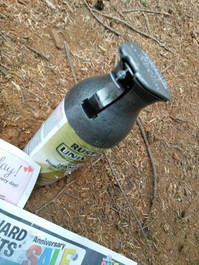
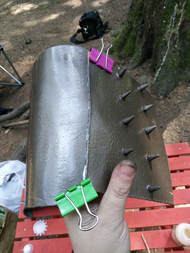
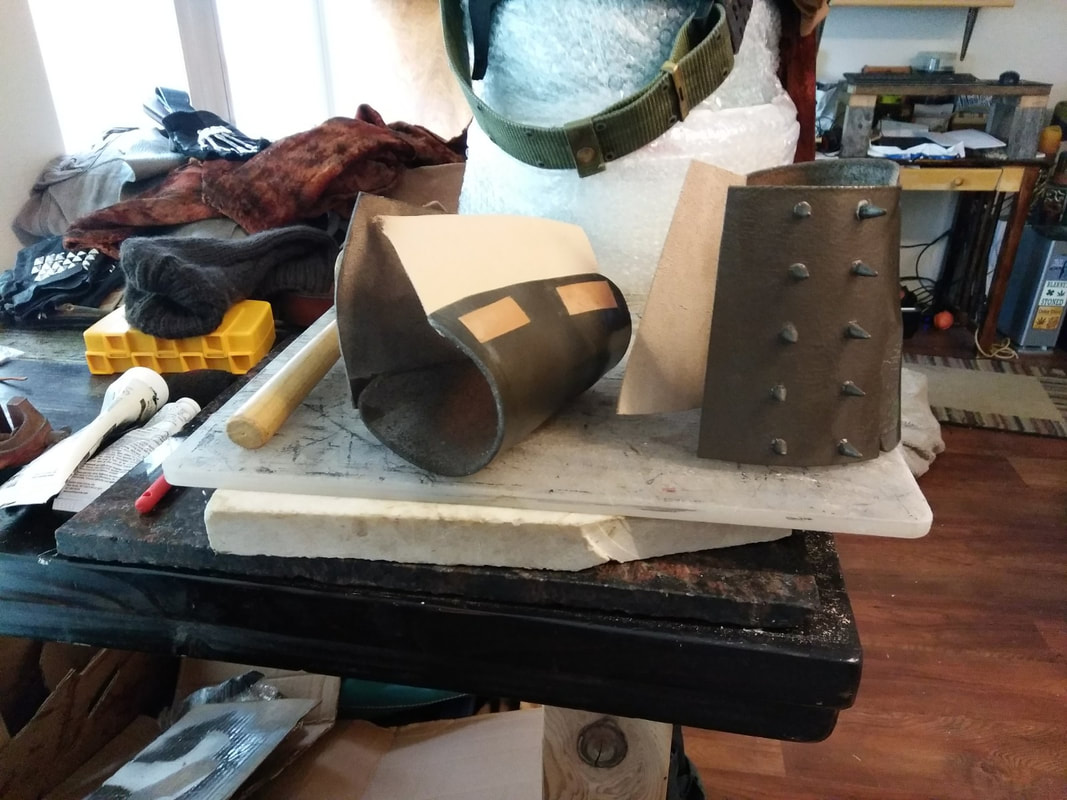
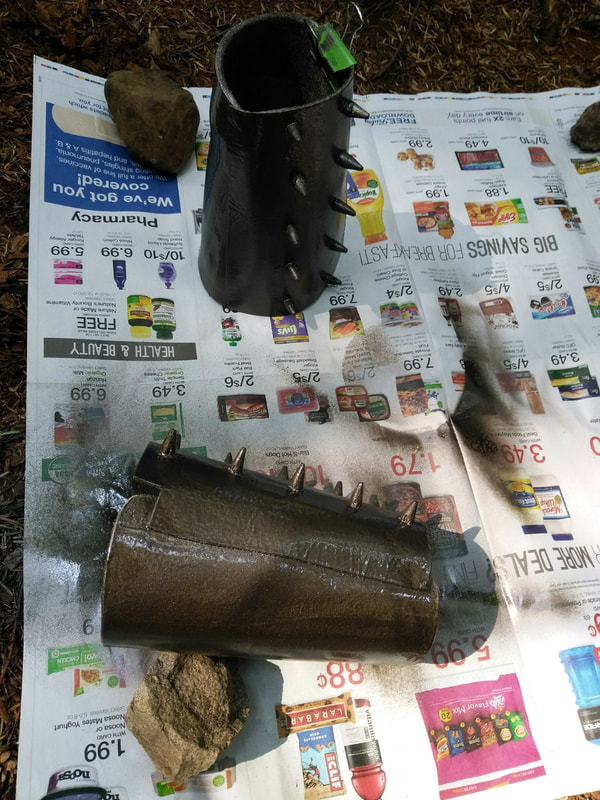
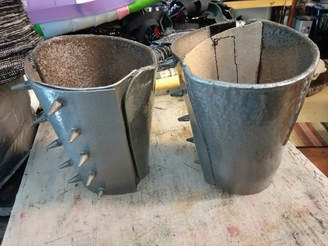
Get Your Metal OnWhen it came time to paint the bracers, I didn’t use a primer since both materials are natural and raw. I used tape to mark off the sections that I wanted to leave raw for gluing later. Then laid the bracer pieces onto a piece of newspaper, shook my Forged Hammered pewter spray paint and then sprayed away. At first I tried to use one of the newer spray nozzle paints, however, it just dribbled all over my fingers leaving spots on my bracer pieces. So I returned that defective can and got an old school version with the little top that can be popped off and soaked if it gets clogged. I did a few layers of paint, waiting in between for the first coat to dry some. Leave overnight to dry.
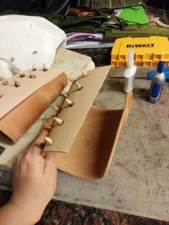
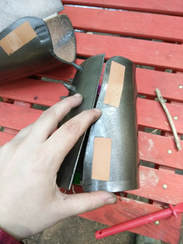
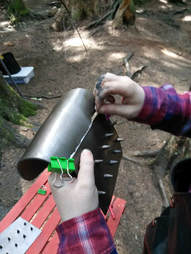
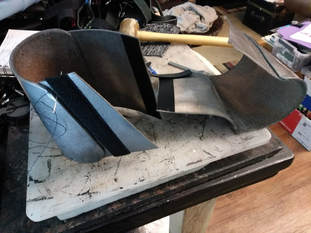
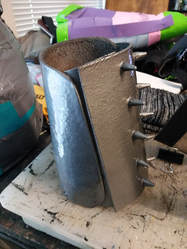
How to create your own Movie MagicIn order to get that "how the Hell does that even close," seamlessness look that Lexa sports in the T.V. Show, The 100, we had to use glue and hidden stitching. First, the spiked top flap was glued to the bottom bracer piece. I used Eco-weld leather cement, applied it to both sides of the leather, and waited for it to become tacky. I pressed the pieces together and clamped them for at least 10-15 minutes. If you don’t want clamp marks, be sure to use a piece of scrap leather between the clip and the project. Also, be sure to clean any overspill of the glue from combined edges or you will have a visible glue line.
Sometimes when you are working on building something for the first time you make mistakes or underestimate the project. I completely forgot to take into account that I would be wearing a thick sweater or jacket sleeves underneath my bracers, so I had to add an additional leather flap for circumference. This allows me to wear the bracers much looser and accommodate the bulky sweater sleeves better. The additional leather sections were also spray painted to look the same as the previous sections.
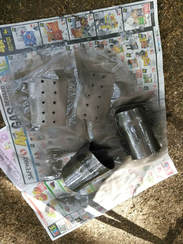
Hand Sewn with LoveAfter the bracers were dry, sections of velcro were measured and hand sewn onto the under flap leather. I used stitch hole punches to put holes in the velcro and leather. Since we don’t see this part, visible sewing wasn’t an issue. However, for the corresponding velcro on the top spiked section, the velcro had to be glued or stuck with sticky tape. This way we won’t see any stitching on the outside, and the movie magic will be preserved.
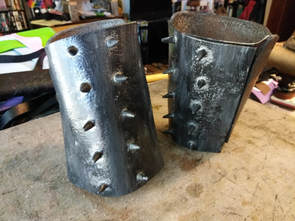
Since Lexa’s bracers aren’t actually new and shiny in the show, I had to tone down the metal spray paint shine. I used black, brown, titan buff, and white acrylic paints to weather the bracers. I layered the paint onto the sponge, dark to light and then sponged the paint onto the bracers. Again referencing my photos, I painted them until they resembled Lexa's. I left them to dry thoroughly and then used some silver leaf Rub N Buff wax to go back to the piece and give it a slightly worn metal shine.
Devil's in the DetailsThe subtle difference of adding the silver leaf Rub N Buff wax really gives the Lexa bracers that believable quality. Tiny details can give your cosplay character greater authenticity, and make it even more appealing to fans and non-fans alike. The more definable pieces you have in your cosplay, the better chance you’ll have of being placed in that universe. Of course, you will also have the opportunity to do some extremely awesome role-playing through photography which is always fun!
1 Comment
|
Willow EnrightI started crafting out of leather in 2011, and now I am making it my life's work. I am writing this blog to help myself remember some of the small steps in past projects, sharing my triumphs and failures, as well as my love of leather. Archives
November 2017
Categories
All
|

|
Cosplay DIY (Blog) |


 RSS Feed
