|
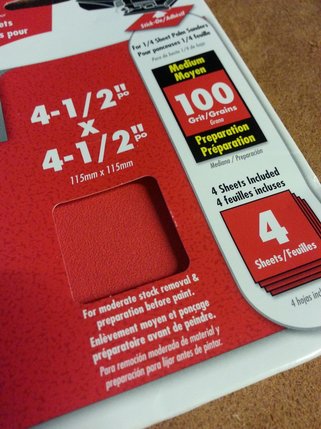
by Willow Enright 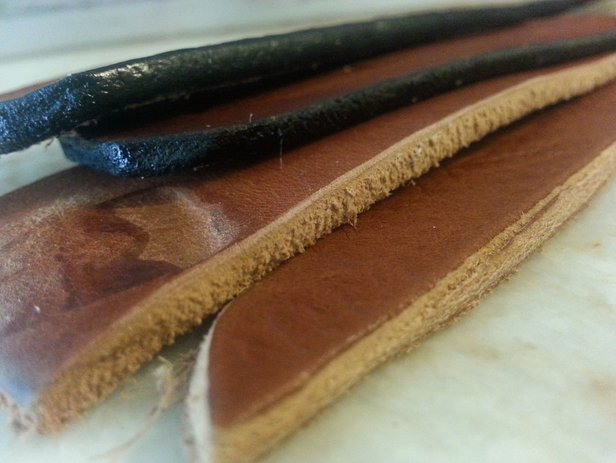 Four different edges: Raw cut, Beveled and Sanded, Edge Coated, Gum Tragacanth and Burnished Edge. Working with leather edges can be a challenge, and when you first start off it may not be as important to you that they look great. However, as you continue to leather work you will eventually want your edges to look as smart as the rest of your leather creations. There are multiple steps to getting just one edge looking fabulous. We'll cover the basics of beveling, sanding, edge coating, and burnishing to take your leather edge work to the next level of amazing. 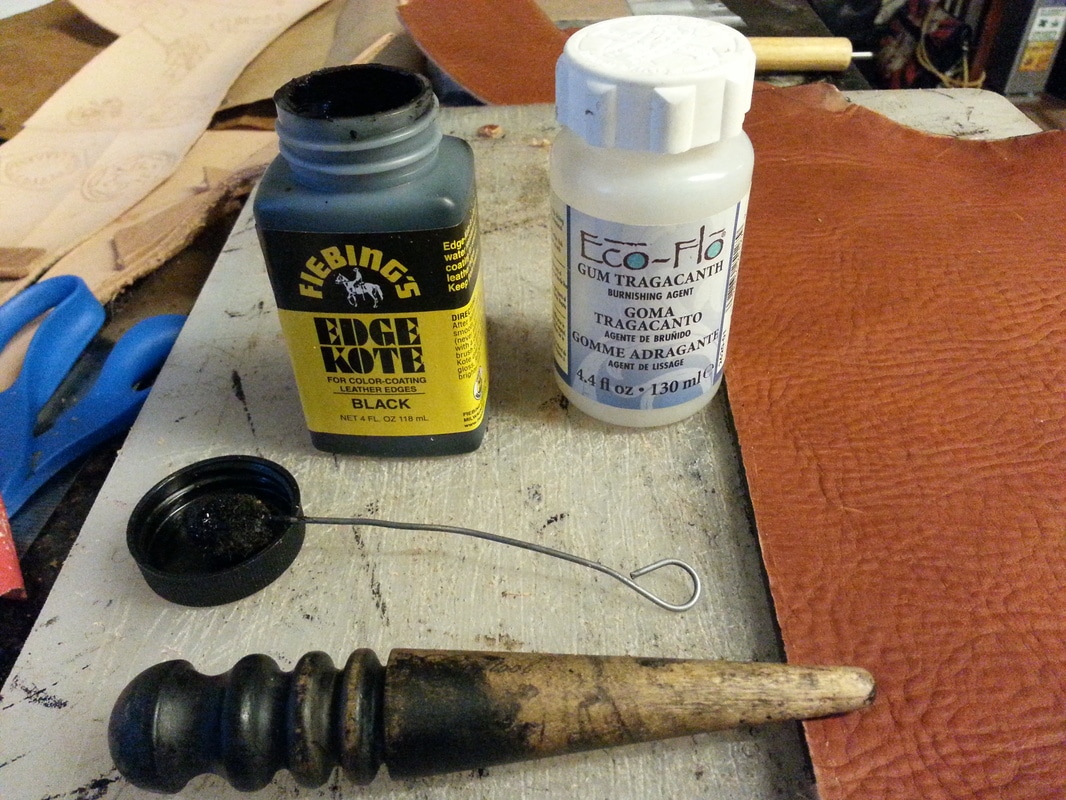 Black Edge Coat, Gum Tragacanth, Wool Dauber, Wood Burnisher and 8-9 oz Double Austin Shoulder Supplies5-10 oz Leather Swivel Knife/Head Knife/Scissors Safety Beveler Sand Paper 100 grit Wood Burnisher Edge Coat Gum Tragacanto Wool Dauber or Paint Brush Wash Cloth/Paper Towel Clamps Cutting Board
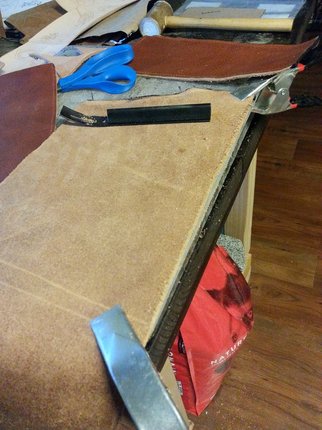
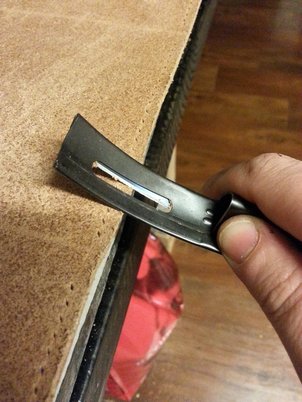
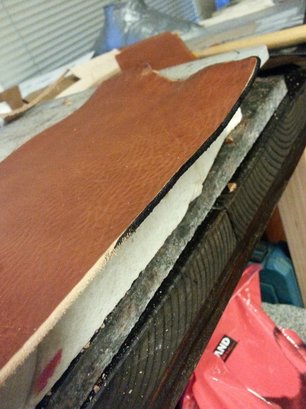
Cut your leather with your swivel knife/head knife/scissors, and then clamp it at either end to your cutting board. Leave the edge just barely hanging over the side of the cutting board, about 3-4mm. This is to give you just enough room to bevel without compromising your supporting surface, or damaging your safety beveler.
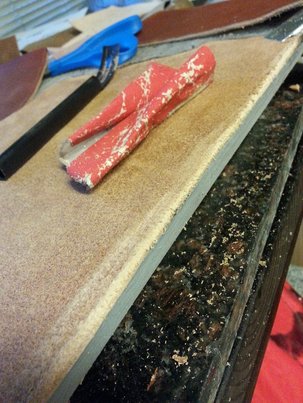
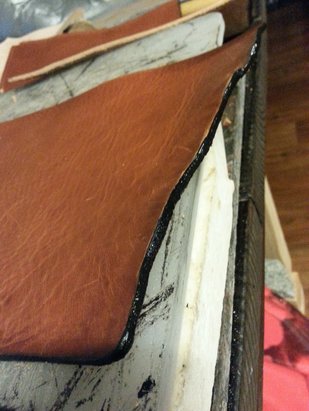
Use your Safety Beveler at about a 45 degree angle to trim the leather in order to round out your straight cut edge. Do this to all under sides of your exposed edges, but don't use the beveler on the front of the leather or you may remove too much by accident. This process takes some time, and you need to be extremely careful so as to avoid cutting yourself with the beveler. Follow up the beveling with 100 grit sand paper to the edges for a smoother finish.
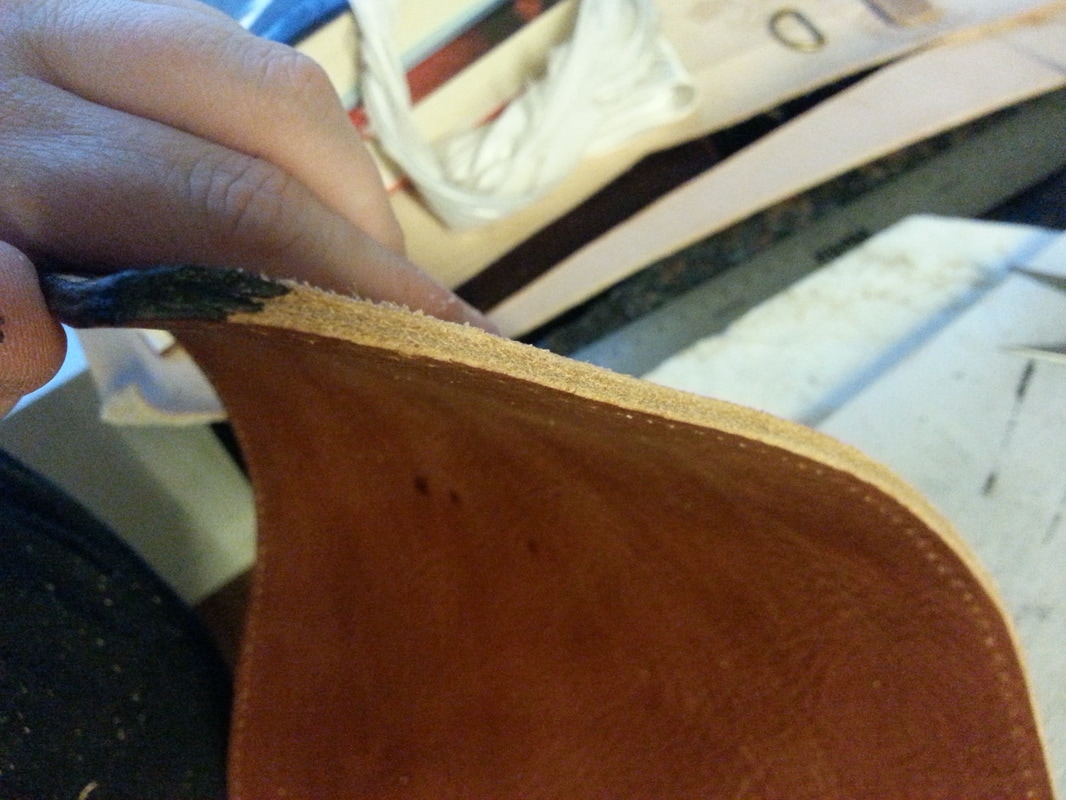
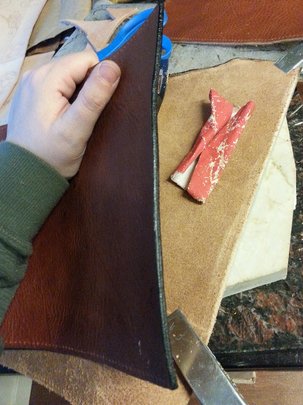
Sometimes you will need to repeat the beveling and sanding if your edges don't end up being smooth enough. If they are smooth enough you can begin with the edge coating. This comes in clear, black and brown. Apply the edge coat with a wool dauber or medium paint brush. Use a damp work cloth or some paper towel to wipe away any excess edge coat that you may get on the front of the leather as you work. Let the edge coat dry before continuing.
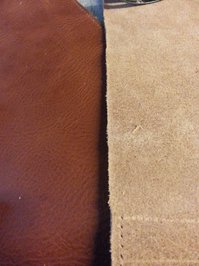
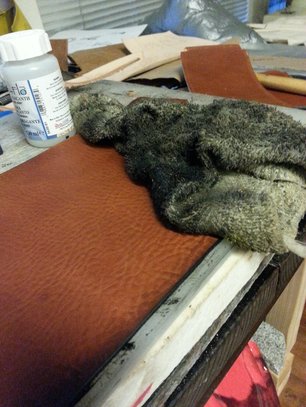
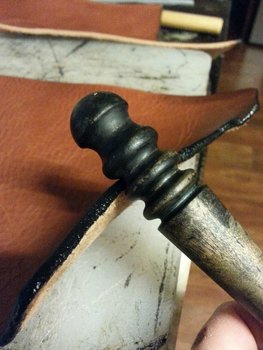
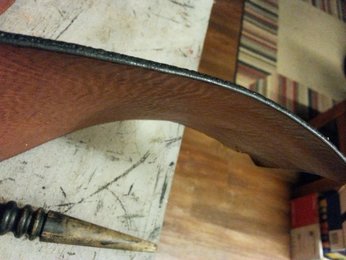
Use the Gum Tragacanth, applying it with either a wool dauber or paint brush. Leave it for a few moments to get tacky before using the wood burnisher, moving it along the edge between the appropriate sized groves. Do this until your leather edge appears nice and smooth. Repeat the Gum Tragacanth until you are satisfied with the smoothness of your edges. Finishing your raw edges with this lengthy process will be well worth the effort. Your edges will look amazing, and wear better over time!
by Willow Enright 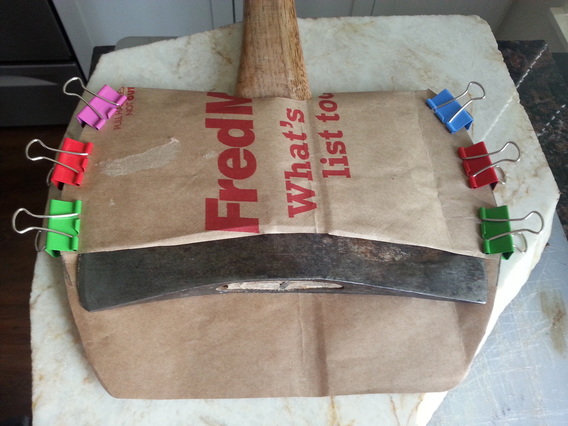 Using some office clips to help hold the paper bag pattern in place to fit it around the axe. People have been copying others for centuries. They copy hairstyles, clothes, weapons, mannerisms, shoes, and even vocabularies. Sometimes you fall in love with something that you see and you just have to recreate it. This is the essence of cosplay, in pretty much a nut shell. Reverse Engineering is the process of figuring out what steps to take to create a garment or item that copies an already existing item that you have seen without a pattern. Outright copying a pattern that has a copyright is against the law, but you can state that you were using such and such’s pattern to create your final product. With reverse engineering you’re going to use all of your know-how to create an item that looks like the one you see. The first step is to choose what you want to recreate. You will need either the physical object to recreate, or some pictures of the item you are trying to copy. If you are using photos try to get pictures of the front, back, and side along with any close ups of the details. 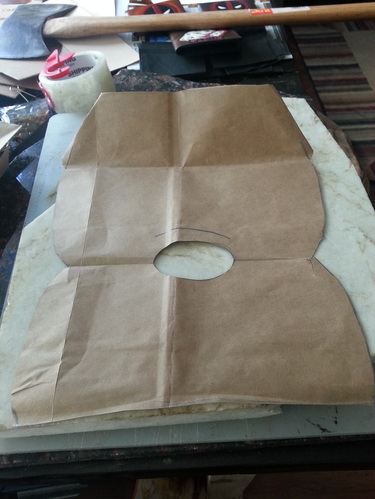 Axe pattern made from paper bags laid out. The next step happens to be my favorite way to reverse engineer something, whether it is a bag or clothes, and that’s to build it with paper bags and tape first. Cut open and lay out your paper bag, then trace the basic shape of the item onto the bag. This is a great way to make changes to the shape and structure quickly. You can pinch, fold, cut, tuck, and tape until you get the shape you want. When it looks like the shape that you’re aiming for, you can cut out the pattern into pieces. This will let you see if the pattern will need darts or strategic cuts in places to be able to put it all back together. Your next step is to build it out of fabric or cardboard. If you are using a garment leather to recreate a fabric item such as a skirt, or gloves then use fabric to create your pattern. If you are using a thicker leather to create a pouch or bag you can stick with the paper bag or transfer your pattern to cardboard. I find both are useful for different patterns. Cardboard is great for wallets, straps, and body armor pieces because it’s thicker and will hold up for multiple uses. If you are making sheaths or other specialty item cases, then paper bags will suit your need better since you are able to bend the pattern over an actual item to see how it will fit. 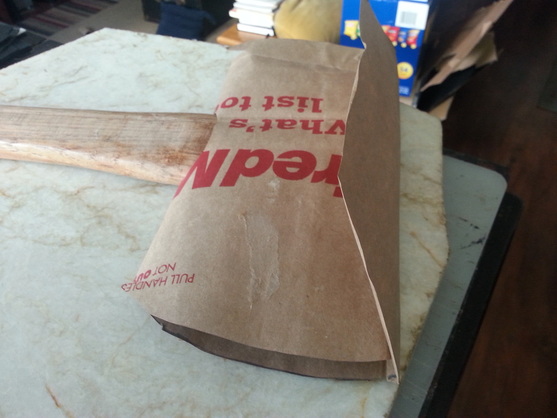 Axe tucked into its paper pattern. One of my favorite reverse engineering of patterns is using small boxes as guidelines for making pouches. This one is pretty simple in that it skips the having to figure out your pattern for the most part. The two adjustments that you need to figure out are another way to make the flap that will cover the basic box shape, and how you want to do your belt strap.
Once you have your pattern, you can begin the real project! For continued use I recommend that you label the pattern and store it in a zip-lock bag or a filing cabinet. Let me know if you try doing reverse engineering, I’d love to see what you come up with! by Willow Enright  Tyrell Armor all dry after Water Hardening. The process of water hardening leather is a time old tale which the French commonly came to refer to as Cuir Bouilli, or boiled leather. It’s not a particularly difficult process, but it does require some knowledgeable finesse. I’ve narrowed it down to five steps. Mostly, you need some water, leather, a large enough pot to soak the item you are working with, something to protect your hands, and nowadays a thermometer is recommended for consistency.  This is the Tyrell Armor after being Cuir Bouillied and is being held and shaped into place. How to Water Harden Leather
 This is the Tyrell Armor with a little burnt edge. BE CAREFUL! This was amazingly difficult to shape and cut. So whether you call it boiled leather, Cuir Bouilli, or water hardening we are all talking about the same thing. There’s also the use of wax to harden, but I haven’t yet experimented with this way, if you have I would love to hear about it. There is also, the basic wet forming which I covered in a previous blog. Click the words Wet Forming for the link. For further questions you can leave a comment or send me a message on Facebook.
by Willow Enright  This is the Sophia Handbag Kit #44314-00 from Tandy. Don't be fooled into thinking you'll get the pattern for the bag layout, you will only get the tooling pattern for free. One thing that I have been asked for in the past few weeks is for patterns. “Where do you get your patterns?” “Can I have that pattern?” “Do you have a pattern for that?” Most of my patterns aren’t directly taken from one place or another, nor do I start off with a perfect pattern when I craft them myself. I will do more research on how to transfer my original cardboard patterns into digital copies that can be shared around the world, but for now I will share a few sites that have free downloadable patterns that you can start downloading and making, today! First and foremost Leather Craft Library, this site is brought to you by Tandy Leather. Most of their free downloads have to do with the tooling patterns that they show on an item, and aren’t a layout for how to construct the item. That being said they show you what tools it would take to duplicate the process, this means that in order to perfectly copy the pattern, you have to go out and buy a bunch of Tandy tools. I see what you’re doing Tandy. A.k.a. feeding my leather addiction, and creating new fuel for the fire that fills my soul and empties my pocket book. 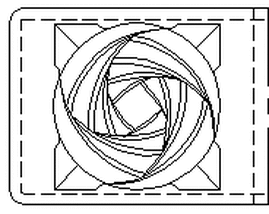 This is the LC-521b pattern from Outside the Box Pattern. Outside the Box Patterns is a great way to look for free patterns. They tell you how large the image is, and what is the best item to place that tooling pattern on. You can open the pattern on a new tab on your browser then click the download button, it’s that easy. No wondering if that checkout chart will let you get away without paying a dime. There’s no tricking me into thinking that your messenger bag pattern was actually going to give me a layout pattern for said bag, only to give me the tooling pattern on that bag instead. What you see is what you get. I like this straight forward method of sharing. Elk Tracks is a nice one if you want to create buffalos and other western themed tooling patterns. I downloaded a few. I really like how they show you the pattern then the finished tooled product for a side by side comparison. I learn really well this way having to look and study at what’s happening and then experiment and try something, leaving me to figure it out on my own. I learn best this way, but this may not be the way you learn to each his own. 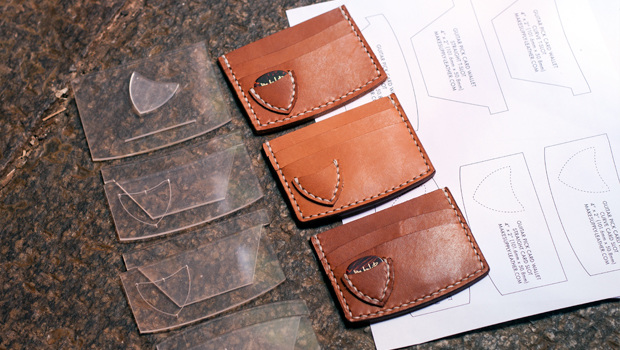 This is the Leather Guitar Pick Wallet template, pattern, and finished product from Make Supply. If you are a beginner Make Supply is a great place to start making wallets. Not only are the patterns free, but they have video tutorials that compliment those patterns. For those that want a more permanent template that will hold up to repeated use you can purchase the acrylic templates for a fee. One site that really caught my attention is Leather Craft Pattern, but this site isn’t the greatest if you’re only searching for free patterns. I went onto this site found many free patterns that I would like to look at with a more in depth eye, only to be asked for payment greater than $0.00 at check out. Meaning you have to buy something in order to get the free patterns.  A screen shot of Leatherworkers.net forum for free templates. I would stay away from pattern sharing forums like those on leatherworker.net. More than half of the links listed on this forum are so old they are dead ends. If you are up to challenge then this site is fine. I find it to be more frustrating than helpful. Don Gonzales Saddlery doesn’t have a great selection, I liked the skull pattern. This site is much like Outside the Box Pattern, with its straight forwardness. 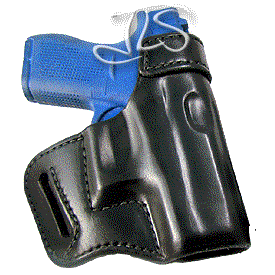 This is a finished Glock 42 Avenger Holster Pattern from JLS Leather. If you are looking for patterns for your 2nd Amendment support piece, aka a gun then, JLS Leather is the site for you.
I hope that this list of resources is helpful to you, and will fuel your creativity. I look forward to seeing what you make with this knowledge and hope that you share by leaving a comment below. The inspiration for creativity should always be free, and leather crafters need to share their knowledge. |
Willow EnrightI started crafting out of leather in 2011, and now I am making it my life's work. I am writing this blog to help myself remember some of the small steps in past projects, sharing my triumphs and failures, as well as my love of leather. Archives
November 2017
Categories
All
|

|
Cosplay DIY (Blog) |
 RSS Feed
