|
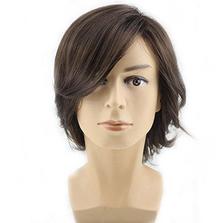
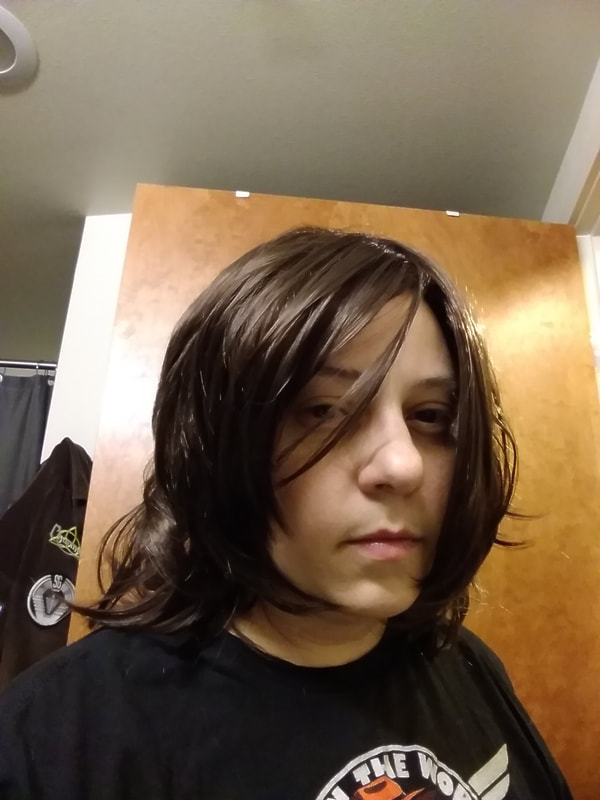
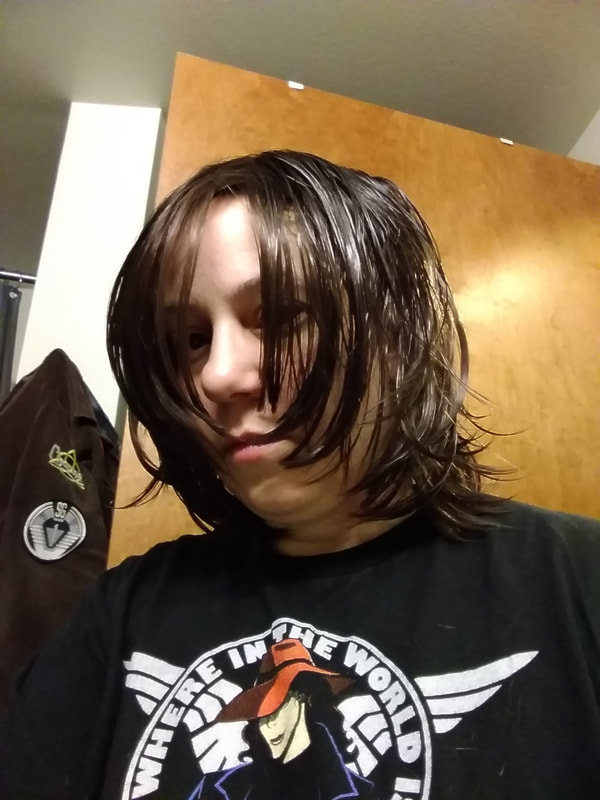
By Willow Enright 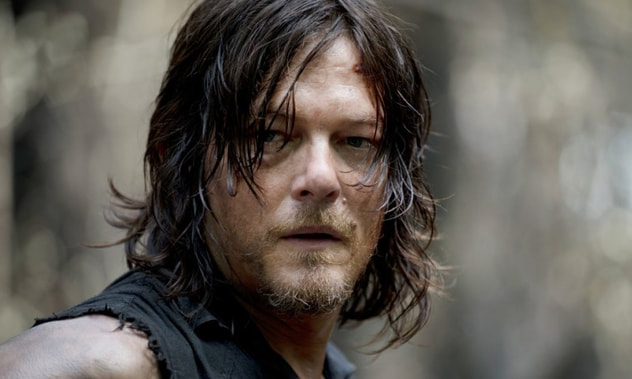 Norman Reedus as Mr. Daryl Dixon from AMC's The Walking Dead Attempting to capture the details of your favorite characters can be as mind boggling as it can be rewarding. There’s nothing worse than being able to convincingly recreate their clothes, props, and identifying features but not be able to sport their characteristic locks without drastically changing your own hair to match. Finding the right wig can go miles when it comes to your cosplays, and not breaking the bank. Especially, when you've have a different character for each day of the con, you'll need more than one wig. Note, this is the first wig I have ever manipulated. I found mine on Ebay from RightOn, Men's Medium Wavy Heat Friendly (150 c / 302 f) Synthetic Wig in dark brown, and it was less than $20. I also made sure to use a good reference photo of the character before starting my wig sculpting, hint, you've already seen it.
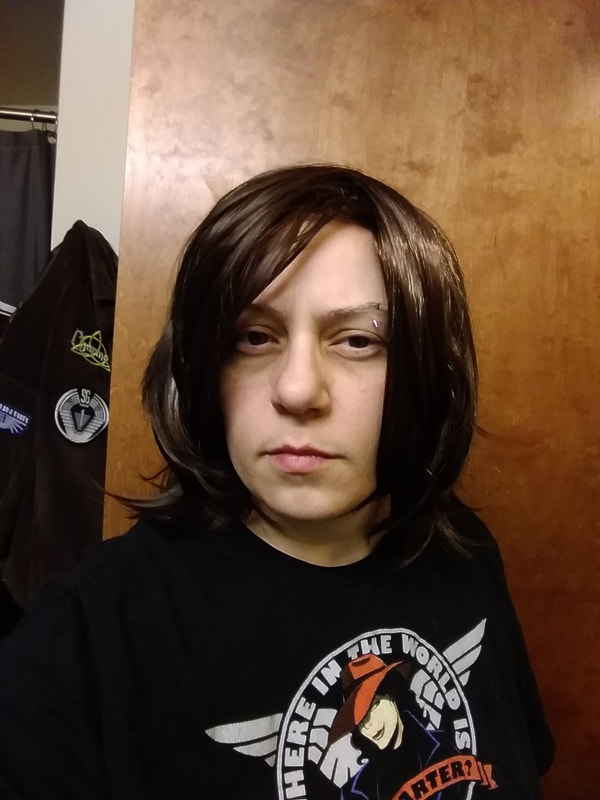
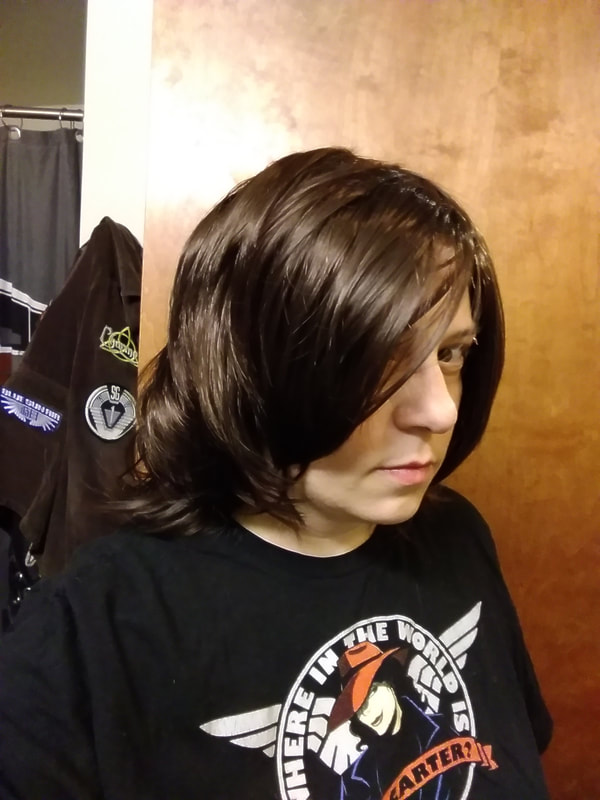
First thing out of the bag the wig was very poofy, and required lots of palm petting to calm down the wig fibers. This transfers the normal oils of your hair to the synthetic wig hairs. The wavy style had the whole top part of the wig swept over, and I had to separate the long bangs to give them that classic Daryl part. Usually, this would be the time to brush the wig, but this is Daryl Dixon and he doesn’t brush his hair. So, I used my fingers which seemed appropriate.
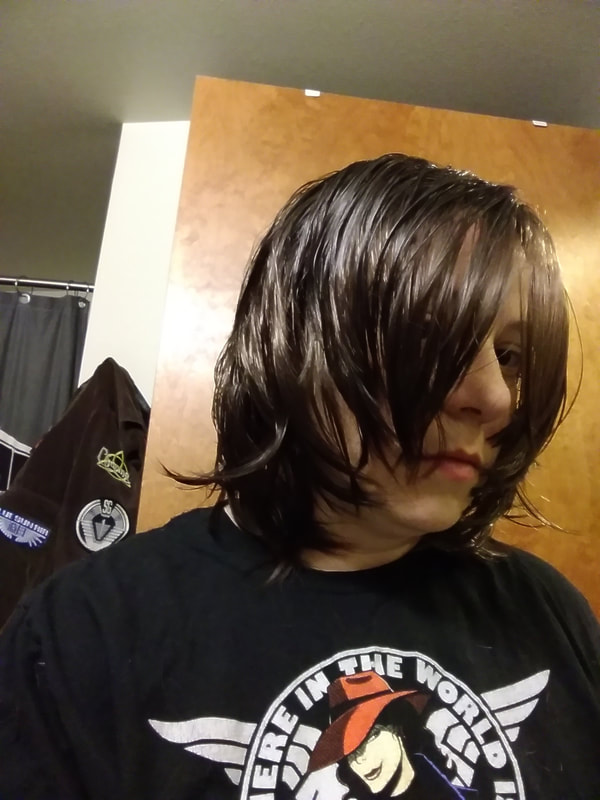
Wearing the wig, I applied two different hair care products, Alterna Life Curls Detangler and Avon’s Curl Goddess Curling Mist. The detangler helps the synthetic hair to avoid knotting up. While the Curling Mist gives some body to the flat wig. I spritzed the products over the wig and used my fingers to scrunch it into the synthetic hair.
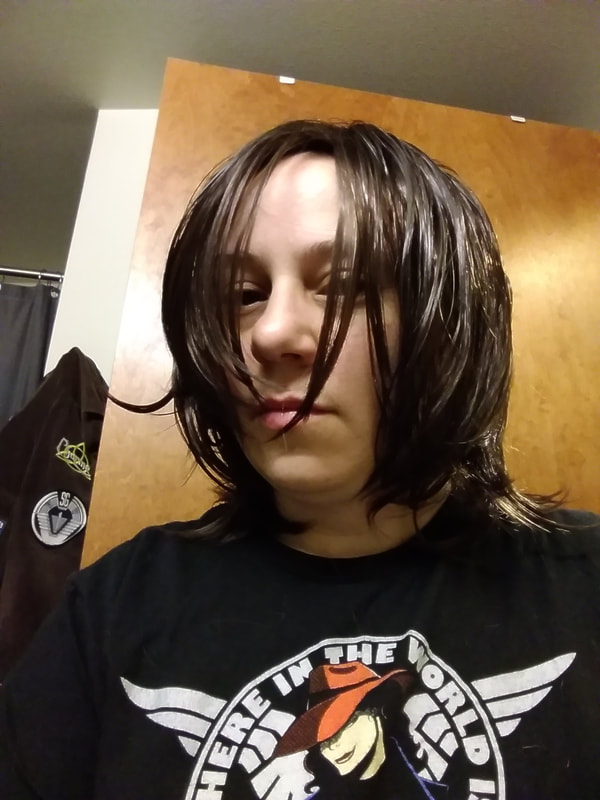
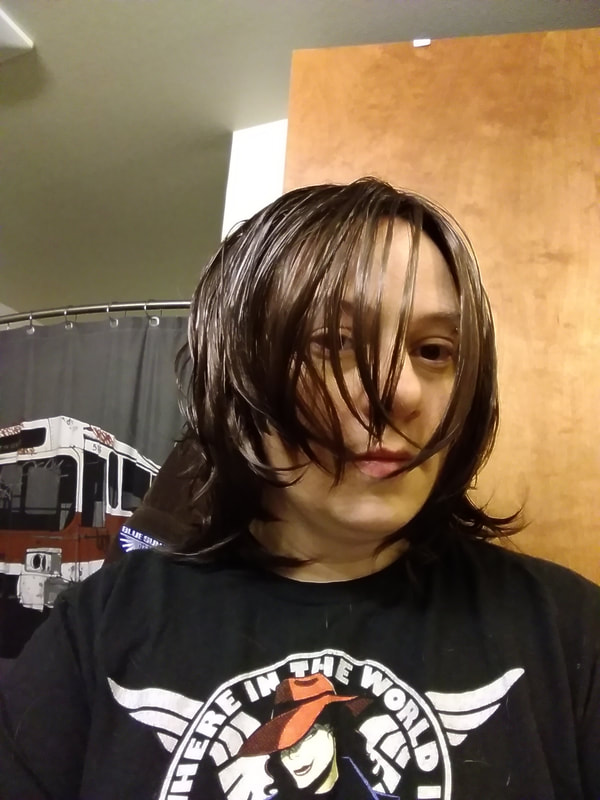
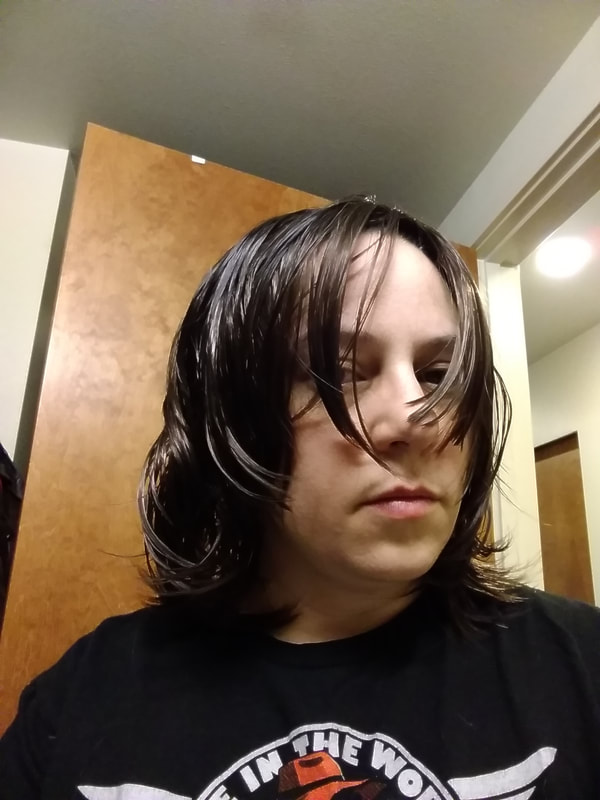
Water is hard to come by in the apocalypse so washing your hair isn’t a priority, especially to a snake eating dirty fiend like Daryl. In order to obtain the greasy dirtiness that he usually sports, I used coconut oil. Rubbing it into my fingertips and then running them through the wig hair. I did this a few times until I was satisfied with the amount of grunge. Since the bangs were designed to sweep over to the side they were quite long and I had to do some random trimming to help create the disheveled bangs of Mr. Dixon. The end results completely tie together the costume, makeup, and props wonderfully! 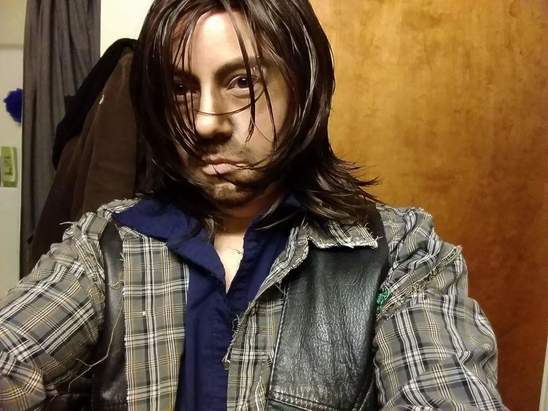 My freshly wet hair Here you can see me in full Drayl Costume. If you'd like to know more about how I created the rest of the costume you can click here: Creating TWD's Daryl Dixon. Stay tuned for next's week's blog about how wig making doesn't always go as planned when I discuss Clarke Griffin's (The 100) wig making experience. 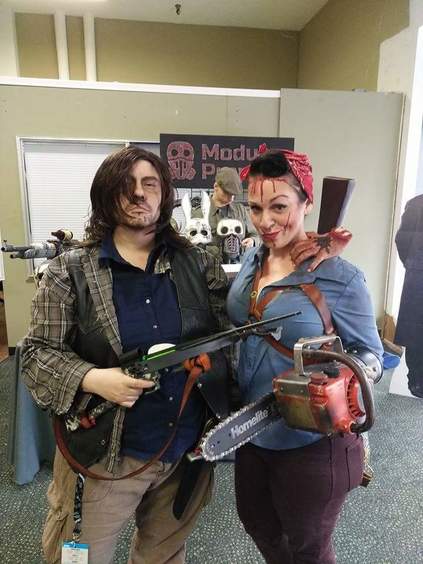 All dry and at the Con! I'm standing next to a fantastic cosplayer, Tina Rivets.
2 Comments
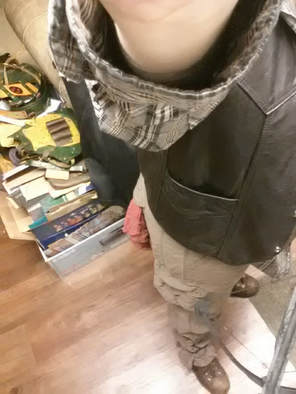
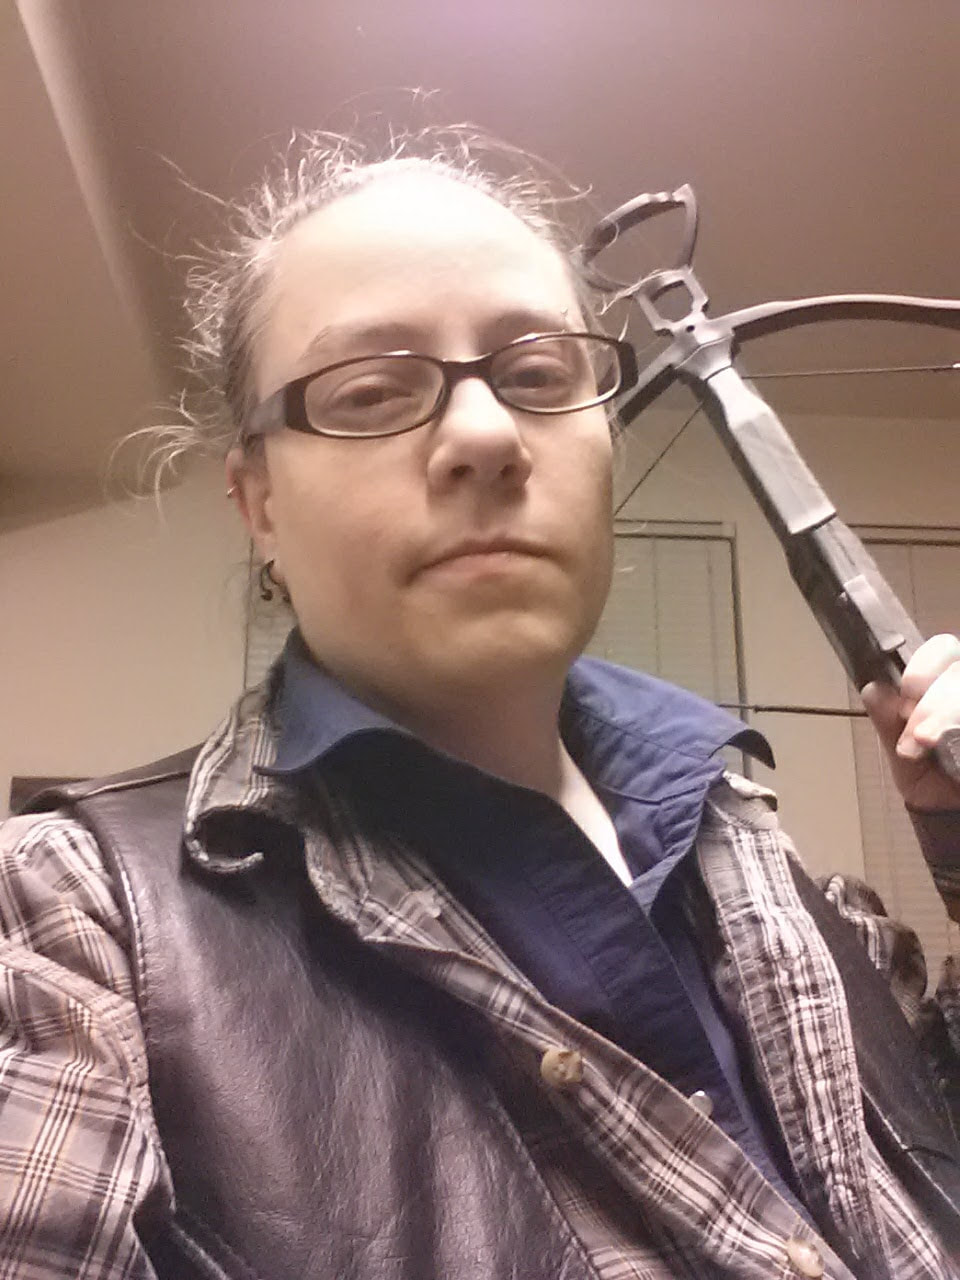
by Willow Enright 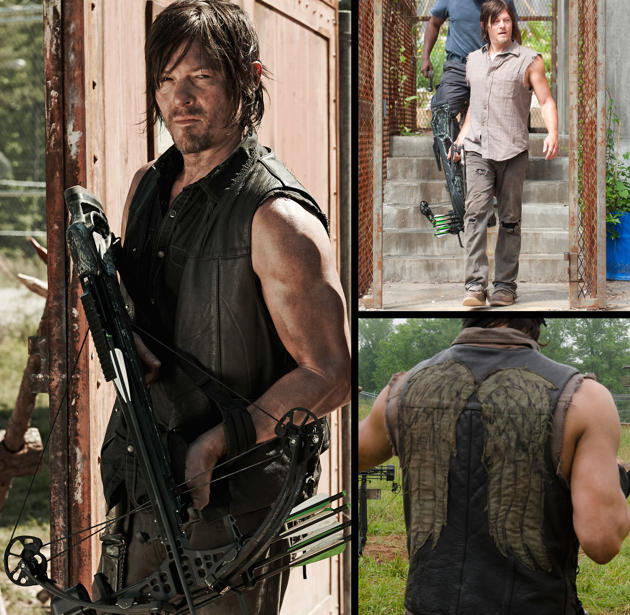 The Walking Dead's Daryl Dixon We all have our heros, and although this particular hero doesn't wear spandex or a cape he certainly inspires me with his everyday choices. Daryl Dixon from The Walking Dead's T.V. show is the kind of hero I hope that I would be in an End of the World scenario. Not only are his hunting and tracking skills legendary, but his tender heart within his tough exterior melts even the most calloused individual. Below are the steps I took to recreate my hero, Daryl Dixon! Identifying Costume & Accessories:Cargo Pants Boots Solid Color Shirt Plaid Shirt Leather Vest Crossbow Knife, Sheath, & Belt Makeup & Hair
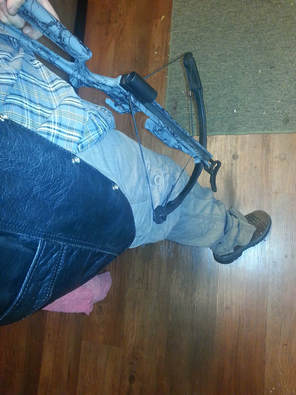
Cargo Pants &BootsAll of the clothing in this cosplay was either acquired second hand at a thrift shop, or I already owned it and I modified it. The light brown cargo pants aren't the right shade of brown, but otherwise they worked. Including the newly acquired hole in the butt which is now patched with the sleeve of the dark blue shirt I reappropriated for Daryl's wardrobe. The cargo pants and my Caterpillar boots required the least amount of attention for modification. My boots were already worn and weathered from years of wear and tear, and although they aren't the exact same ones that the actor wears they are a close enough approximation. For the shoe lace straps he wears wrapped around his pants legs I simply used old broken shoe laces tied together for added detail. Solid Color Shirt
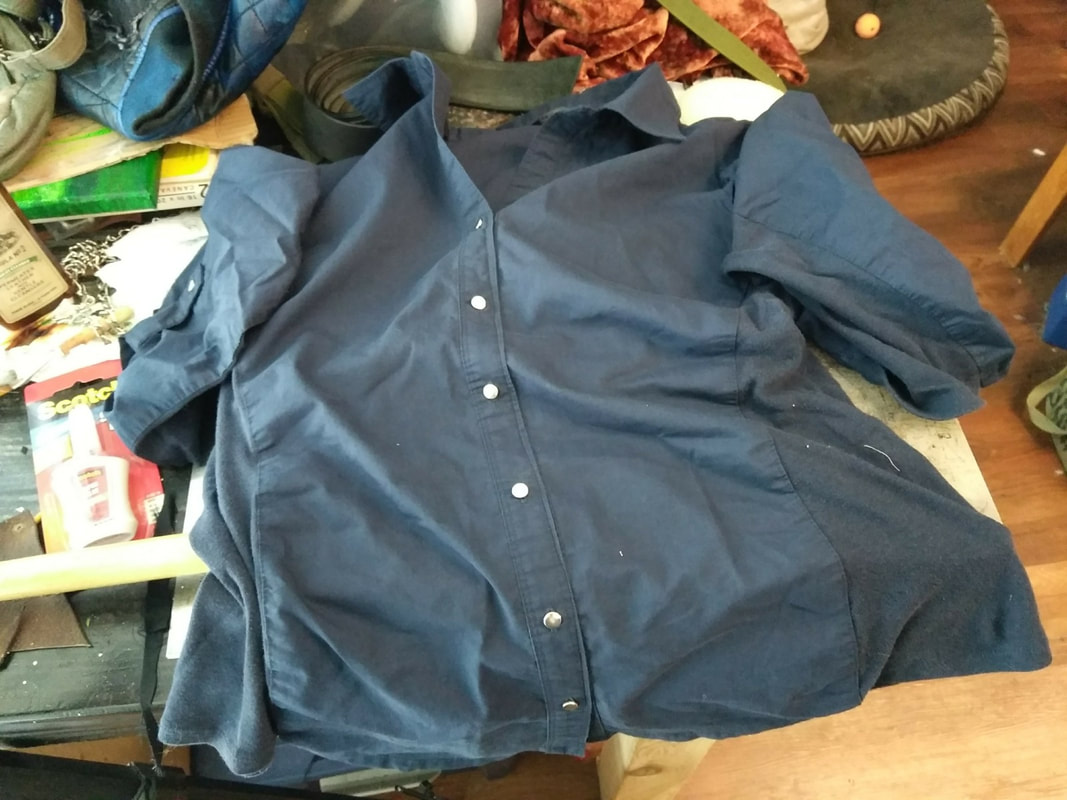
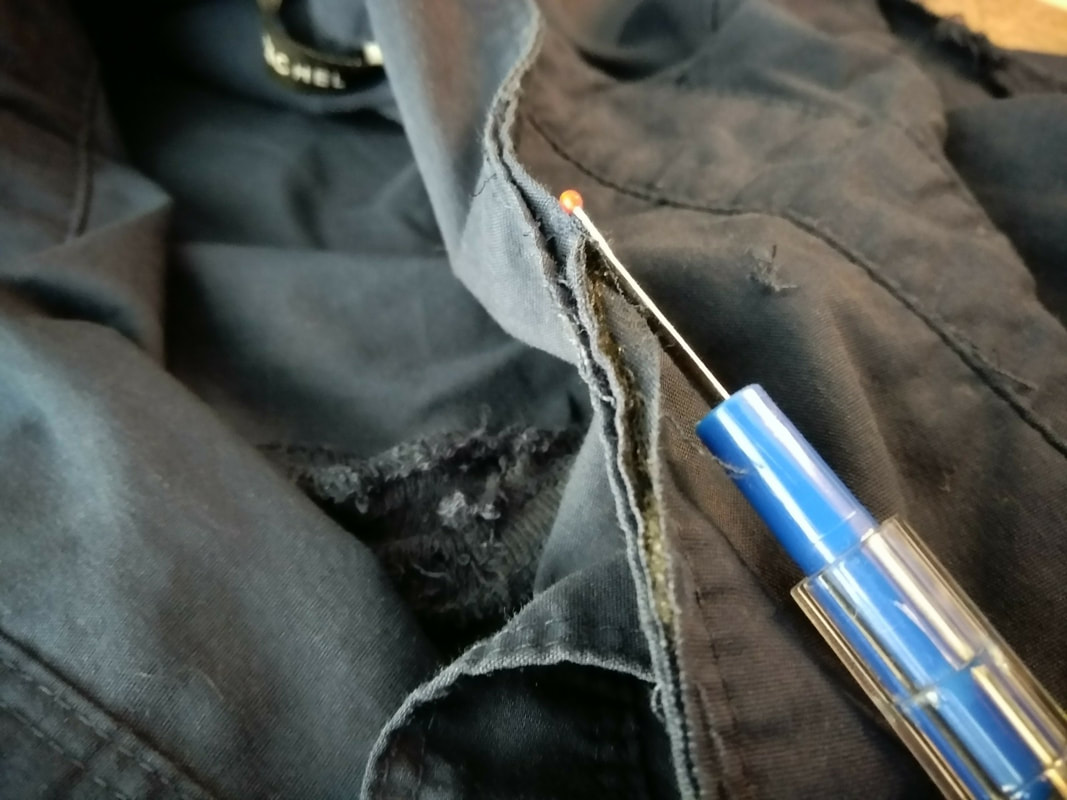
The dark blue button shirt was an old three quarter length work shirt that was annoying with its awkward sleeve length and button popping. So, I tore off both sleeves using a seam ripper to get Daryl's classic sleeveless shirt. I used one sleeve to patch my holey cargo pants, and since the shirt always gave me troubles with the buttons randomly popping open I chose to sew the shirt permantly shut. So, no more button popping! With the sides being a nice stretchy material I can easily slip the shirt over my head like a t-shirt. The seam ripper was used to strategically create frayed seams all over the shirt including the inside collar. In the process of taking off the sleeves I accidently let the seam ripper go wild and created a few rips which I decided added to the authenticity of weathering so I left them as they were. Plaid Shirt
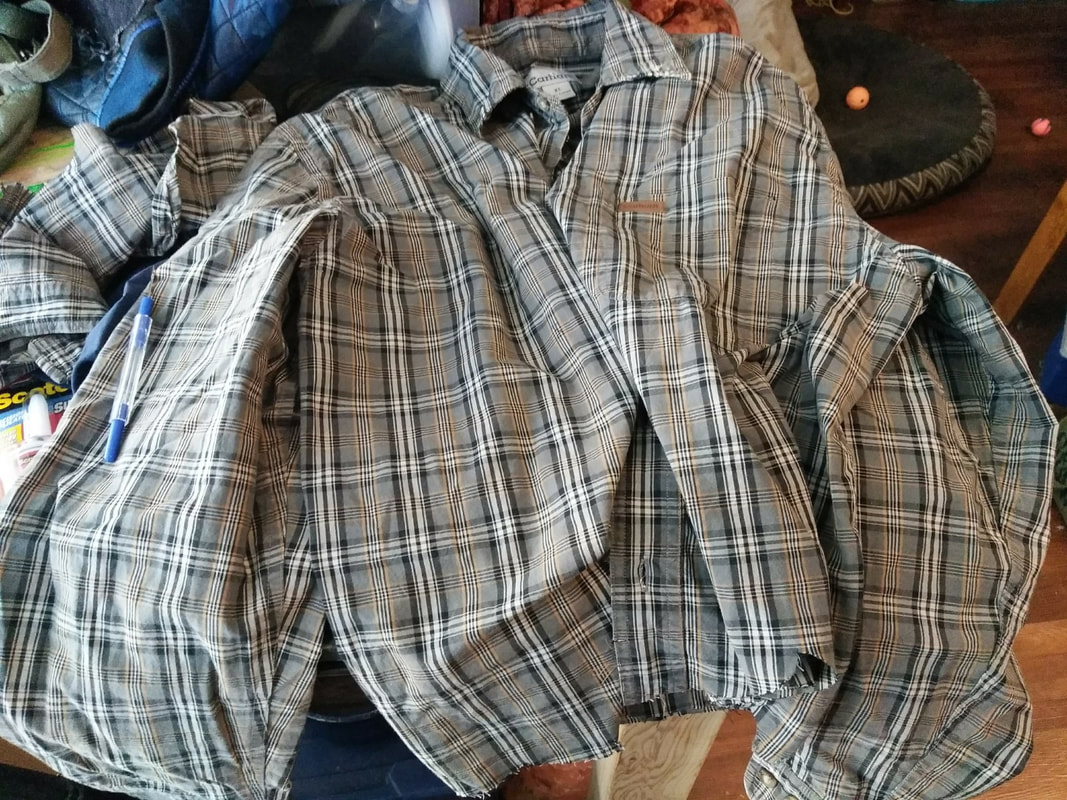
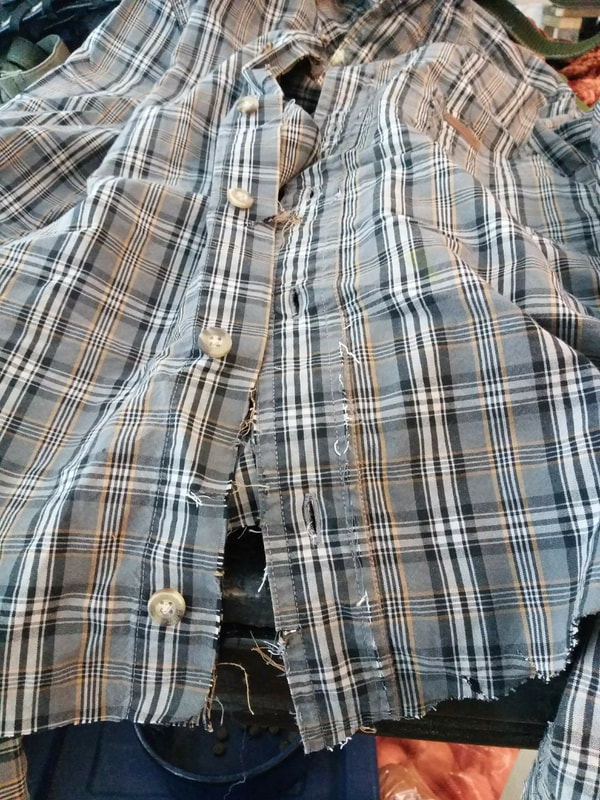
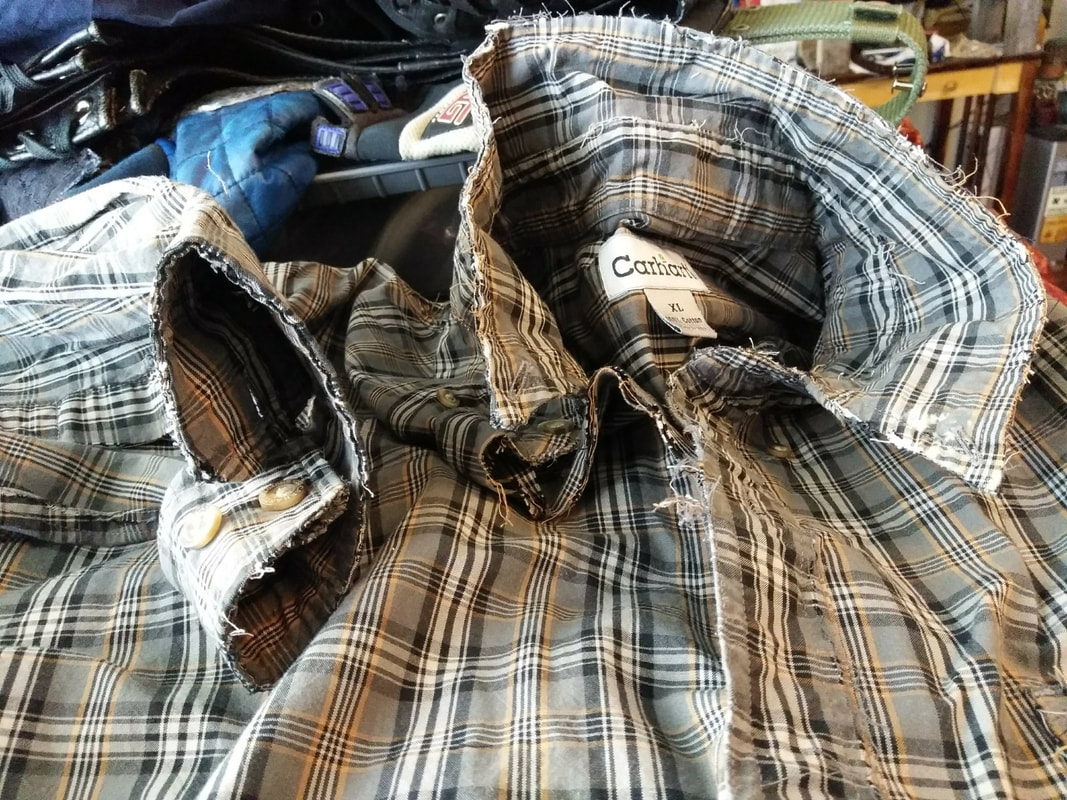
The long sleeve over shirt was acquired at a second hand store specifically for its pattern and the fact that it was a Carhart brand. Not only did I think that Daryl would actually choose such a shirt, but it also gave me tons of double seams for maximum fraying and weathering without compromising the shirt's structural integrity. Again, the seam ripper was my tool here, and I used it along every single seam that I had the option to fray. Since the button shirt is a man's it was entirely too long to fit my short frame and I had to remove several inches from the bottom. I tore the bottom asymmetrically so that it would look like a walker got me or something. The sleeves were also ridiculously long, so these were both folded and permanantly sewn to keep the original sleeve hems intact. On the left cuff there was some awesome bleach stains on the inside that I wanted to keep visible so I simply folded the cuff and sewed it to have a permantly folded sleeve. A huge hole was ripped in the left elbow as if I had been caught on something, and in my vigorous seam ripping I accidentally tore a big hole that I didn't want next to my breast pocket. So, I used some green twine thread that looked a bit like fishing line to sew it back up crudely like Daryl would. Woredrobe in a Post-Apoclytic world is so easy to replicate all it is is rips, tears, and stains. Although you can't just fling mud on your clothes and say, "Done." It's strategic planning with a few minor "Did I do that," moments thrown into the mix. Leather Vest
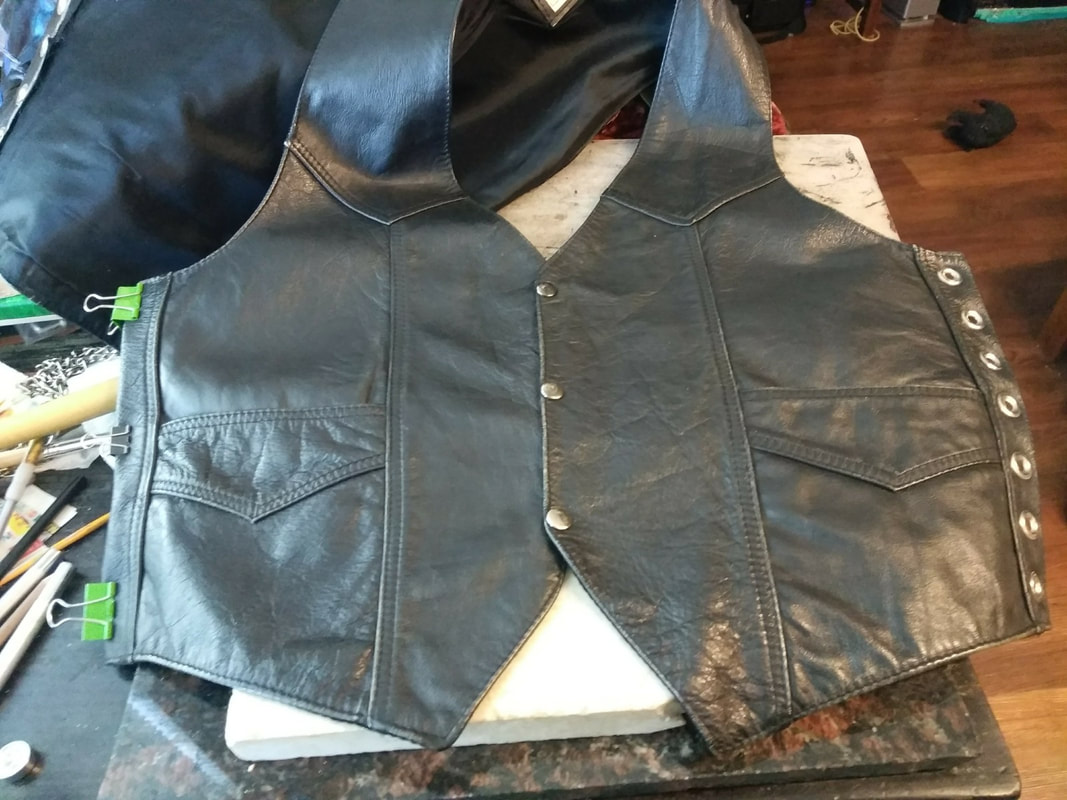
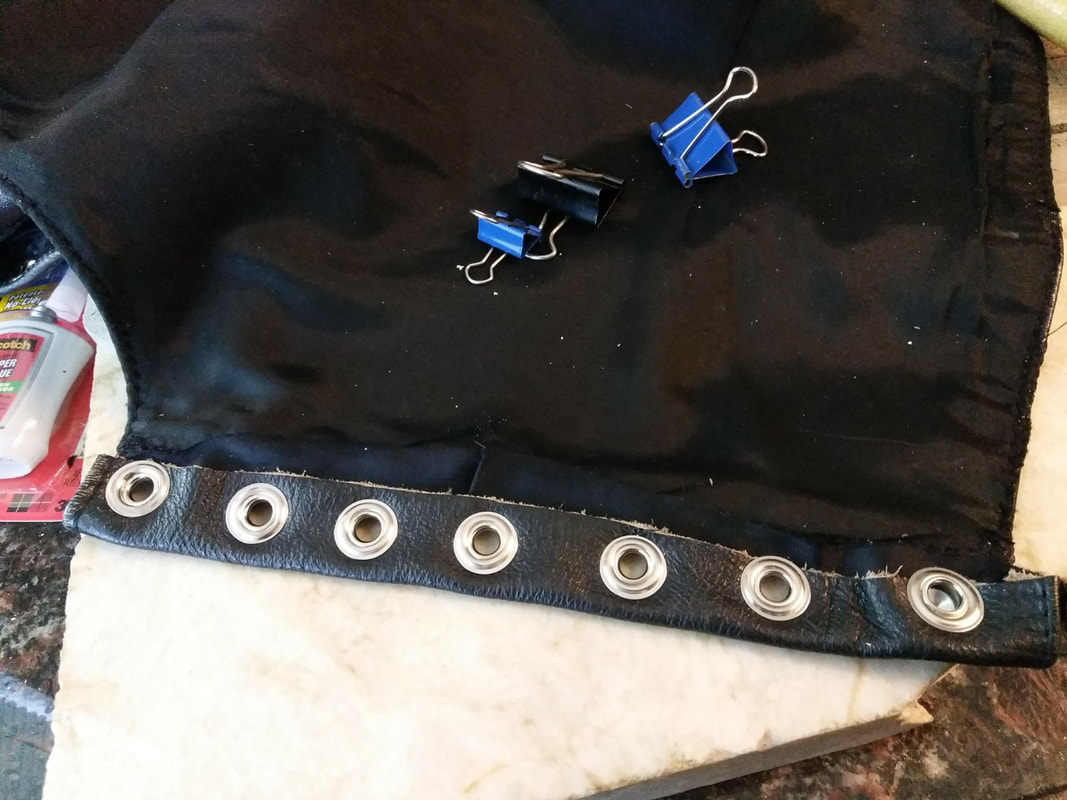
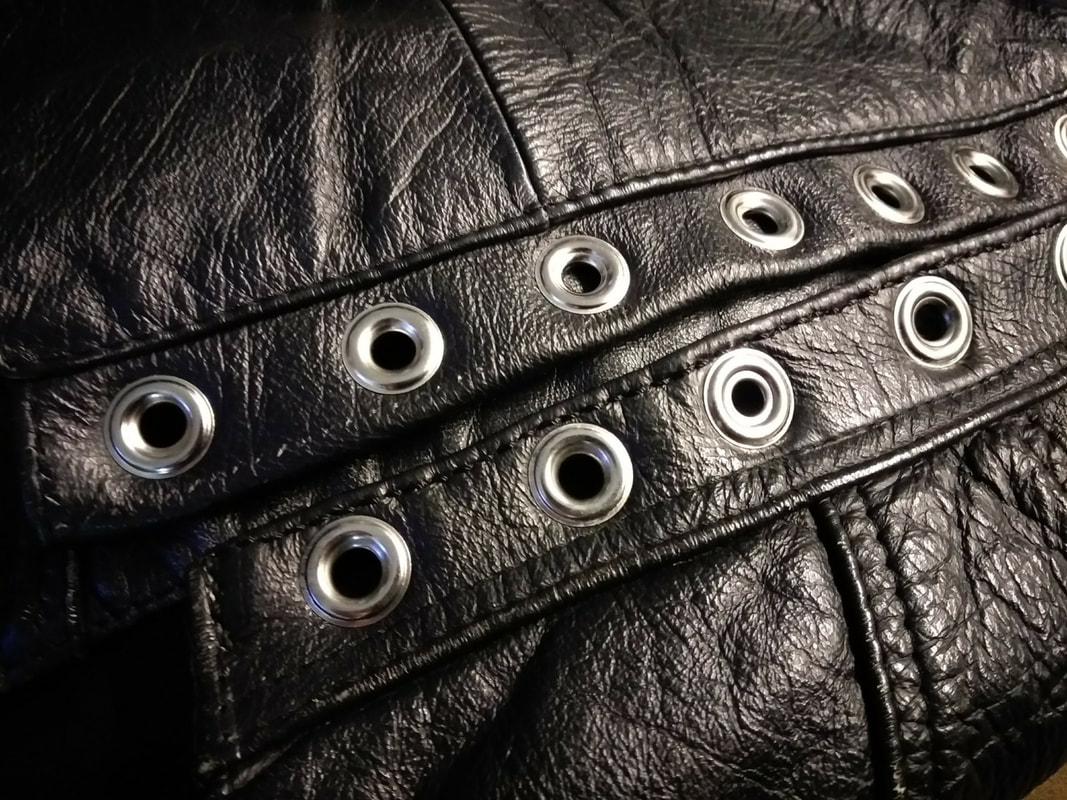
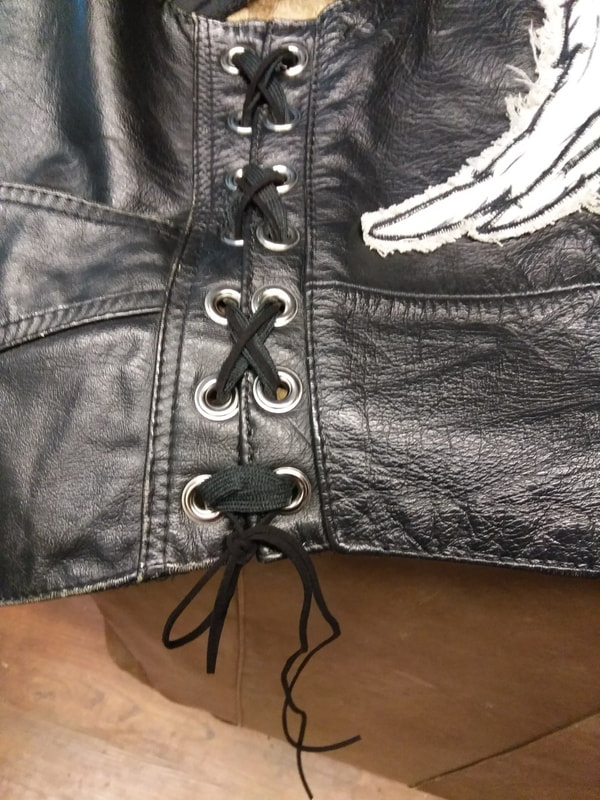
Daryl's signature leather vest was a bit more challenging. It took me a good while to find the vest at a second hand shop, but when I did, all the hunting was worth it. It's almost an identical match to the T.V. show one. I split the sides of the vest evenly and used 7 grommets on each side of the split followed by hand stitching to finish off the edges. To lace the panels back together I temporarily used a black shoe lace until I can find the right leather cording.
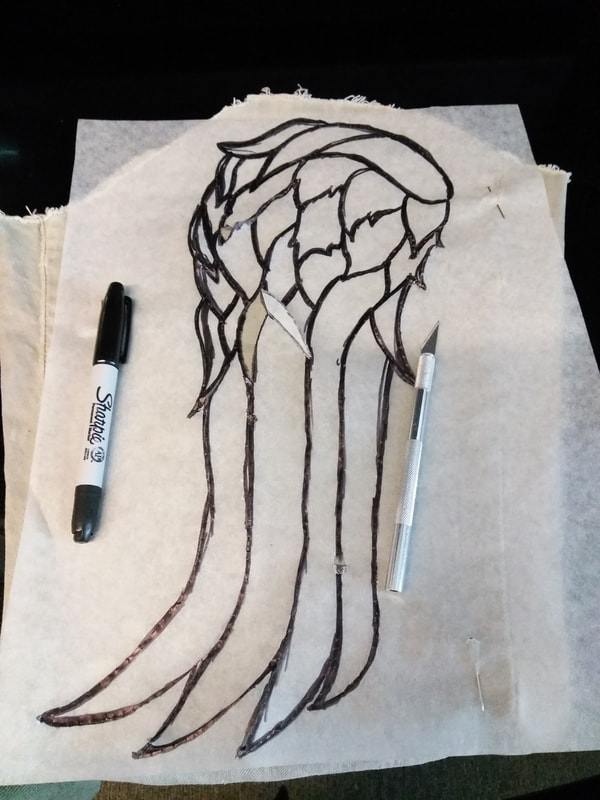
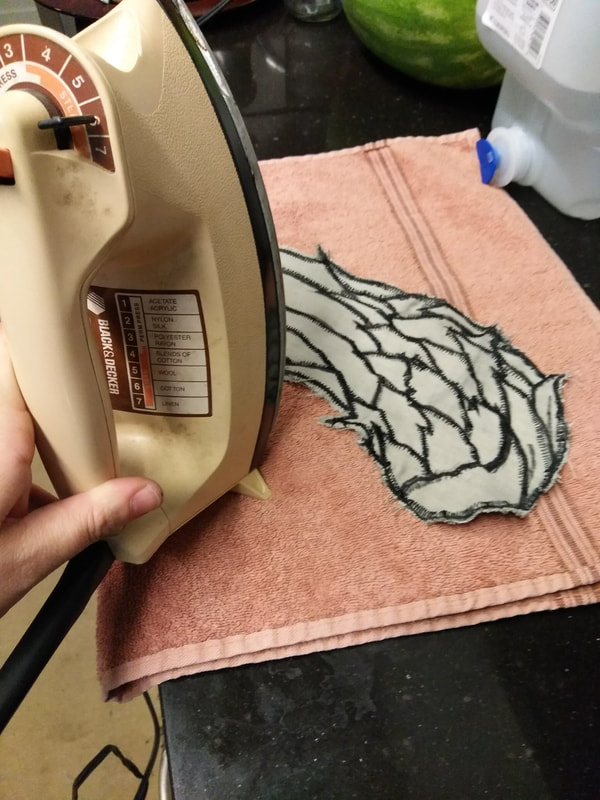
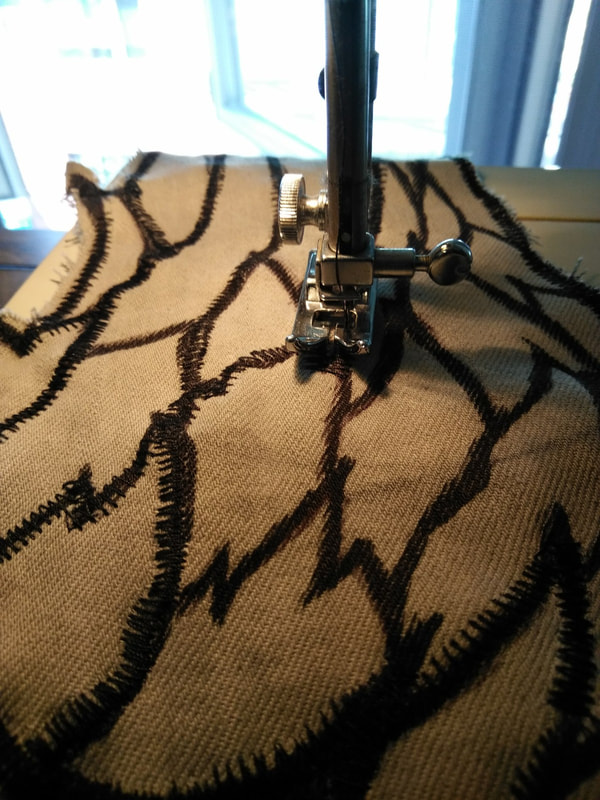
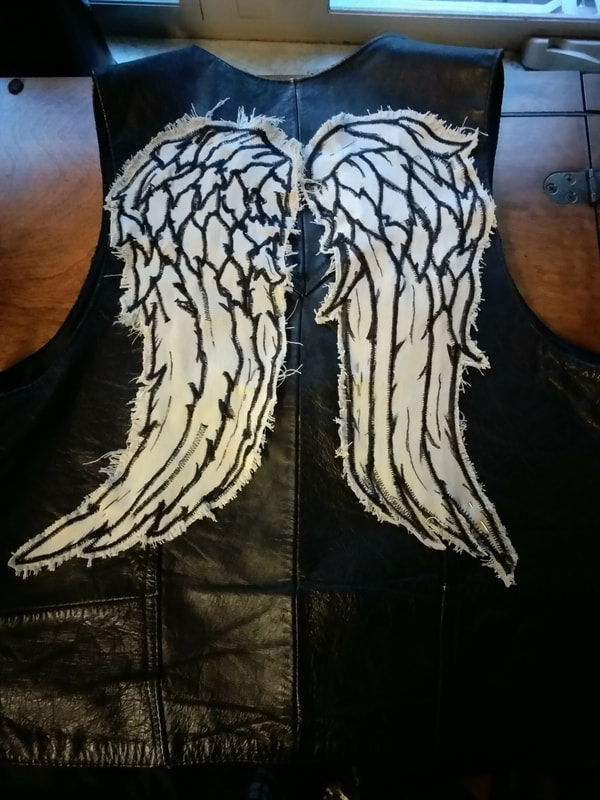
I also used a pair of old denim jeans for the wings, starting by bleaching them until they were a dingy white. This took several hours of soaking and checking on the denim and I used various YouTube videos to guide me in the process. The wings were sized, drawn and traced and instead of using a fabric transfer marker which would have been easier, I instead used an exacto knife to cut each feather out of the tracing paper before tracing the outline left with a black sharpie pen. Once my wings were drawn onto the denim I used a zig-zag pattern on my sewing machine to go over the sharpie pen lines to give them an embroidered look. I made sure to leave a good half inch of denim along the edges to be frayed for weathering. This was finished with a straight stitch along the zig-zagged edges to attach the wings to my leather vest. Crossbow
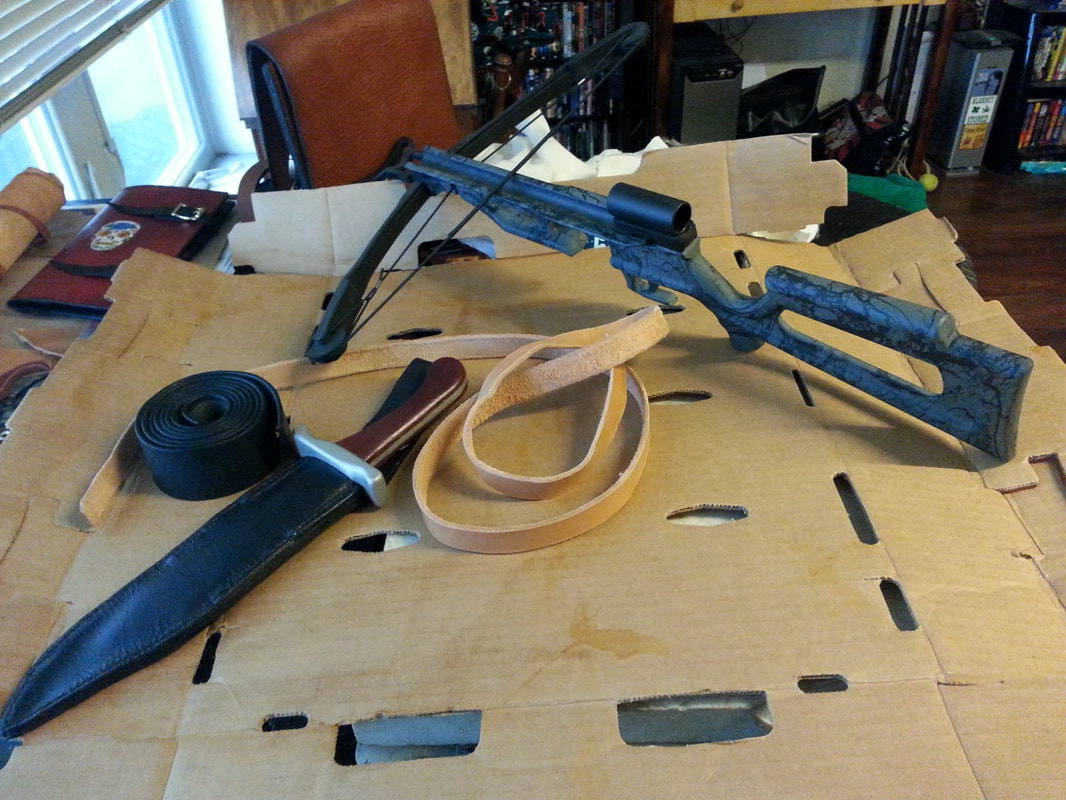
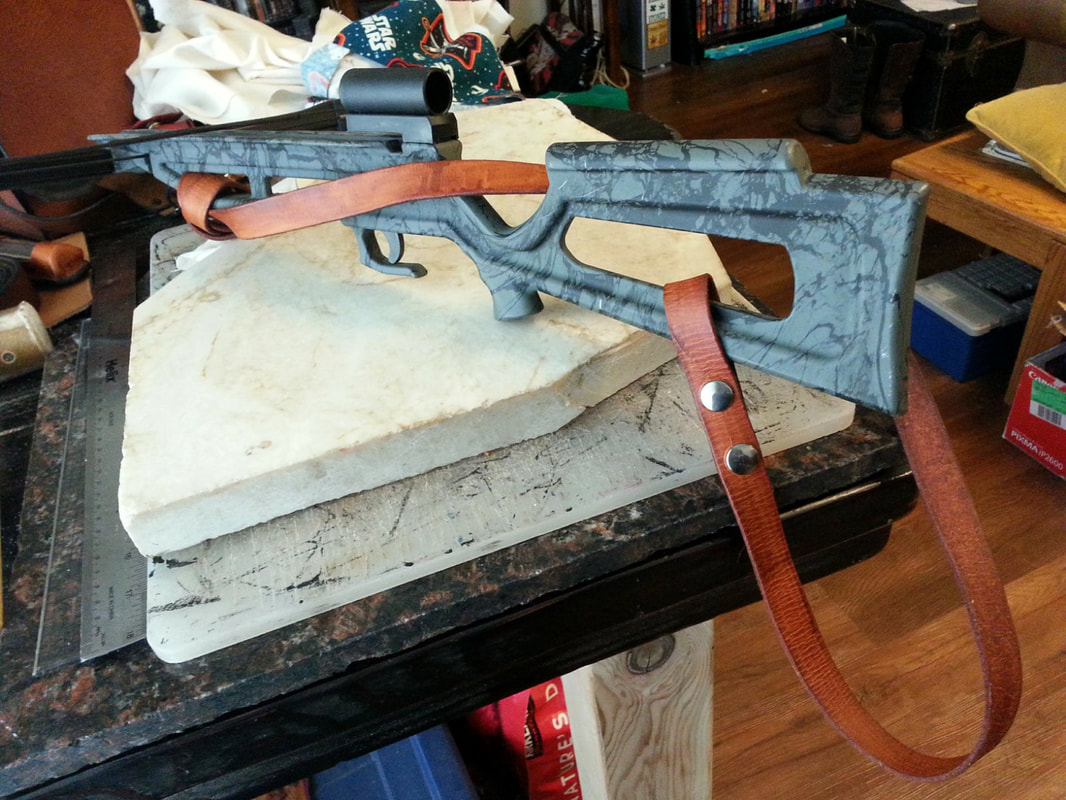
The Crossbow accessory is plastic and was bought at Emerald City Comic Con from official Walking Dead merchandise. The leather strap was made from 8 oz vegetable tanned leather cut, beveled, and dyed with a tan Waterstain and burnished with black Edge Coat and Gum Tragacanto. (See Those D@m# Edges) One end of the leather strap has two antique nickel snaps in order to attach it to the handle and the other end simply wrap ties around the hand hold. The red pocket cloth was an old car cloth for checking the oil that was already dirty and ready for stuffing in my pocket. It was almost like I'd been planing this for years. Knife, Sheath, & Belt
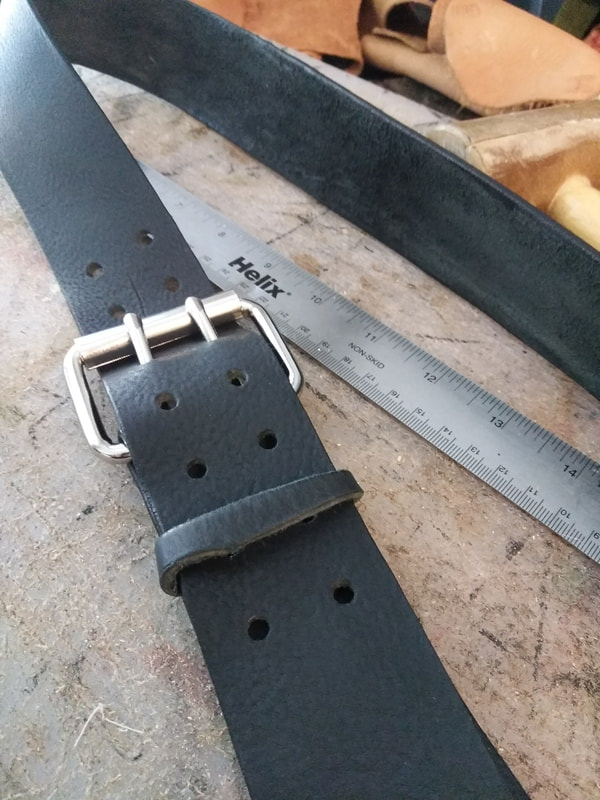
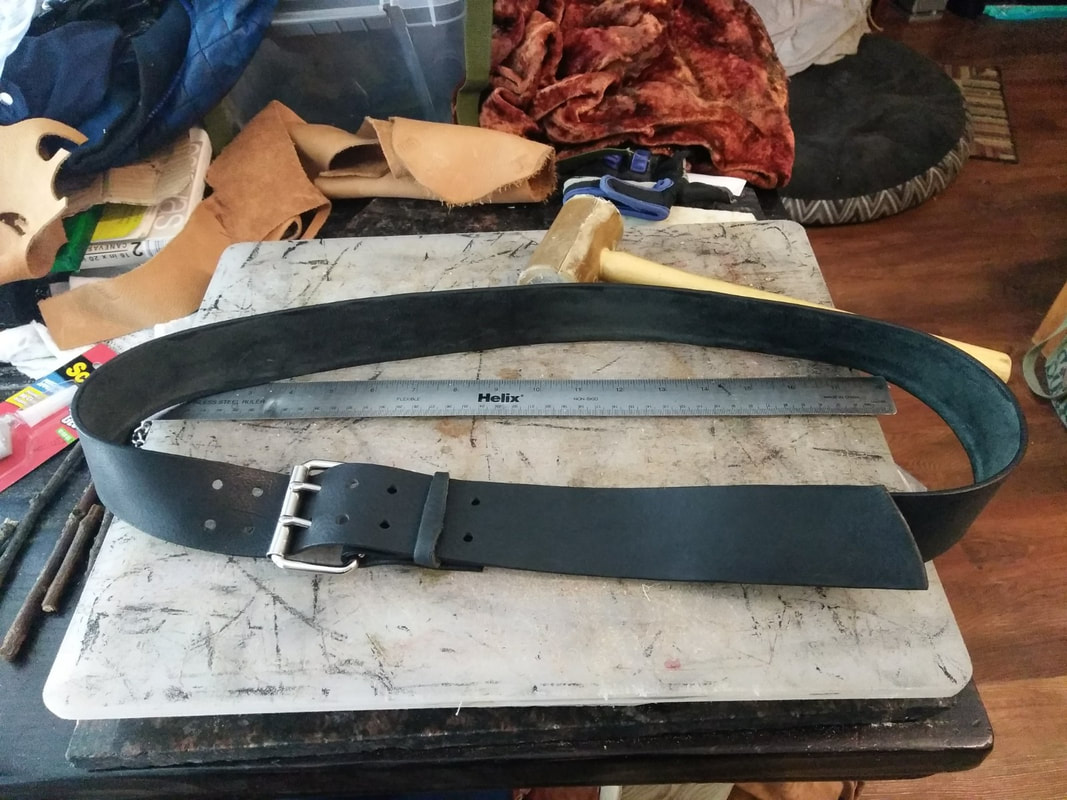
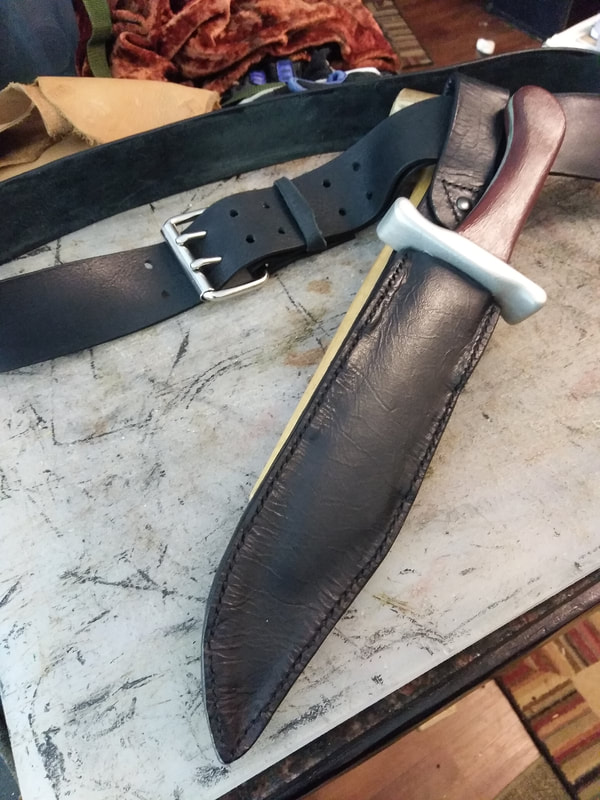
Daryl's black leather belt was made with black Austin double shoulder leather and a Tandy 2" nickel plated double prong roller buckle. Again, the edges were burnished with the same process mentioned earlier, and an oblong buckle punch was used for the double prong buckle. Medium antique nickel rivets attach the buckle to the leather, and Tandy leather Staples hold the keeper in tact.
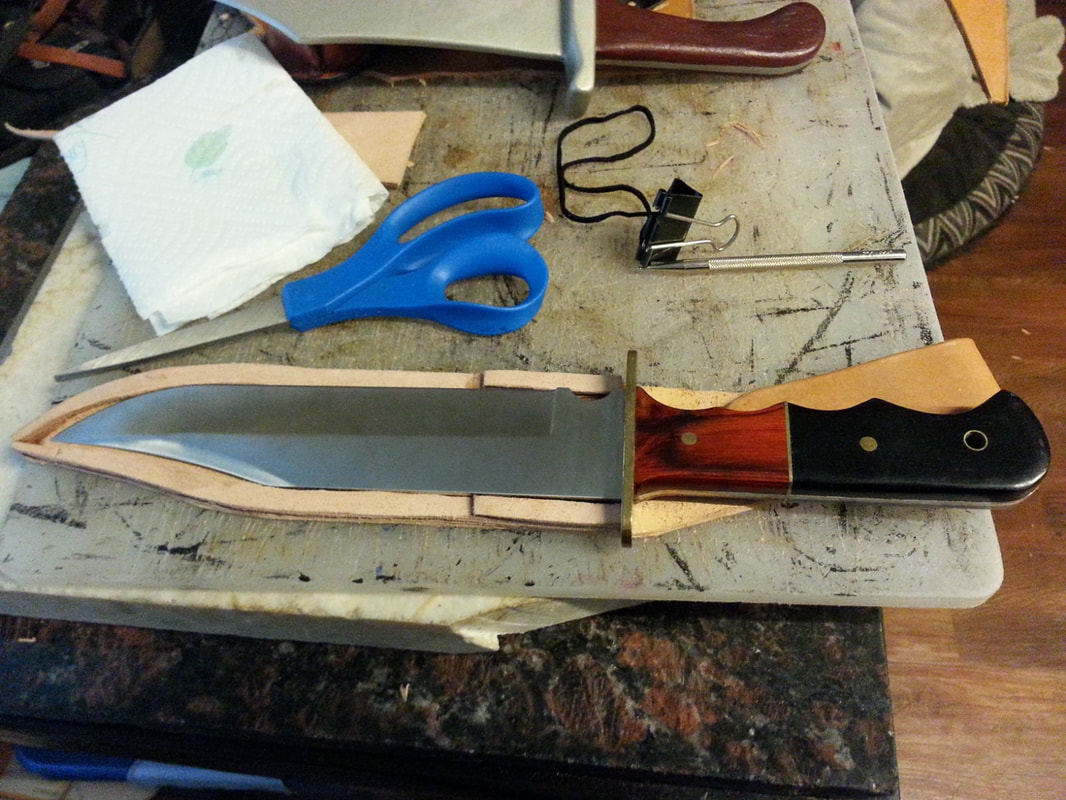
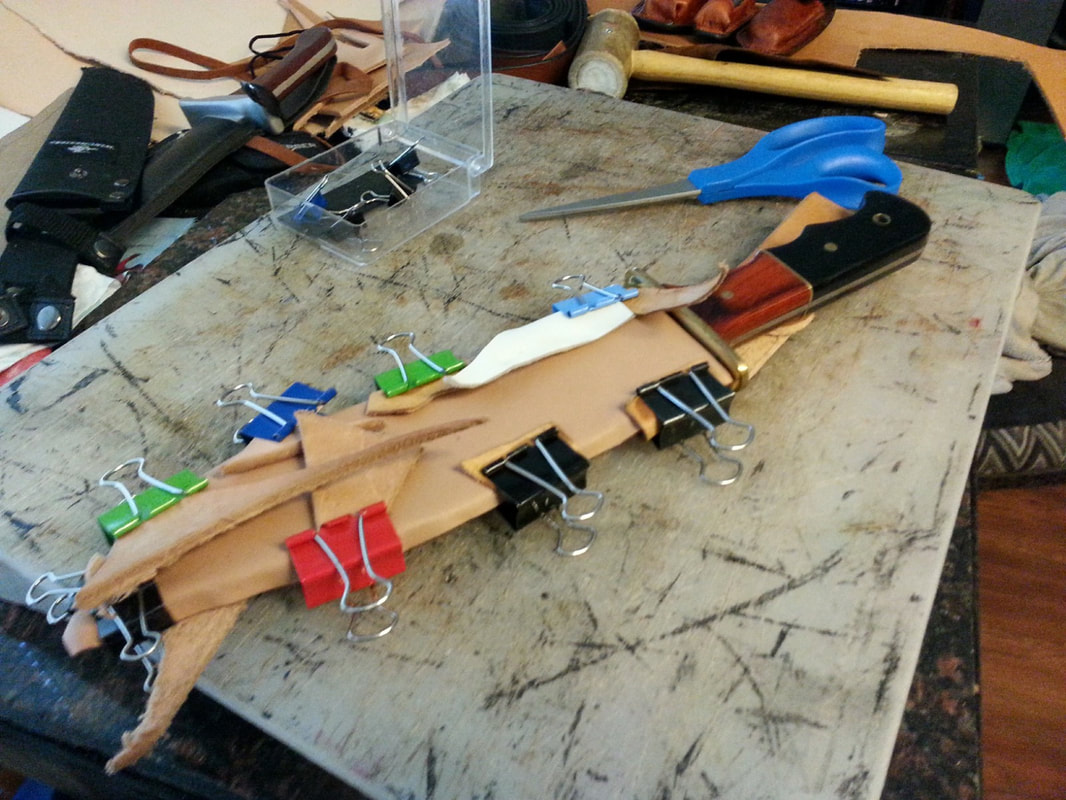
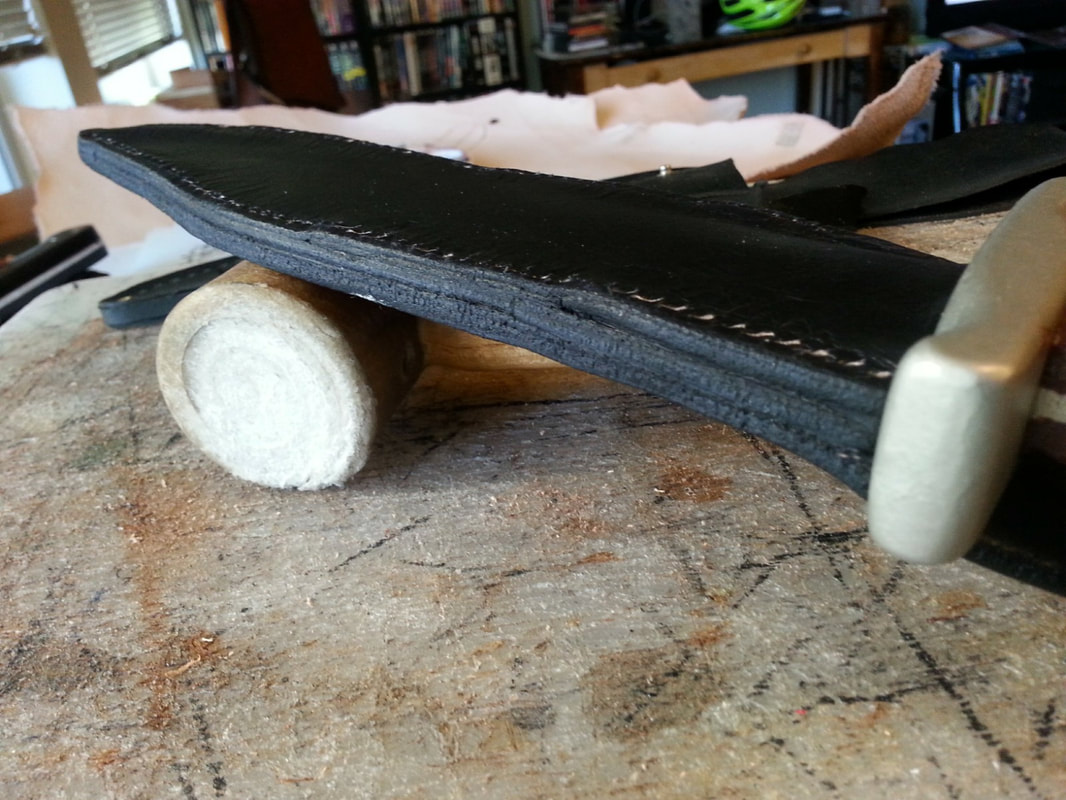
For Daryl's Bowie hunting knife I used a 9" Winchester Bowie that I already had, and I made a sheath to match Daryl's . But for Cons, I plan on using a wooden knife that my friend Michael Spidell carved for me in trade many years ago. He designed it to resemble my 9" Winchester. The sheath was put together with a 7-9 oz vegetable tanned leather for the base and belt strap, and a 3-4 oz vegetable tanned leather for the top of the sheath. All leather was stained with black Waterstain before being glued and then hand stitched with black waxed thread. A black double capped rivet finishes off this classic sheath, and Those Damn Edges were burnished like the others after being beveled and sanded. Makeup & Hair
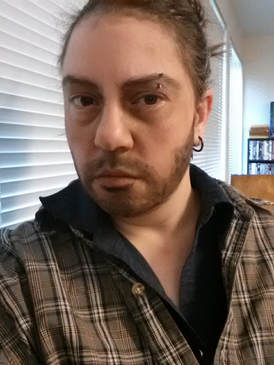
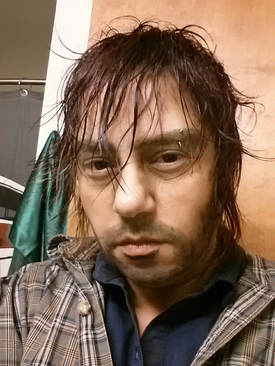
In order to transform my face into Daryl I followed multiple YouTube videos on makeup tutorials, including a few drag queen videos. Basically I gave myself masculine lines with both brown and grey eye shadows and then I used mascara to create a stipling effect for his beard. A stipling sponge would have been much better, but I managed with the mascara brush. I also used my own long hair to create Daryl's shorter locks by twisting a pony tail in the back of my head to flop over the front of me, and pinning it in place with a bunch of bobby pins. I sprayed it with some mouse and messed it up real good. It looked silly from behind, but from the front it looked pretty authentic. 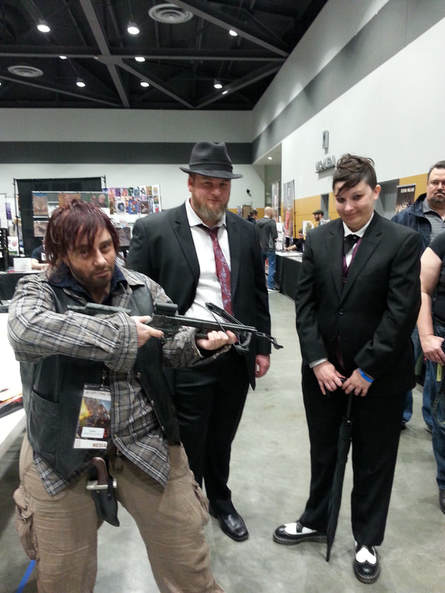 Me dressed as Daryl Dixon at Jet City Comic Con 2016 Since I first wrote this blog, I have purchased a wig and created a Daryl Dixon Wig Tutorial, Now I need to work on creating some foam arrows. I have decided to use foam so that there won't be any issues at future Convention events with the weapon being banned. Especially, since my plastic crossbow can actually fire projectiles around 30 feet or so. Having foam arrows keeps it super safe, and will give my hero an advantage against his foes! Which Walking Dead character is your favorite? Have you or are you planning to create your own Walking Dead hero? If so please leave a comment to share your own creation!
|
Willow EnrightI started crafting out of leather in 2011, and now I am making it my life's work. I am writing this blog to help myself remember some of the small steps in past projects, sharing my triumphs and failures, as well as my love of leather. Archives
November 2017
Categories
All
|

|
Cosplay DIY (Blog) |


 RSS Feed
