|
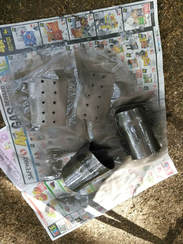
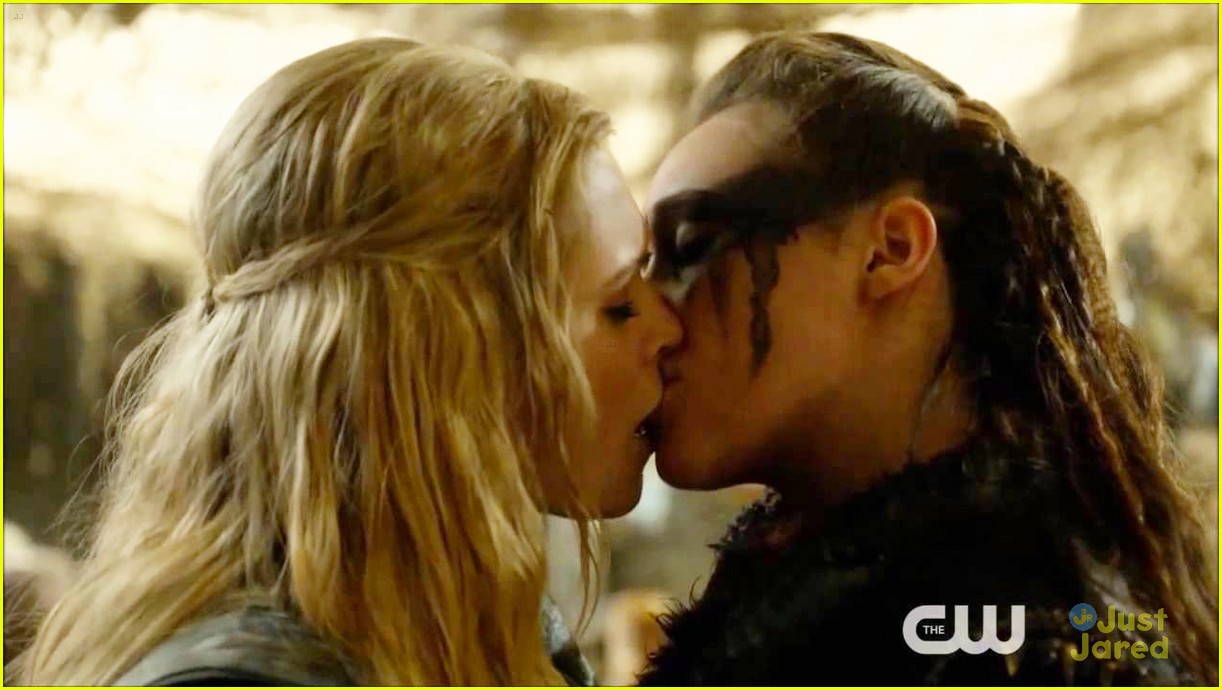
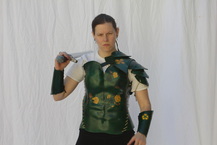
By Willow Enright 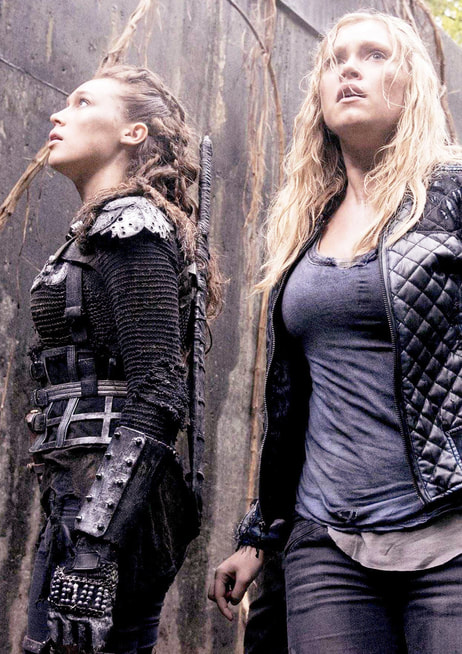 Lexa and Clarke (The 100) http://data.whicdn.com/images/173347757/original.jpg Supplies:
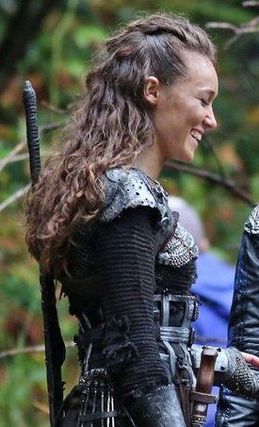
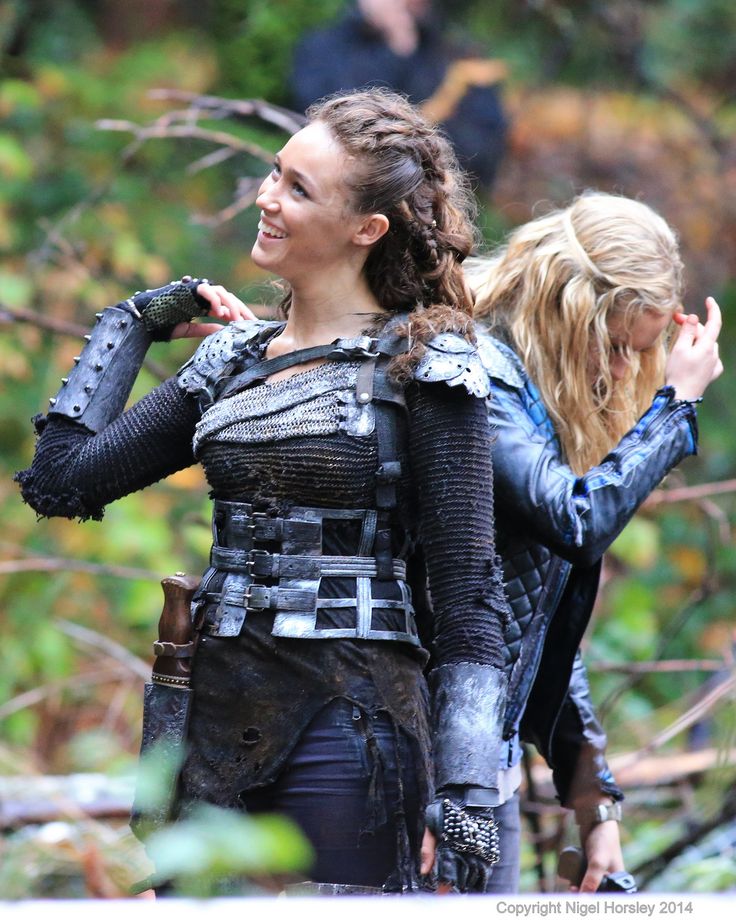
Research Equals ObsessionIf you love cosplay you probably find yourself obsessing over the littlest costume piece of your favorite character’s wardrobe. Especially, when you plan on building complicated, barely documented recreations of something a costuming department made from scratch. The movie magic behind wardrobe can be frustrating, and usually, your only options are front angled photos, exhibits, and the actual TV show or movie. I like to use several reference photos, and sometimes I pause shows or movies on the character so that I can sketch design patterns.
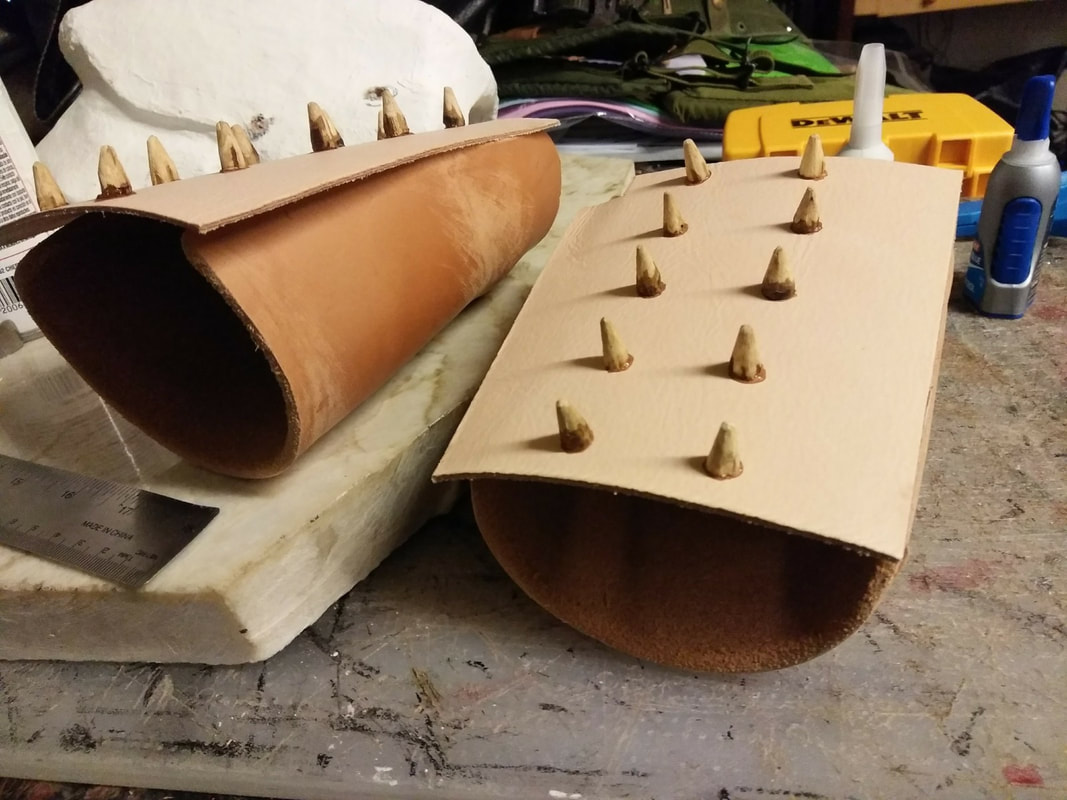
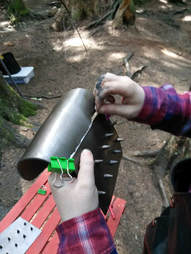
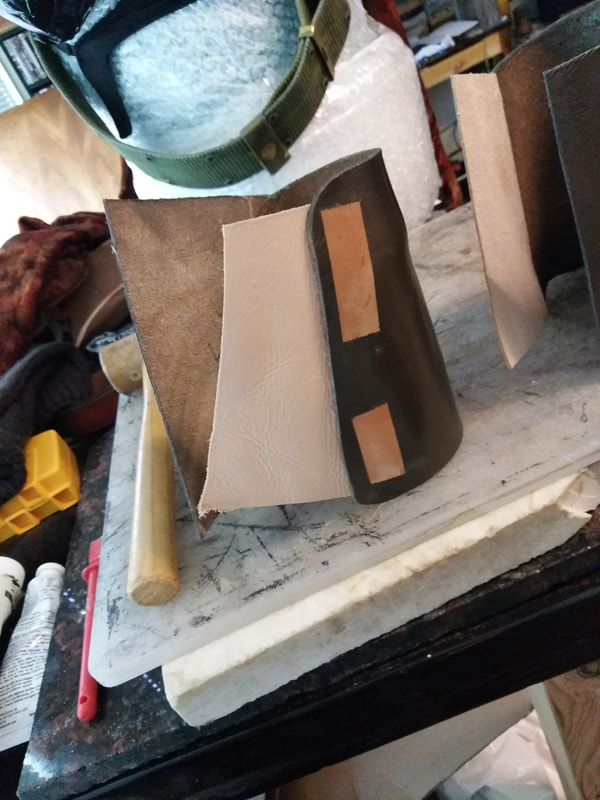
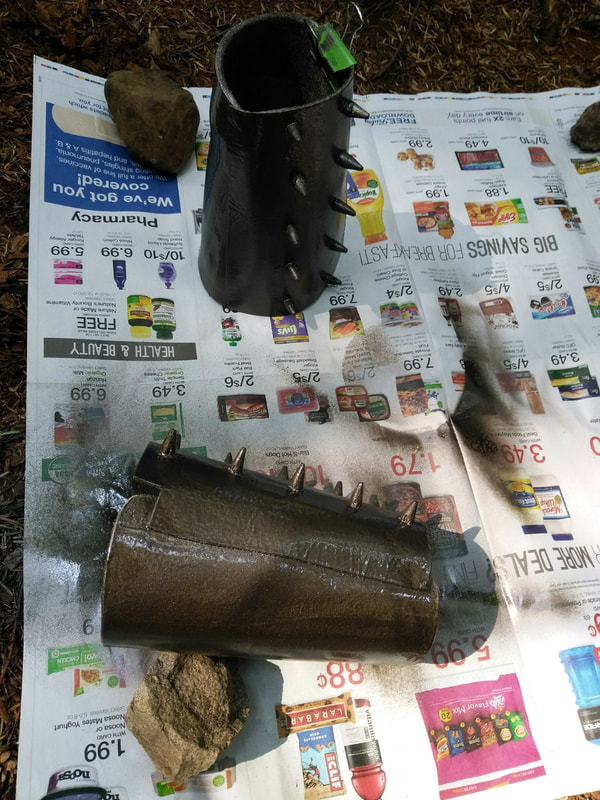
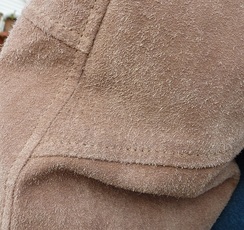
When making armor pieces I prefer to use a vegetable tanned leather, usually 7-12 oz depending on the armor and its use. For cosplay armor using a 5-9 oz veg tan is good. For Lexa’s bracers, I used an 8-9 oz section of veg tan leather that I got in trade from a friend who had wet formed them. She used some strapping which left some marking on the leather, so I had to sand and cut the pieces before they were the right size for the back section of Lexa’s bracers. The top flap and under flap were made with a 3-4 oz vegetable tanned leather since they would be overlapped and have velcro attached. I measured my forearms and cut the pieces according to my measurements, but I originally forgot to account for the thick under layers of my costume and had to add the under the flap to give a larger circumference. Needless to say, always wear as much of your costume as possible when measuring.
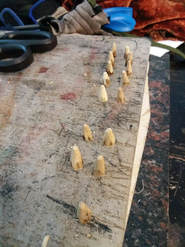
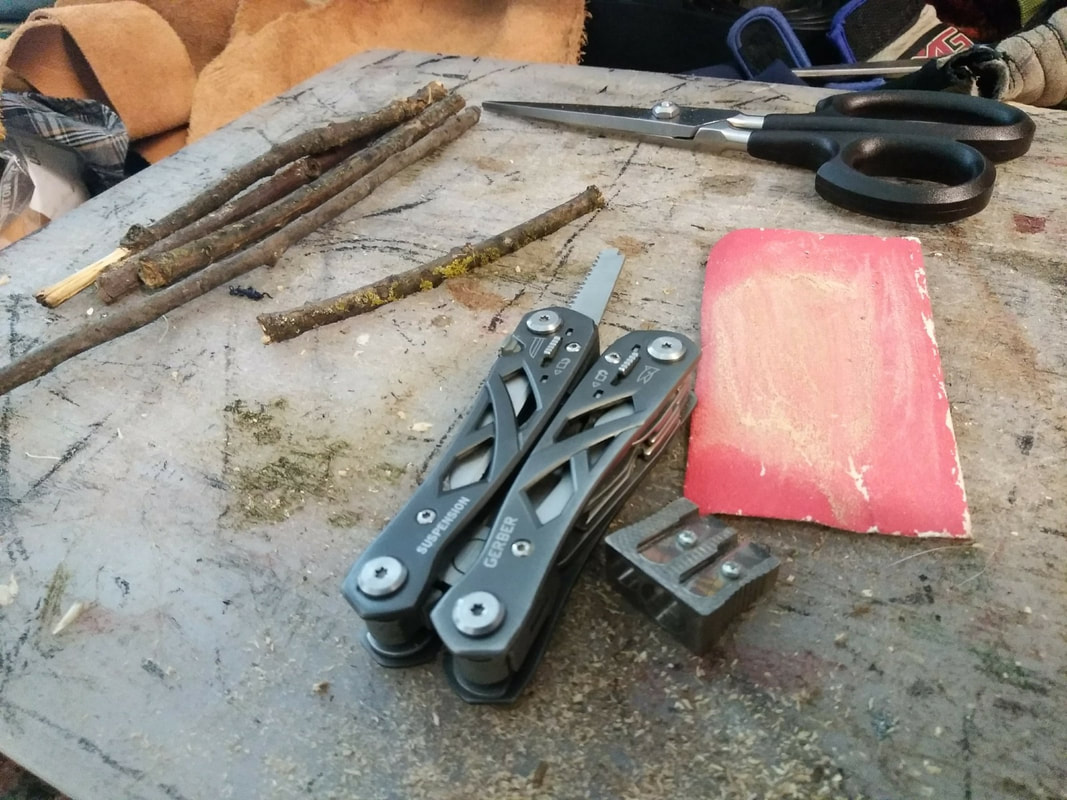
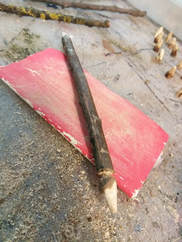
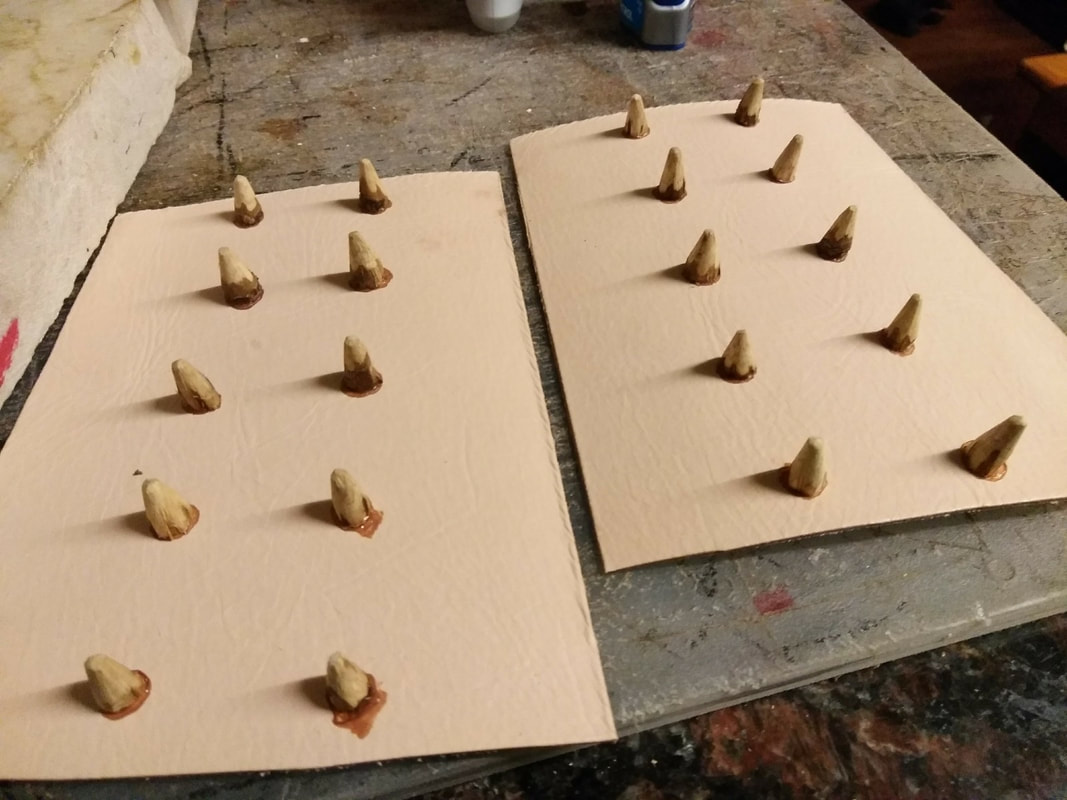
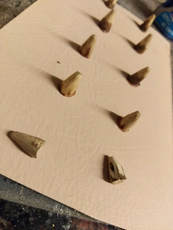
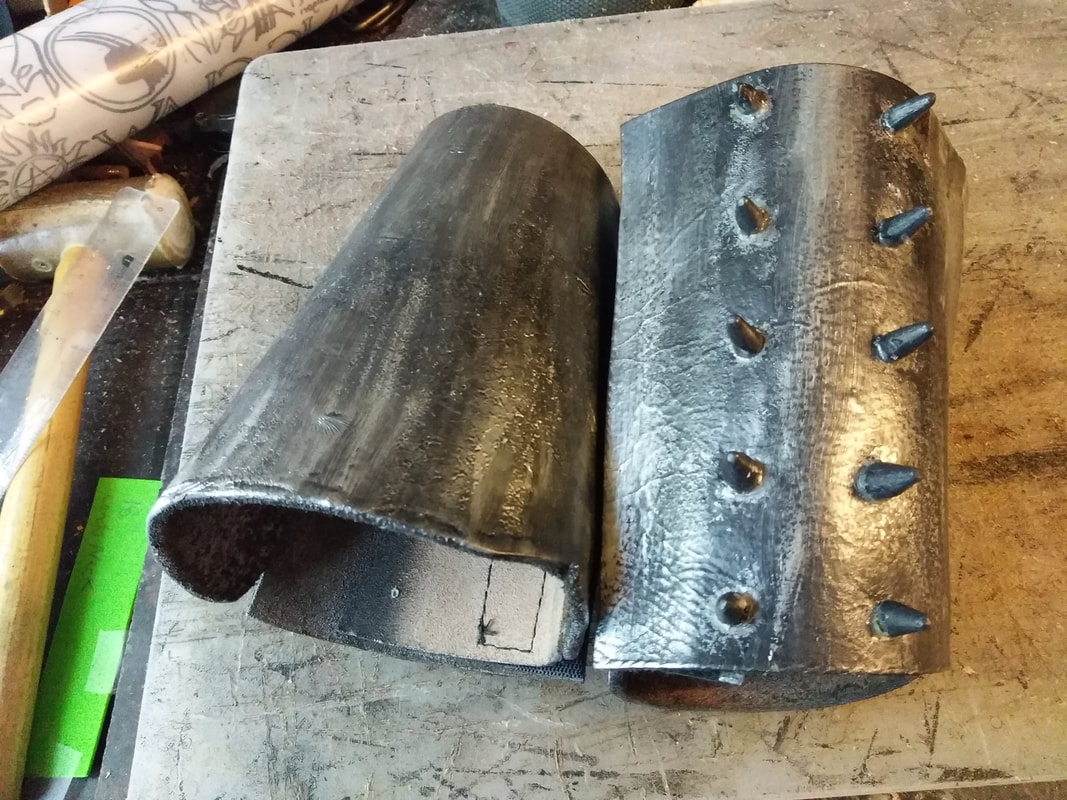
Lexa the Vampire SlayerThe little spikes on the top section are made from twigs roughly the size of pencils in diameter so that they would fit into the pencil sharpener. I sharpened each end and then used the saw on a Gerber to cut them off. I repeated this process until the twig was too small and in the end, I had twenty little wooden spikes. I then used the 100 grit sandpaper to smooth the spikes, especially on the bottom where they would glue to the leather.
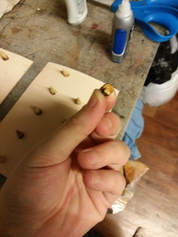
I originally tried to use super glue on them. However, the leather pieces flex so much the wood spikes would pop off and I had to reglue them with Eco-weld leather cement. This gave them a bit more flexibility.
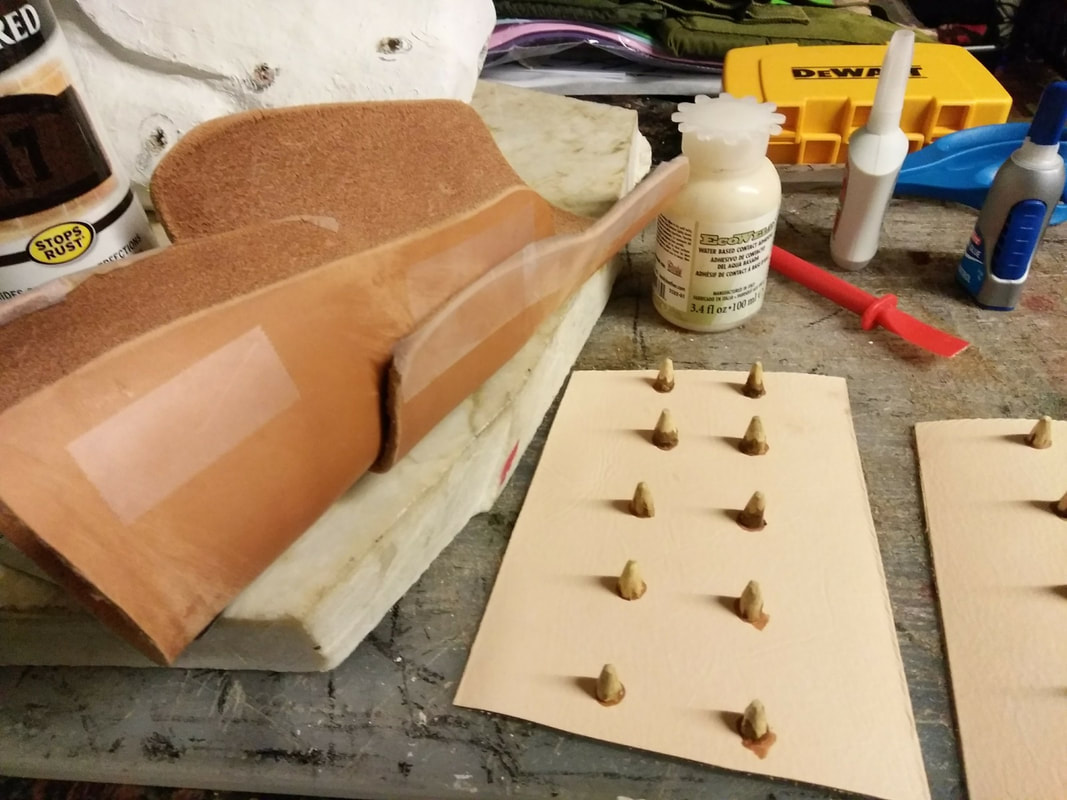
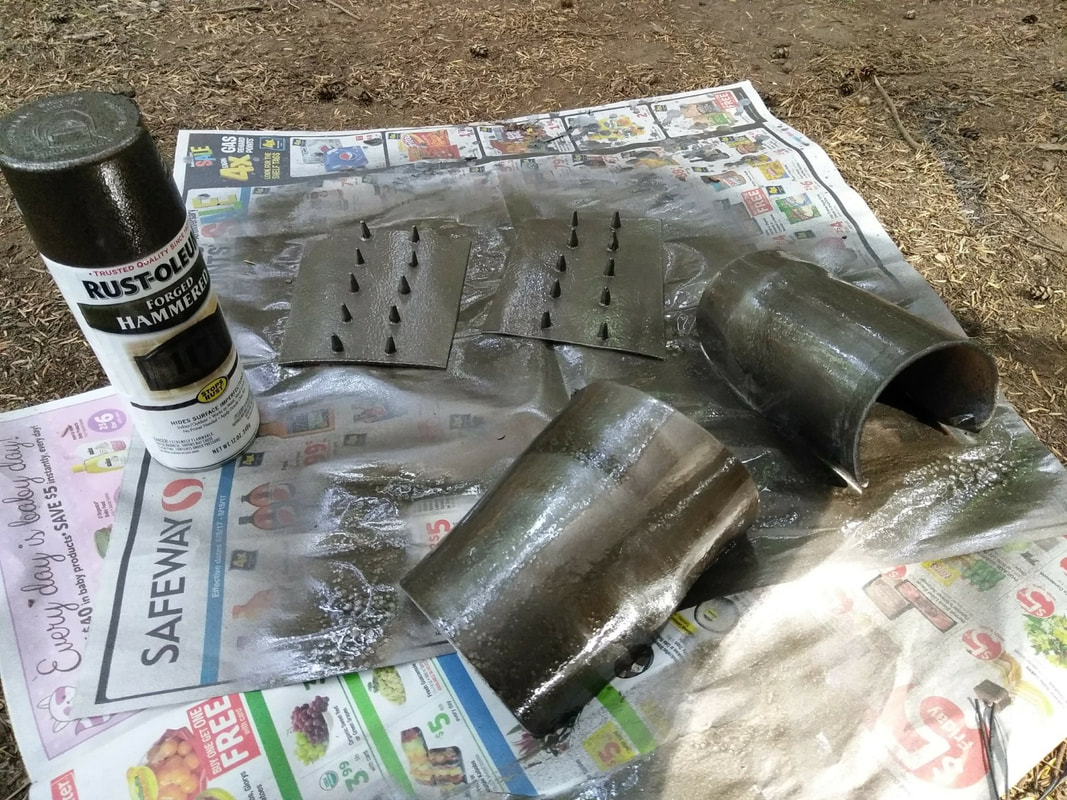
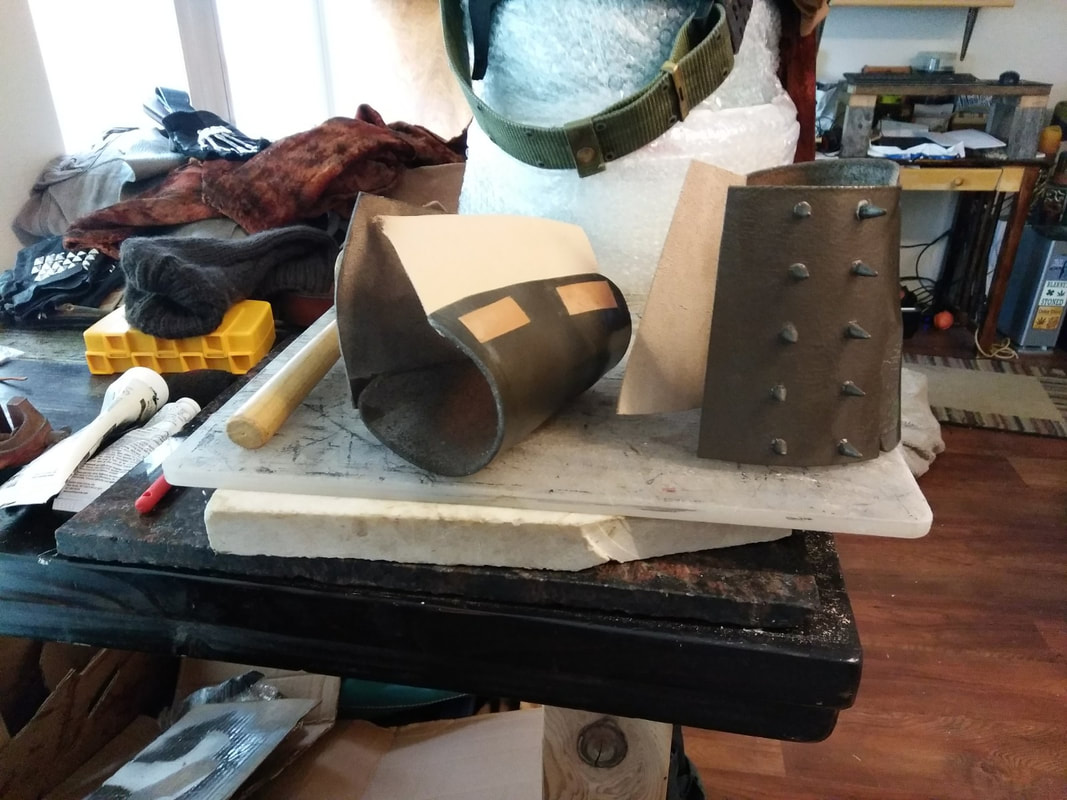
Get Your Metal OnWhen it came time to paint the bracers, I didn’t use a primer since both materials are natural and raw. I used tape to mark off the sections that I wanted to leave raw for gluing later. Then laid the bracer pieces onto a piece of newspaper, shook my Forged Hammered pewter spray paint and then sprayed away. At first I tried to use one of the newer spray nozzle paints, however, it just dribbled all over my fingers leaving spots on my bracer pieces. So I returned that defective can and got an old school version with the little top that can be popped off and soaked if it gets clogged. I did a few layers of paint, waiting in between for the first coat to dry some. Leave overnight to dry.
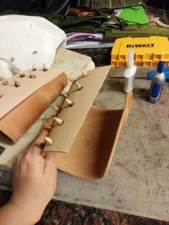
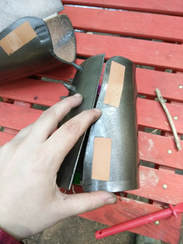
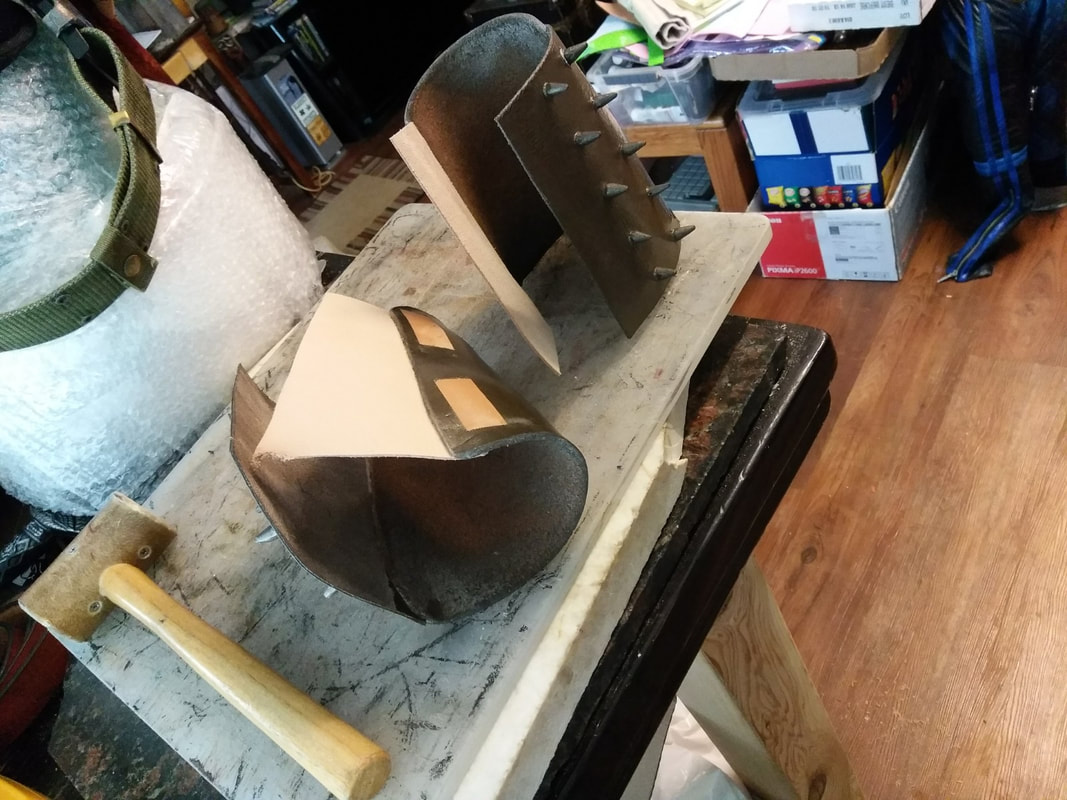
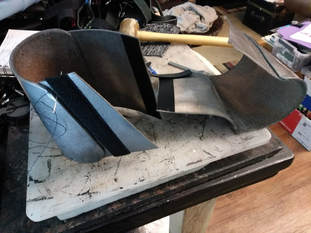
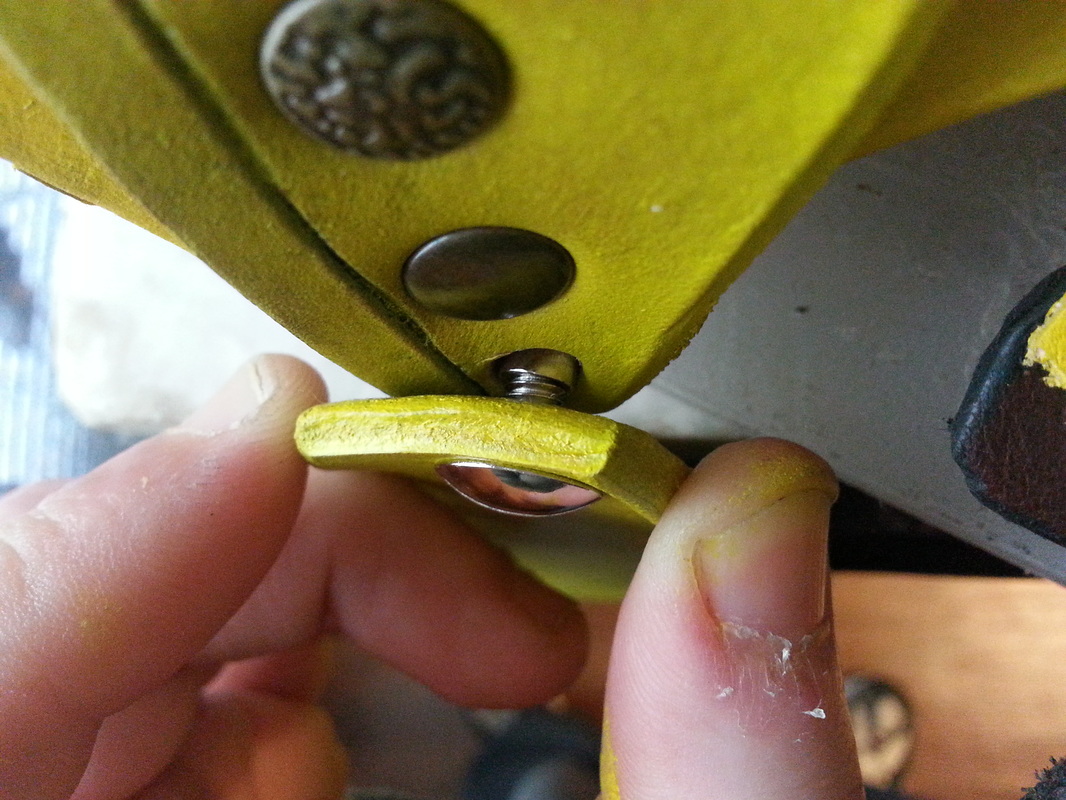
How to create your own Movie MagicIn order to get that "how the Hell does that even close," seamlessness look that Lexa sports in the T.V. Show, The 100, we had to use glue and hidden stitching. First, the spiked top flap was glued to the bottom bracer piece. I used Eco-weld leather cement, applied it to both sides of the leather, and waited for it to become tacky. I pressed the pieces together and clamped them for at least 10-15 minutes. If you don’t want clamp marks, be sure to use a piece of scrap leather between the clip and the project. Also, be sure to clean any overspill of the glue from combined edges or you will have a visible glue line.
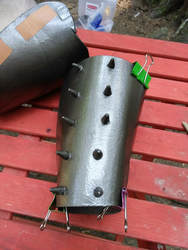
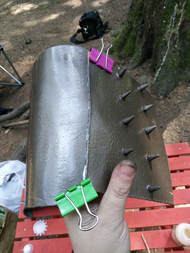
Sometimes when you are working on building something for the first time you make mistakes or underestimate the project. I completely forgot to take into account that I would be wearing a thick sweater or jacket sleeves underneath my bracers, so I had to add an additional leather flap for circumference. This allows me to wear the bracers much looser and accommodate the bulky sweater sleeves better. The additional leather sections were also spray painted to look the same as the previous sections.
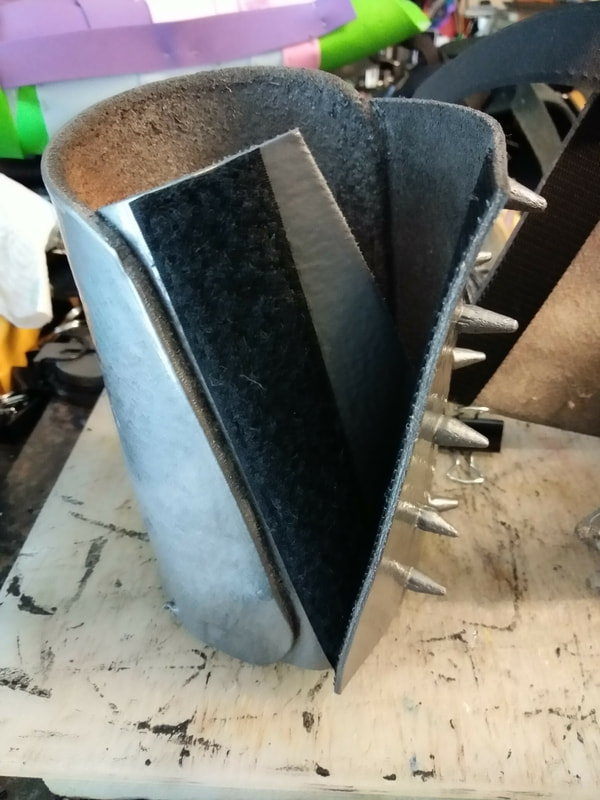
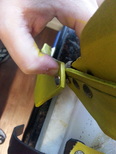
Hand Sewn with LoveAfter the bracers were dry, sections of velcro were measured and hand sewn onto the under flap leather. I used stitch hole punches to put holes in the velcro and leather. Since we don’t see this part, visible sewing wasn’t an issue. However, for the corresponding velcro on the top spiked section, the velcro had to be glued or stuck with sticky tape. This way we won’t see any stitching on the outside, and the movie magic will be preserved.
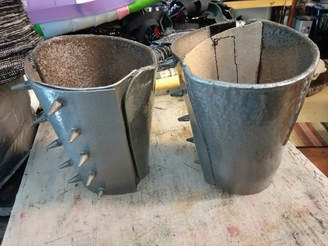
Since Lexa’s bracers aren’t actually new and shiny in the show, I had to tone down the metal spray paint shine. I used black, brown, titan buff, and white acrylic paints to weather the bracers. I layered the paint onto the sponge, dark to light and then sponged the paint onto the bracers. Again referencing my photos, I painted them until they resembled Lexa's. I left them to dry thoroughly and then used some silver leaf Rub N Buff wax to go back to the piece and give it a slightly worn metal shine.
Devil's in the DetailsThe subtle difference of adding the silver leaf Rub N Buff wax really gives the Lexa bracers that believable quality. Tiny details can give your cosplay character greater authenticity, and make it even more appealing to fans and non-fans alike. The more definable pieces you have in your cosplay, the better chance you’ll have of being placed in that universe. Of course, you will also have the opportunity to do some extremely awesome role-playing through photography which is always fun!
1 Comment
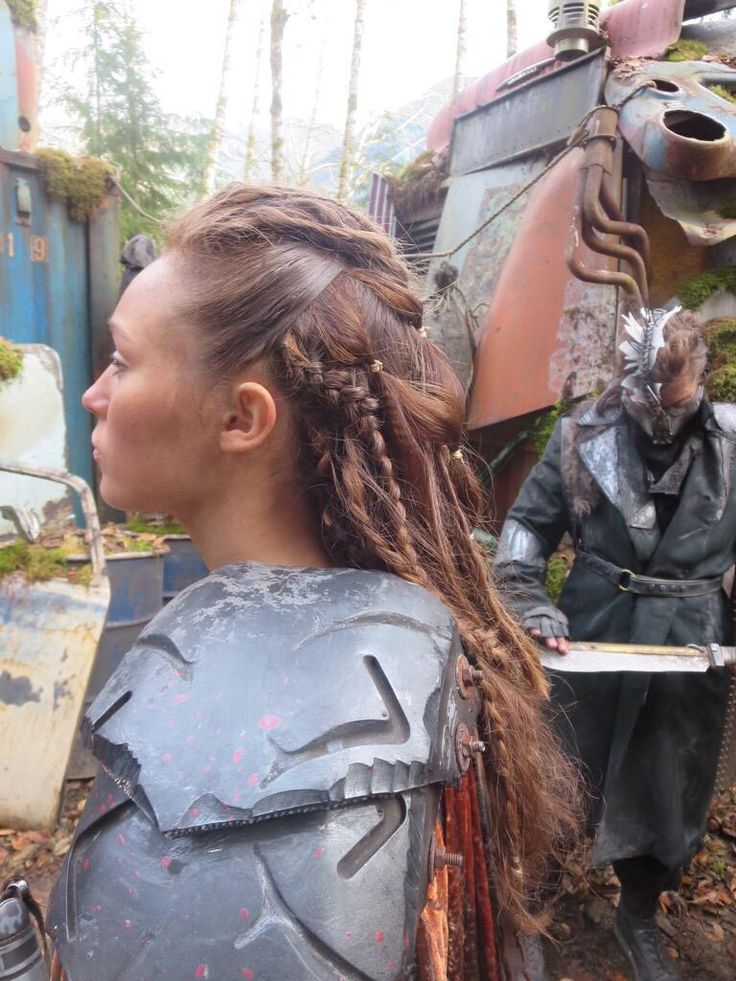
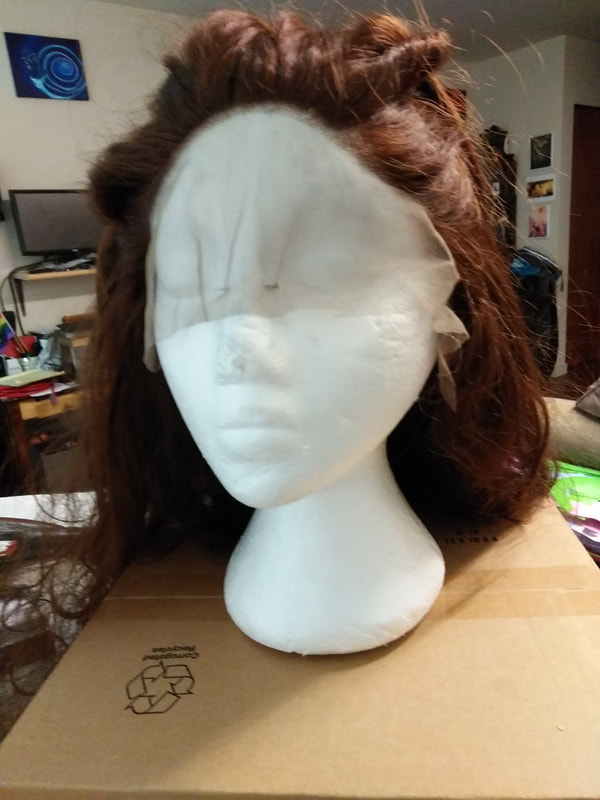
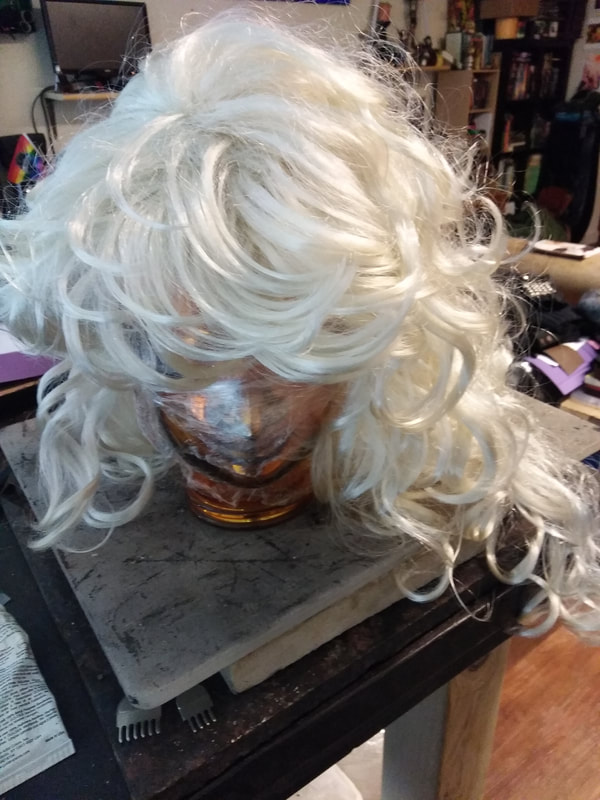
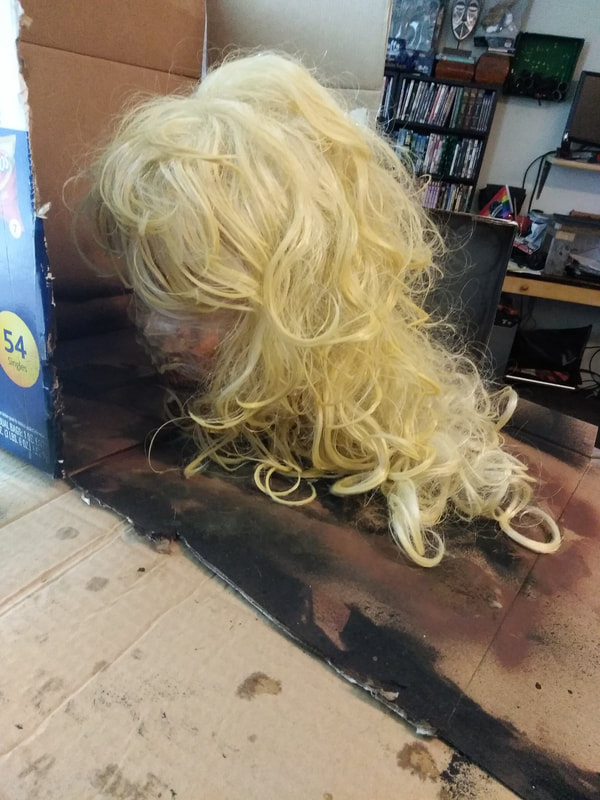
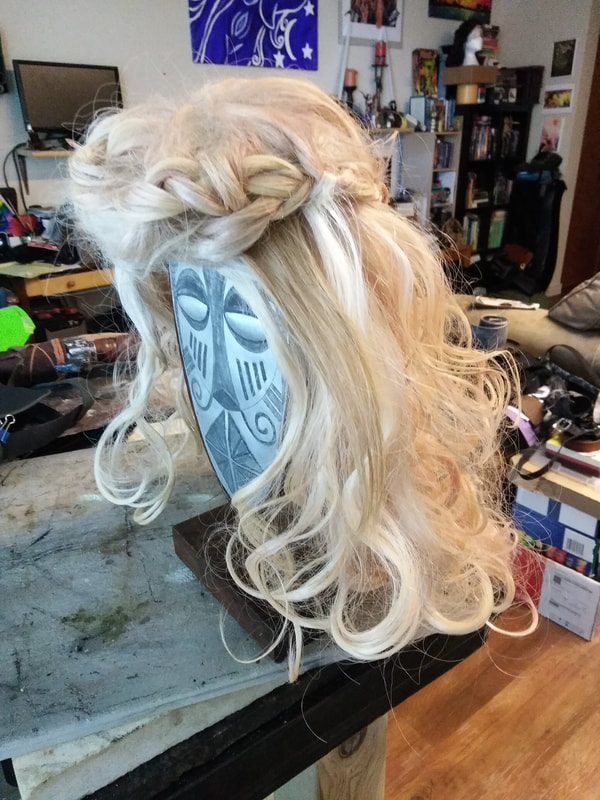
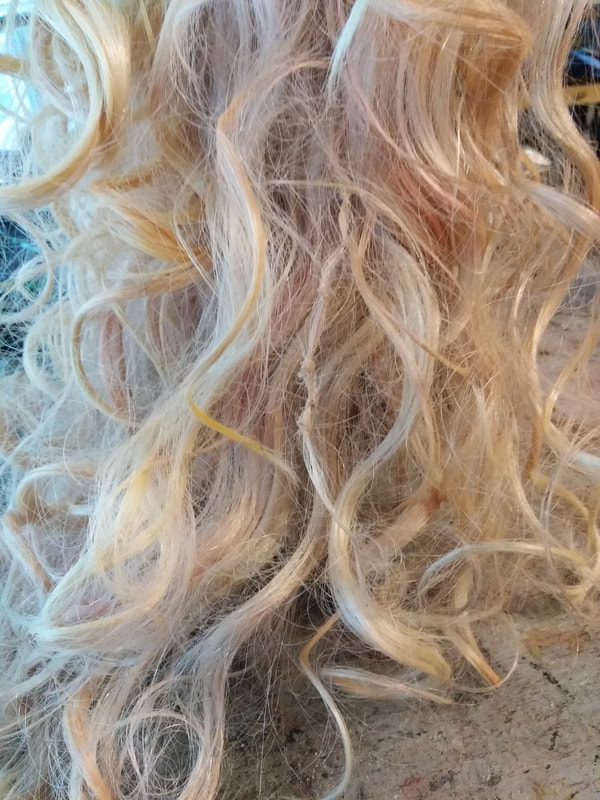
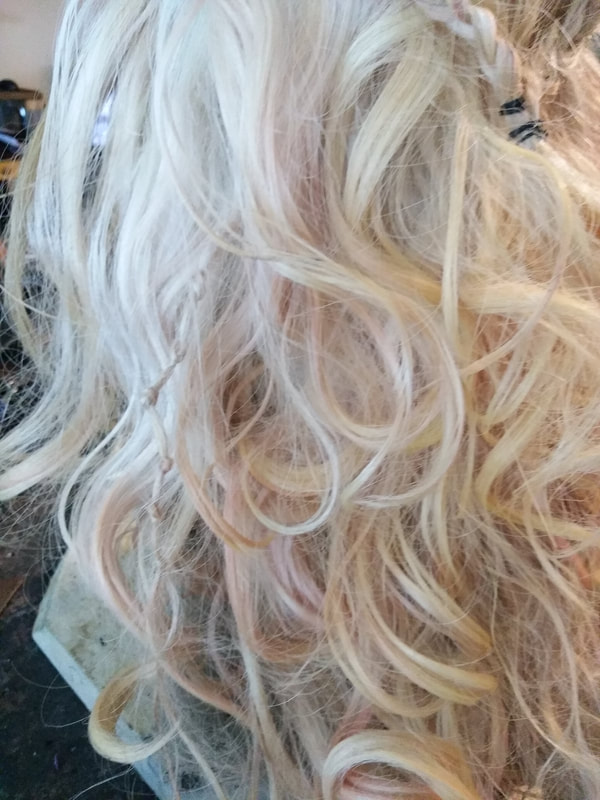
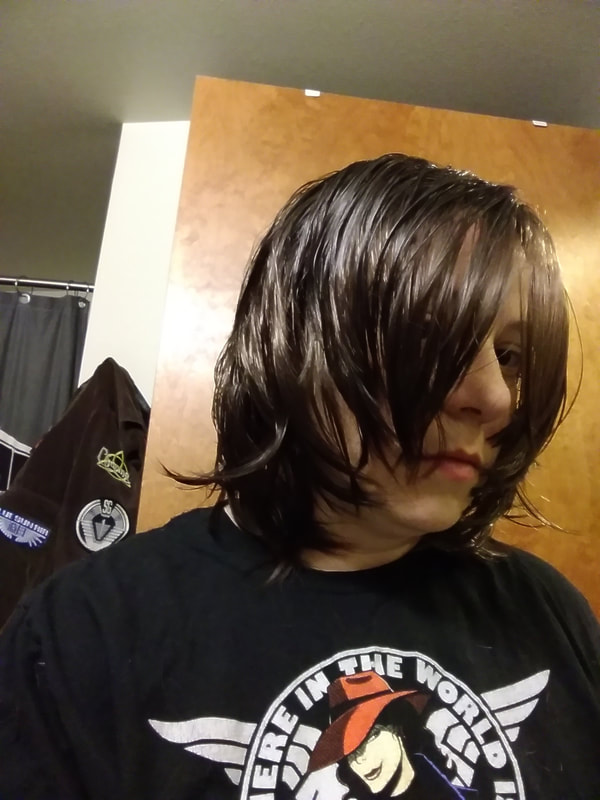
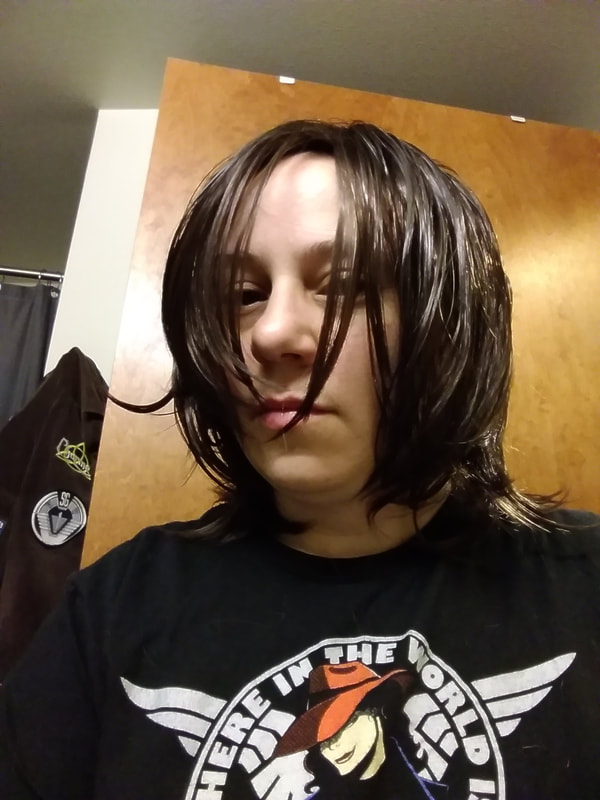
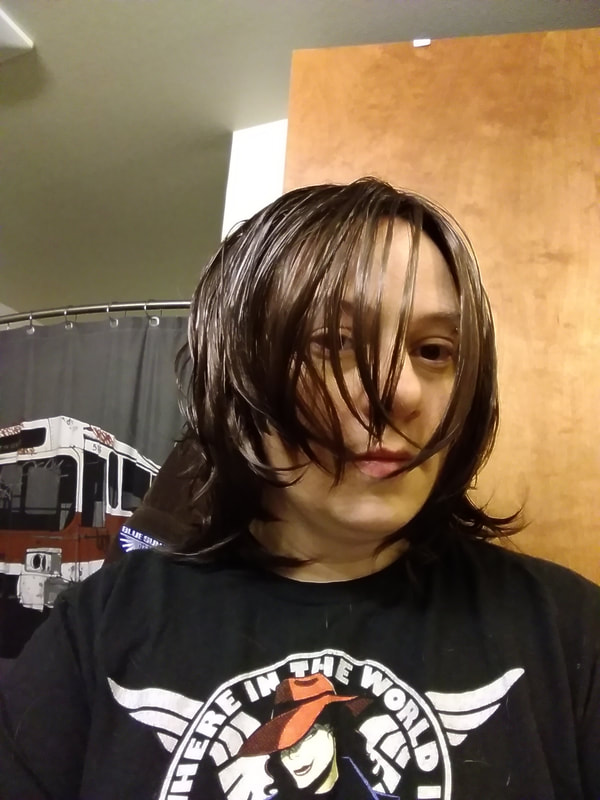
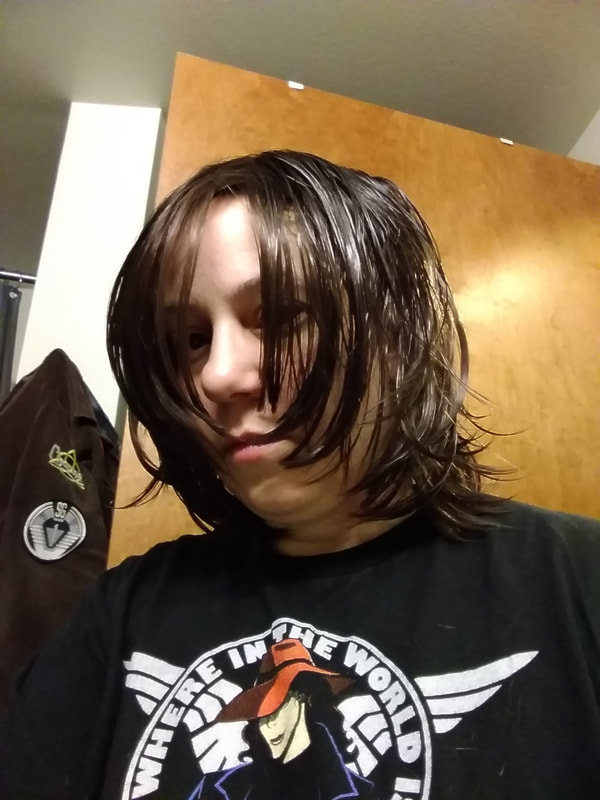
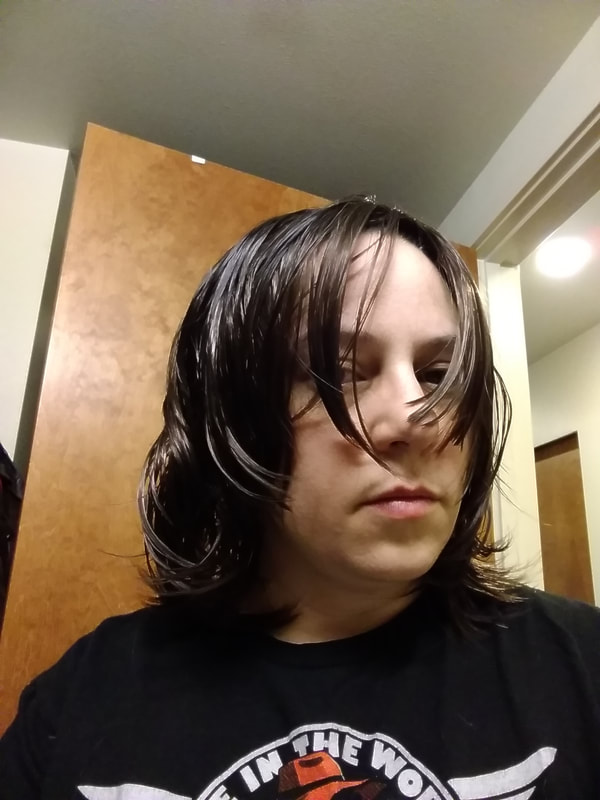
By Willow Enright 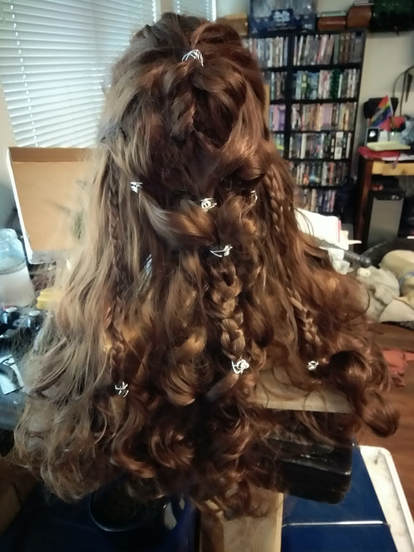 Finished Lexa Kom Trikru's Wig from the CW's The 100 Sometimes when you are putting together a cosplay it’s easier to acquire a wig for the character in order to have consistent continuity for your character’s look. I used to try and cut, color and maintain my own hair for every cosplay, but that starts to take a toll on your own luscious locks. Especially when you want to do multiple characters with different hair styles and colors, possibly for the same event.
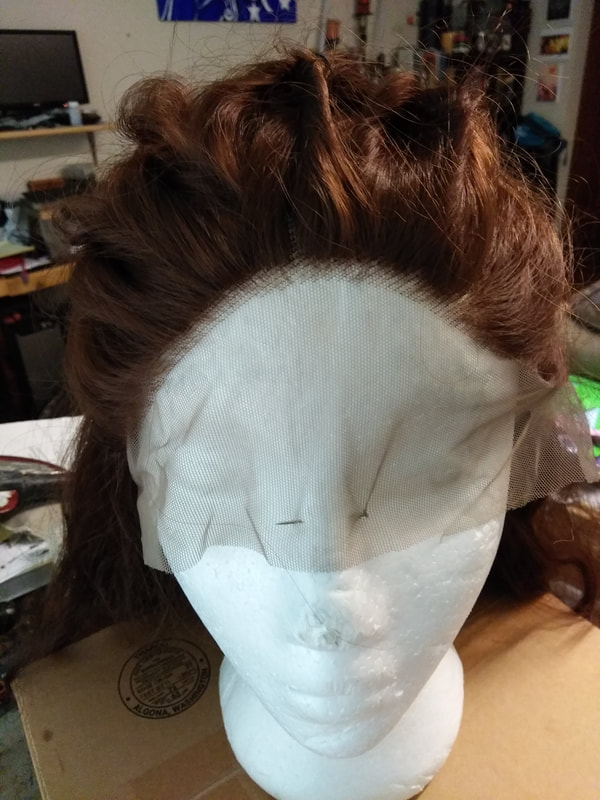
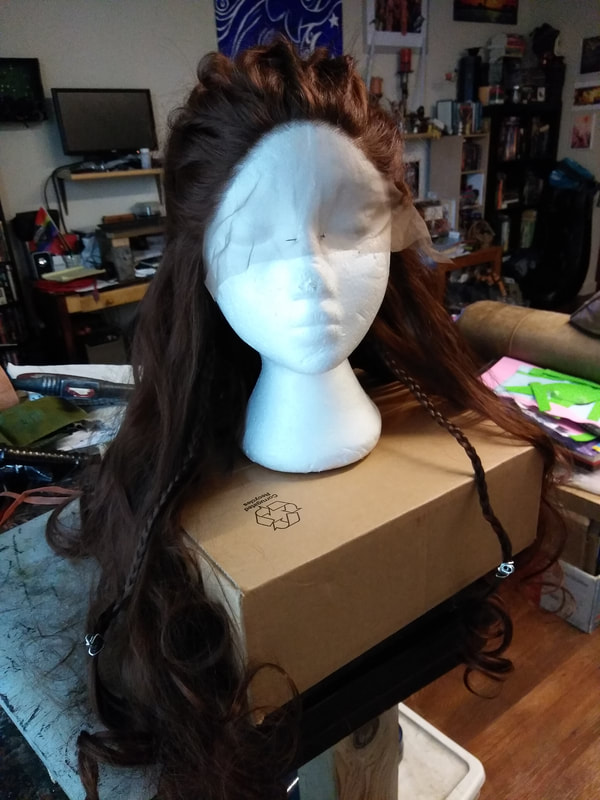
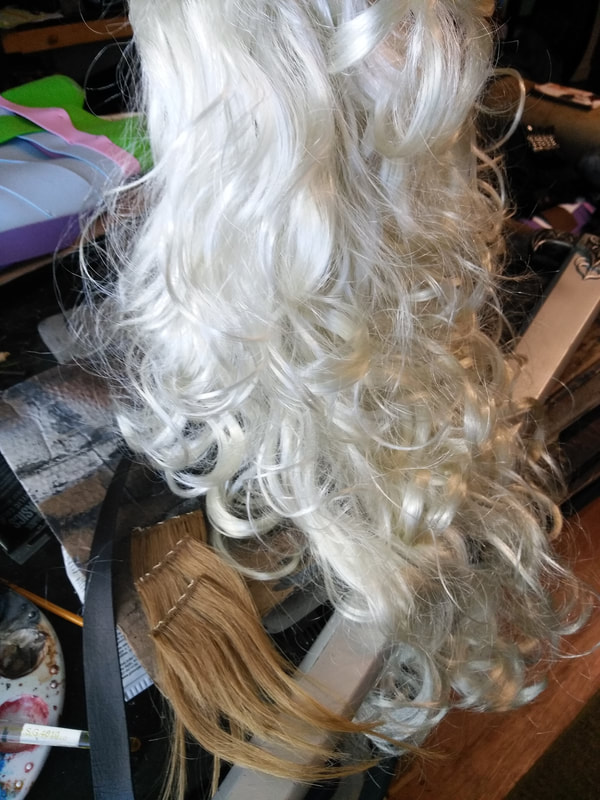
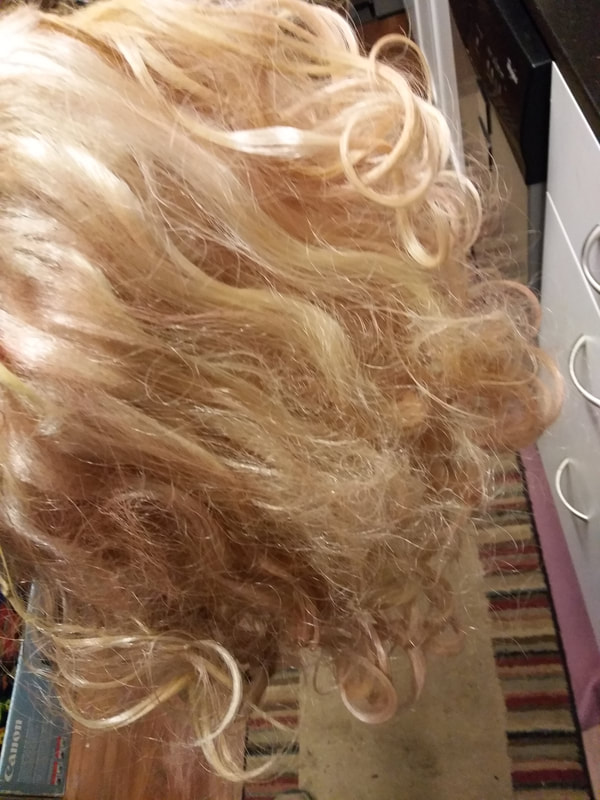
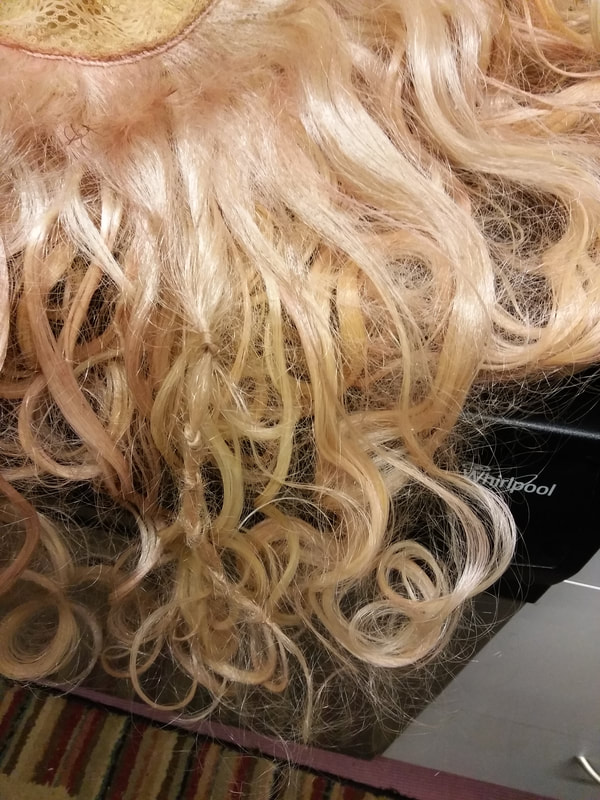
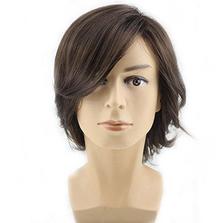
Reference, Research, RestyleLexa has some seriously long locks which she keeps tied back with a series of various techniques. The wig that I acquired for her look was a 24” heat resistant lace front wavy synthetic hair, medium brown. I bought it on Ebay for a really decent price, and I couldn’t be more happy with the quality of it, especially on camera. It has a sewn in cap with clips and an adjustable strap for under the skull, dense locks with a natural variation of color, and the hair feels extremely soft and natural. The most important part is that there is enough hair on the wig itself to do all the details we need to fully embody Heda.
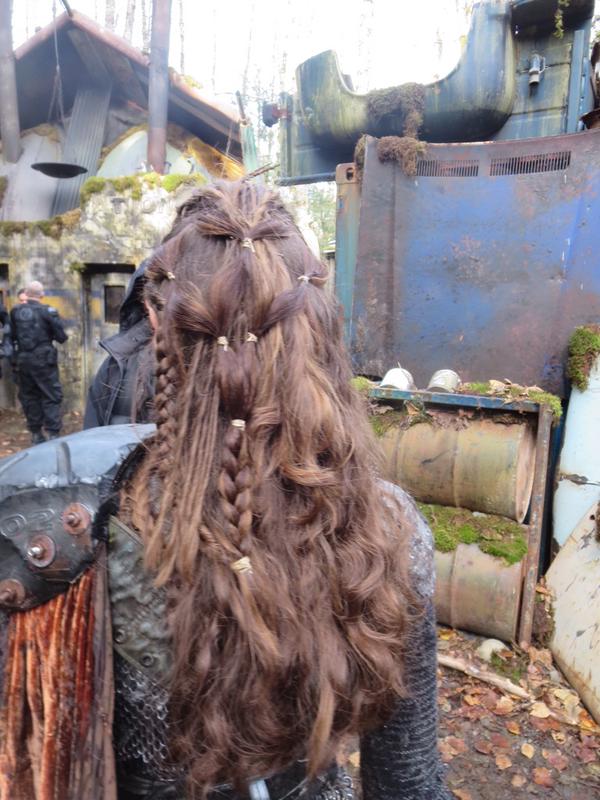
I used a behind the scenes reference photo of Alycia Debnam-Carey (Lexa Kom Trikru) from the TV set of The 100, and I also referenced two YouTube Lexa hair tutorial videos. The main video, Commander Lexa Hair & Makeup Tutorial! | The 100 by Jackie Wyers, and the second The 100 Hair Tutorial for Commander Lexa by Silvousplaits. I mostly wanted to match the reference photo but really liked some of the added details from the two tutorials.
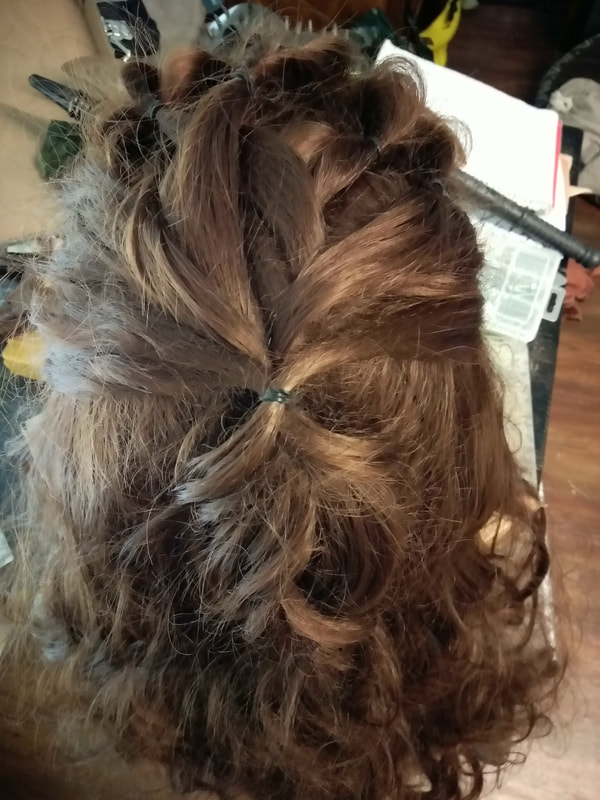
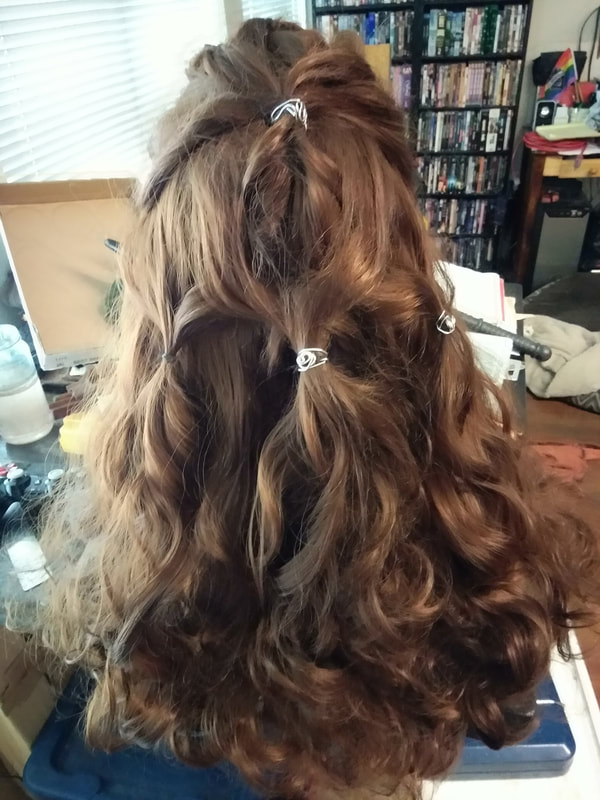
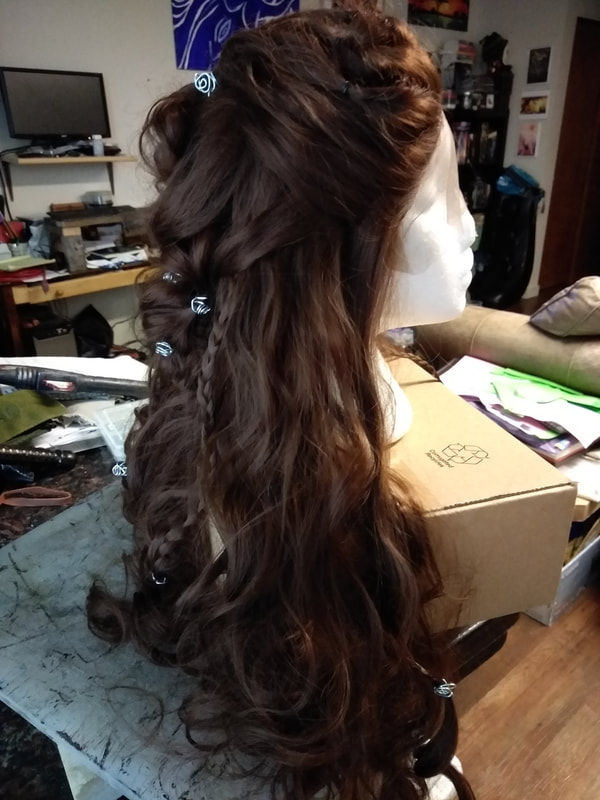
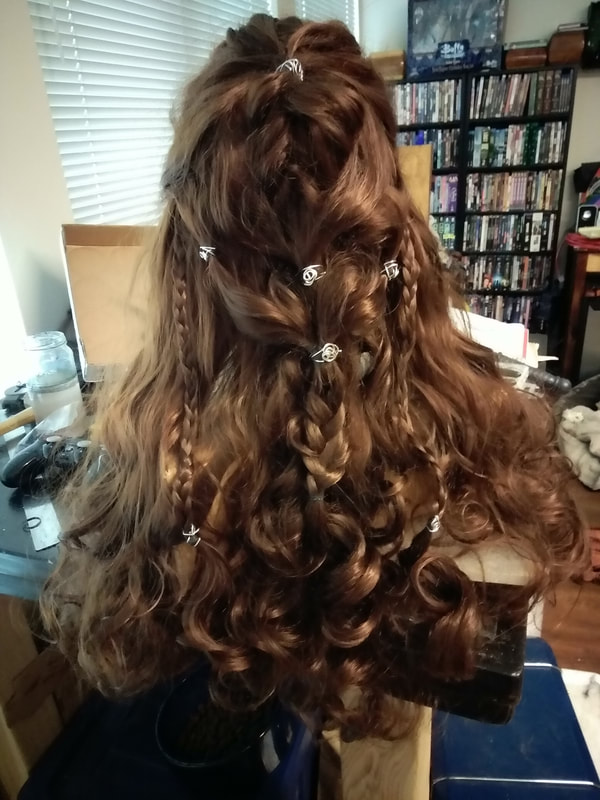
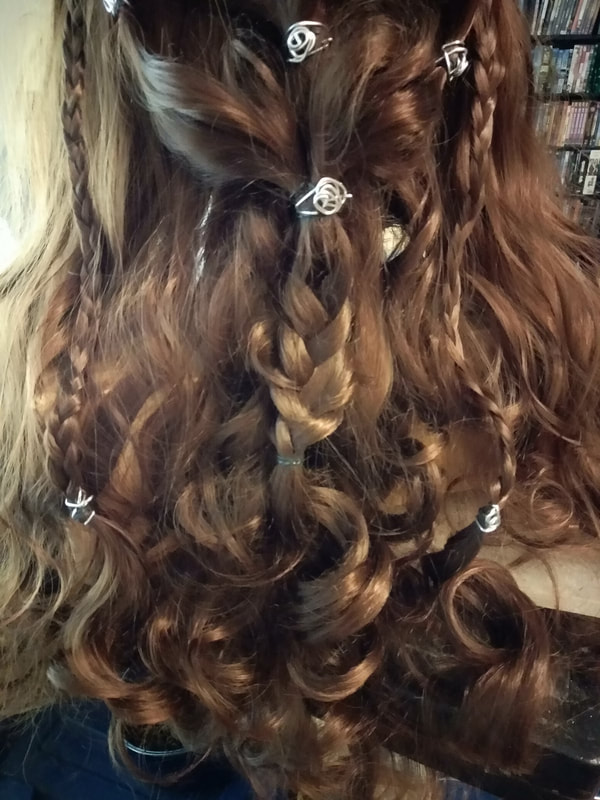
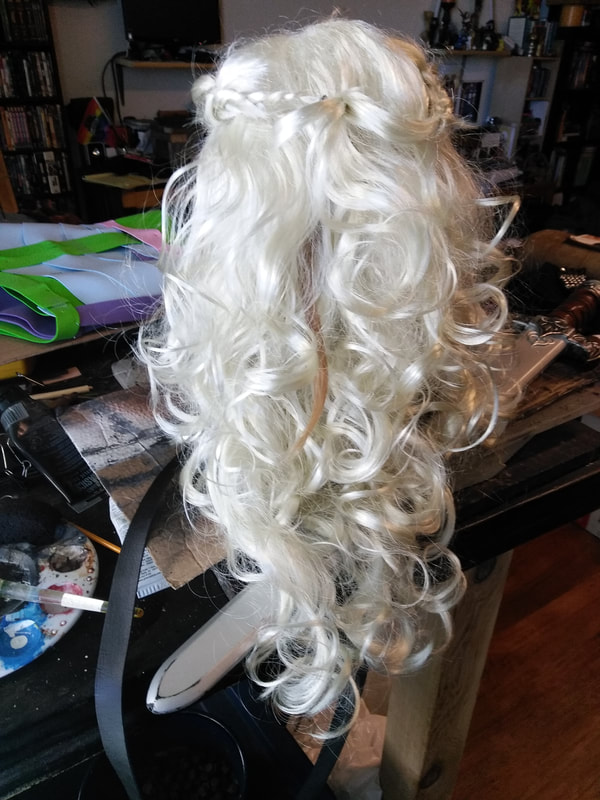
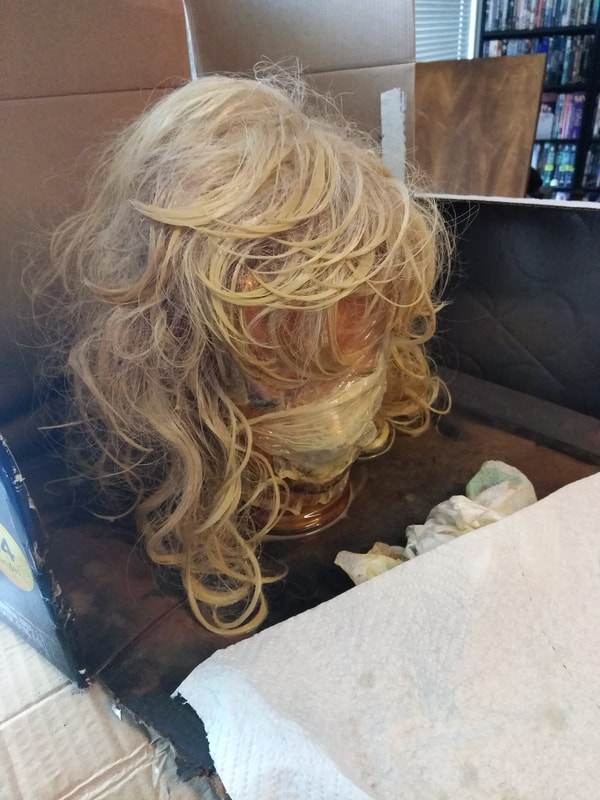
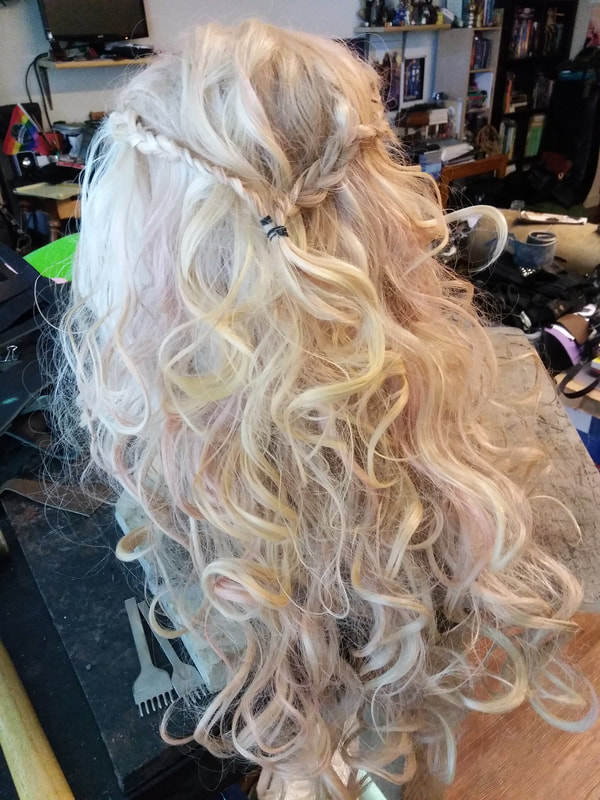
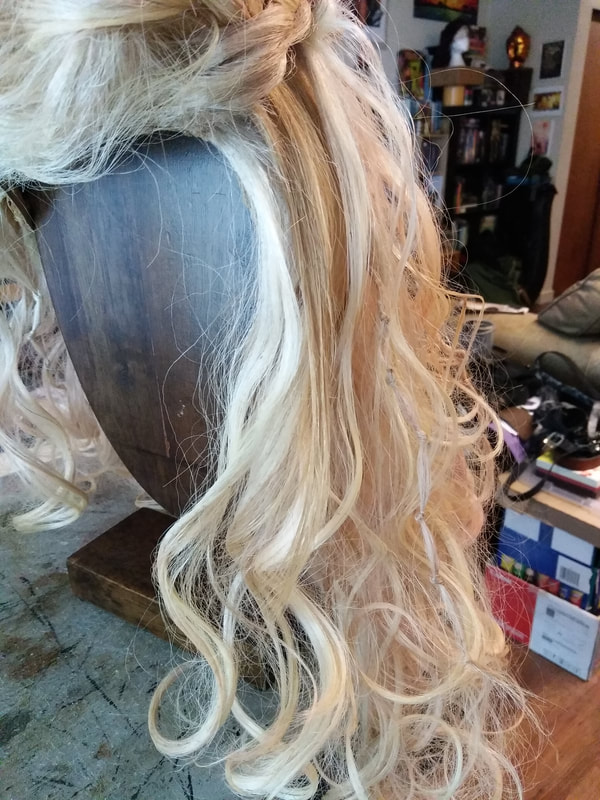
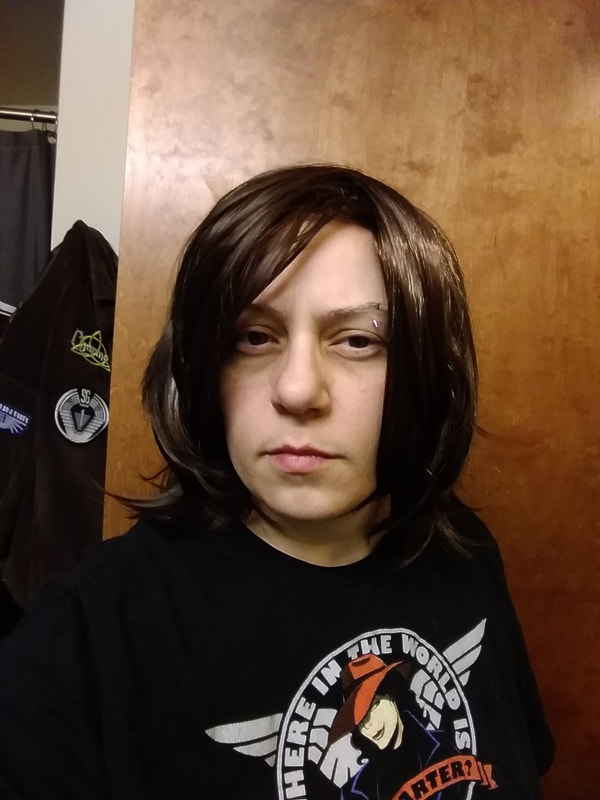
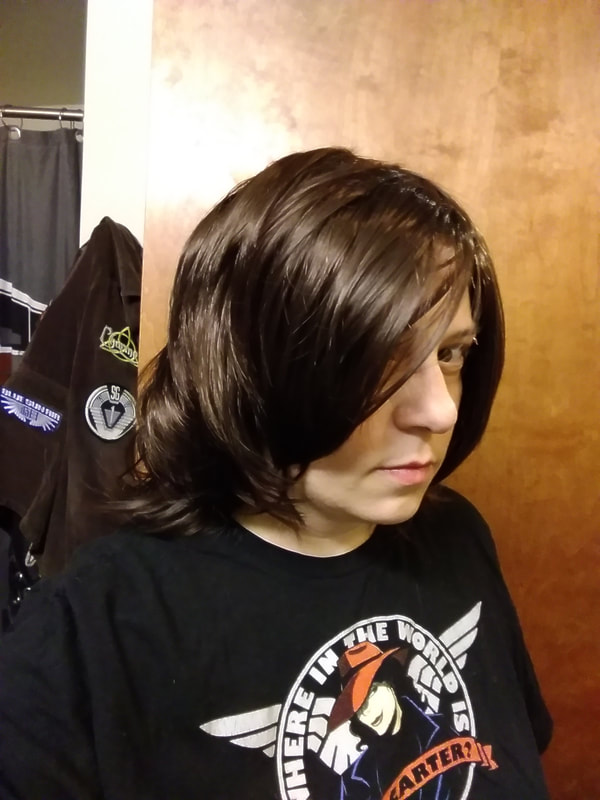
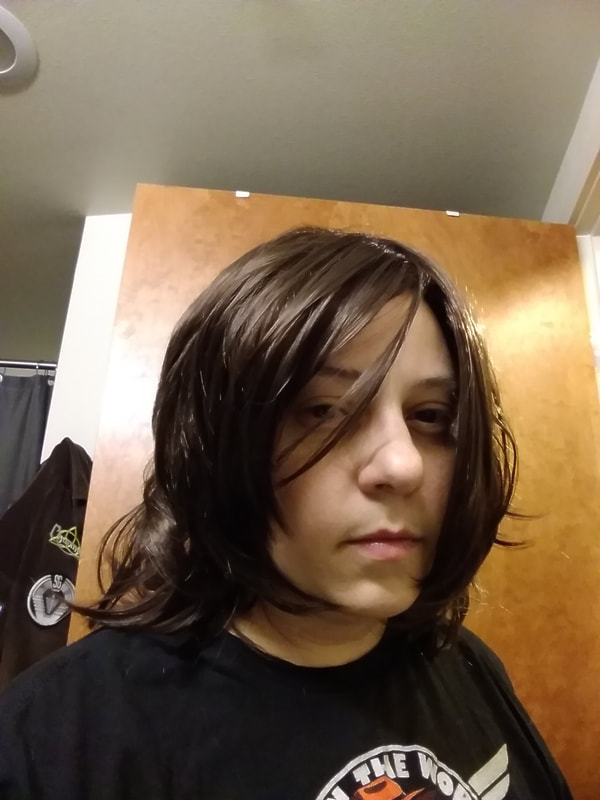
Wig: Ready, Set, Braid!The first step was to section off the front bangs/fringe and separate it into five small sections. I used the little, cheap, black rubber hair bands that are better to cut out of hair than pull. They come in a large packet for fairly cheap so you never feel bad cutting or breaking them to remove them instead of attempting to slide hair back out of them. I made five small pony tails and to give them extra poof I did a reverse tuck with each. Separating the hair close to the scalp with thumb and index finger I pulled each pony through itself, giving each hair section a nice twisted definition. Then the hair along the temples was smoothed flat and pulled into a ponytail at the crown of the head for Lexa’s slicked back sections.
In order to carry the front five ponies back over the top of the head, and to give some more of that defining poof of Lexa’s front section, I did a loose weave of two braids created with the five strands into one. I used the middle ponytail for one of the strands with both braids which nicely guided it along the middle of the head. This was then tied into a ponytail right where the slicked back hair was, leaving one ponytail on top of the other. I then implored the pull through braid technique. By dividing the top ponytail into two sections which I looped over the second ponytail before bringing them back together at the base of the second pony and into a new ponytail underneath. This process was repeated three times and can be found visually at around 3:22-4:13 in Jackie’s video. Once you are done, tug on the separate pieces to puff out the loops. It gives some nice added detail and poof to the crown of the head.
Next you’ll want to take two additional small sections from beside the tied off pull through ponytail and combine them into one ponytail. This will sit over top of the pull through braid. Be sure to pull the loops out to create the soft curving detail of each loop. You’ll want to make two additional ponytails in the same way, only on either side of the middle pull through set. Try to tie them off at roughly the same height so that your loops are fairly symmetrical to each other. Again, you can visually reference Jackie’s video at 6:10 for this technique. The remaining combined ponytails are fairly easy, simply divide the ponytails into two sections, connecting the two center pieces into one hair elastic. This leaves you with two ponytails which you bring together making the final ponytail, tie it off and braid the remaining hair securing the end with another black rubber band.
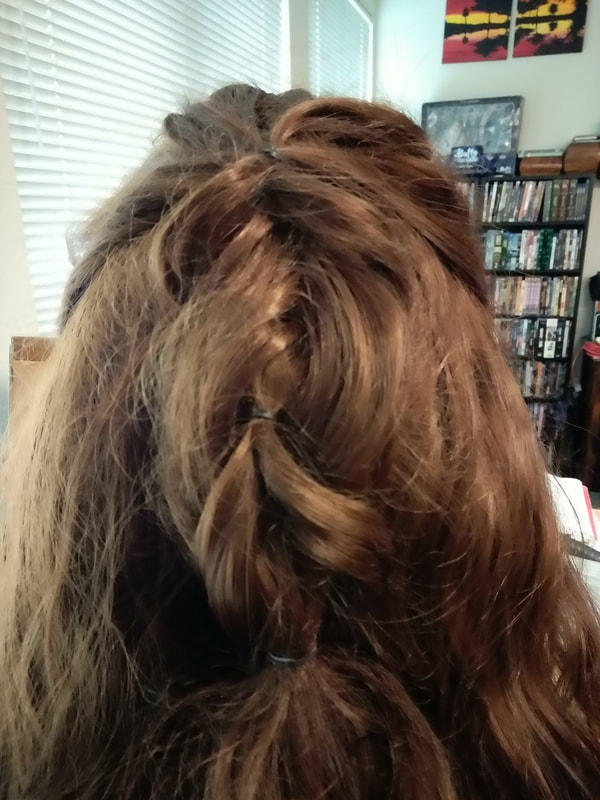
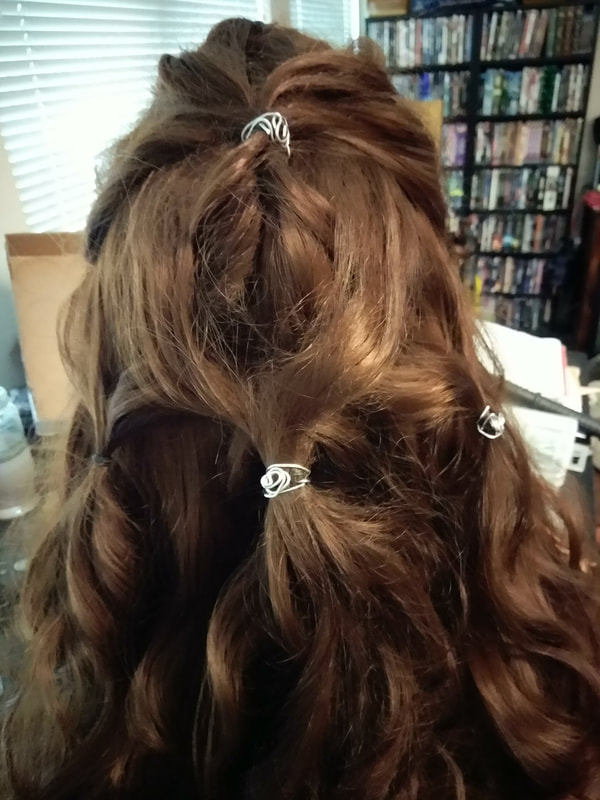
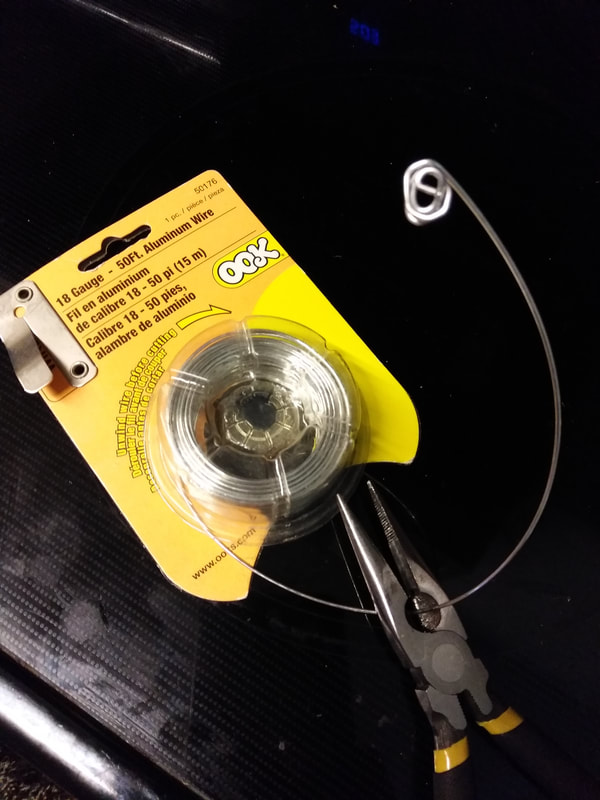
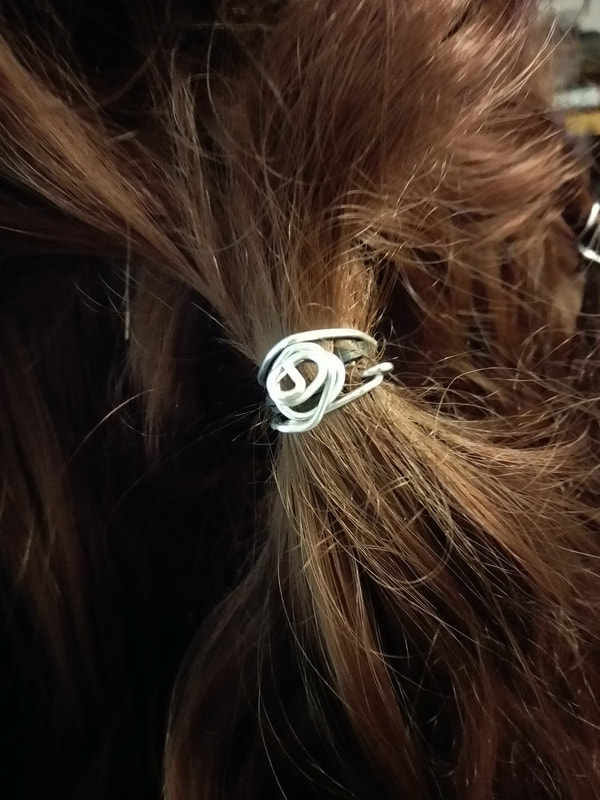
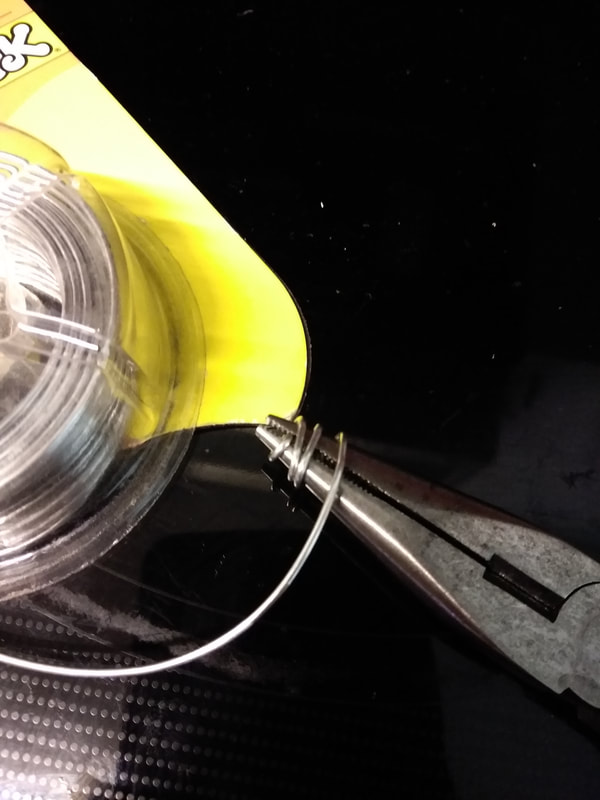
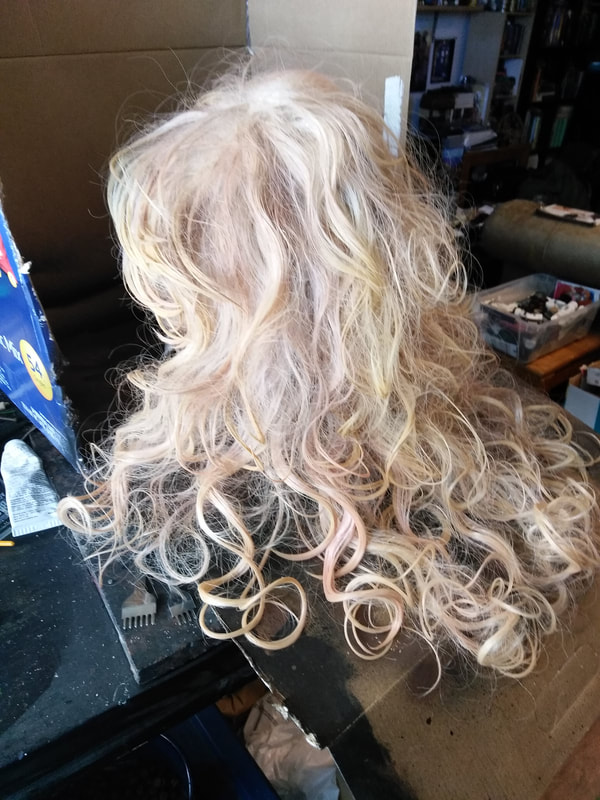
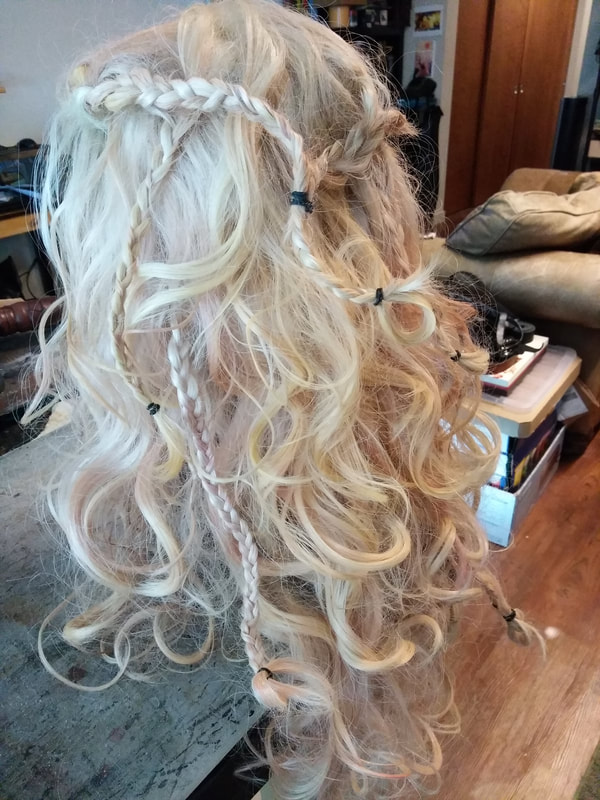
You Nail the Details, You Nail the CharacterTo give each tied ponytail section some added detail like in the show, I used a malleable 18G aluminum wire. Using pliers I twirled a section of wire around the plier head creating some cool spiral details and then cut the wire about 2-3 inches away from the spiral design. I then wrapped the remaining wire around each hair section, being careful to tuck in the sharp wire ends so that they don’t end up poking me.
Time to add some accent braids into the mix! I choose to do one on each side of the head in the back, and two underneath on each side so that you can see them from the front. I didn’t use any fancy braids since my braiding skills aren’t that great, traditional three plait braids did the trick. Jackie does a lovely dutch lace braid, around 7:08 in her video, but I wasn’t feeling that fancy with mine. If you have thinner hair or your wig is slightly thin, Silvousplaits video is a great reference for this hairstyle.
You can also choose to attach the dutch lace braid to the main braid, or leave it to hang free. I also like the idea of possibly adding in some dreaded sections for additional details. I noted a small section of four on the TV show reference photo, and Jackie used dreaded hair extensions in her tutorial. I’m fairly confident that I could get the wig synthetic hair to dread up pretty easily. However, I want to make sure that there’s enough hair left over that it doesn’t end up looking way too thinned out from all the detail braids and ponytails before I make that choice.
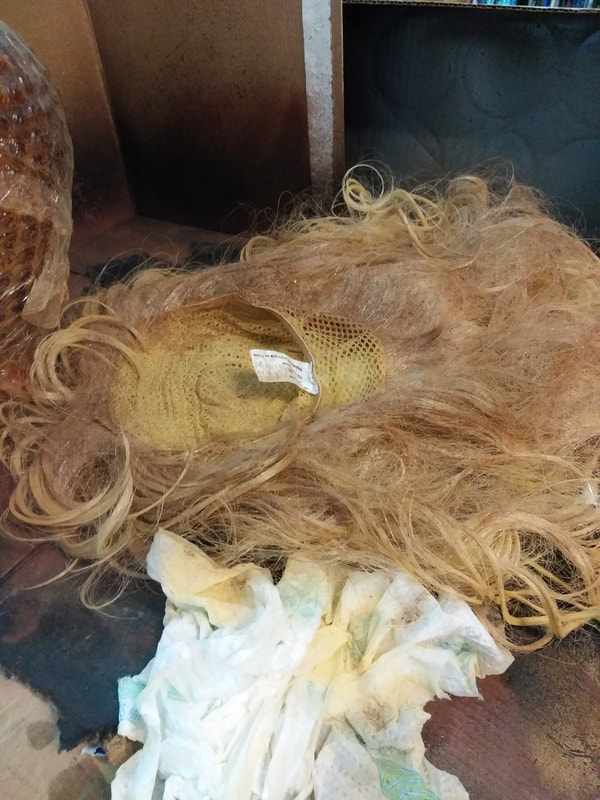
www.facebook.com/leatherworksbywillow/After all the careful detailing and braiding, be sure to store your wig appropriately to avoid unnecessary entanglements. I left mine pinned on my styrofoam head and covered it with the hair netting that came with the wig, carefully tucking the ends up into the net. I will likely find a cloth to also drape over it to avoid dust gathering on it. I now have my Lexa hairdo ready for every time I need to suit up for battle! Kom wor! (To War!)
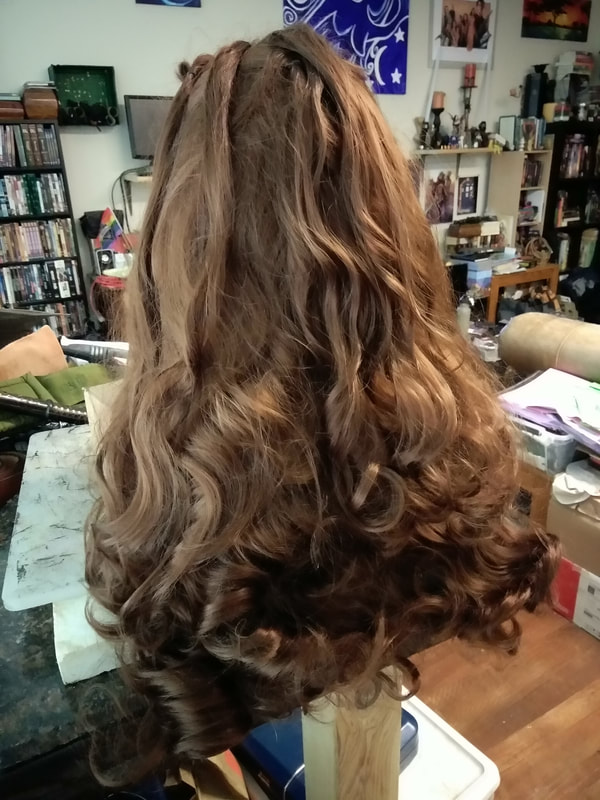
The next blog will come out on November 4th! I'll be getting into the holiday spirit next Saturday. I'd love to see you Halloween outfits in the comments, or on our Facebook Page. By Willow Enright 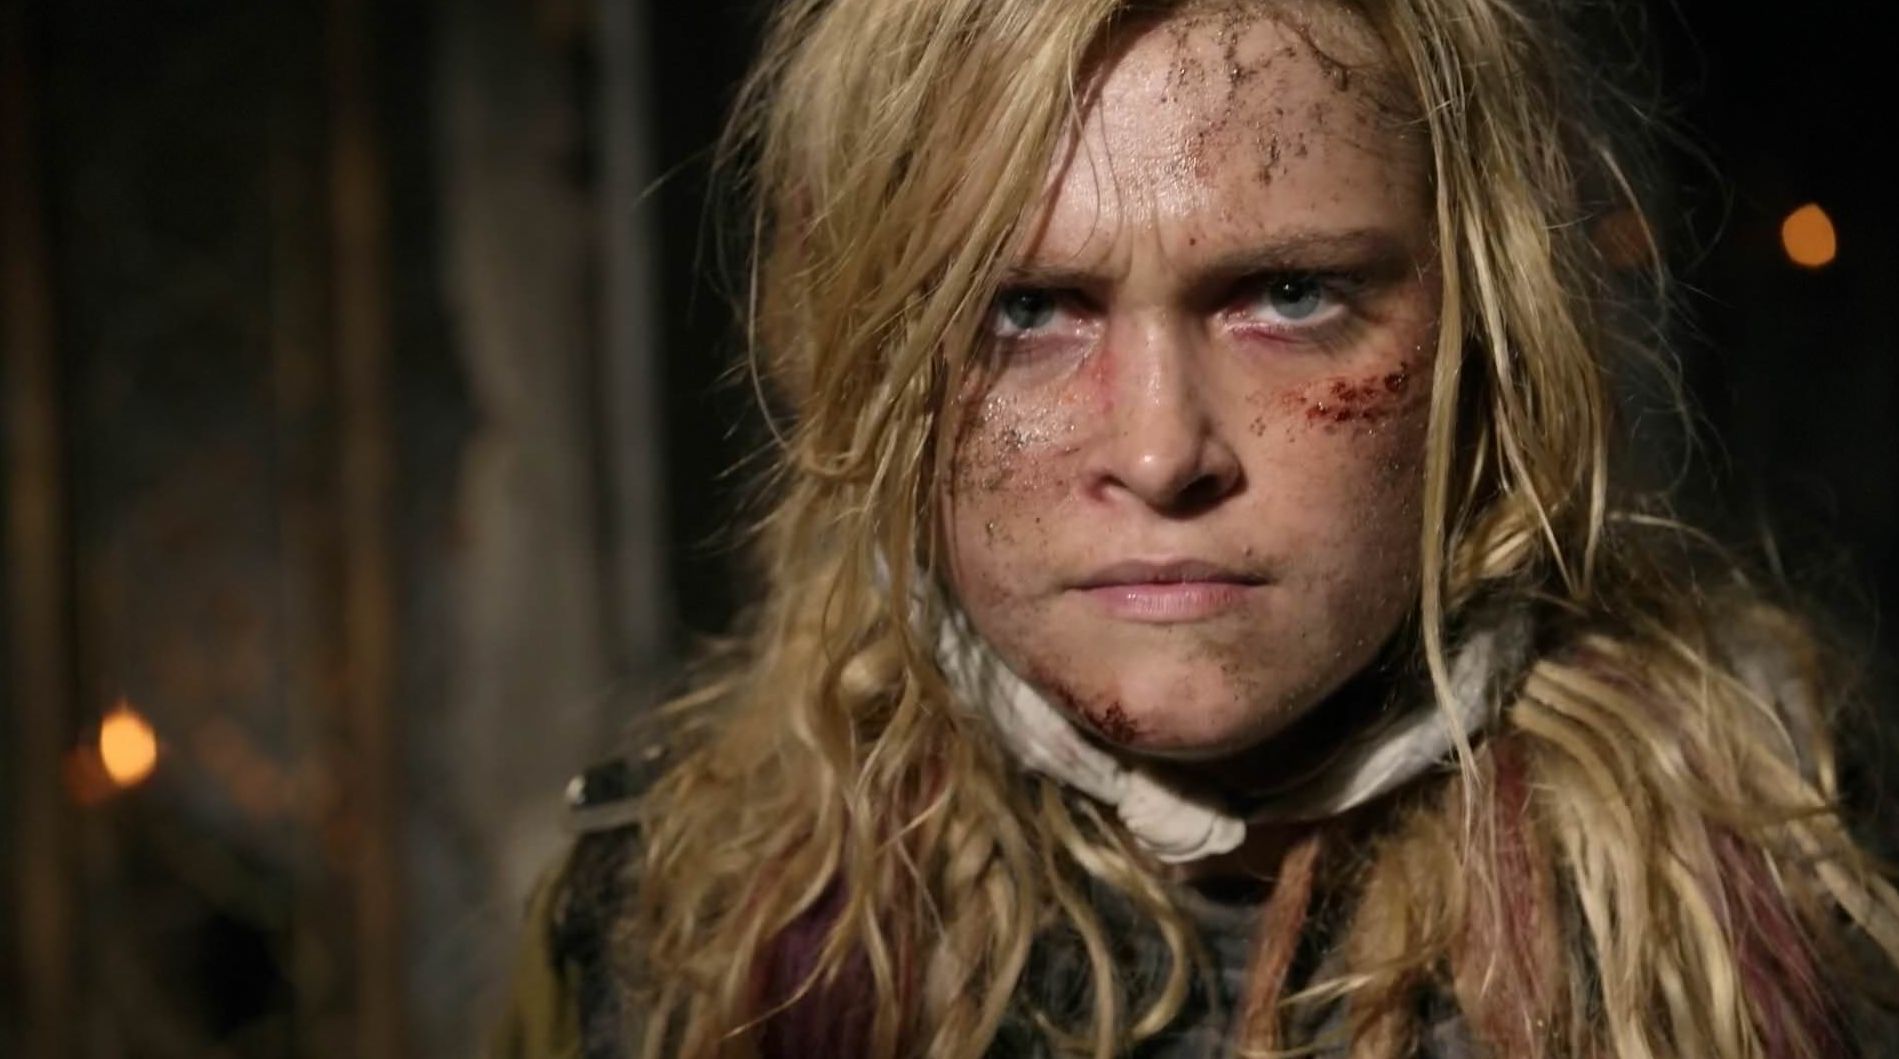 Clarke Griffin The 100 http://www.cultjer.com/img/ug_photo/2016_01/95177720160131112418.jpg There are times in your life where you really feel like making a change. Coloring or cutting your hair can be fun and give you a new outlook on life, however there are times where going blonde just won’t work for you. Clarke Griffin (The 100) has some ever changing blonde locks, and we’re going to transform an ordinary wig into a version of her combined hair-do’s.
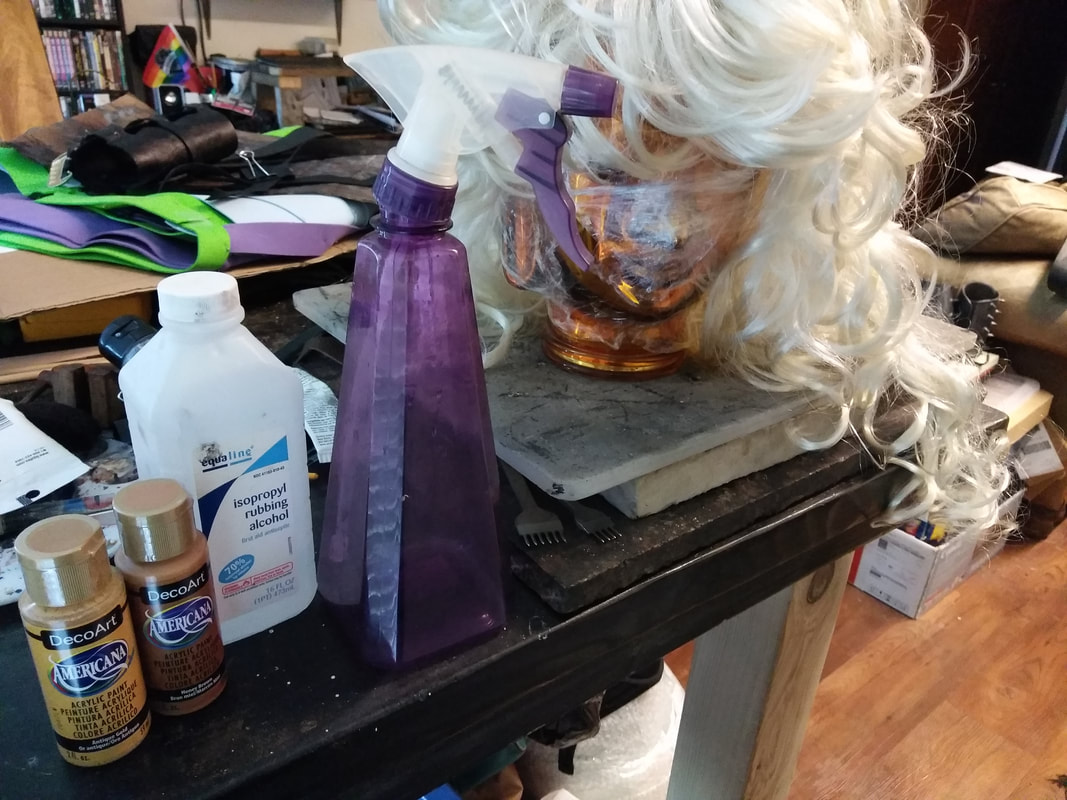
Supplies:Antique Gold, Honey Brown, and Crimson Acrylic paint, Rubbing Alcohol, Head Stand (I used a glass Buddha head, you might be temped to use styrofoam, DON'T!), Saran Wrap (optional), Spray Bottle, Cardboard, Paper Towels, Cheap Small Rubber Bands, and Wig (This wig was originally purchased for a comic book Black Canary cosplay.)
Cheap vs QualityThe wig that I started with was a super cheap synthetic Halloween wig that we got at Goodwill one year ago. So, the quality to start with wasn’t great, in fact it was a pretty typical bad wig. However, it was what we had to work with and I figured that I would at least give it a shot to see how it would turn out. After all, I love a good challenge. Only, if I were to repeat this process in the future, I would definitely invest in a higher quality wig.
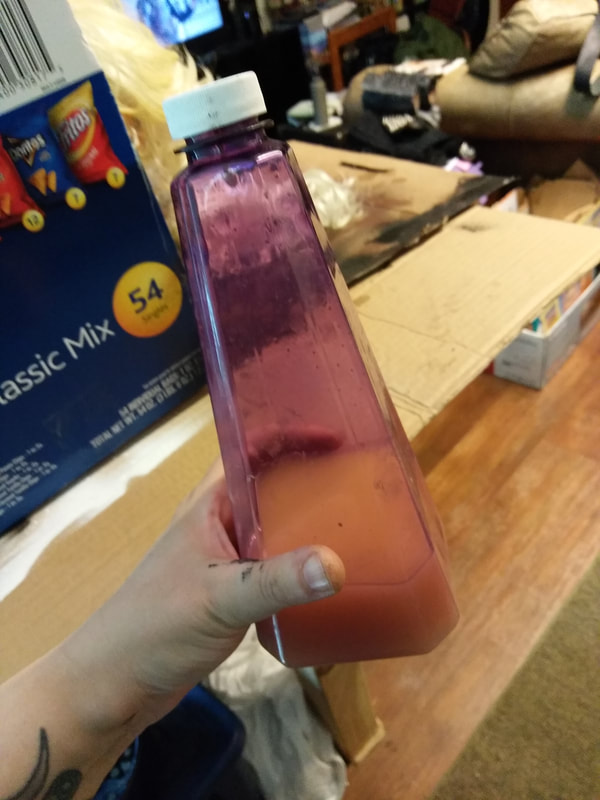
Color ChemistrySince the coloring process involves rubbing alcohol it’s important to use a glass head instead of styrofoam, otherwise it will simply melt. I also covered it with saran wrap beforehand so that the paint wouldn’t stain the glass. I used a cardboard box to make a three sided place to spray, and placed paper towels underneath the glass head to soak up the alcohol. I mixed 1 cup of rubbing alcohol with about 10 drops of paint in order to get the richness of color that I wanted. Always start with your lightest color, Antique Gold in this case. I spritzed the entire platinum wig with this light color first.
Coloring Synthetic HairChanging the color was a lot easier than I had thought initially. The tricky part is making sure that you mix the paint in the rubbing alcohol extremely well so that it won’t clog your sprayer, or you will spend a long time trying to clear it. Eh, hemmm… as some of us may have done. Once the Antique Gold covered the whole wig, I added another cup of rubbing alcohol and 10 drops of the Honey Brown. Making sure to constantly mix the solution, spritz the second color in various random spots, including the underside of the wig. Adding the red at the end was insanely easy. For this part of coloring you won’t need a full cup of alcohol, just ¼ cup and only 5 drops of paint. The platinum hair just soaks the color up nicely giving that slightly Clarke hue. Leave the wig to dry for 24-48 hours before styling. Also, don’t repeat the alcohol/paint process on the wig more than twice, making sure it is completely dry in between, otherwise the synthetic hair might disintegrate. Styling
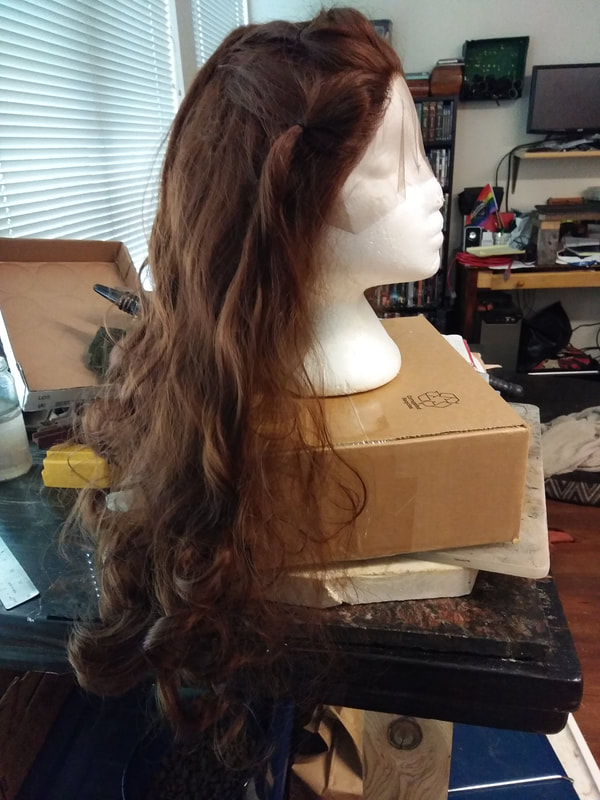
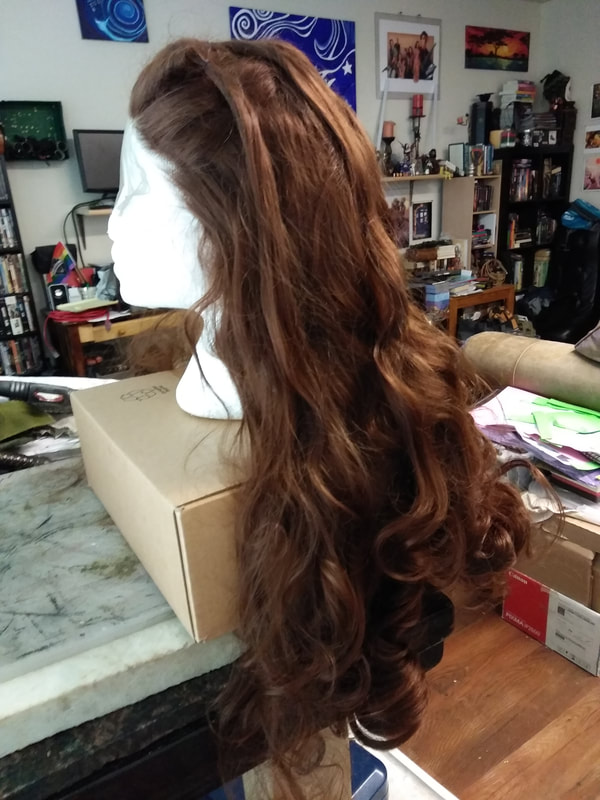
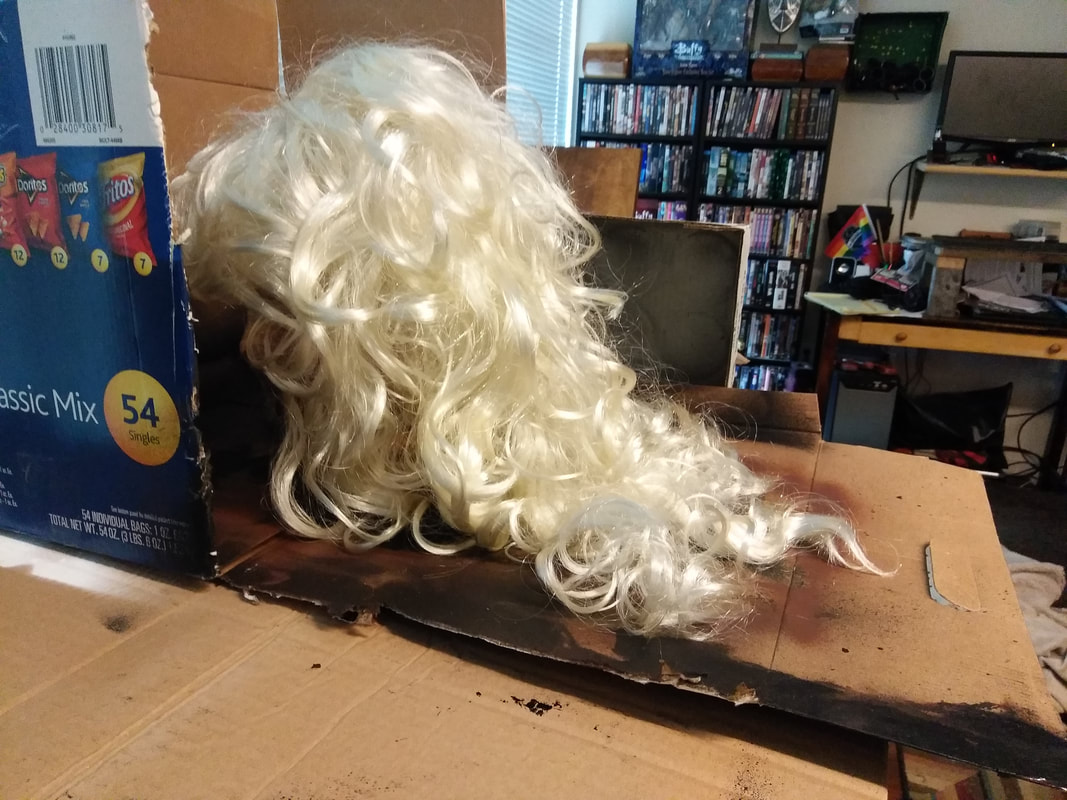
This particular wig has bangs and Clarke doesn’t, so it made sense to me to braid them together along the temples using a dutch lace braid. I was then able to combine the two braids at the crown like Clarke does. There was also a lot of matted hair underneath from previous wearing. When knotted together in sections it became lovely texture, and a lot less 80’s punk mess. I repeated this process several times throughout the wig.
To finish off the Clarke Grounder hair, I added several more small braids. I used cheap rubber bands that can be cut out instead of pulled out. Synthetic hair will not tolerate rubber bands being removed. It will rat the hair, break it, or pull it out. Let’s face it, rubber bands aren’t that kind to real hair either. Getting cheap ones will ensure you don’t care about cutting or ripping them.
The process of changing synthetic wig hair color was daunting, and I wasn’t certain that it would turn out like I wanted. I was actually surprised at how easy and fun it ended up being. The colors turned out wonderfully! I just wish that I someone had told me to invest in a much better quality wig before attempting this process. Even though it would have cost more, the end would have been a very satisfying kickass result. Instead, I spent countless hours recoloring a crappy wig that really just can’t be used as a complete character wig due to its poor quality. Next time I will begin with a quality foundation. C'est la vie! ("That's life!") Stay tuned for next week's wig transformation: Lexa (The 100) Wig!
By Willow Enright 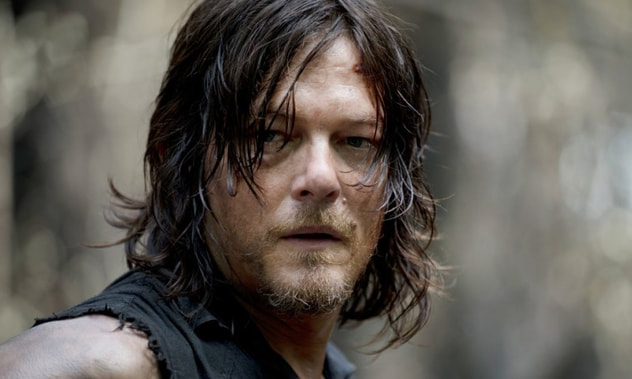 Norman Reedus as Mr. Daryl Dixon from AMC's The Walking Dead Attempting to capture the details of your favorite characters can be as mind boggling as it can be rewarding. There’s nothing worse than being able to convincingly recreate their clothes, props, and identifying features but not be able to sport their characteristic locks without drastically changing your own hair to match. Finding the right wig can go miles when it comes to your cosplays, and not breaking the bank. Especially, when you've have a different character for each day of the con, you'll need more than one wig. Note, this is the first wig I have ever manipulated. I found mine on Ebay from RightOn, Men's Medium Wavy Heat Friendly (150 c / 302 f) Synthetic Wig in dark brown, and it was less than $20. I also made sure to use a good reference photo of the character before starting my wig sculpting, hint, you've already seen it.
First thing out of the bag the wig was very poofy, and required lots of palm petting to calm down the wig fibers. This transfers the normal oils of your hair to the synthetic wig hairs. The wavy style had the whole top part of the wig swept over, and I had to separate the long bangs to give them that classic Daryl part. Usually, this would be the time to brush the wig, but this is Daryl Dixon and he doesn’t brush his hair. So, I used my fingers which seemed appropriate.
Wearing the wig, I applied two different hair care products, Alterna Life Curls Detangler and Avon’s Curl Goddess Curling Mist. The detangler helps the synthetic hair to avoid knotting up. While the Curling Mist gives some body to the flat wig. I spritzed the products over the wig and used my fingers to scrunch it into the synthetic hair.
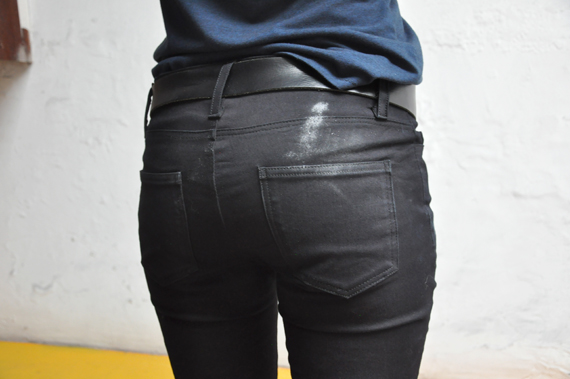
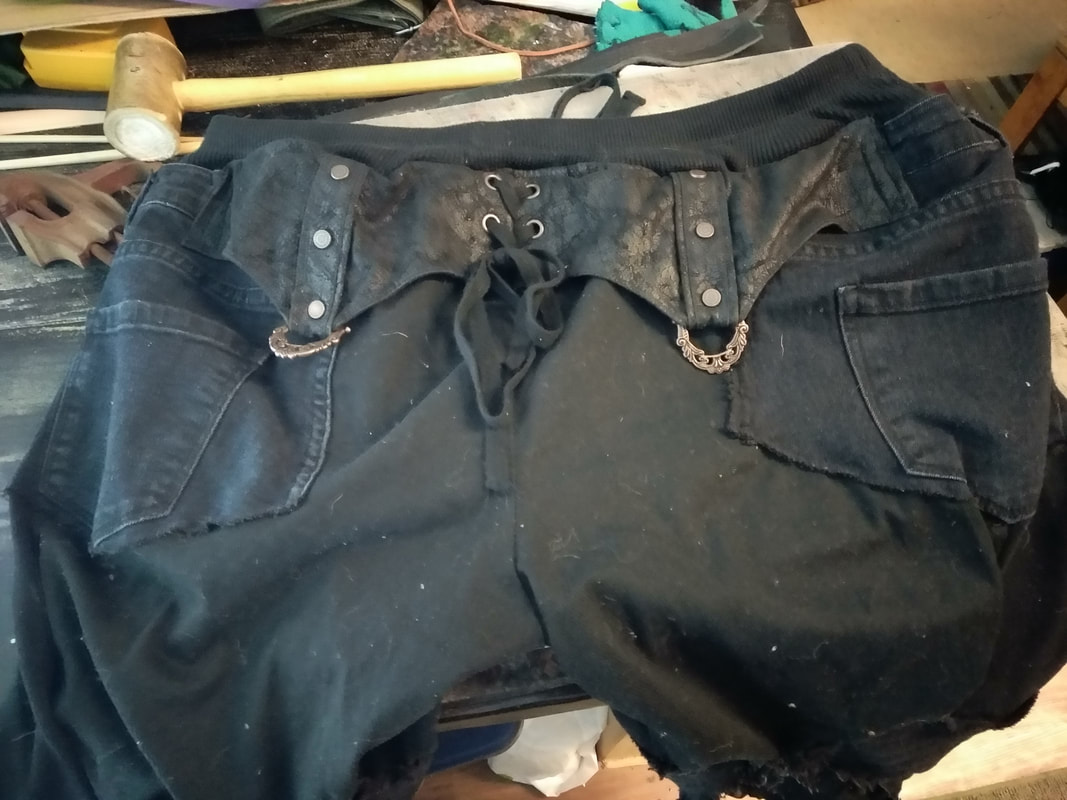
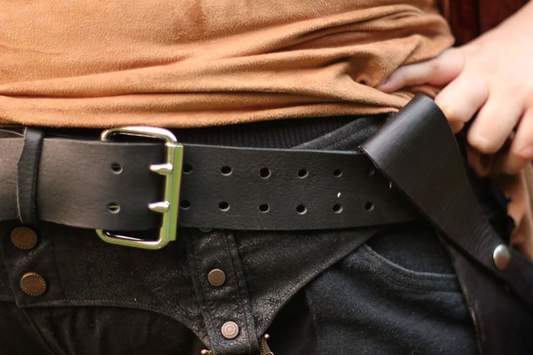
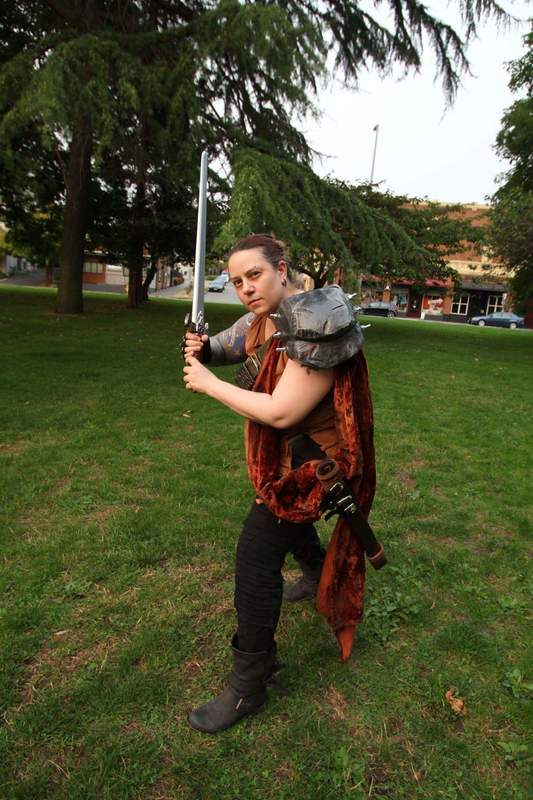
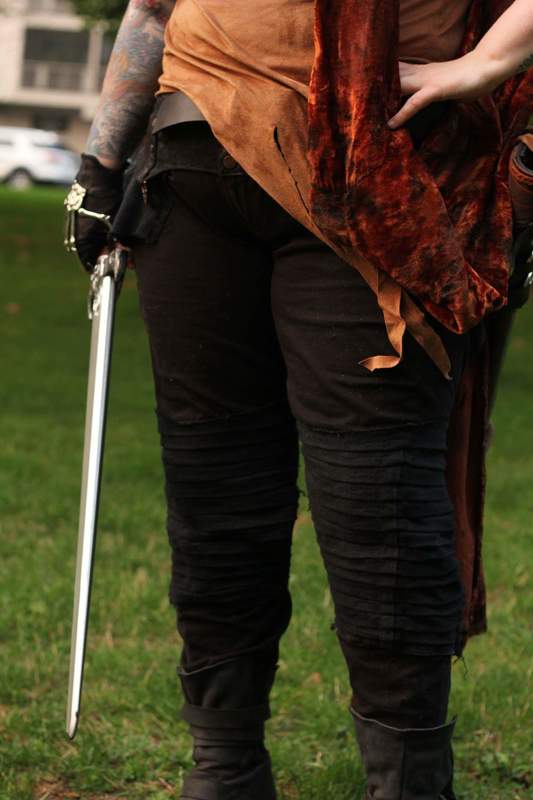
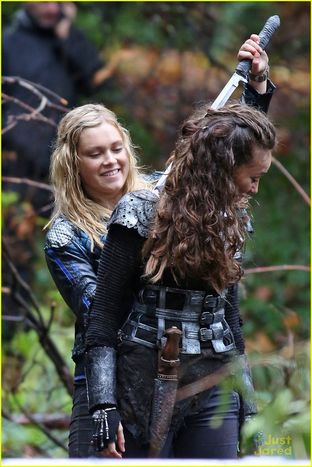
Water is hard to come by in the apocalypse so washing your hair isn’t a priority, especially to a snake eating dirty fiend like Daryl. In order to obtain the greasy dirtiness that he usually sports, I used coconut oil. Rubbing it into my fingertips and then running them through the wig hair. I did this a few times until I was satisfied with the amount of grunge. Since the bangs were designed to sweep over to the side they were quite long and I had to do some random trimming to help create the disheveled bangs of Mr. Dixon. The end results completely tie together the costume, makeup, and props wonderfully! 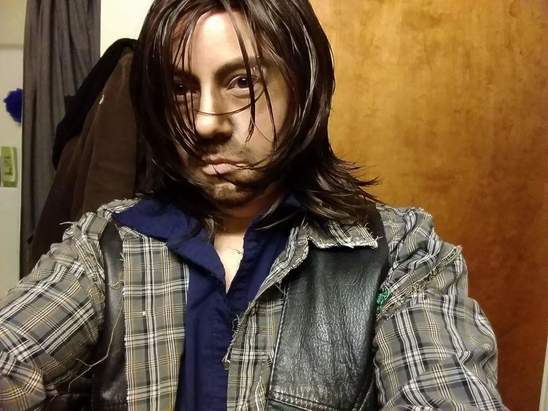 My freshly wet hair Here you can see me in full Drayl Costume. If you'd like to know more about how I created the rest of the costume you can click here: Creating TWD's Daryl Dixon. Stay tuned for next's week's blog about how wig making doesn't always go as planned when I discuss Clarke Griffin's (The 100) wig making experience.  All dry and at the Con! I'm standing next to a fantastic cosplayer, Tina Rivets. By Willow Enright 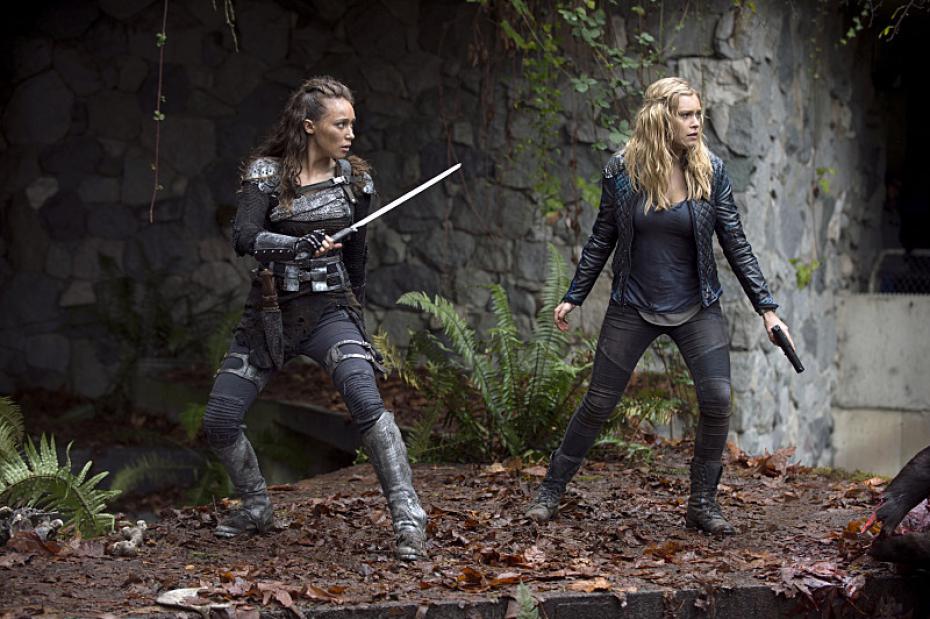 On Left: Lexa (The 100) sporting her warrior pose in her sexy black jeans On right: Clarke sporting her blue jacket https://vignette.wikia.nocookie.net/thehundred/images/8/8f/Lexa-and-clarke-are-going-to-have-to-trust.jpg The wardrobe in The 100 is a cosplayer’s dream. There are so many rich details to garbled together clothing and armor, that the world of the Grounders seems tangible. Maybe it’s their use of seat belts, tires, and ripped up grunged gear to create their recycled style, or perhaps it’s simply the ingenuity. Either way, the post-apocalyptic look of The 100 is fun to recreate!
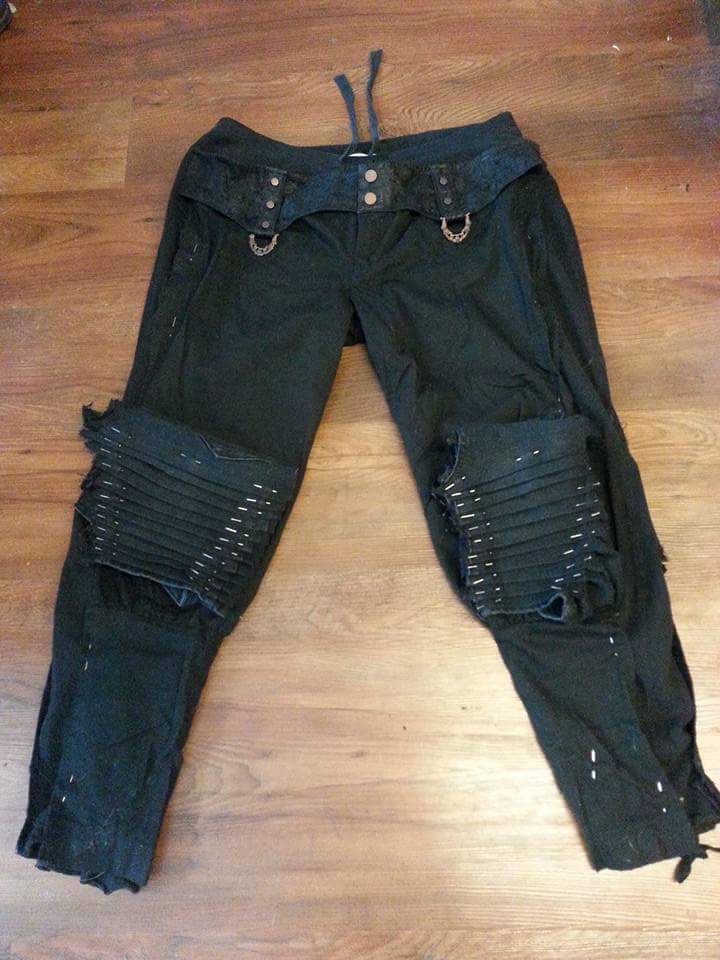
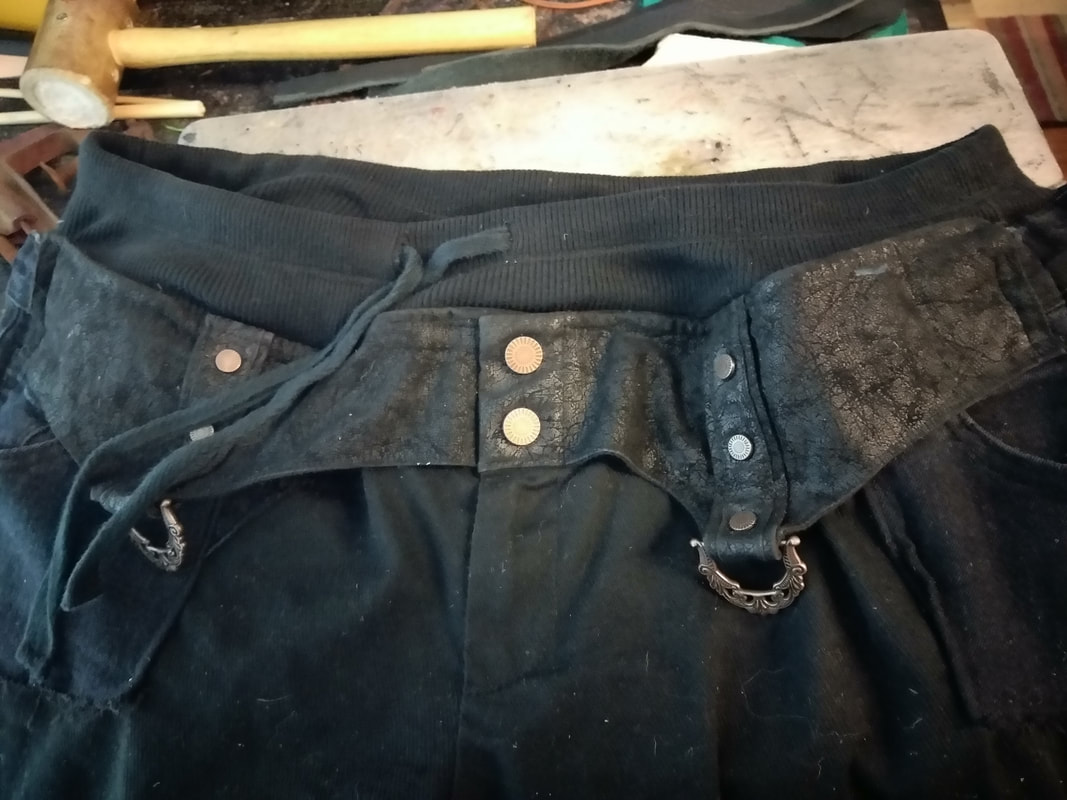
Grounders don't buy fashion, they create it!I decided that I didn’t want to outright buy the motorcycle pants, but make them myself so that they are more Grounder-like. To recreate the Lexa Grounder pants I used three different pairs of pants that I already had. The anchor pair are old workout pants that have a decent waist height, fit, and are stretchable with a drawstring waist. I used this pair as my base for building the rest of the pants. The main focal point of pants were some black linen Steampunk pants acquired a long time ago by catalog, only they never fit because the pants were so incredibly low cut that it was obscene. I decided to split these and use them as the front and back of the pants due to their cool Steampunk flare of hardware and leather. The third pair were black denim stretch jeans that were way too small. These were used for pockets, and accent details, including the pleated knees.
I started by putting the workout pants on my body. I then pinning the flared legs over for a more fitted pant all the way to my ankles. I cut off the excess material folded over and sewed the pant legs back together. I apologize that I didn’t actually take great photos of my build process, including before photos of each pair of pants. I had to use similar reference photos for the stretch denim jeans, and shots of the already finished Steampunk pants.
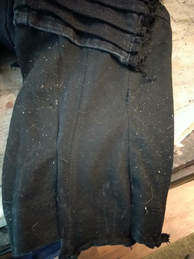
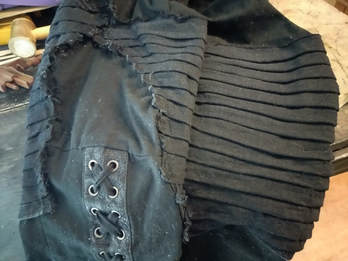
Tear it down, to build from the Grounder up.My next step was to split the Steampunk pants down the outer seams. This essentially left me with a large flap of pants in the front and back connected by the crotch of the pants. I then pinned these large pieces to the workout pants, before cutting away the additional layer of workout pants on the inside that would make the pants unnecessarily two layered. Since these pants were also originally puffy at the knee, I had to take in the knee area until it was fitted. I sewed these two pants parts together before adding any of the denim detail pieces, and I used a basic straight stitch to combine them. The stretchy workout pants along the side help to accommodate getting into the pants once they are all sewn, especially since the focal pair aren’t stretchy at all so there’s zero give to the fabric.
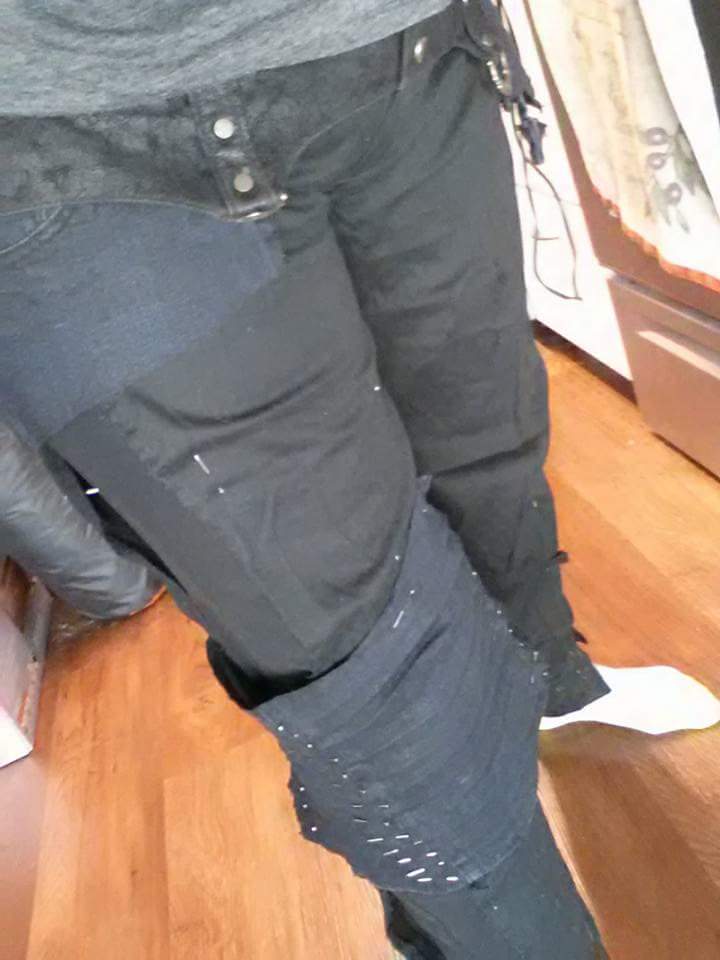
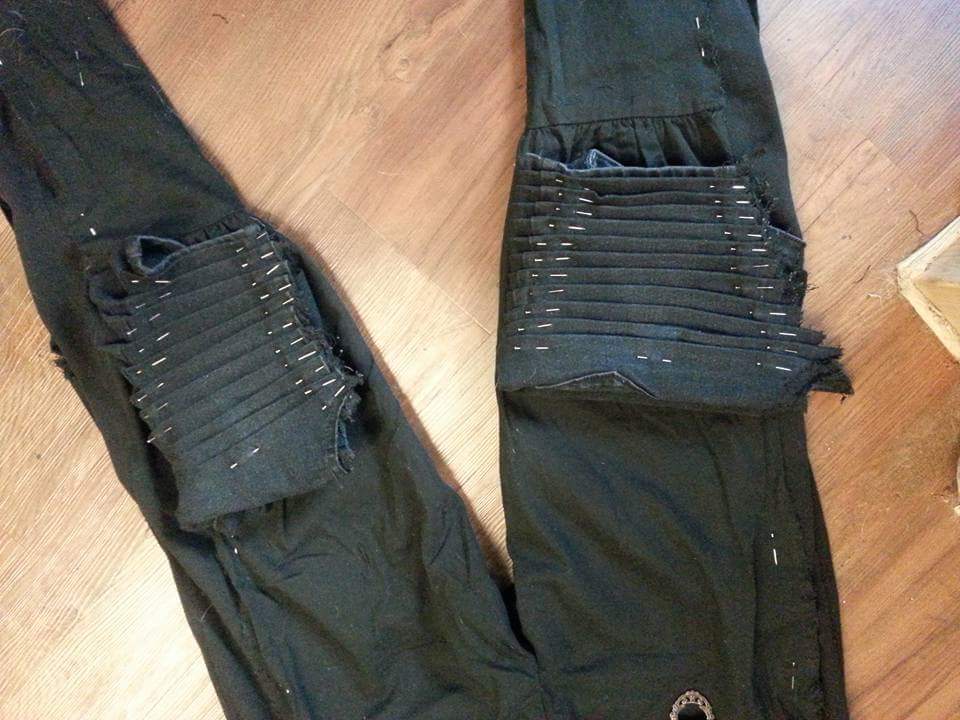
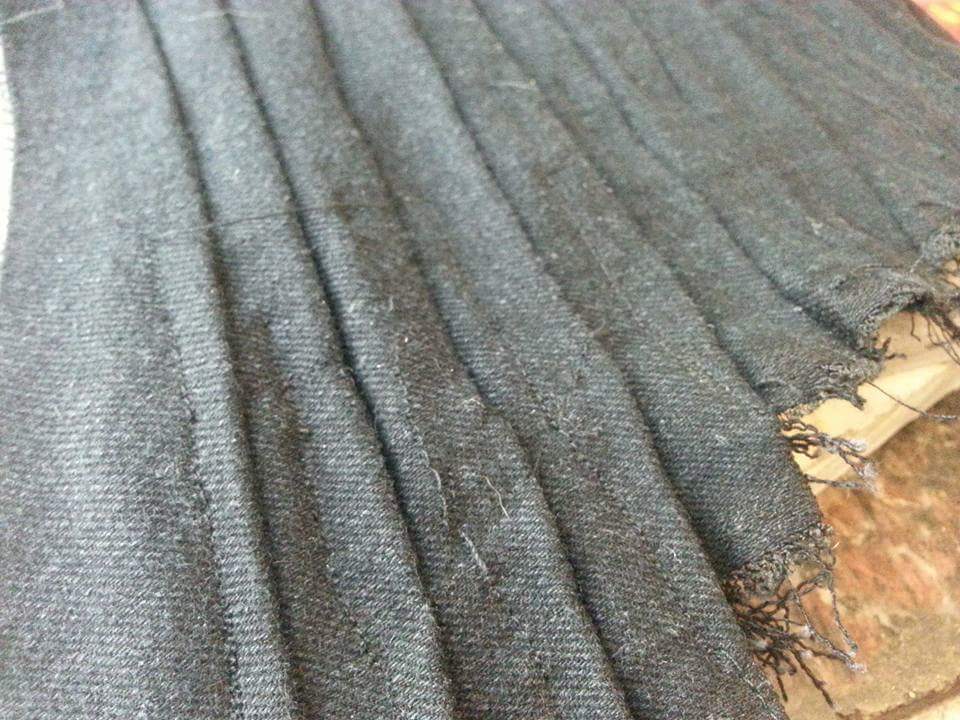
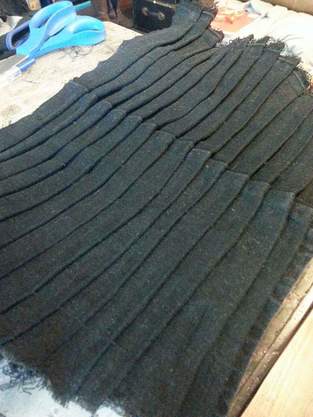
The stretchy denim jeans were dissected into four parts. The legs of the jeans were cut off just under the pocket lines so that all four pockets could still be used. The front button and zipper section were cut off since the Steampunk pants already have a button/zipper combo, and the back pockets were separated by cutting along the seam leaving the original seam on one pocket’s edge. Each leg was opened along the inseam, and then pleat folded until the entire leg of the jeans was one huge denim pleat. This process took several pinning, un-pinnings before the pleats were even on both sides and could be sewn to make them permanent pleat panels.
Don't Forget About the POCKETS!I then pinned the denim pocket sections so that the front pockets could easily be used, along with the belt loops. The back pockets wrap around and add some additional details to the butt, even if they aren’t traditionally placed. I sewed these denim sections over the combined pair so that the finished pants appear to be altered jeans. The matching pleated knee panels tie in the materials to make the pants seem more cohesive. Each pleated panel was wrapped around the knee section and sewn on top of the combined pants.
In the end I have an original pair of Grounder pants. They retain the classic Lexa pant style by being fitted with pleated knee sections, but also have a uniqueness which make them my own creation. Emulating post apocalyptic characters provides the opportunity for your own artistic expression, and gives you a wicked new style to sport!
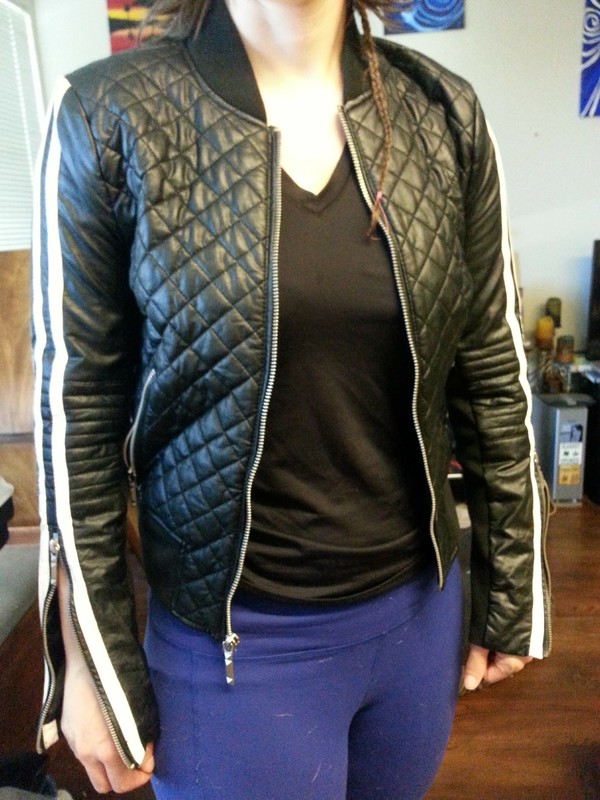
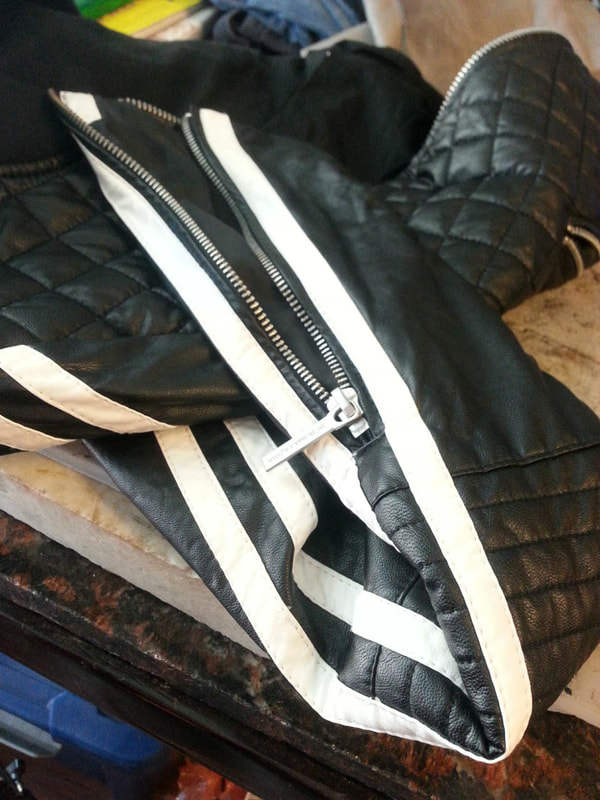
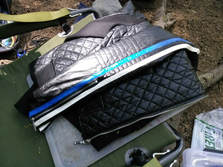
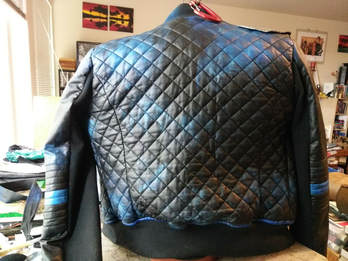
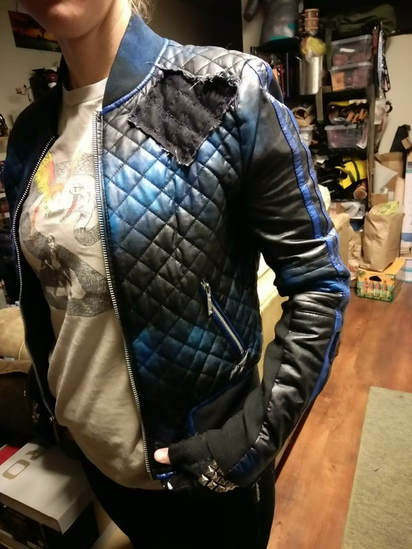
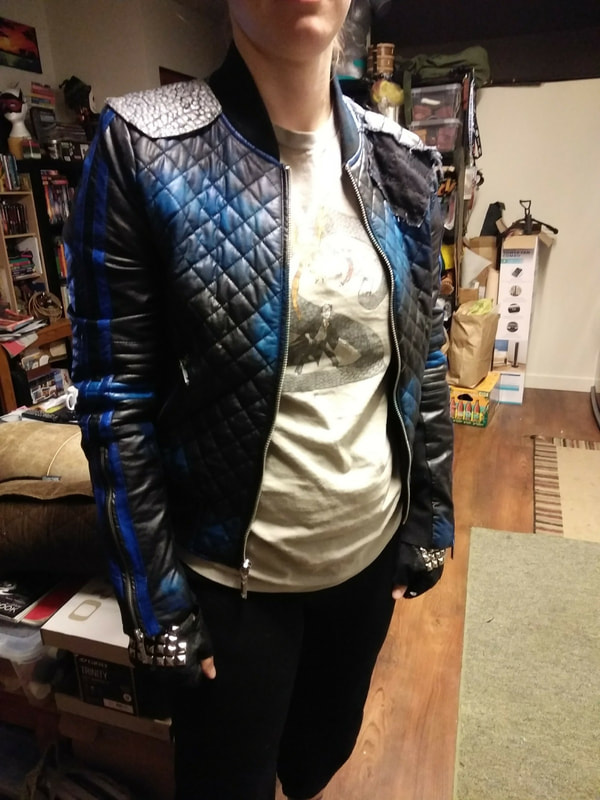
by Willow Enright  Clarke Griffin from the CW's The 100 Clarke Griffin from the CW's The 100 has more outfits than she does plot lines. It certainly provides a vast array of cosplay ideas to choose from when creating your own Clarke. Since I'm making this Cosplay for my girlfriend, Erin, it was her choice and she decided to go with season two's classic quilted bomber jacket with all the blue accents. We'll be adding other ensemble pieces to this jacket to create the whole Clarke Griffin for Erin as a Cosplay character, but today I'm going to focus on her bomber jacket since this really is the main piece.
I happened across the BCBG Maxazria Black Faux Leather Quilted Bomber Jacket on Ebay by chance. When I saw it I knew I had to snag it to save myself the hassle of building the jacket by scratch since it was the perfect base starting point. Of course I scoured the internet in search of several reference photos to use before I began to actually transform it. I attempt to get pictures from all angles if possible to be sure that my reference is accurate enough.
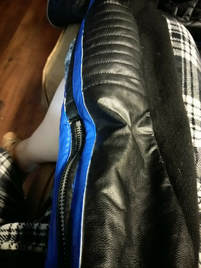
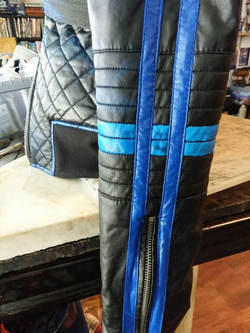
Since this jacket already had white accents where we needed to have blue ones, that's where I started. I used Angelus Blue Acrylic Leather Paint and craft paint brushes of various sizes to painstakingly make all the white areas blue. This took quite some time since you put on one coat of paint and then wait for it to dry before doing another, doing as many as are necessary to get the shade you want. I did 3 coats over the white until I was satisfied with the hue of blue. The black areas only required 2 coats to match the white stripes. For the horizontal arm bands on the sleeves I mixed Angelus Blue with a dab of Acrylic Heavy White to slightly lighten the blue to match the reference photos. The black faux leather only needed 1-2 coats of this color, especially since I wanted these arm bands to look more worn than the darker blue stripes. You can use a painter's tape when working on something this intricate to keep paint off the jacket and zippers, but I didn't simply because I knew that I would have to mess up my beautiful paint job in the end anyways. Once the initial transformation from white/black accents to blue ones was done I waited for it to fully dry, 24-48 hours.
The next step was to add the blue highlights that appeared to be spray painted onto the jacket. For this step I again used Angelus Blue and Acrylic White only a very small amount on a sponge so that I could lightly dab it over the jacket, which I zipped over my body double so that I could see exactly where I was highlighting with the blue in comparison to my reference photos. I didn't blend the paint on the sponge but rather used a downward motion while dabbing with the sponge to mimic a spary paint can pattern. When I was done with the first pass, and while I waited for it to dry, I checked my reference shots again to see how accurate I was on the first blotching. I felt that it required more color so on my second blotching I used a medium amount of pressure to dab the same spots with more blue paint before leaving it to dry another 24 hours.
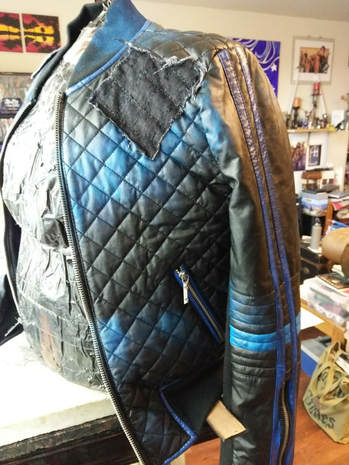
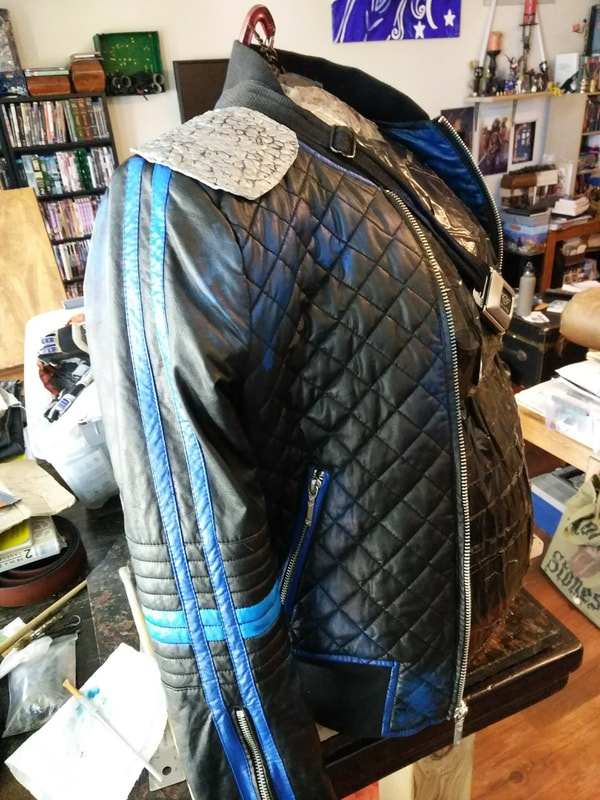
In the meantime I did some mild experimenting with different materials trying to figure out what would mimic Clarke's patches closely enough. For the left shoulder I found that using jean material would best match, only the scrap pair of jeans I had in my sewing scrap bin were blue. So, I took a good ol' Sharpie to the square of material transforming it into black denium. I left the edges to naturally fray, but colored them to match before hand sewing this patch into the diamond stitch pattern on the jacket. I realized after the fact that I didn't double check my reference picture, so my patch is diamond shape looking while Clarke's is actually a bit more square shaped... hence, the importance of checking your reference shots even when you think you know what you are doing. Alas. I wasn't going to undue all those hand stitches to turn it, so mine's a bit unique.
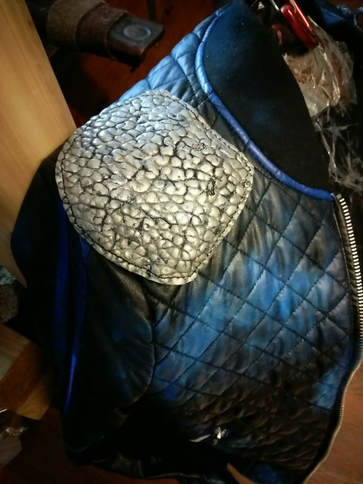
The right shoulder patch was tricker to mimic because whatever the material was that was actually used in the T.V. show is unknown to me. I first tried bubble wrap painted silver thinking that using some sort of alternative material would be more post apocalyptic, but it was too obviously bubble wrap. In the end I used a black Italian Lambskin with a bubbled texture that I painted with Angelus Silver. However, I was careful not to paint the leather fully, leaving the black leather in the cracks of the design black for a more weathered appearance. After it was completely dry this patch was also hand stitched onto the right shoulder.
Antique Black Leather Stain was used on a sponge to go over areas of the blue stripes to add some additional weathering before leaving it to dry fully yet again. The painted areas were then treated with Chamberlain's Leather Milk no. 3 to help protect and perserve it so that when Erin takes it into the woods to give it that final weathering effect all my hard work won't be undone.
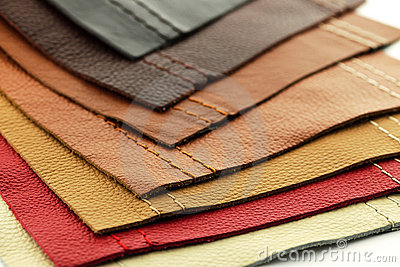
This is how I created Clarke Griffin kom Skaikru's post Apocalyptic bomber jacket! If you too are a fan of CW's The 100, which character have or would you like to do as a Cosplay? Stay tuned for more blogs as I will be working on more Clarke Griffin in the future, as well as Lexa kom Trikru! "Aai badan yu op en nou moun (I serve you but no other)!" by Willow Enright 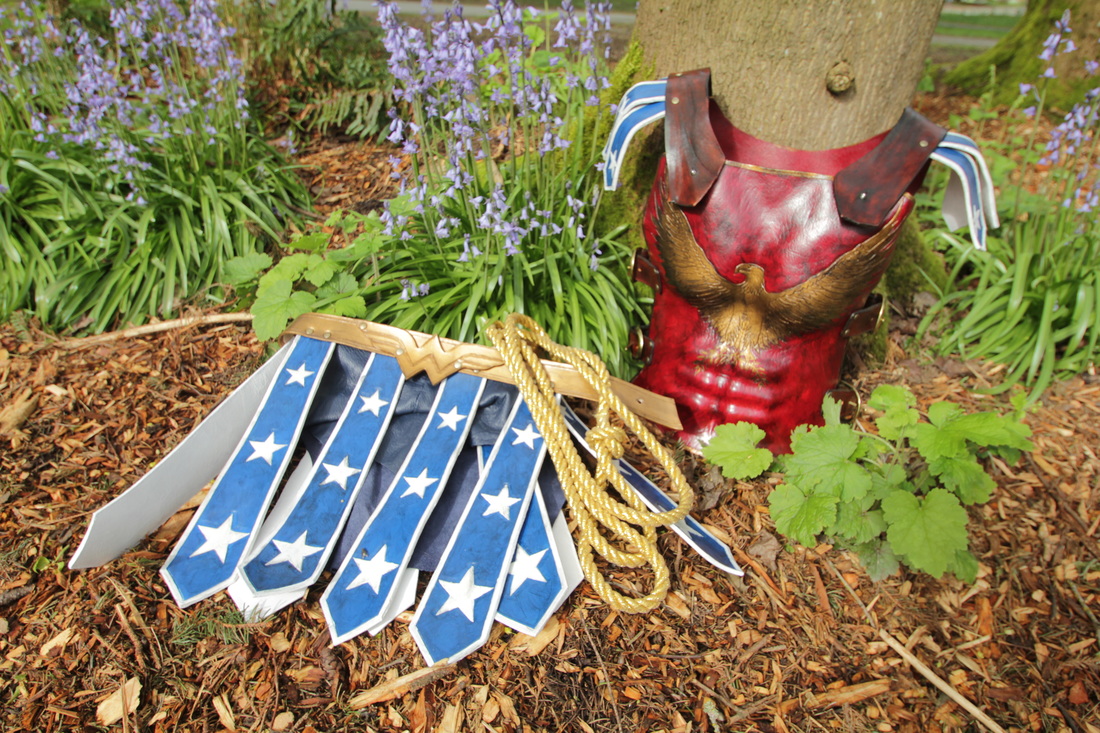 Grecian Style Wonder Woman Leather Cosplay Welcome to the second installment of Building an Epic Leather Cosplay! We're going to cover some more of the basics for understanding and working with leather. There are many different types of leather for various projects, each having their own thickness, durability, and usefulness. Let's see if we can summerize a few of the leathers that you might want to work with as a beginner leather worker. Types of Leather
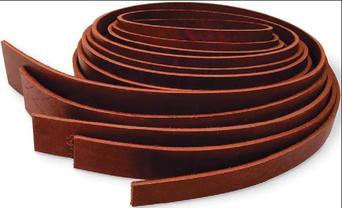
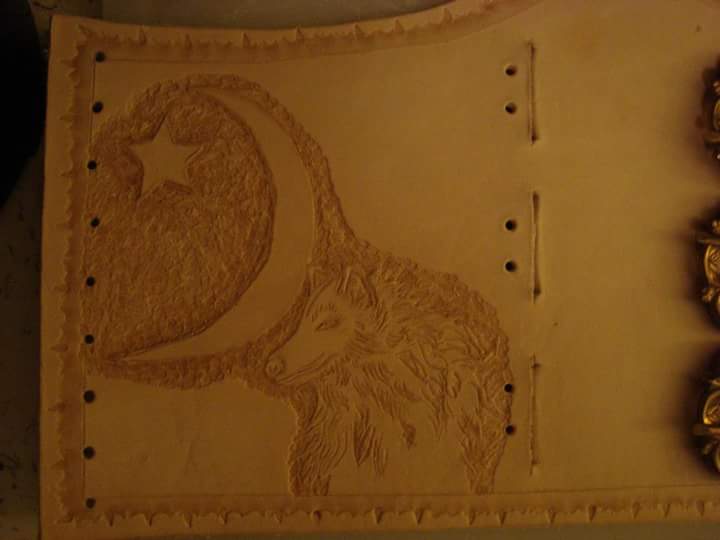
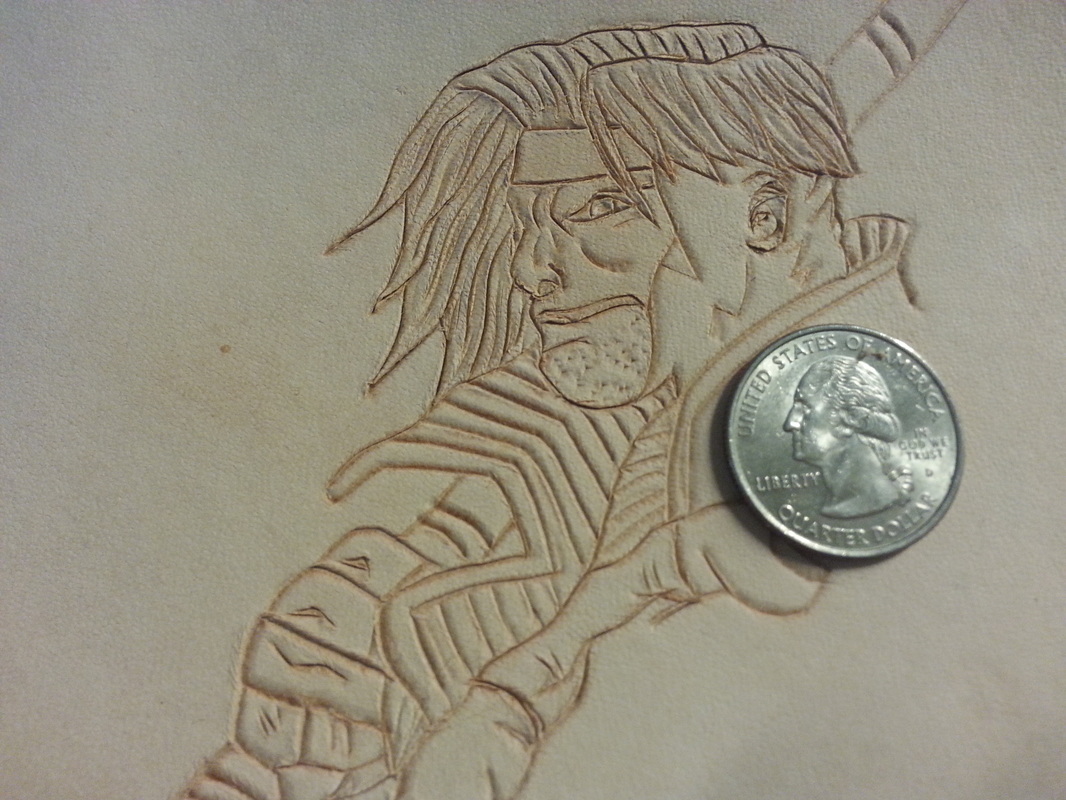
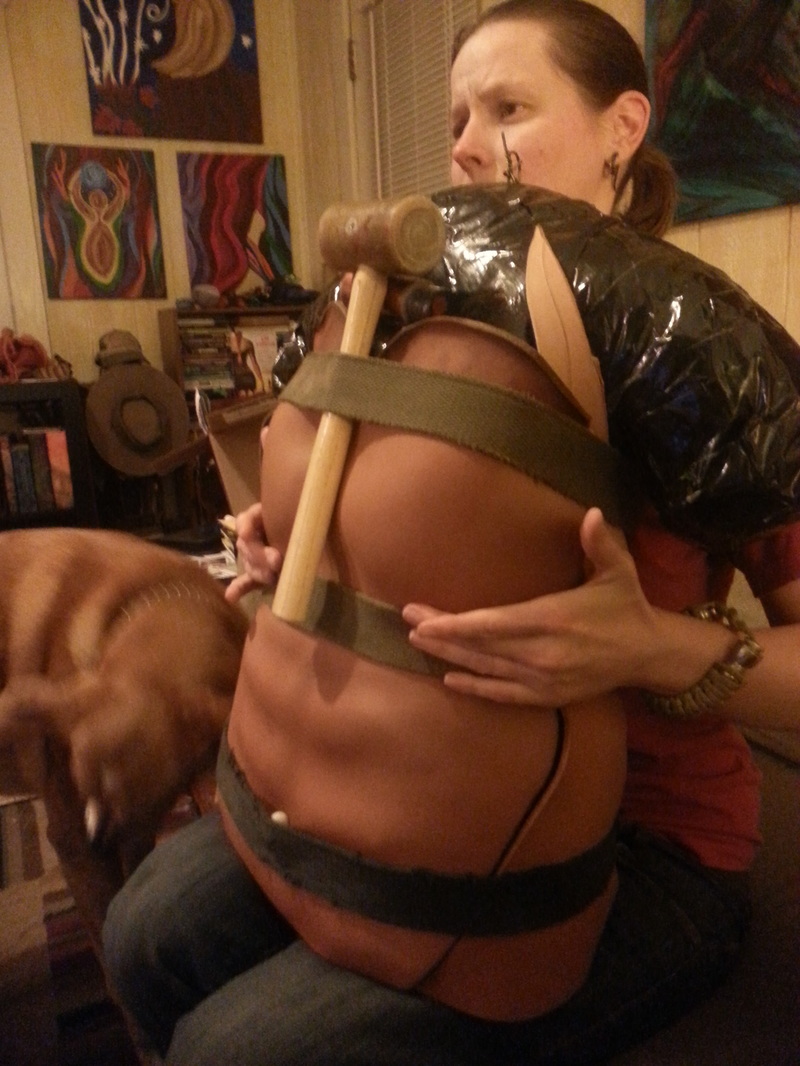
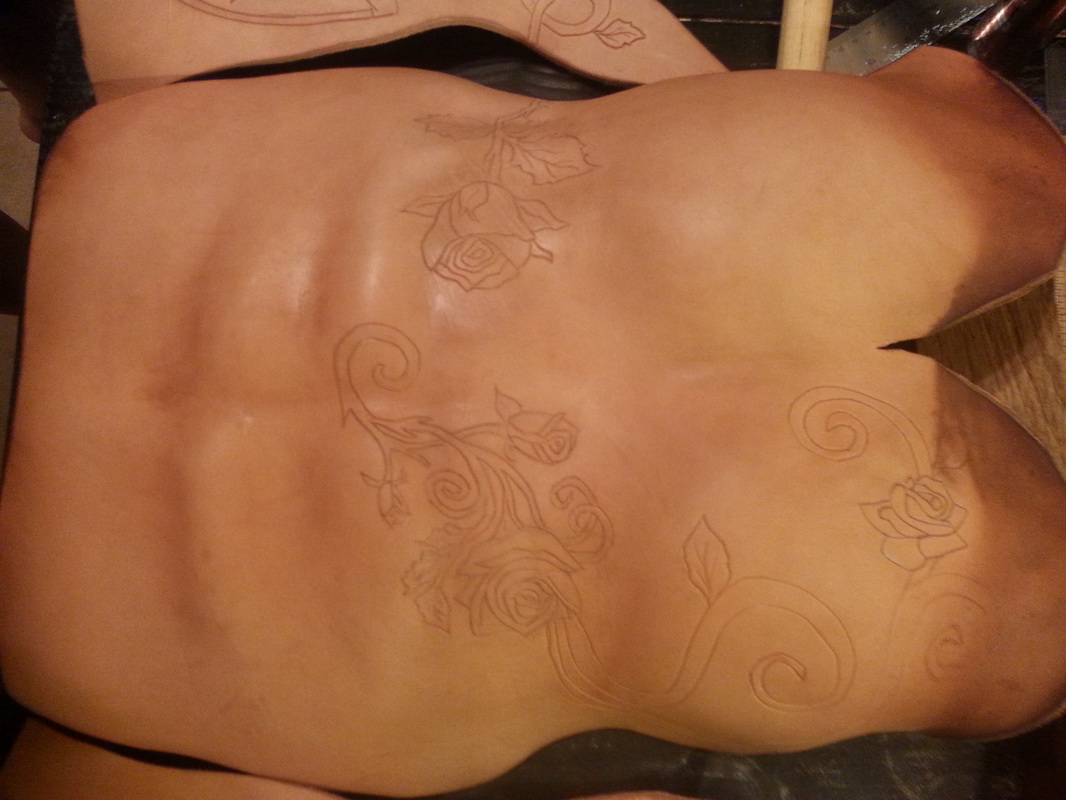
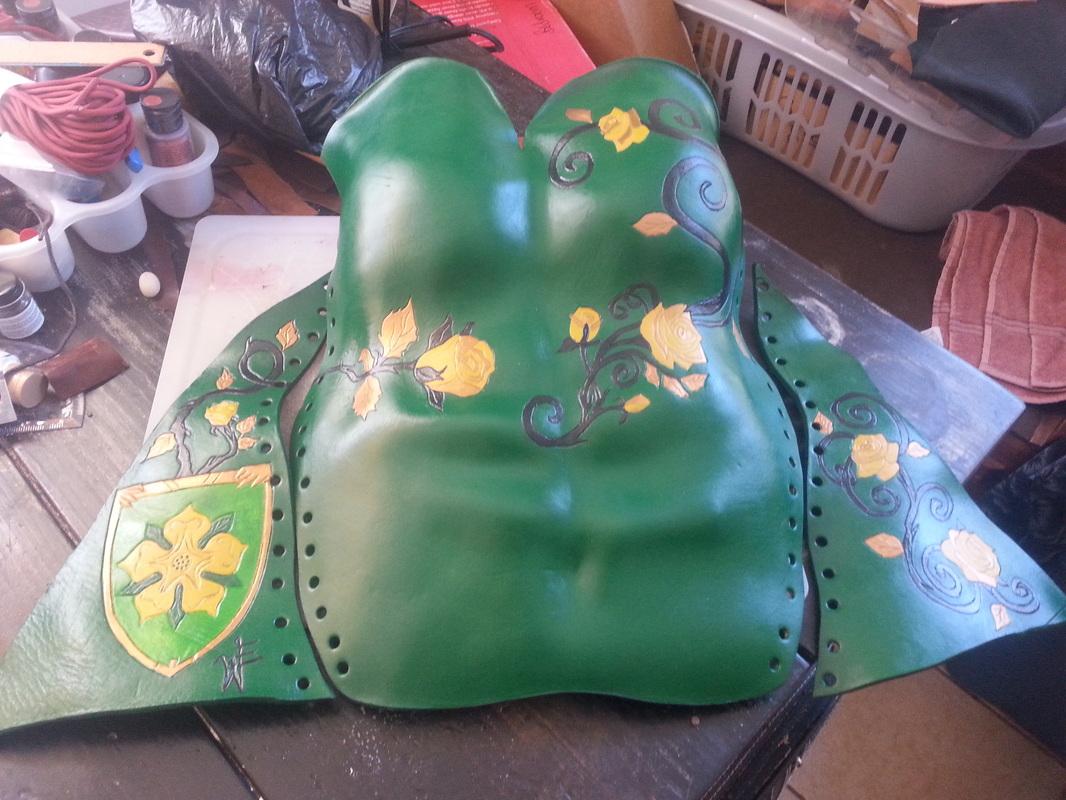
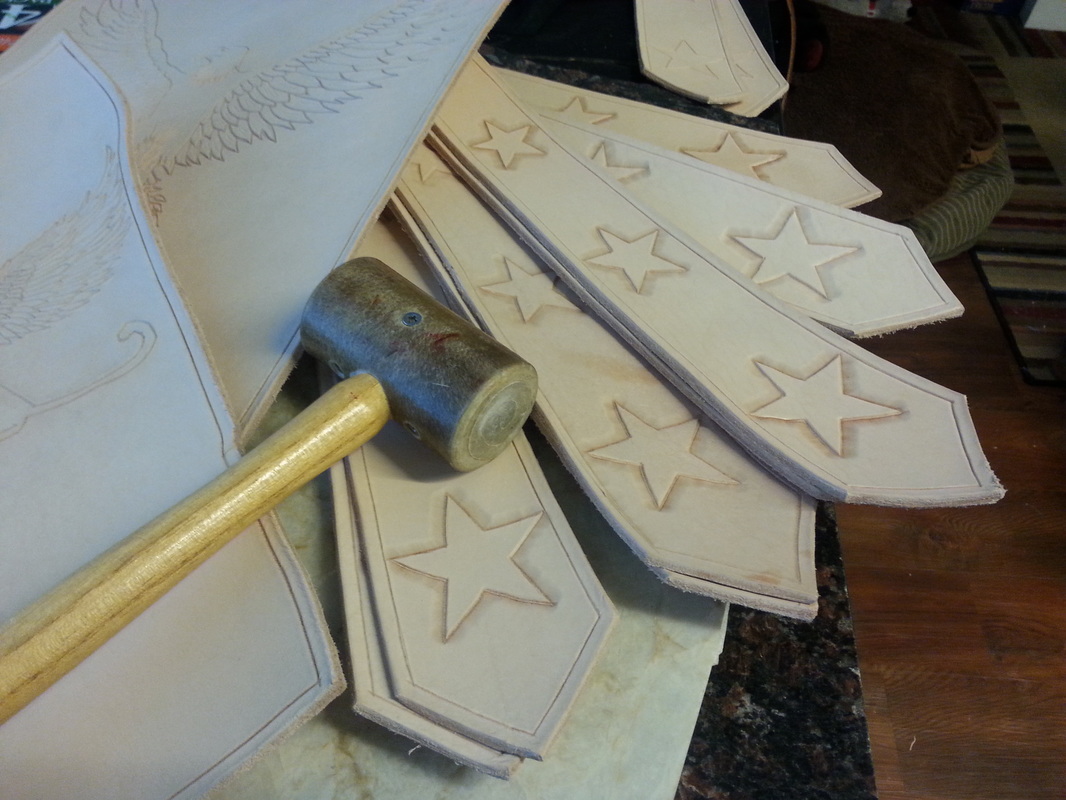
Leather Hide Weight and ThicknessThe chart below shows the different parts of leather hide that are available, along with the ounces and thickness. 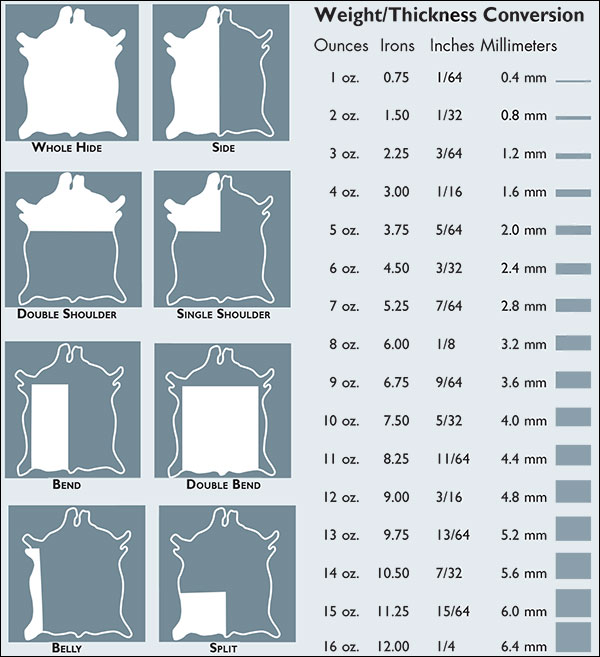 Tandy Chart for Leather Weight and Thickness The chart below is Tandy’s recommendation for what thickness of leather to use for what project, but you can change this up somewhat. You can make journals out of a thinner leather than a 5-6 oz, you can use a 3-4 oz instead. And holsters can be made from 6-8 oz leather and not just 8-10 oz. It depends on what you are trying to achieve. Larping armor should be between 7-9 oz, and armor for the SCA should be more like 10-16 oz. Otherwise, you can use whatever you think is best to achieve your cosplay. 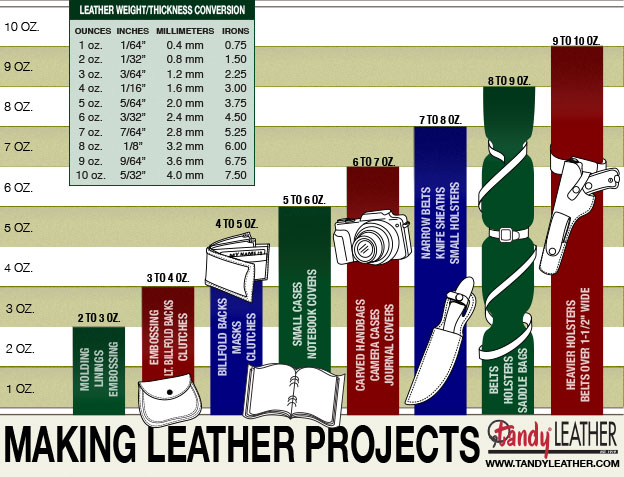 Tandy chart for what leather to use for different projects. Devil is in the DetailsYou can really get a lot of details into your leather project when you use a Vegetable Tanned leather. You use tracing film and a stylus to transfer your desired design to the leather, and then use a swivel knife to carve the details. Case your leather by wetting it and leaving it to almost dry again, and then use the Craftsman Tool Set and Rawhide mallet to pound the design into the leather. This process is often called Hand Tooling.
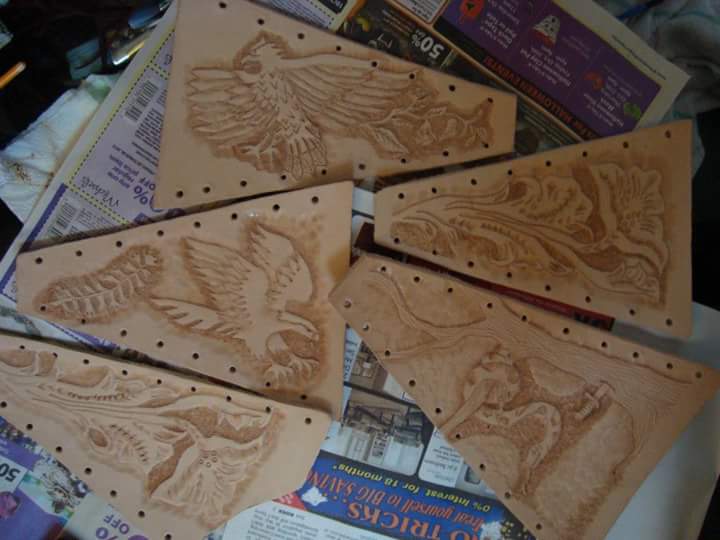
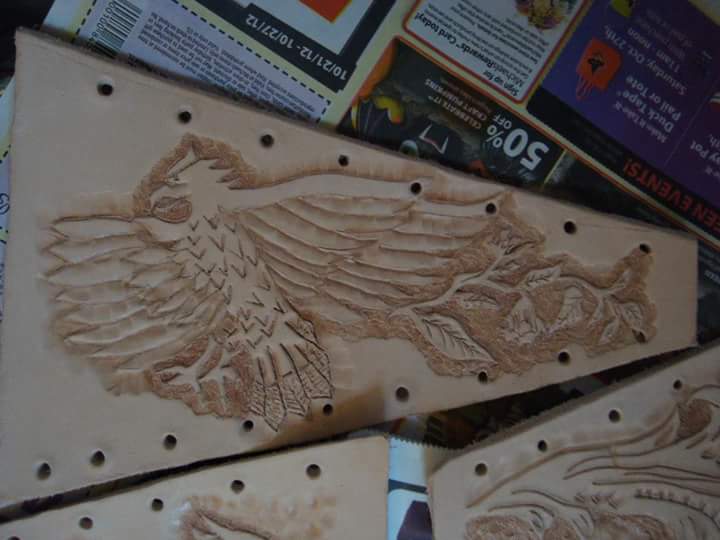
Below and to the left is an example of the design carved into the leather, and below and to the right is the finished tooled and painted design.
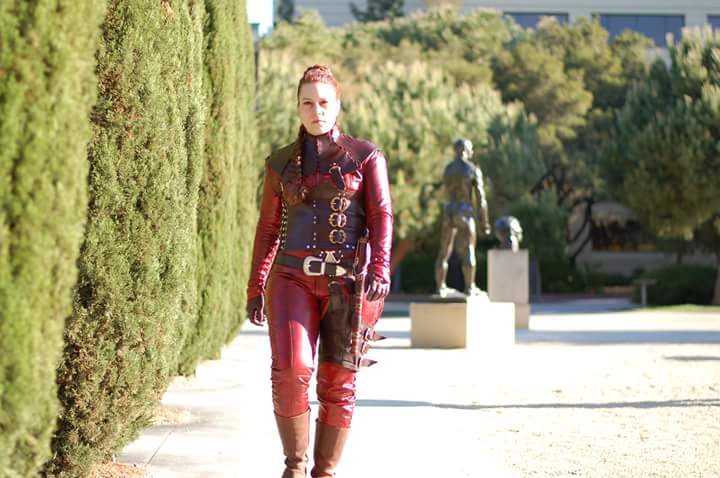
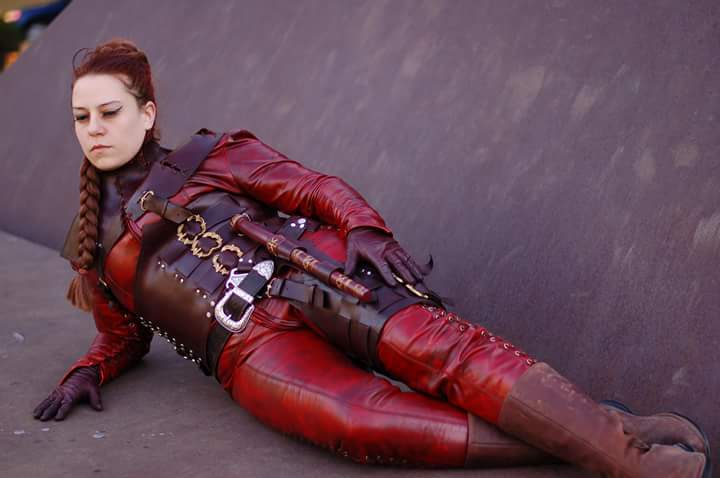
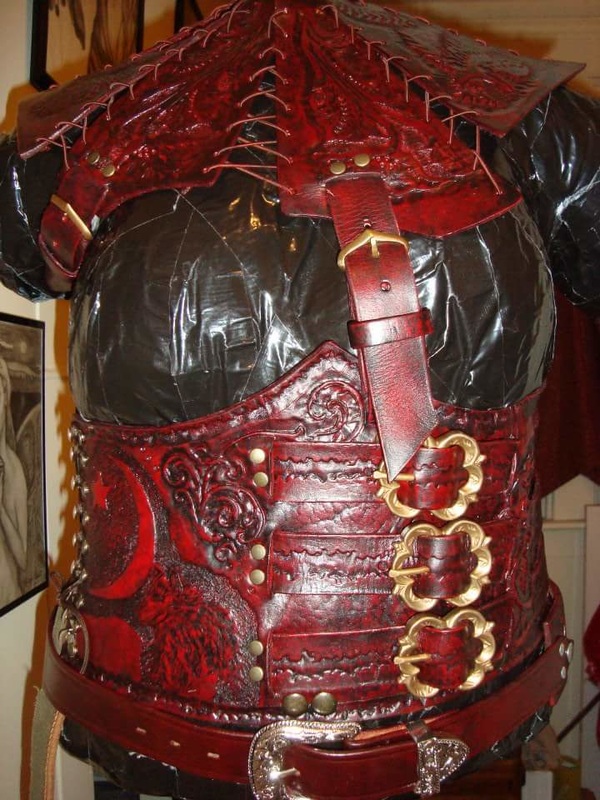
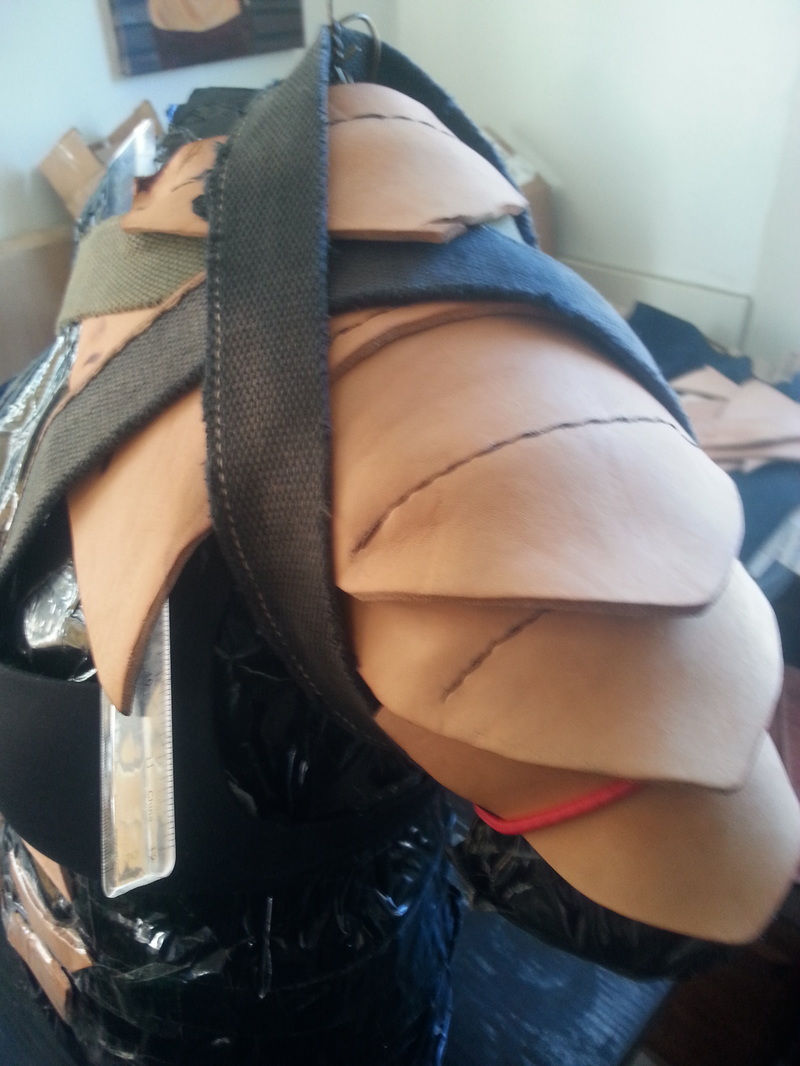
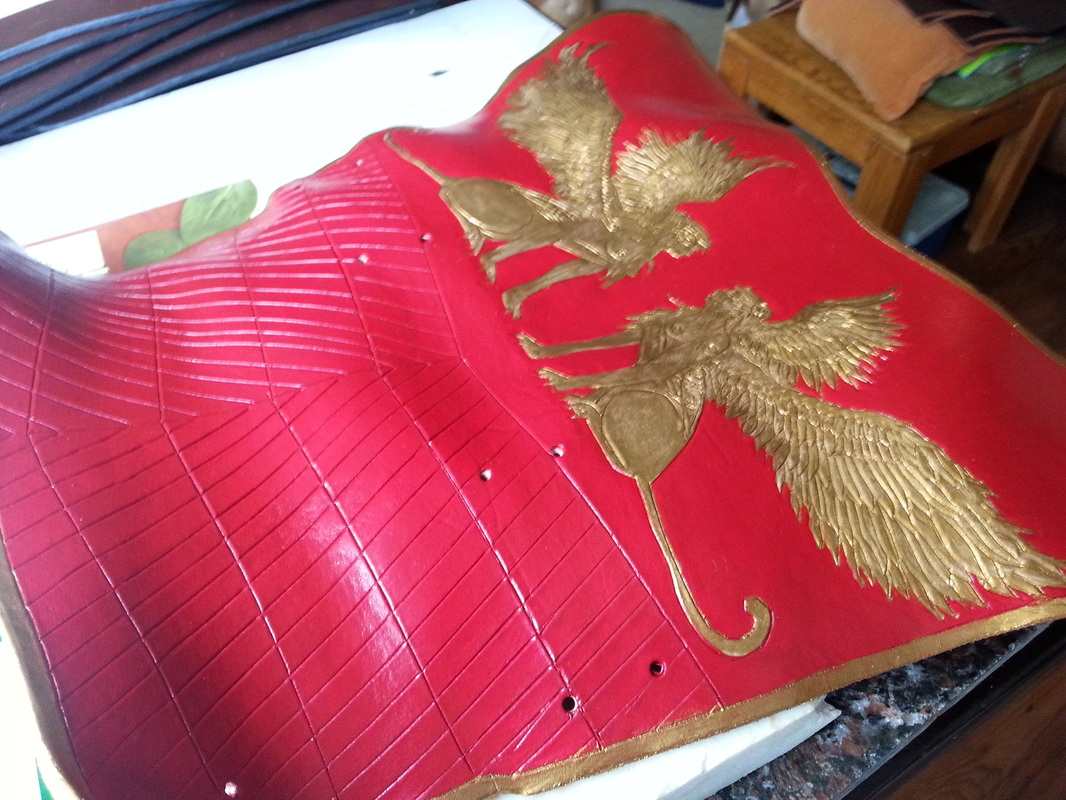
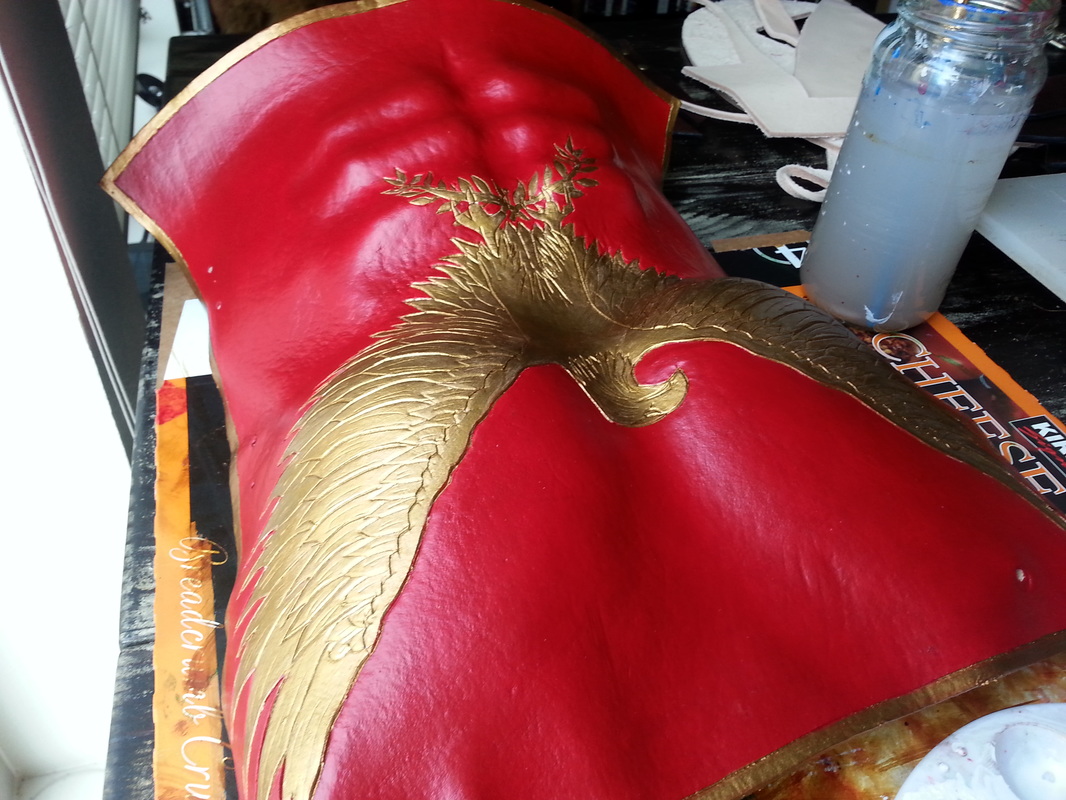
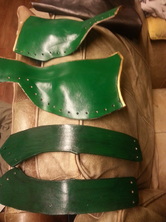
The shots below are of my first Mord-Sith armor. I used a 5-6 oz mahogany leather for everything except the belt, that was made with a much thicker vegetable tanned leather of 8-9 oz. For the first version of this armor I concentrated on the pattern and the hardware to give it the design and feel that I wanted to match the T.V. show, Legend of the Seeker.
 Denna's Mord-Sith Armor, and buckle hardware. The second set of Mord-Sith armor was done with a 7-9 oz vegetable tanned cowhide leather so that I could really tool the design I wanted in order to show others the character’s story on the leather. Some of the raw detailed shots are above, but the finished shots are below. If you want to see how this costume has transformed over time please check out my blog all about the Mord-Sith.
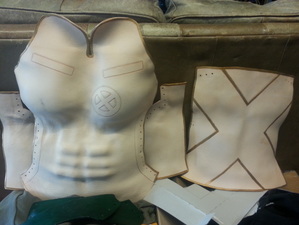
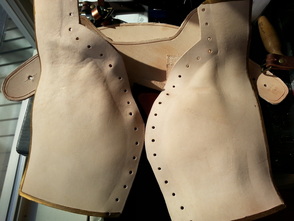
Wet Forming (Shaping)The process of wet forming (shaping) is extremely useful for creating cosplay pieces, especially armor. It isn’t quite as difficult as it seems either. You can check out that process more in depth through my Wet Forming blog. Margery Tyrell Armor Wet Form
Wonder Woman Wet Form
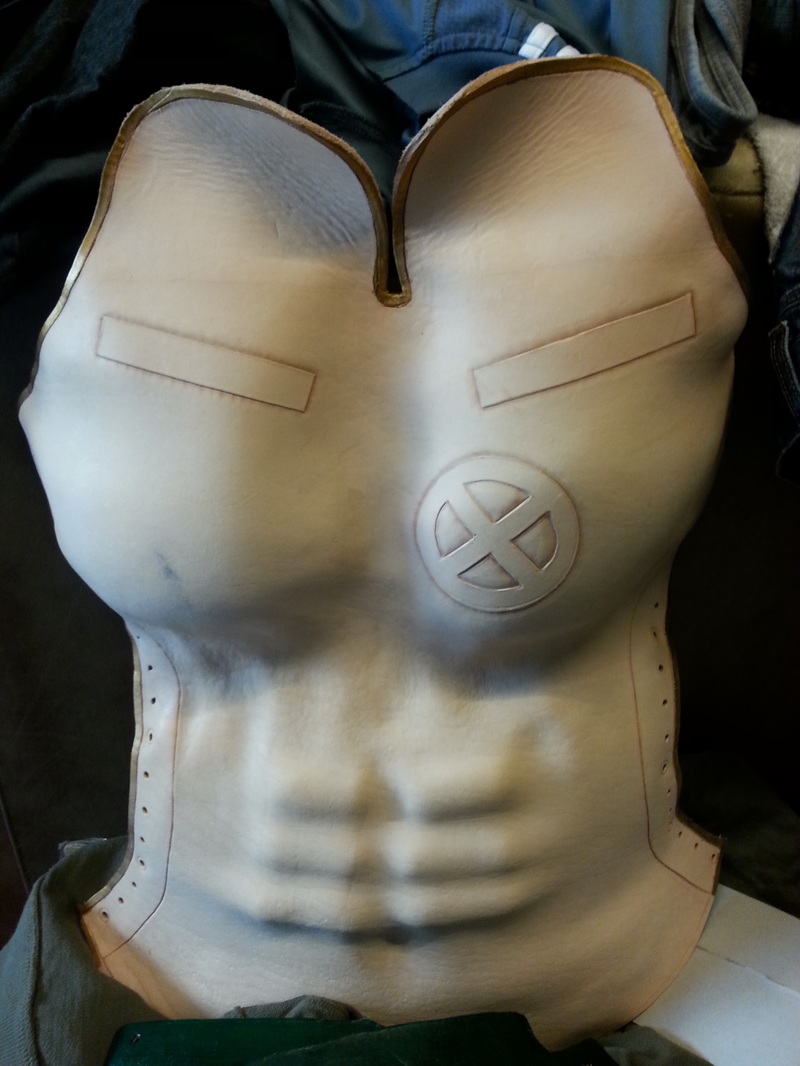
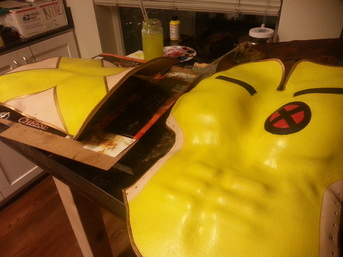
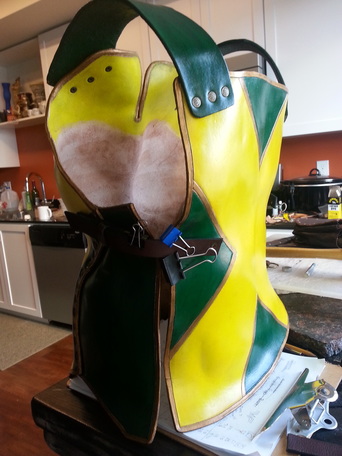
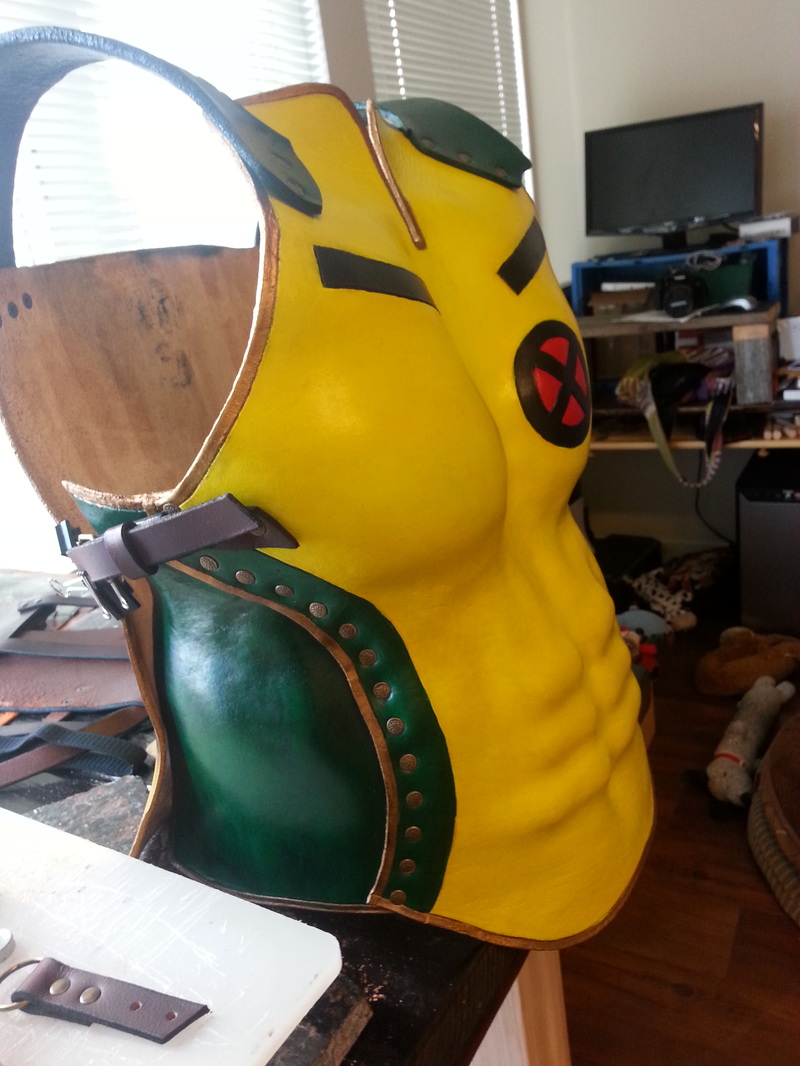
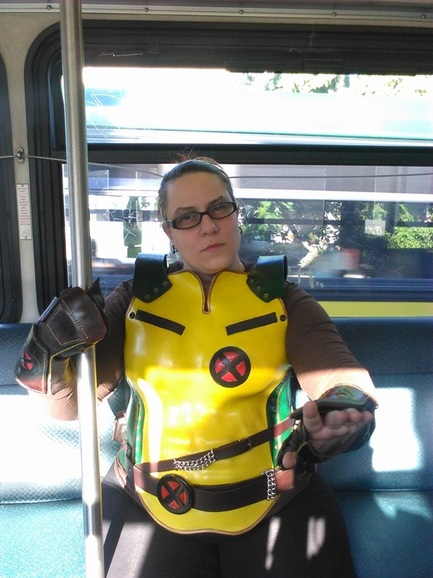
X-Men Rogue Chest Armor Wet Form
There are a ton of amazing things that can be done with leather. Getting yourself some specific tools, and learning the basics of attaching bits and pieces is a huge chunk of it. Trying out some useful techniques such as Wet Forming or Wax Hardening can also take your cosplay to the next level. The tooling can be a challenge, but it’s very rewarding when you get that perfect design onto the leather. However you choose to incorporate leather into your cosplay, have fun with it!
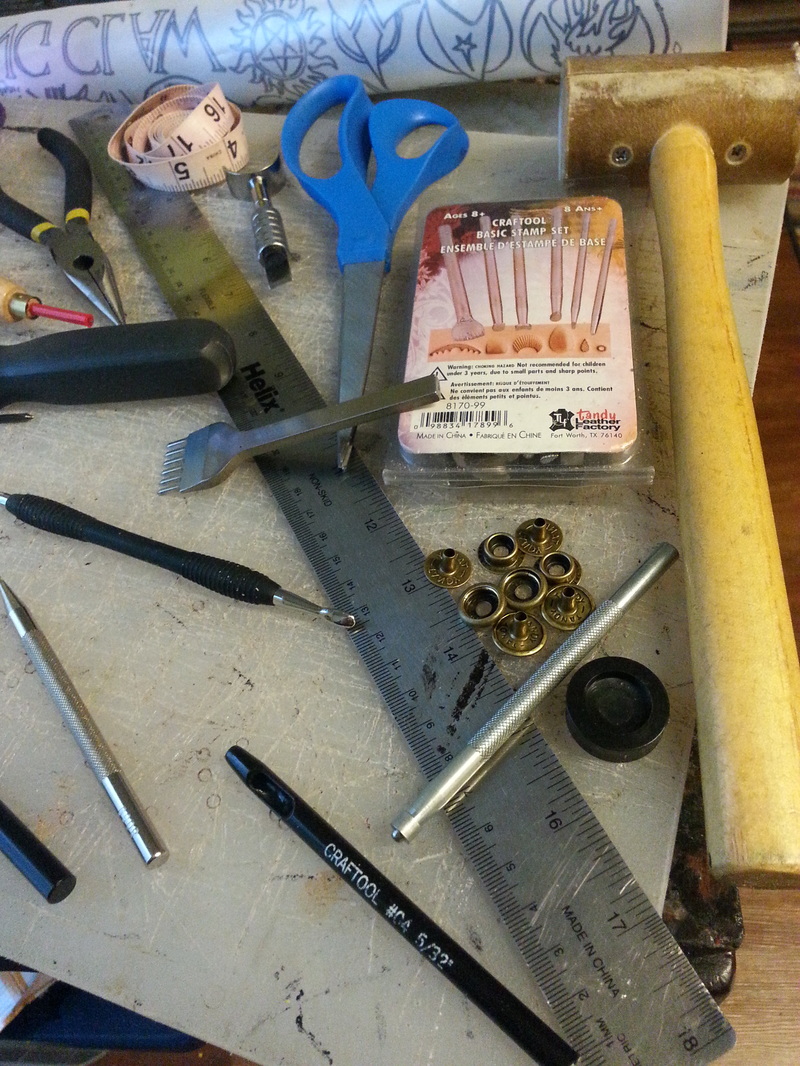
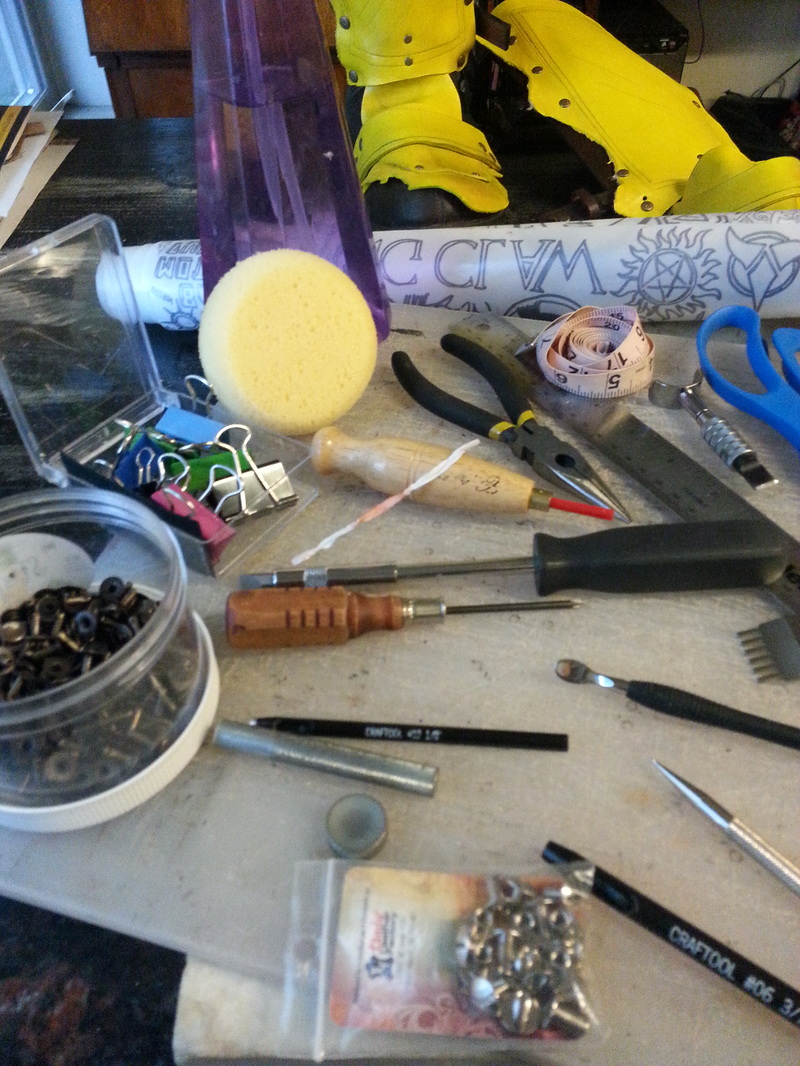
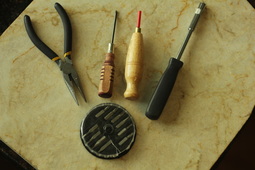
by Willow Enright 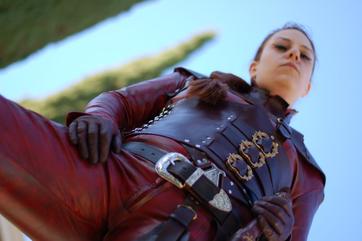 Willow in her first Mord-Sith armor made with 5 oz mahogany leather. When I first started doing leather work I didn’t know anything about leather, leatherworking, or the tools needed to actually work with leather. I simply had a desire to create an amazingly epic cosplay. That desire lead me to many hours of researching screen shots that I could use for referencing the costume I wanted to imitate. Trying to figure out which leather to use or what tools would get the job done was even more hard work, and led to many failed attempts. I would like to help you avoid the same pit-falls that I came across by covering a few of the basics for working with leather.  Leather Cosplay Tool Kit The tools you will need can greatly depend on the cosplay you are creating. My first leatherworking project didn’t involve any fancy tooling design, but focused on the shape of the pattern to match the T.V. screen shots and the hardware needed to really bring the details to the piece. I used a ruler, wooden mallet, double capped rivets with rivet setter, a cutting board, both flat and Philips head screwdrivers and scissors. My rivets looked like junk and wouldn’t stay together that well, my design around the boarder made with the screw driver didn’t really stand out much, and the leather I chose was a bit too thin for armor and wasn’t going to hold up to the strain being put on it for long. However, the cosplay turned out well enough that people were wowed despite my disappointments, and through their reactions I was convinced to try again which led to one of the greatest pieces I’ve made to date. (link to Mord-Sith Blog) Leather Cosplay Tool KitI’ve put together a list of tools that I think would be helpful for the cosplayer or beginner leather worker.
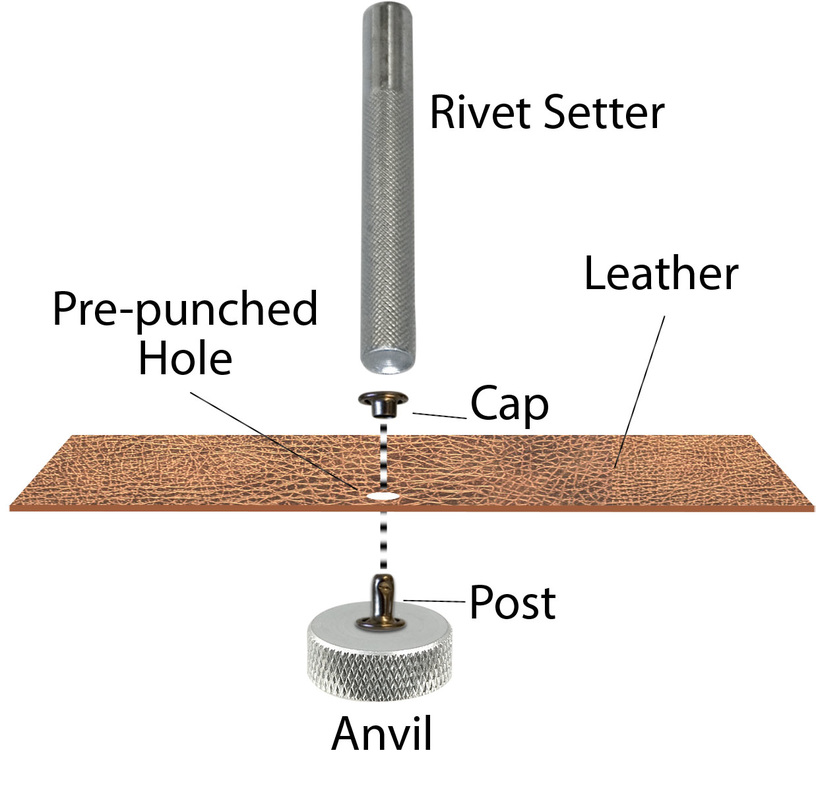
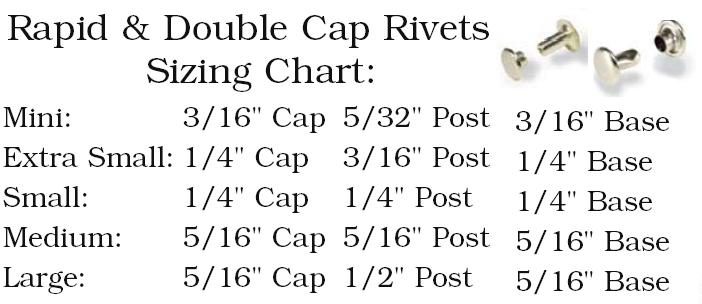
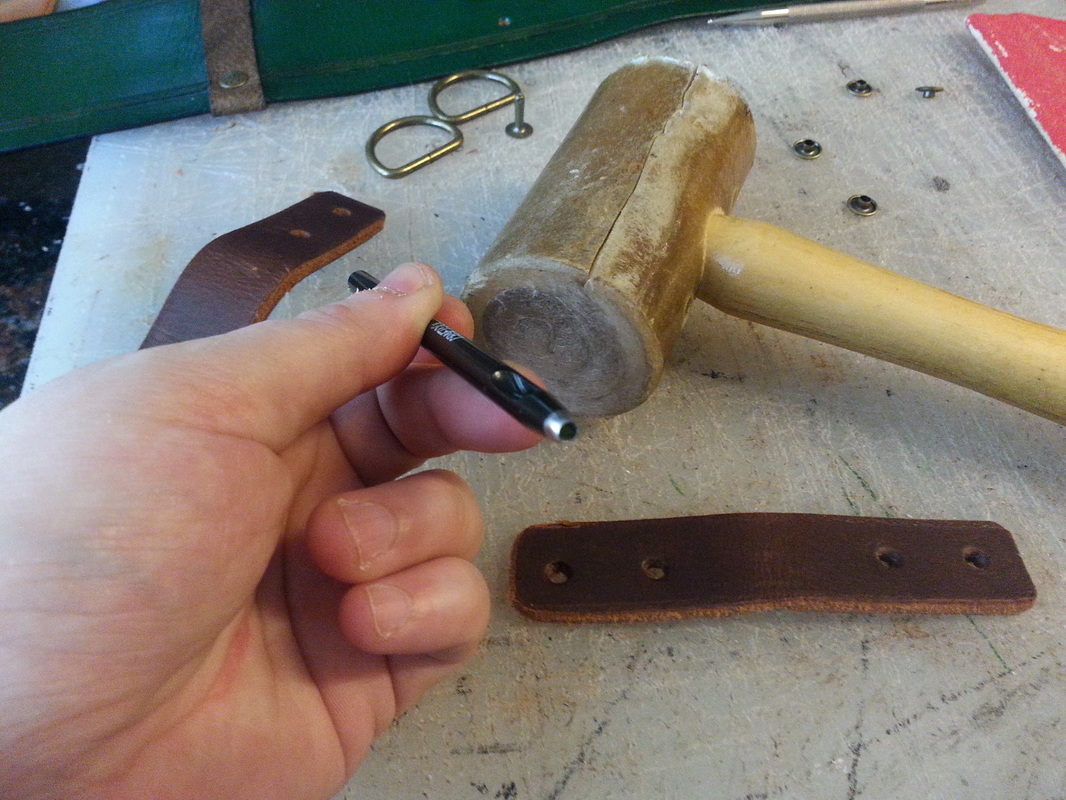
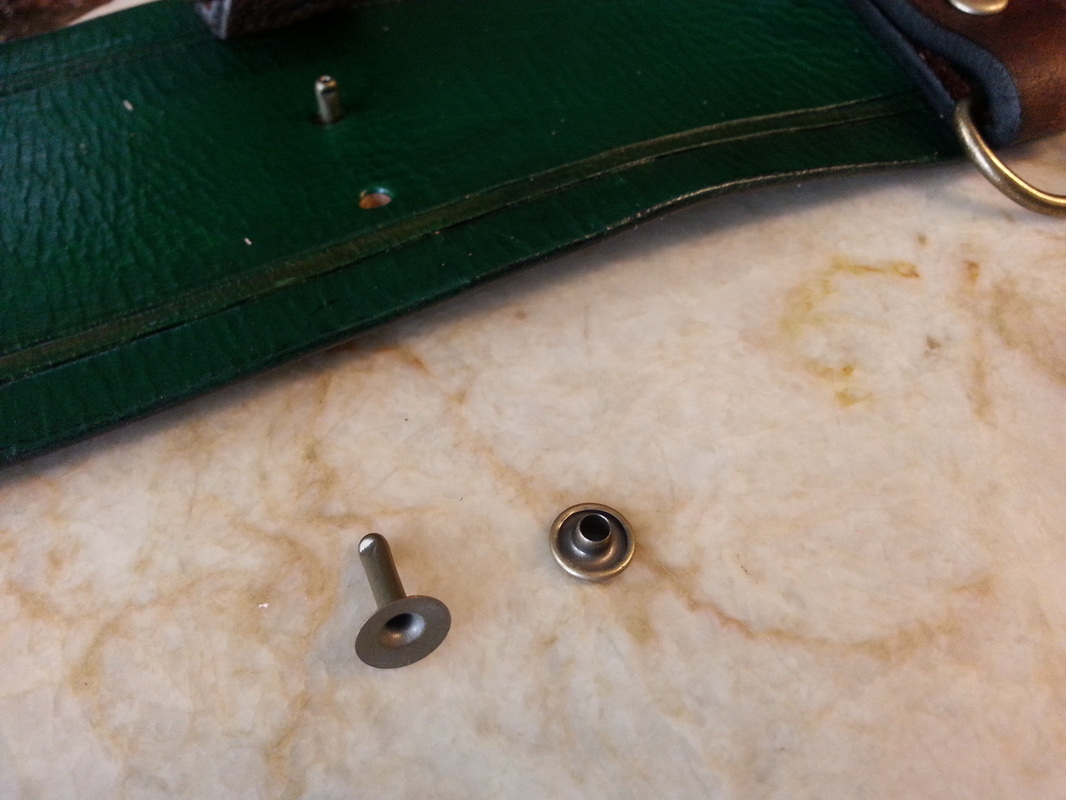
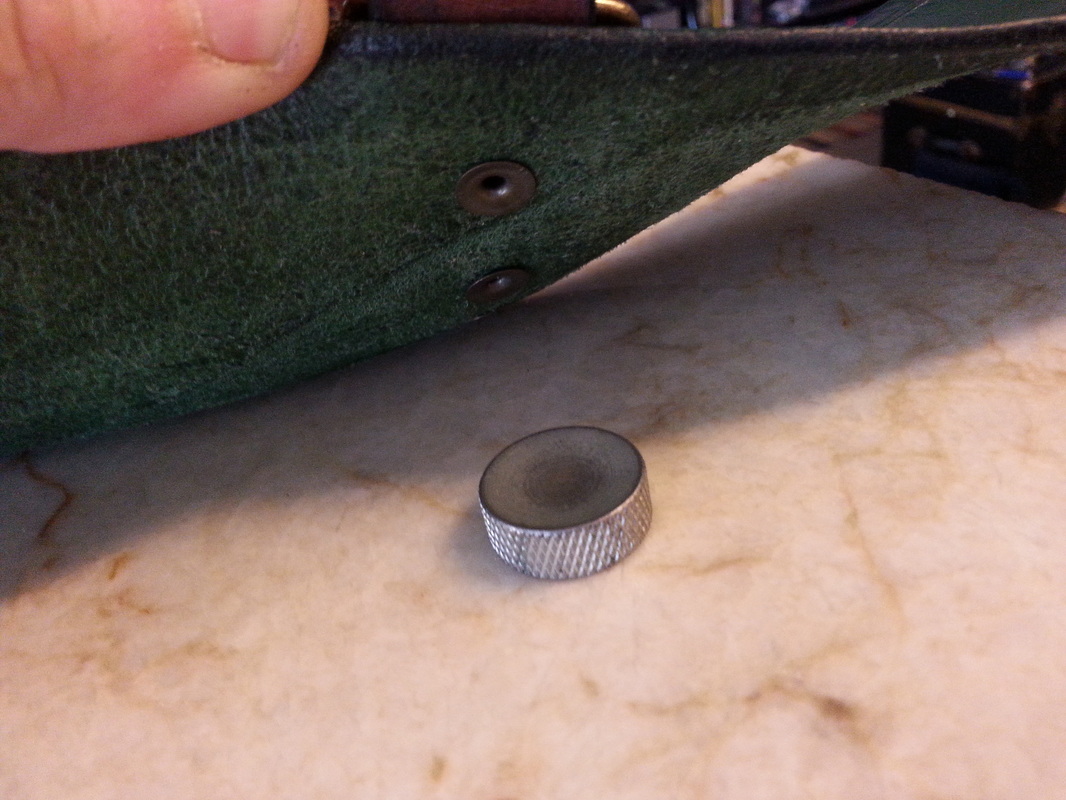
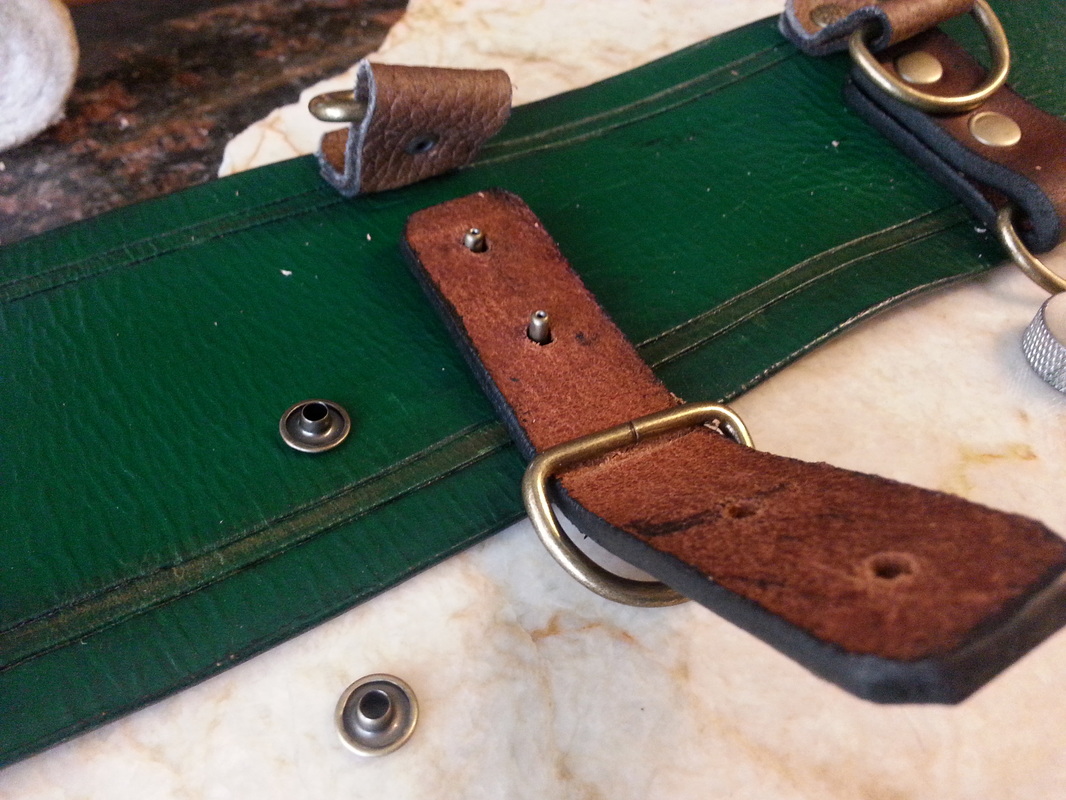
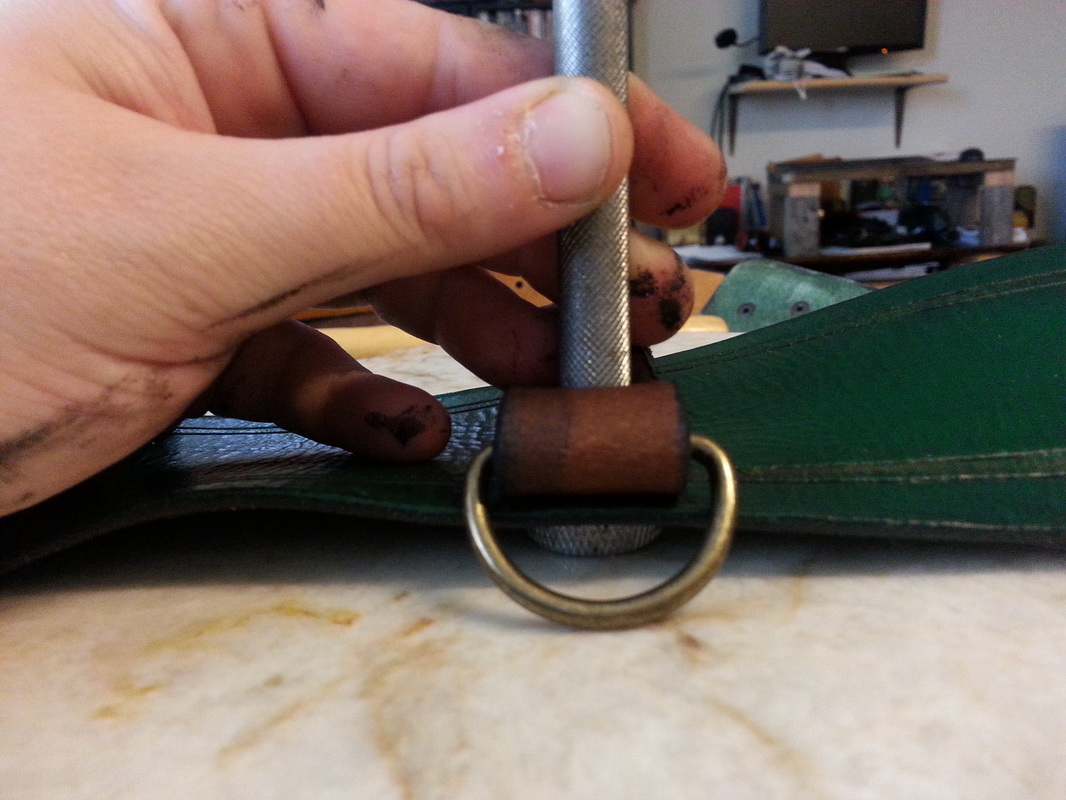
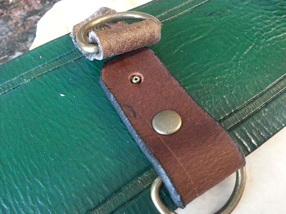
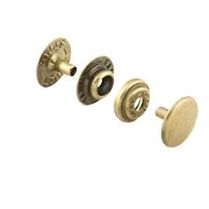
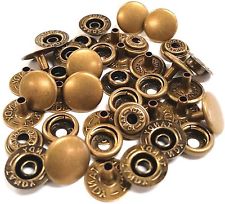
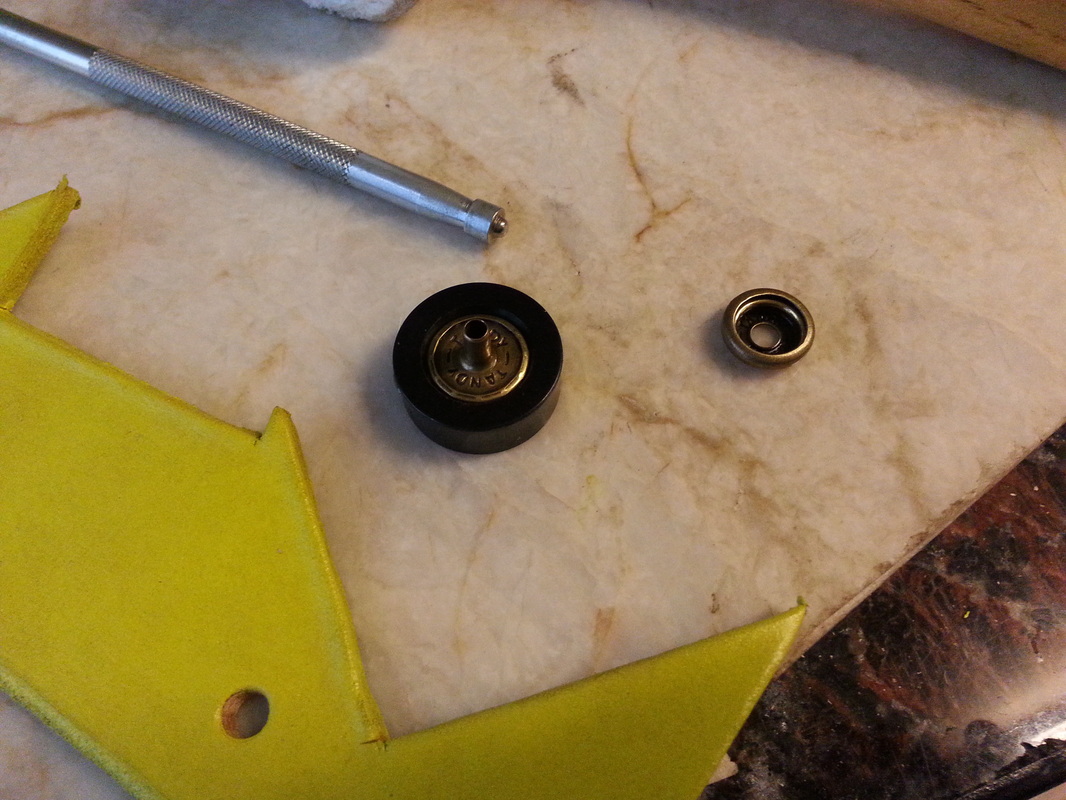
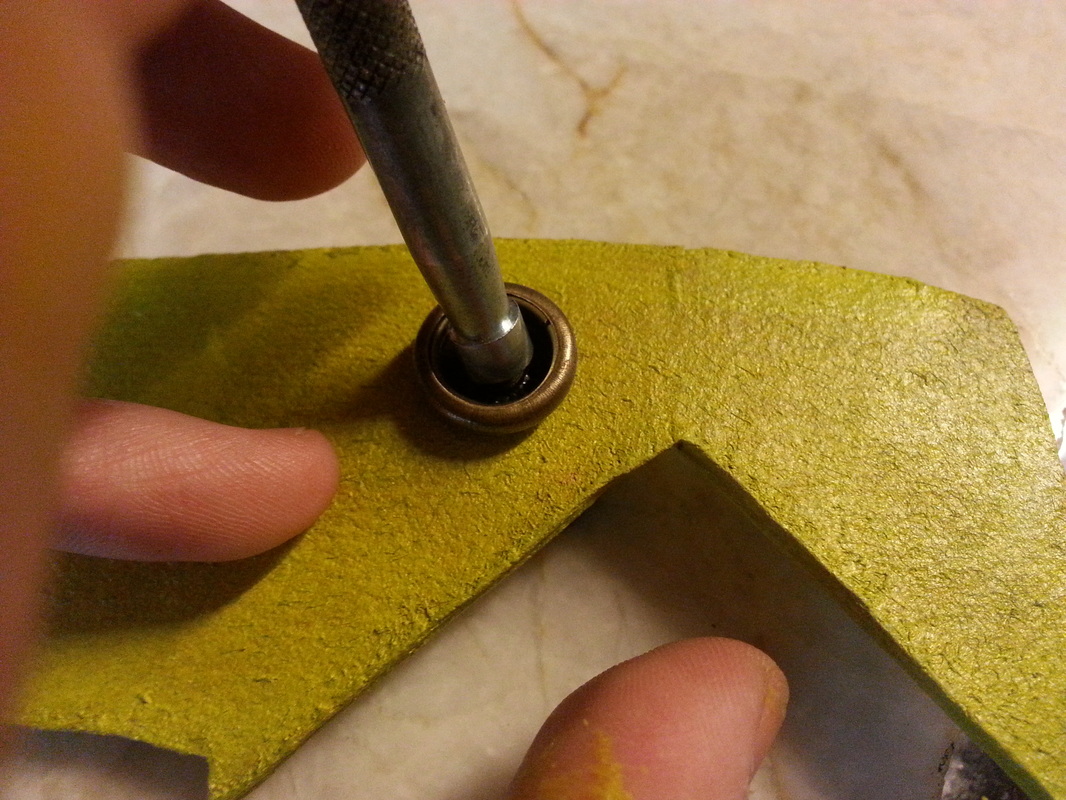
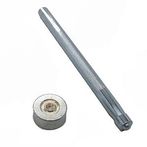
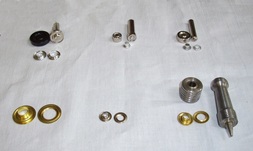
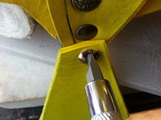
Having many tools for various purposes will be the most helpful for leather working, but you can really do quite a lot with the list of tools I’ve put together. I recommend that you first figure out what costume you want to incorporate leather into. Then you can decide on the tools that will work for that project, and the ones you won’t need can wait until you do need them. This way you can build your tools up slowly and don’t kill your pocketbook. 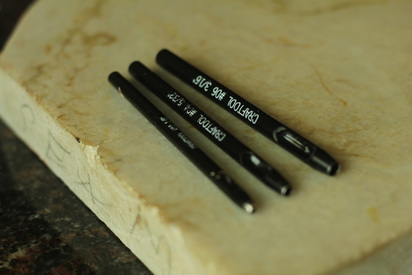 #2, #4, #6 hole punches There are several different sizes of hollow hole punches and you will need at least three for the basic fasteners. Hole Punch #2 (Rivets) #4 (Snaps) #6 (Grommets) You can buy a set of six of these punches at Home Depot for $28, or even less if you shop around online. The Swivel Knife is great for cutting round or curved edges, or for making detailed cuts into the leather, and can be purchased for $18. You can also use it to cut thick leather. Scissors can be used on leathers 6oz and less, or for trimming edges on thicker leather. 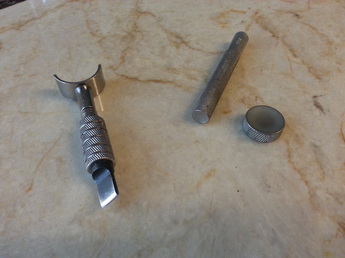 Swivel Knife and rivet setter and anvil I recommend the Rawhide Mallet over the wood because it will give you cleaner rivets, but some people prefer the poly head mallets. You basically want something heavier like a hammer, but not a hammer because that will damage your tools, this will run you around $15.  Rawhide Mallet When you want to fasten something permanently then riveting is the way to go. Having a rivet setter will make sure you don’t squish down the dome cap of your rivet. You need an anvil for the base of the rivet and the setter for the cap on top. Using them together helps to shape the rivet so that the two pieces will meld together to hold fast. You’ll want to choose your rivet sizes based on the thickness of the leathers you will be working with. You can choose to use multiple different thicknesses which will require a variety of sizes, or you can stick to one thickness and one rivet or two rivet sizes. Again, this will depend greatly on your project. A rivet setter can cost $10.
If you want to be able to interchange an aspect or fasten or remove something quickly then snaps are super helpful. Setting them requires a snap setter and the same anvil for the rivets. Plus, you want to use a circular pounding technique when you are putting snaps together. That creates the lip on the stem which will be curled over the bed of the snap, and locking the two pieces together. Similar to the rivet and grommet setters, snaps have their own setters and anvil for holding the cap based on the size. There are grommet setter sets if you prefer to have multiple sizes available, but choosing one to start with is workable. Remember to implore the circular pounding technique for setting snaps. Snap setters cost anywhere from $12-15.
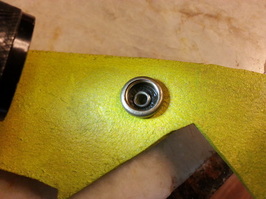 Snap set showing the lip of the stem curled over the bed of the snap. Grommets are very similar to rivets and come in different sizes and metals. Setting these requires the proper sized grommet setter to the grommet you are using, and the grommet anvil which is shaped different that the rivet anvil. It sort of resembles a donut. Variety can be the spice of life, and snaps can definitely add spice as well as practicality. There are different sizes but I prefer the line 24 or line 20 snaps.
Having a metal straight edge ruler is helpful for all straight edges you might need to make, and an absolute must have. Also, being able to utilize a soft sewing measuring tape will make fitting patterns to yourself easier, and allows you to take measurements of yourself or round surfaces. 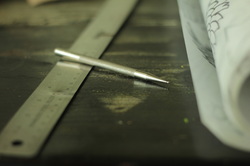 If you want to do any designs on your leather you will want a stylus and tracing film to make transferring your designs in detail to your leather easier as well. Plus, it allows you to keep that same design for quick future use. When googling stylus, make sure you type in "leather crafting stylus," otherwise you'll end up with a new stylus pen for your tablet. Leather stylus will cost somewhere near $10.  A sponge is useful for casing your leather or applying stains and paints. Having a spray bottle will let you soak your leather rather easily while you are working without having to move your leather around a lot. Rivets, buckles, and Chicago Screws are the staples of leather hardware. If you need leather pieces to come together these are the classic ways to make that magic happen.
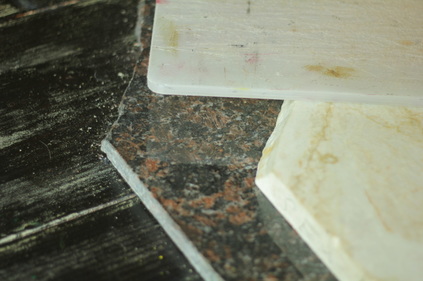 Granite Marble slabs found for free, and cutting board Having a cutting board or poundo board for whatever surface you work on will not only keep you from putting holes into it, but it will also give you a better work surface and likely make the noise of your pounding less annoying to everyone else. If you can find a place that has chunks of left over granite marble from cutting counter tops you can find a piece for a good discount, or even for free. I have three of different sizes that I got for free. Having granite is best for setting rivets, snaps and grommets, but don’t do any of your hole punching on it or you will dull your tools fast. You can set your cutting board on it to punch the holes and then just remove the cutting board when setting things. 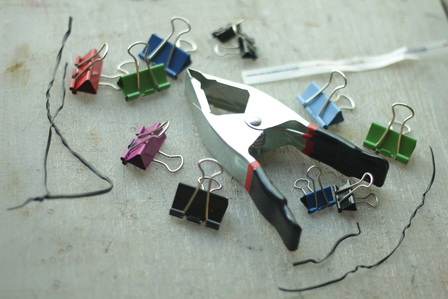 Office clips, twist ties, and heavy clamp. I find having some decent office clips or twist ties can really help me bring together my patterns to make sure that they come together right. You can also use paper brads if you have them and your leather isn’t too thick. Having heavier duty clamps is good for heavier armor making or anything super thick. The Tandy 6 Piece Craftsman Tool Set were the only tools I had for doing detailed tooling for three years, and I put it to good use. You can do all sorts of basic designs with these, and if you have a swivel knife too, then you can do just about anything design wise. The one I use most is the square beveller. 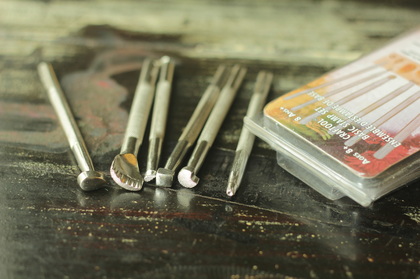 Stay tuned for part 2 of Building an Epic Leather Cosplay coming next week. I'll be covering the different kinds of leather, and the various uses for the different thicknesses of leather, plus a few useful techniques. Please feel free to contact me with any questions you may have.
by Willow Enright 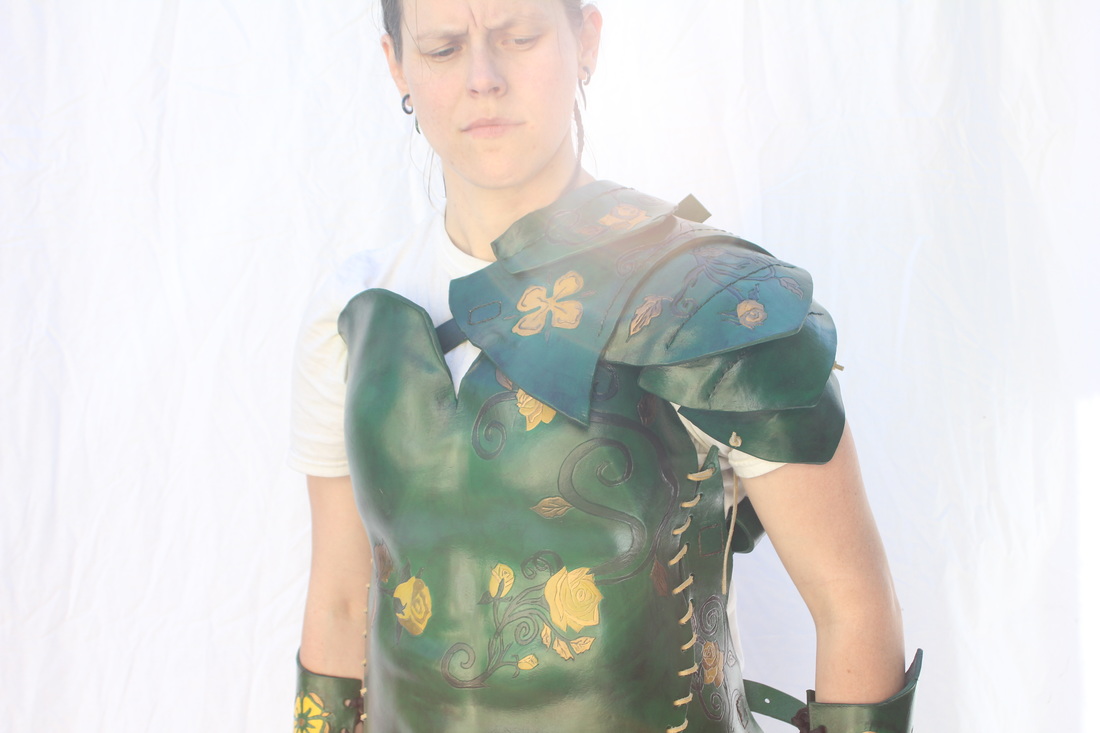 Erin in the Tyrell Armor, aka Game of Thrones. "For Highgarden!" Starting a new cosplay or Halloween outfit is fun. Drafting ideas, looking at inspirational photos on Etsy and Pintrest, rifling through drawers that you haven’t looked at for months, can breathe life into your everyday and make you feel like you have a purpose. Then the questions and doubt start to set in. What if I can’t pull off the character on time? What if I don’t have enough money? Should I have a realistic looking pulse rifle, or a toy nerf gun? I’d have to have to buy so many items. Creating a great cosplay costume doesn’t have to mean all or nothing. True, if you plan to cosplay as Master Chief, you have to go big or go broke, but not every cosplay has to be that grand. It is possible to create awesome characters piece by piece. The trick is to choose your character with that in mind. A good option is something in the dystopian or post-apocalyptic verse. Often times these characters have multiple versions of their outfits, or have interchangeable bits and pieces to add or subtract easily. Mad Max, Hunger Games, Book of Eli, Terminator (after Judgement Day), The 100, The Walking Dead, Borderlands, and Fallout are a few examples of these types of universes. 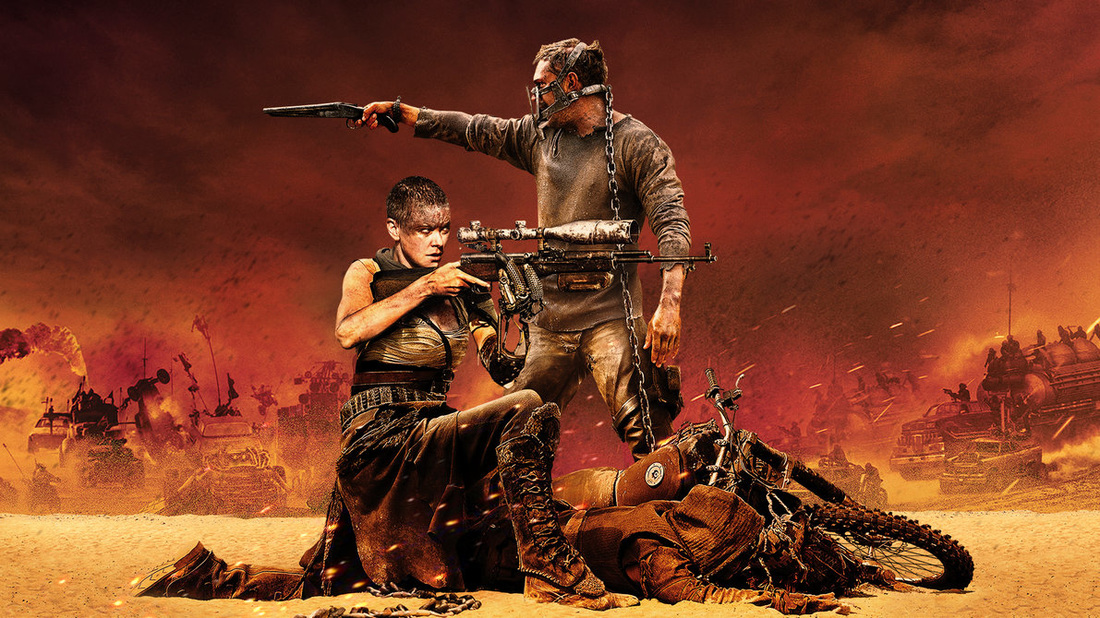 Max and Furiosa from Mad Max: Fury Road (http://www.themarysue.com/wp-content/uploads/2015/12/mad_max_fury_road_wallpaper_1920x1080_by_sachso74-d8r49ti.jpg) Once you pick your character, research them and find out what you can about them. What are their outfits usually made with? What type of footwear do they usually sport? Do they have weapons or props that can be used? Do you have some of the items your character might wear or use already? If you do, all the better. If not, that’s okay. You are going to plan this cosplay for the long haul so you’ll have time to find or make what you need, plus some of it will be improvised while you are creating and perfecting the character. You’ll want to decide how much of your cosplay will be found objects, and how much of it you will want to make. Your time table and budget will both influence your choices, so figure out which event will be your first debut, and how much in the way of funds you’ll need to plan to put into your cosplay. Also, look into last year’s rules for the event before you plan any weapons your character might use as regulations can change for entrance into that event. Then choose what items will cost the most verses those you already have or can acquire for relatively cheap at second hand stores. 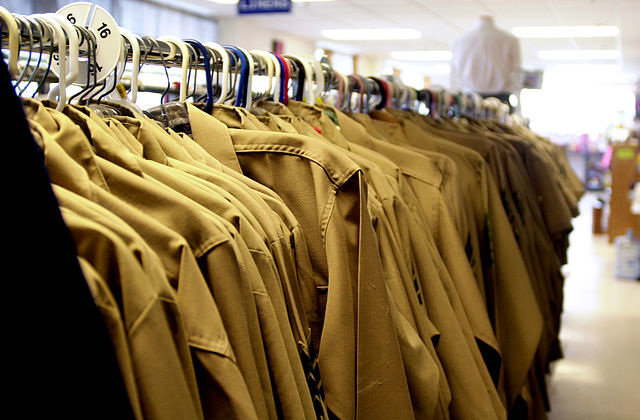 A rack of thrift store shirts (https://upload.wikimedia.org/wikipedia/commons/thumb/a/a4/USMC-05518.jpg/640px-USMC-05518.jpg) I like to divide my cosplay items between easiest pieces and iconic pieces. Identify the top three iconic items for the character and then the three easiest pieces. Determine whether you already have the iconic item, or if you know where to buy it within budget, or if you can make it yourself? For the first version of your character, focus on one iconic piece accompanied by as many of the easy pieces as possible. Your pocketbook will thank you. Once you have your one iconic item and the many easy pieces, and you’re still within your timeframe and budget. Then you can choose to add another iconic piece to increase your character’s recognition, but pacing is the name of the game. If you’re having a hard time choosing what iconic piece to pick, always go for the weapon. What’s Luke without a lightsaber? Cloud without his gigantic sword? Or Daryl without his crossbow? For an example of how to improvise as you create, let’s talk pants. Say your character wears grey pants but all you have are black pants. You can swap the grey for black until you can find or afford the perfect grey pair. Or you can attempt to alter the black pants to appear more grey with sun weathering, rubbing baby powder into them, or aging the material with excessive wear and tear like rubbing them along rocks or beating them with chains. Make sure to protect any zippers you have on the item with some masking or duct tape. A sticky zipper is better than no zipper. 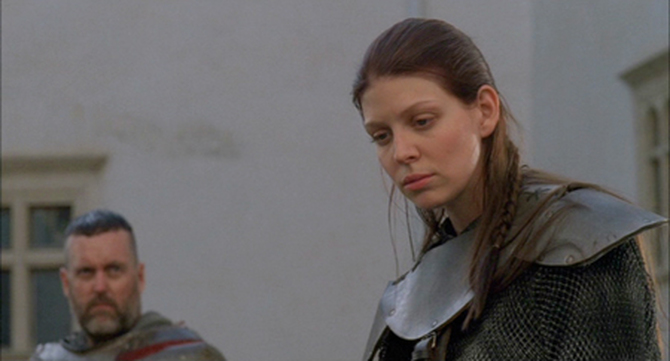 Amber Benson in Attack of the Gryphon. As much as we love Amber, this movie has the worst fake chain mail, ever! Funniest thing is this movie has real armor, just not for the leads. (http://www.chud.com/nextraimages/gry05.jpg) If your character wears metal armor, you don’t want to pick some flimsy material to replace the metal with. Choose an equally sturdy material to emulate metal. Leather, foam, or worbla would work, and there are various tutorials online for how to make these materials look like metal. Unless you’re a professional costumer, don’t use fabrics that look like metal, they never look like metal.
To wrap it up, you want to first look at what you own, then determine what you need to buy. Again Iconic item first, followed by a few easy items, only to be followed by more iconic items, until you are satisfied or until something falls apart. Modifying, making, and finding are the easiest and cheapest way to finish a character, but might take longer than buying. So follow your heart and your budget and have a great time planning your Steampunk Flash outfit. by Willow Enright 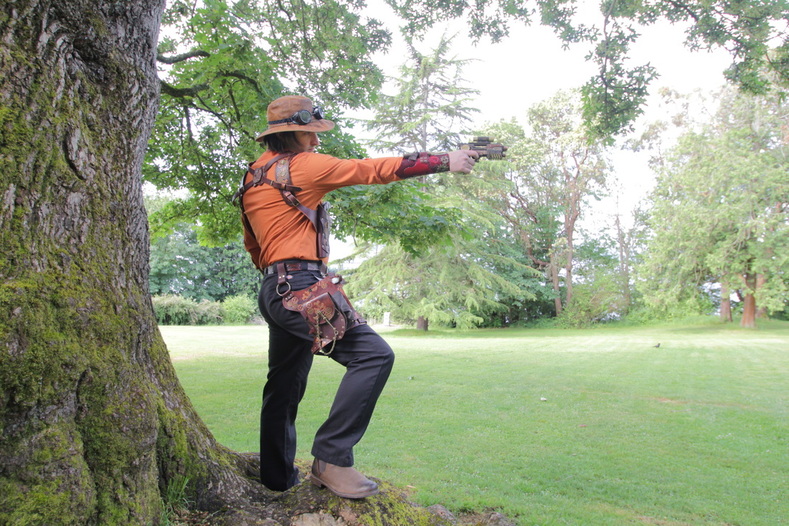 Ben Delano sporting a gun holster with ammo pack, Octopus bracers, hip bag, and belt from Leather Works by Willow's Steampunk Spacetime Vagabond collection. I love to cosplay as much as the next nerd, and not just cosplay but use copious amounts of leather in my cosplay. I understand that some might have concerns about using leather, and if you do please read the previous blog, Cosplayers Concerns Over Using Leather. Now that we’ve covered that, let’s talk about how to incorporate leather into what you are already doing, or hope to be doing. Keep in mind everyone has a different way of creating each costume, but if you’ve never put together a cosplay, this guide should be helpful for you. Always start your costume with a mock-up, create one piece at a time, and budget your time wisely. Most importantly, have fun! After all, that’s why we want to cosplay in the first place!
figure out if all of them need to be cut from the same hide, or multiple hides. You’ll want to think about which ones will be simple and easy to create and which ones will take, FOREVER. You’ll also need to think about which ones are essential to identifying your character, and prioritize properly.
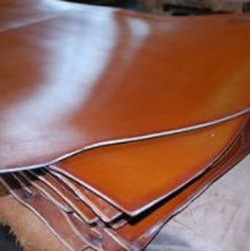
Now that you have made a mock-up, prioritized your items, and outlined your schedule, you have a much better idea of what supplies you might need. You can now head to the store, online or otherwise, and choose which items will work for you. Only when you get to perusing you realize you don’t know whether you should get veg tan, oil, tan, and what the heck is chrome tan? When choosing leather, there are three main processes to consider, besides which animal it’s made out of, vegetable tanned (veg tan), oil tanned, and chrome tanned. If you can find the color, thickness, and overall feel from oil tan leather that fits what you’re looking for, get it. If you are thinking about a chrome tanned hide, you should know that chrome tan is an unnatural chemical process that creates the final color that you see. Vegetable tanned leather is an unfinished and undyed hide that’s been treated with ingredients found in different vegetable matter, such as tree bark prepared in bark mills, wood, leaves, fruits, and roots. 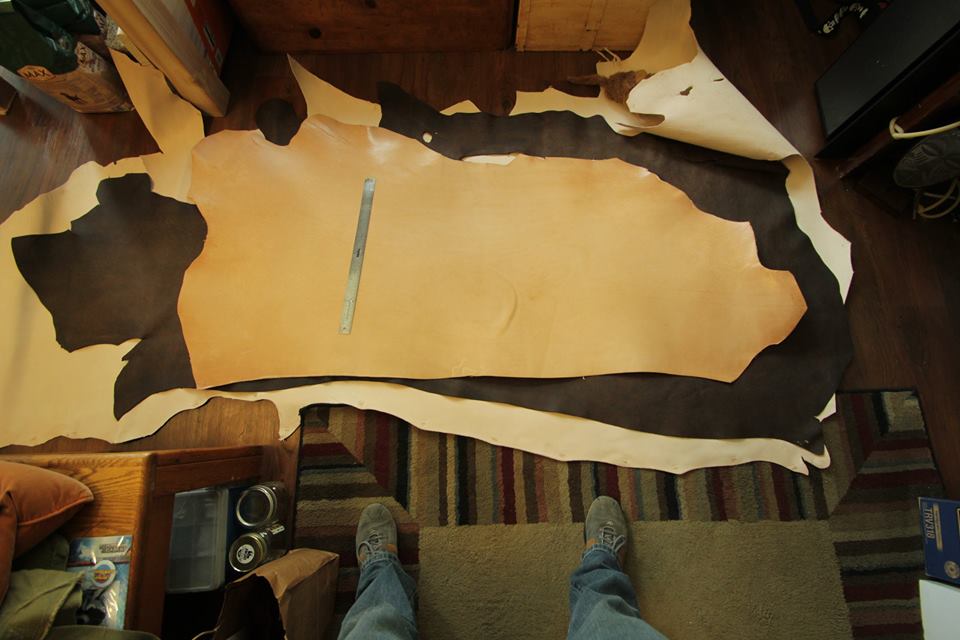 Three leather hides, top and bottom Veg Tan, the middle hide is a brown oil tan. With Erin's feet at the bottom. Fun Fact: the ruler on top of the leather is 18 inches long. If you are having a tough time finding that one piece that works for you, consider veg tan. The vegetable tanned is better for the environment and you can really individualize the piece you are working on, by shaping, tooling, and coloring. The downside of vegetable tanned leather is that you need more supplies such as leather dye and a leather conditioner, or acrylic leather paint and resolene finishing, to help protect it and keep your item looking sharp. However, you can wet form vegetable tanned leather to get specific shapes, whereas the chrome tanned and oil tanned leather you cannot shape in the same way.
Whatever material you end up using for your cosplay, just be sure to enjoy what you are doing! |
Willow EnrightI started crafting out of leather in 2011, and now I am making it my life's work. I am writing this blog to help myself remember some of the small steps in past projects, sharing my triumphs and failures, as well as my love of leather. Archives
November 2017
Categories
All
|

|
Cosplay DIY (Blog) |


 RSS Feed
