|
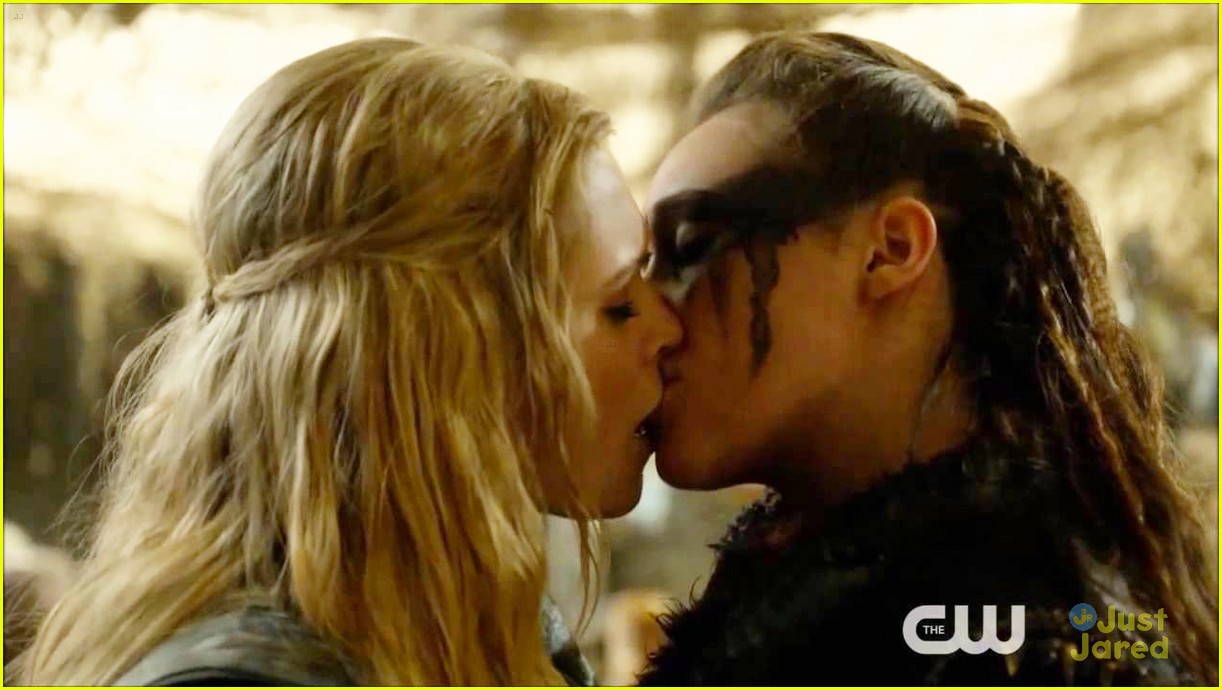
By Willow Enright 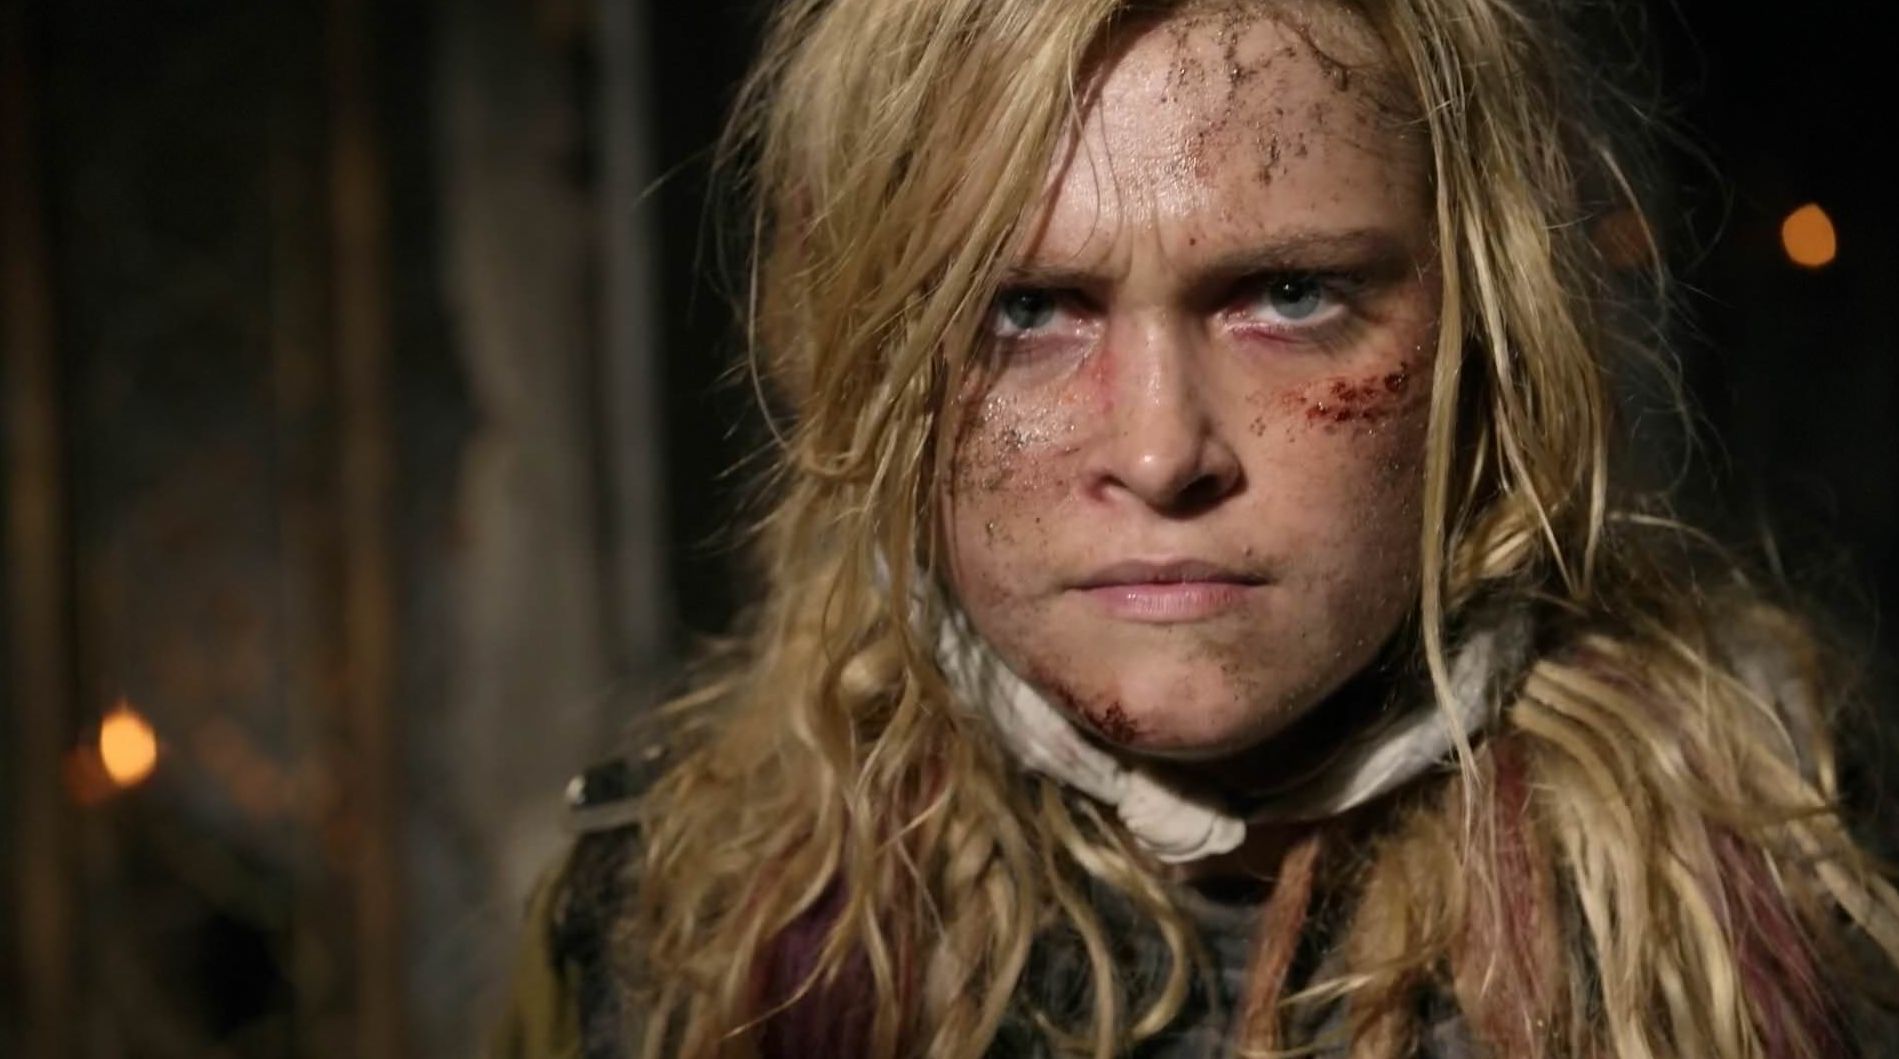 Clarke Griffin The 100 http://www.cultjer.com/img/ug_photo/2016_01/95177720160131112418.jpg There are times in your life where you really feel like making a change. Coloring or cutting your hair can be fun and give you a new outlook on life, however there are times where going blonde just won’t work for you. Clarke Griffin (The 100) has some ever changing blonde locks, and we’re going to transform an ordinary wig into a version of her combined hair-do’s.
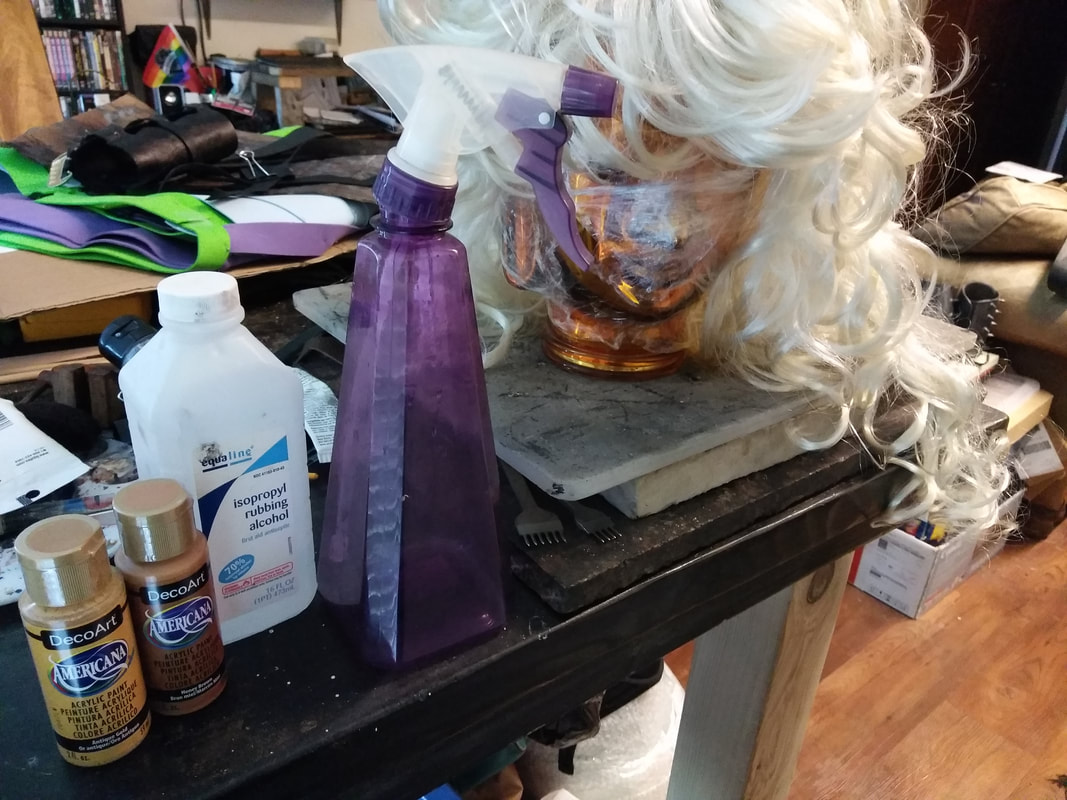
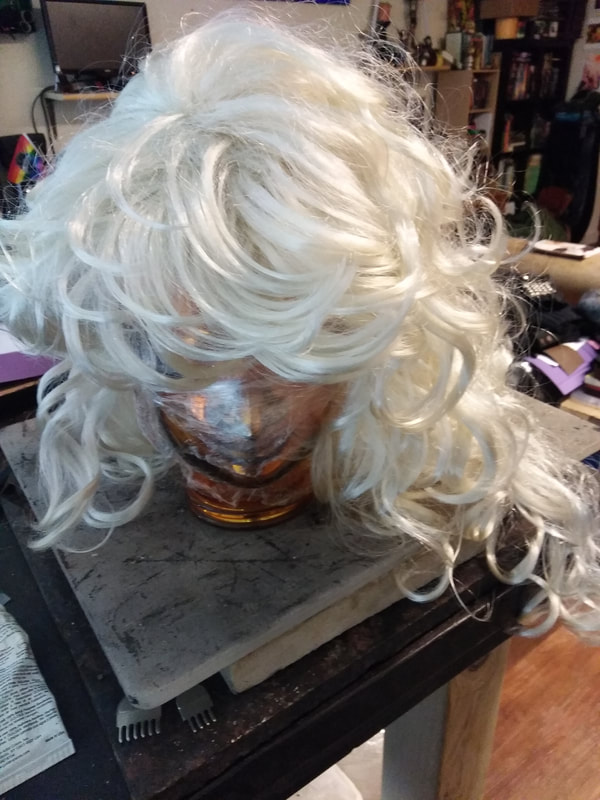
Supplies:Antique Gold, Honey Brown, and Crimson Acrylic paint, Rubbing Alcohol, Head Stand (I used a glass Buddha head, you might be temped to use styrofoam, DON'T!), Saran Wrap (optional), Spray Bottle, Cardboard, Paper Towels, Cheap Small Rubber Bands, and Wig (This wig was originally purchased for a comic book Black Canary cosplay.)
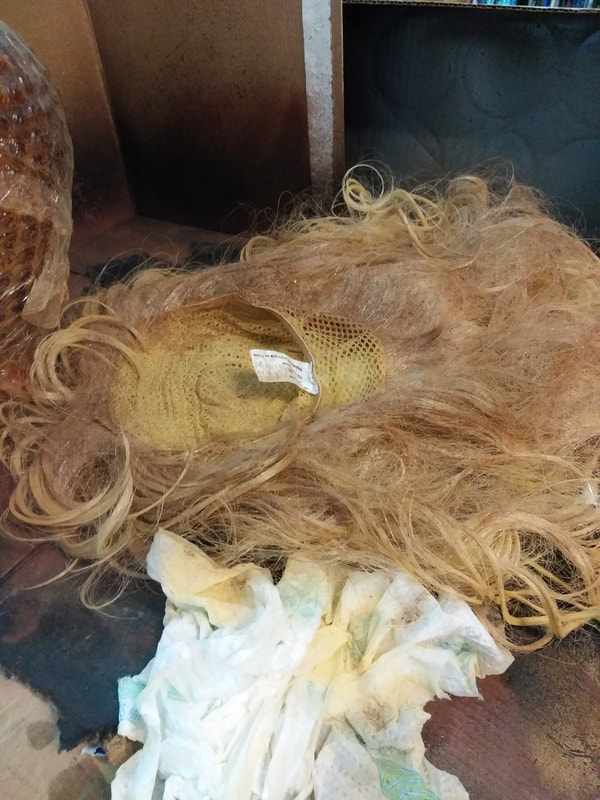
Cheap vs QualityThe wig that I started with was a super cheap synthetic Halloween wig that we got at Goodwill one year ago. So, the quality to start with wasn’t great, in fact it was a pretty typical bad wig. However, it was what we had to work with and I figured that I would at least give it a shot to see how it would turn out. After all, I love a good challenge. Only, if I were to repeat this process in the future, I would definitely invest in a higher quality wig.
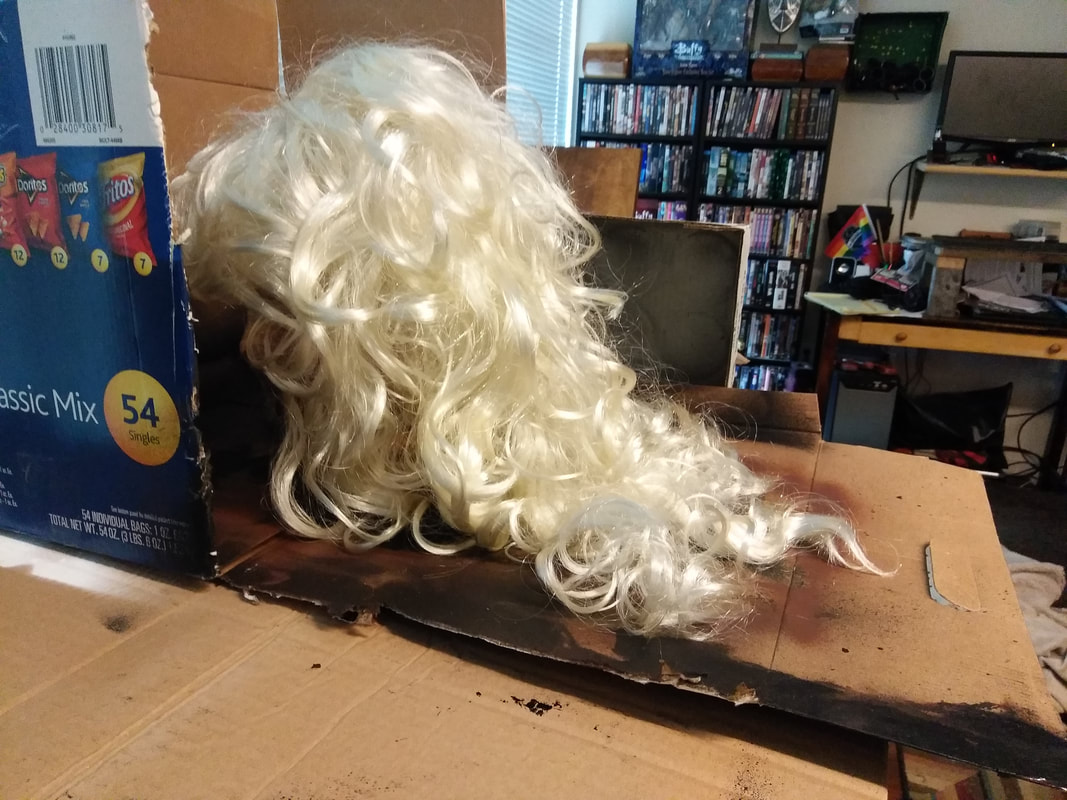
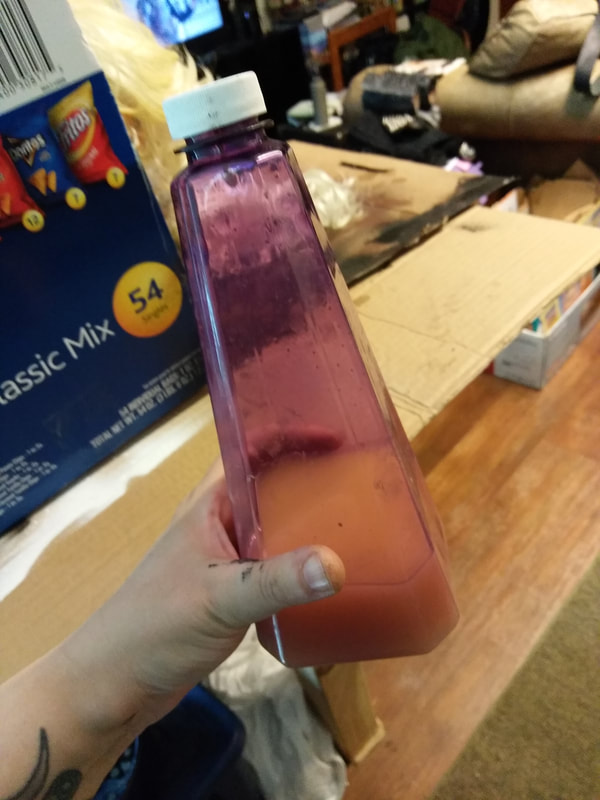
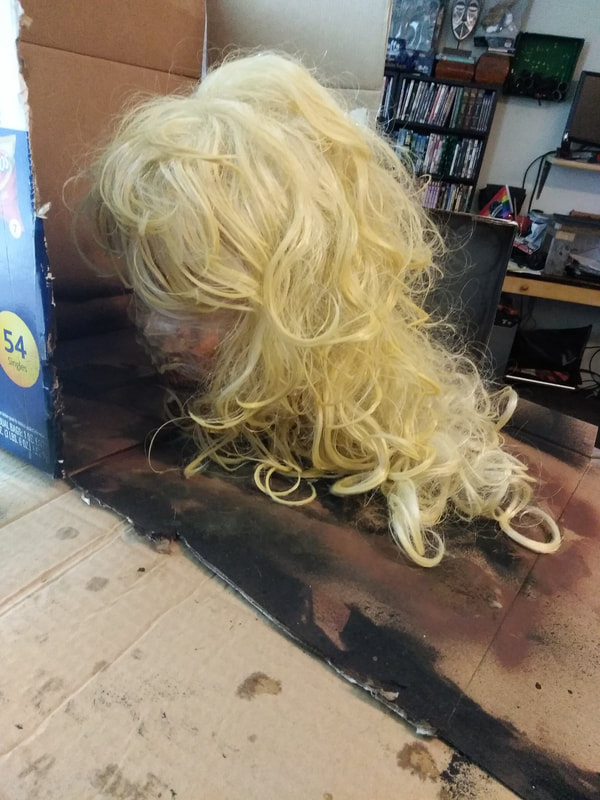
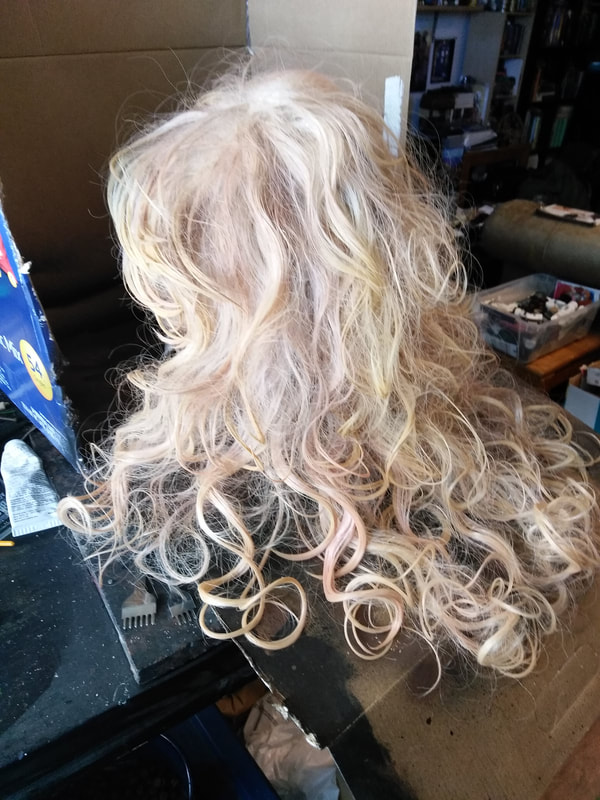
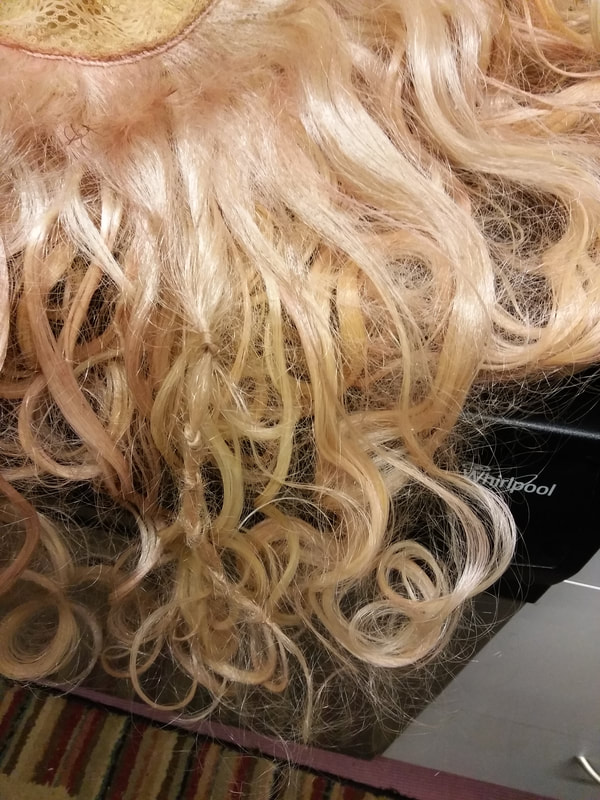
Color ChemistrySince the coloring process involves rubbing alcohol it’s important to use a glass head instead of styrofoam, otherwise it will simply melt. I also covered it with saran wrap beforehand so that the paint wouldn’t stain the glass. I used a cardboard box to make a three sided place to spray, and placed paper towels underneath the glass head to soak up the alcohol. I mixed 1 cup of rubbing alcohol with about 10 drops of paint in order to get the richness of color that I wanted. Always start with your lightest color, Antique Gold in this case. I spritzed the entire platinum wig with this light color first.
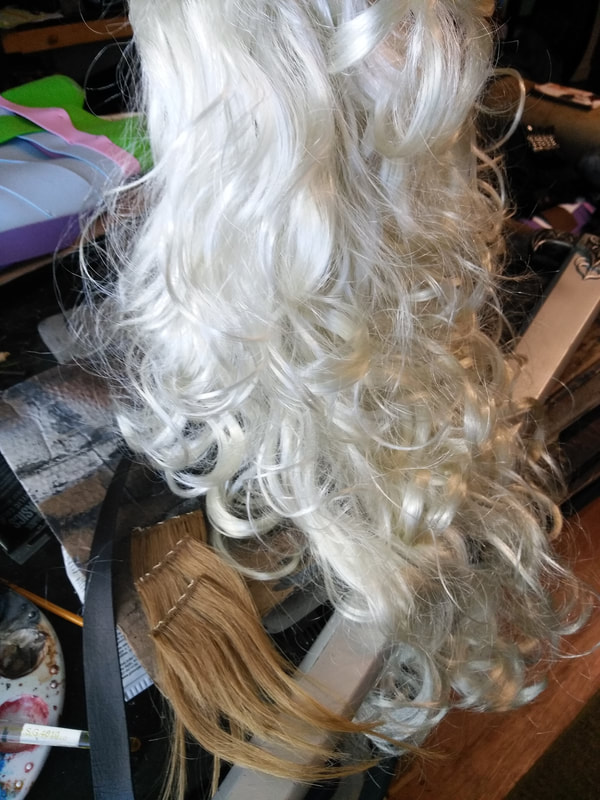
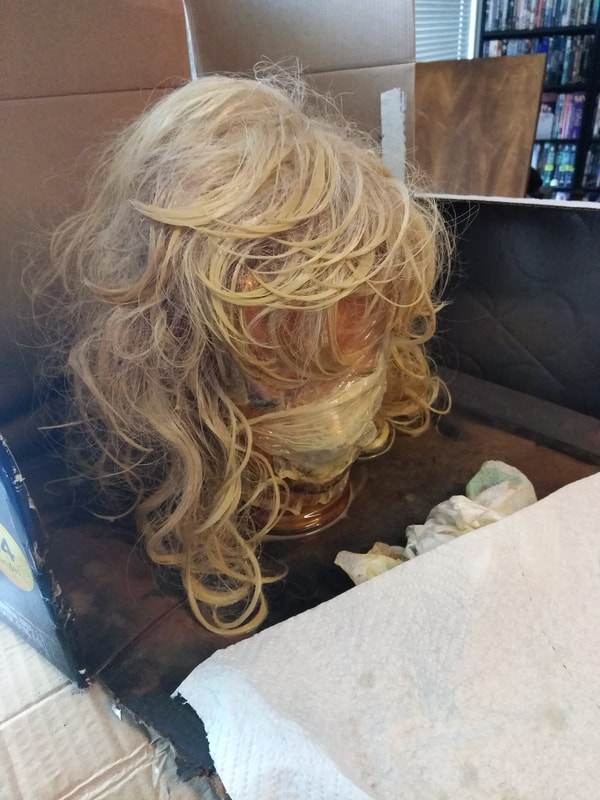
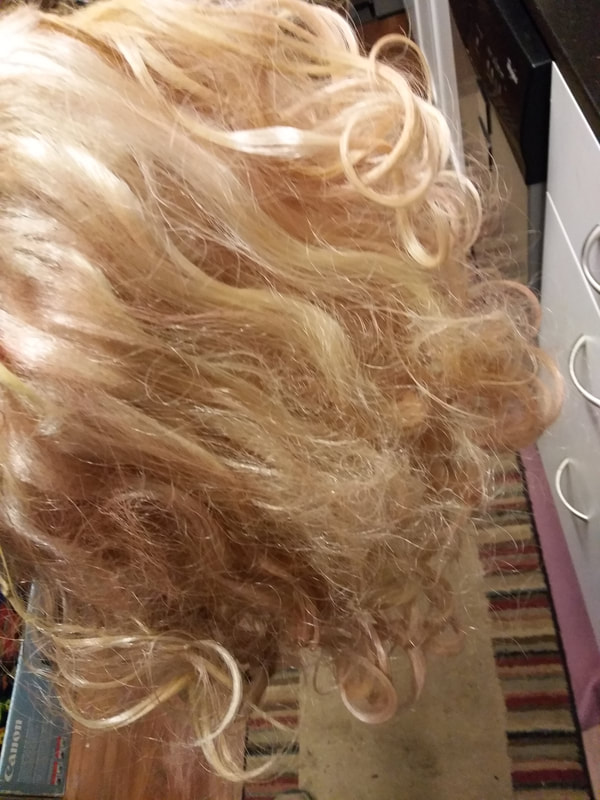
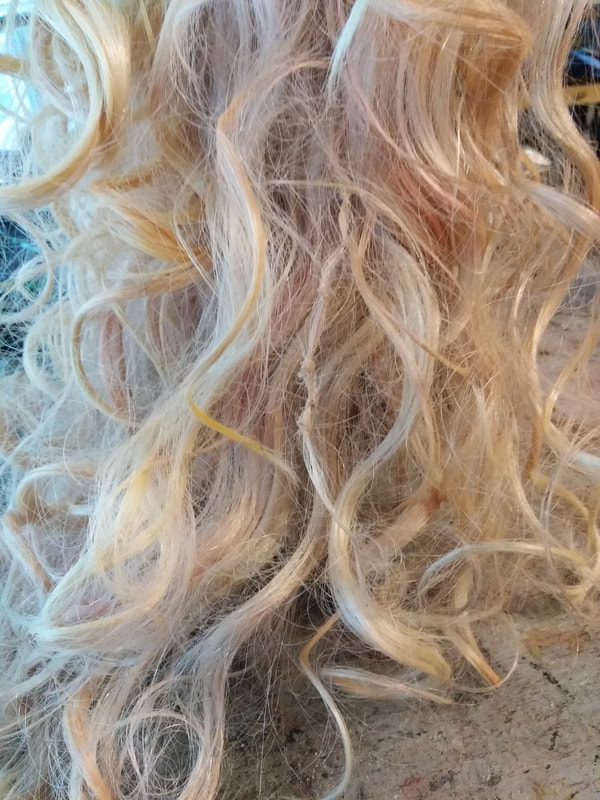
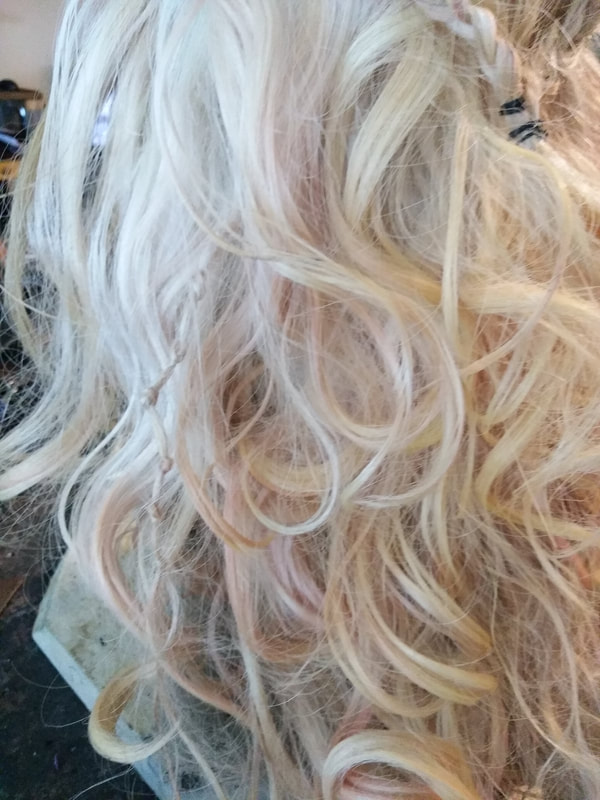
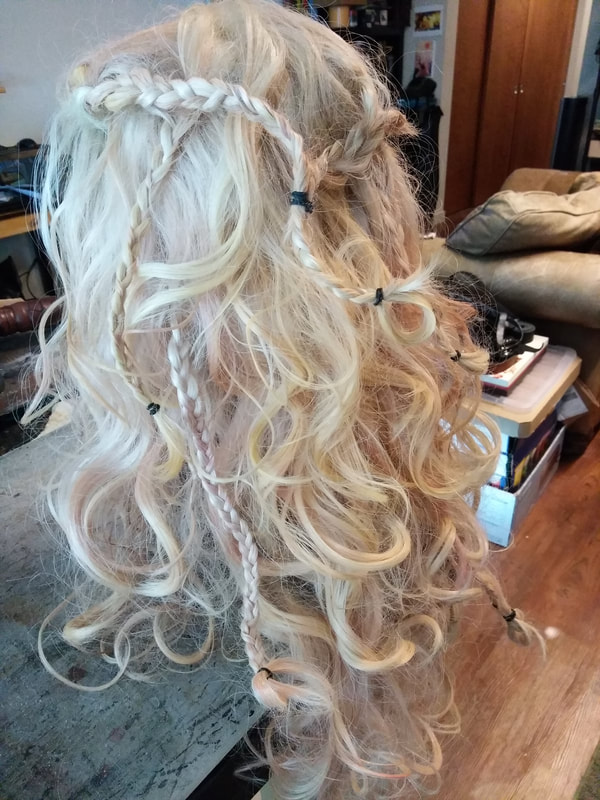
Coloring Synthetic HairChanging the color was a lot easier than I had thought initially. The tricky part is making sure that you mix the paint in the rubbing alcohol extremely well so that it won’t clog your sprayer, or you will spend a long time trying to clear it. Eh, hemmm… as some of us may have done. Once the Antique Gold covered the whole wig, I added another cup of rubbing alcohol and 10 drops of the Honey Brown. Making sure to constantly mix the solution, spritz the second color in various random spots, including the underside of the wig. Adding the red at the end was insanely easy. For this part of coloring you won’t need a full cup of alcohol, just ¼ cup and only 5 drops of paint. The platinum hair just soaks the color up nicely giving that slightly Clarke hue. Leave the wig to dry for 24-48 hours before styling. Also, don’t repeat the alcohol/paint process on the wig more than twice, making sure it is completely dry in between, otherwise the synthetic hair might disintegrate. Styling
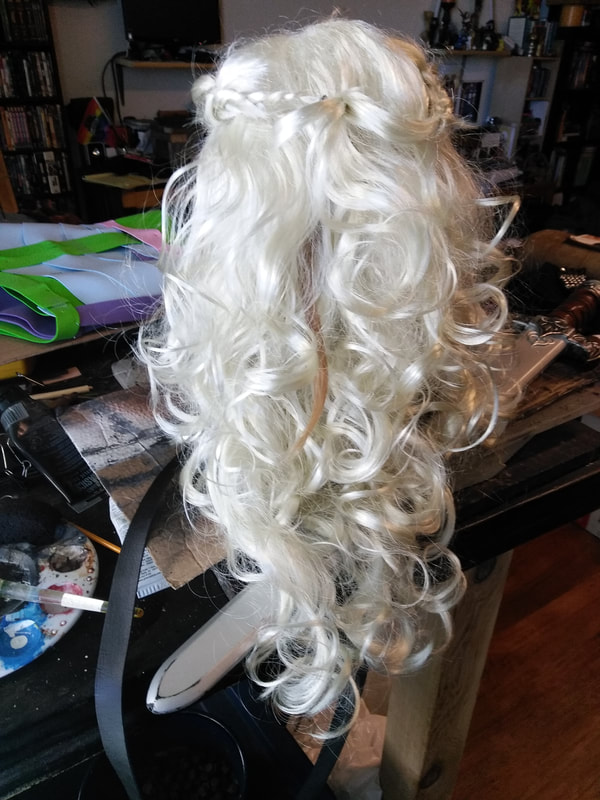
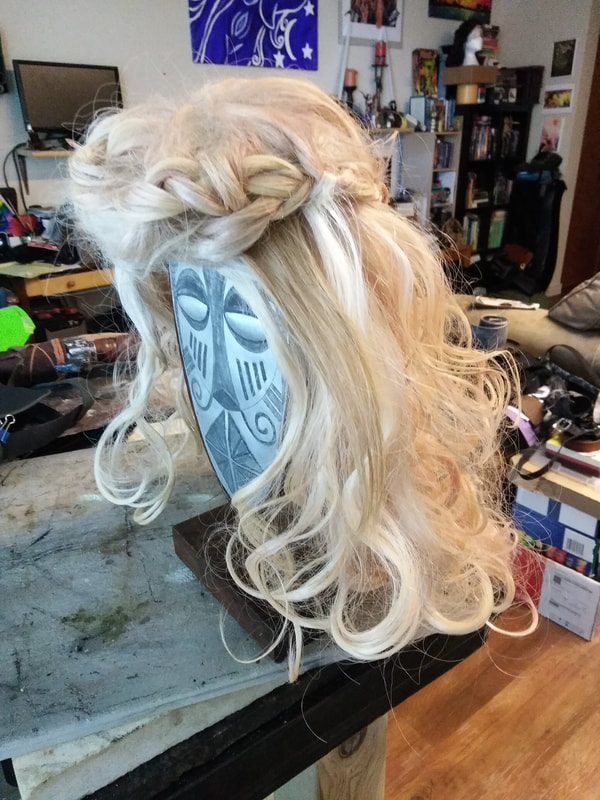
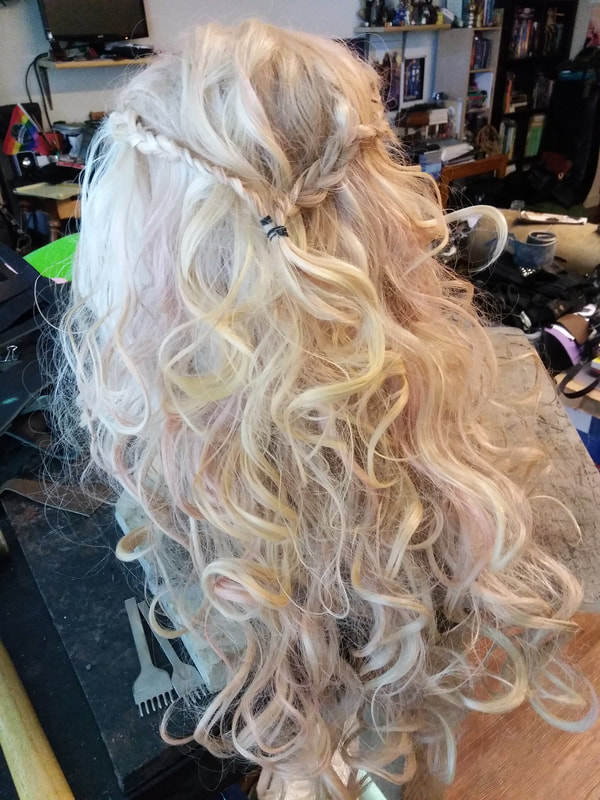
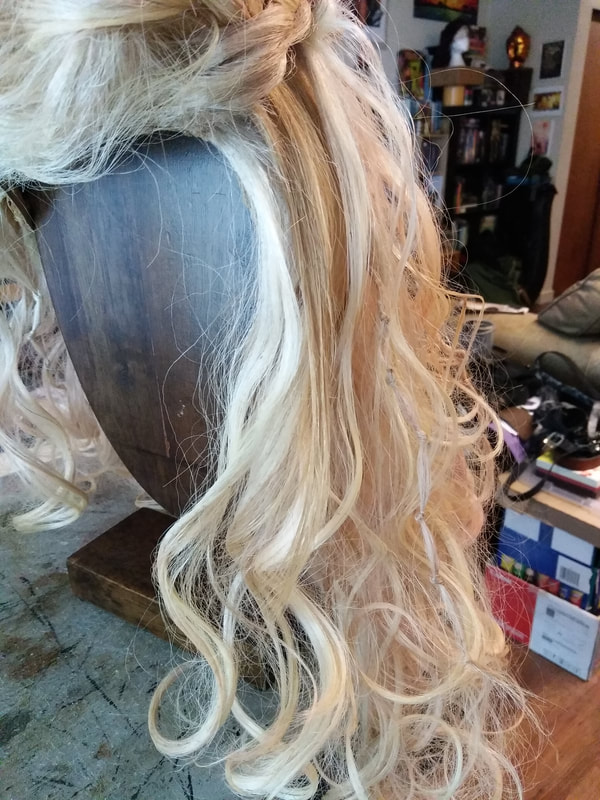
This particular wig has bangs and Clarke doesn’t, so it made sense to me to braid them together along the temples using a dutch lace braid. I was then able to combine the two braids at the crown like Clarke does. There was also a lot of matted hair underneath from previous wearing. When knotted together in sections it became lovely texture, and a lot less 80’s punk mess. I repeated this process several times throughout the wig.
To finish off the Clarke Grounder hair, I added several more small braids. I used cheap rubber bands that can be cut out instead of pulled out. Synthetic hair will not tolerate rubber bands being removed. It will rat the hair, break it, or pull it out. Let’s face it, rubber bands aren’t that kind to real hair either. Getting cheap ones will ensure you don’t care about cutting or ripping them.
The process of changing synthetic wig hair color was daunting, and I wasn’t certain that it would turn out like I wanted. I was actually surprised at how easy and fun it ended up being. The colors turned out wonderfully! I just wish that I someone had told me to invest in a much better quality wig before attempting this process. Even though it would have cost more, the end would have been a very satisfying kickass result. Instead, I spent countless hours recoloring a crappy wig that really just can’t be used as a complete character wig due to its poor quality. Next time I will begin with a quality foundation. C'est la vie! ("That's life!") Stay tuned for next week's wig transformation: Lexa (The 100) Wig!
2 Comments
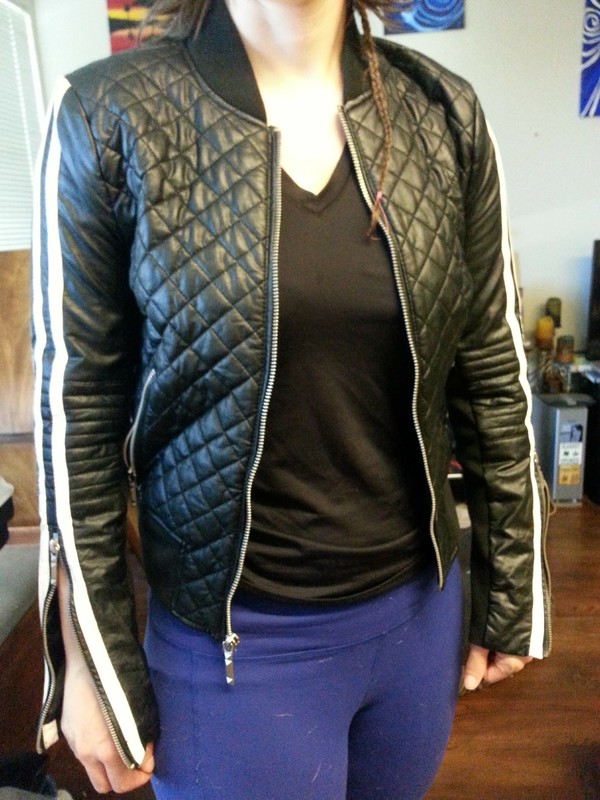
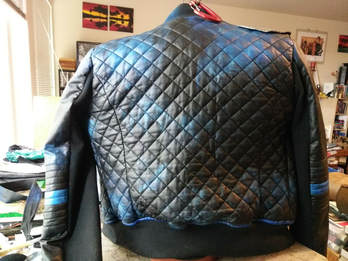
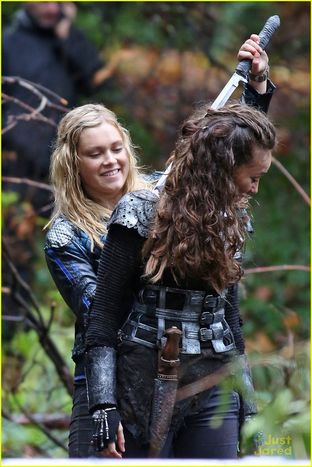
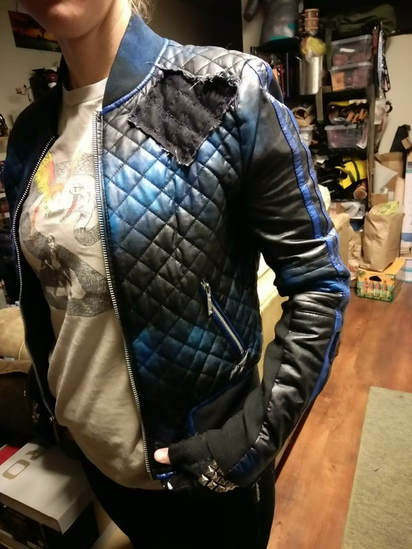
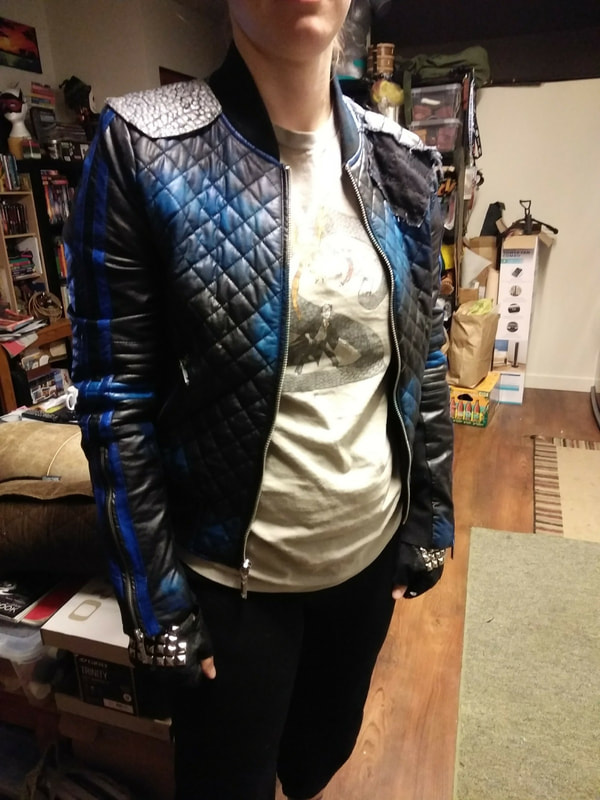
by Willow Enright 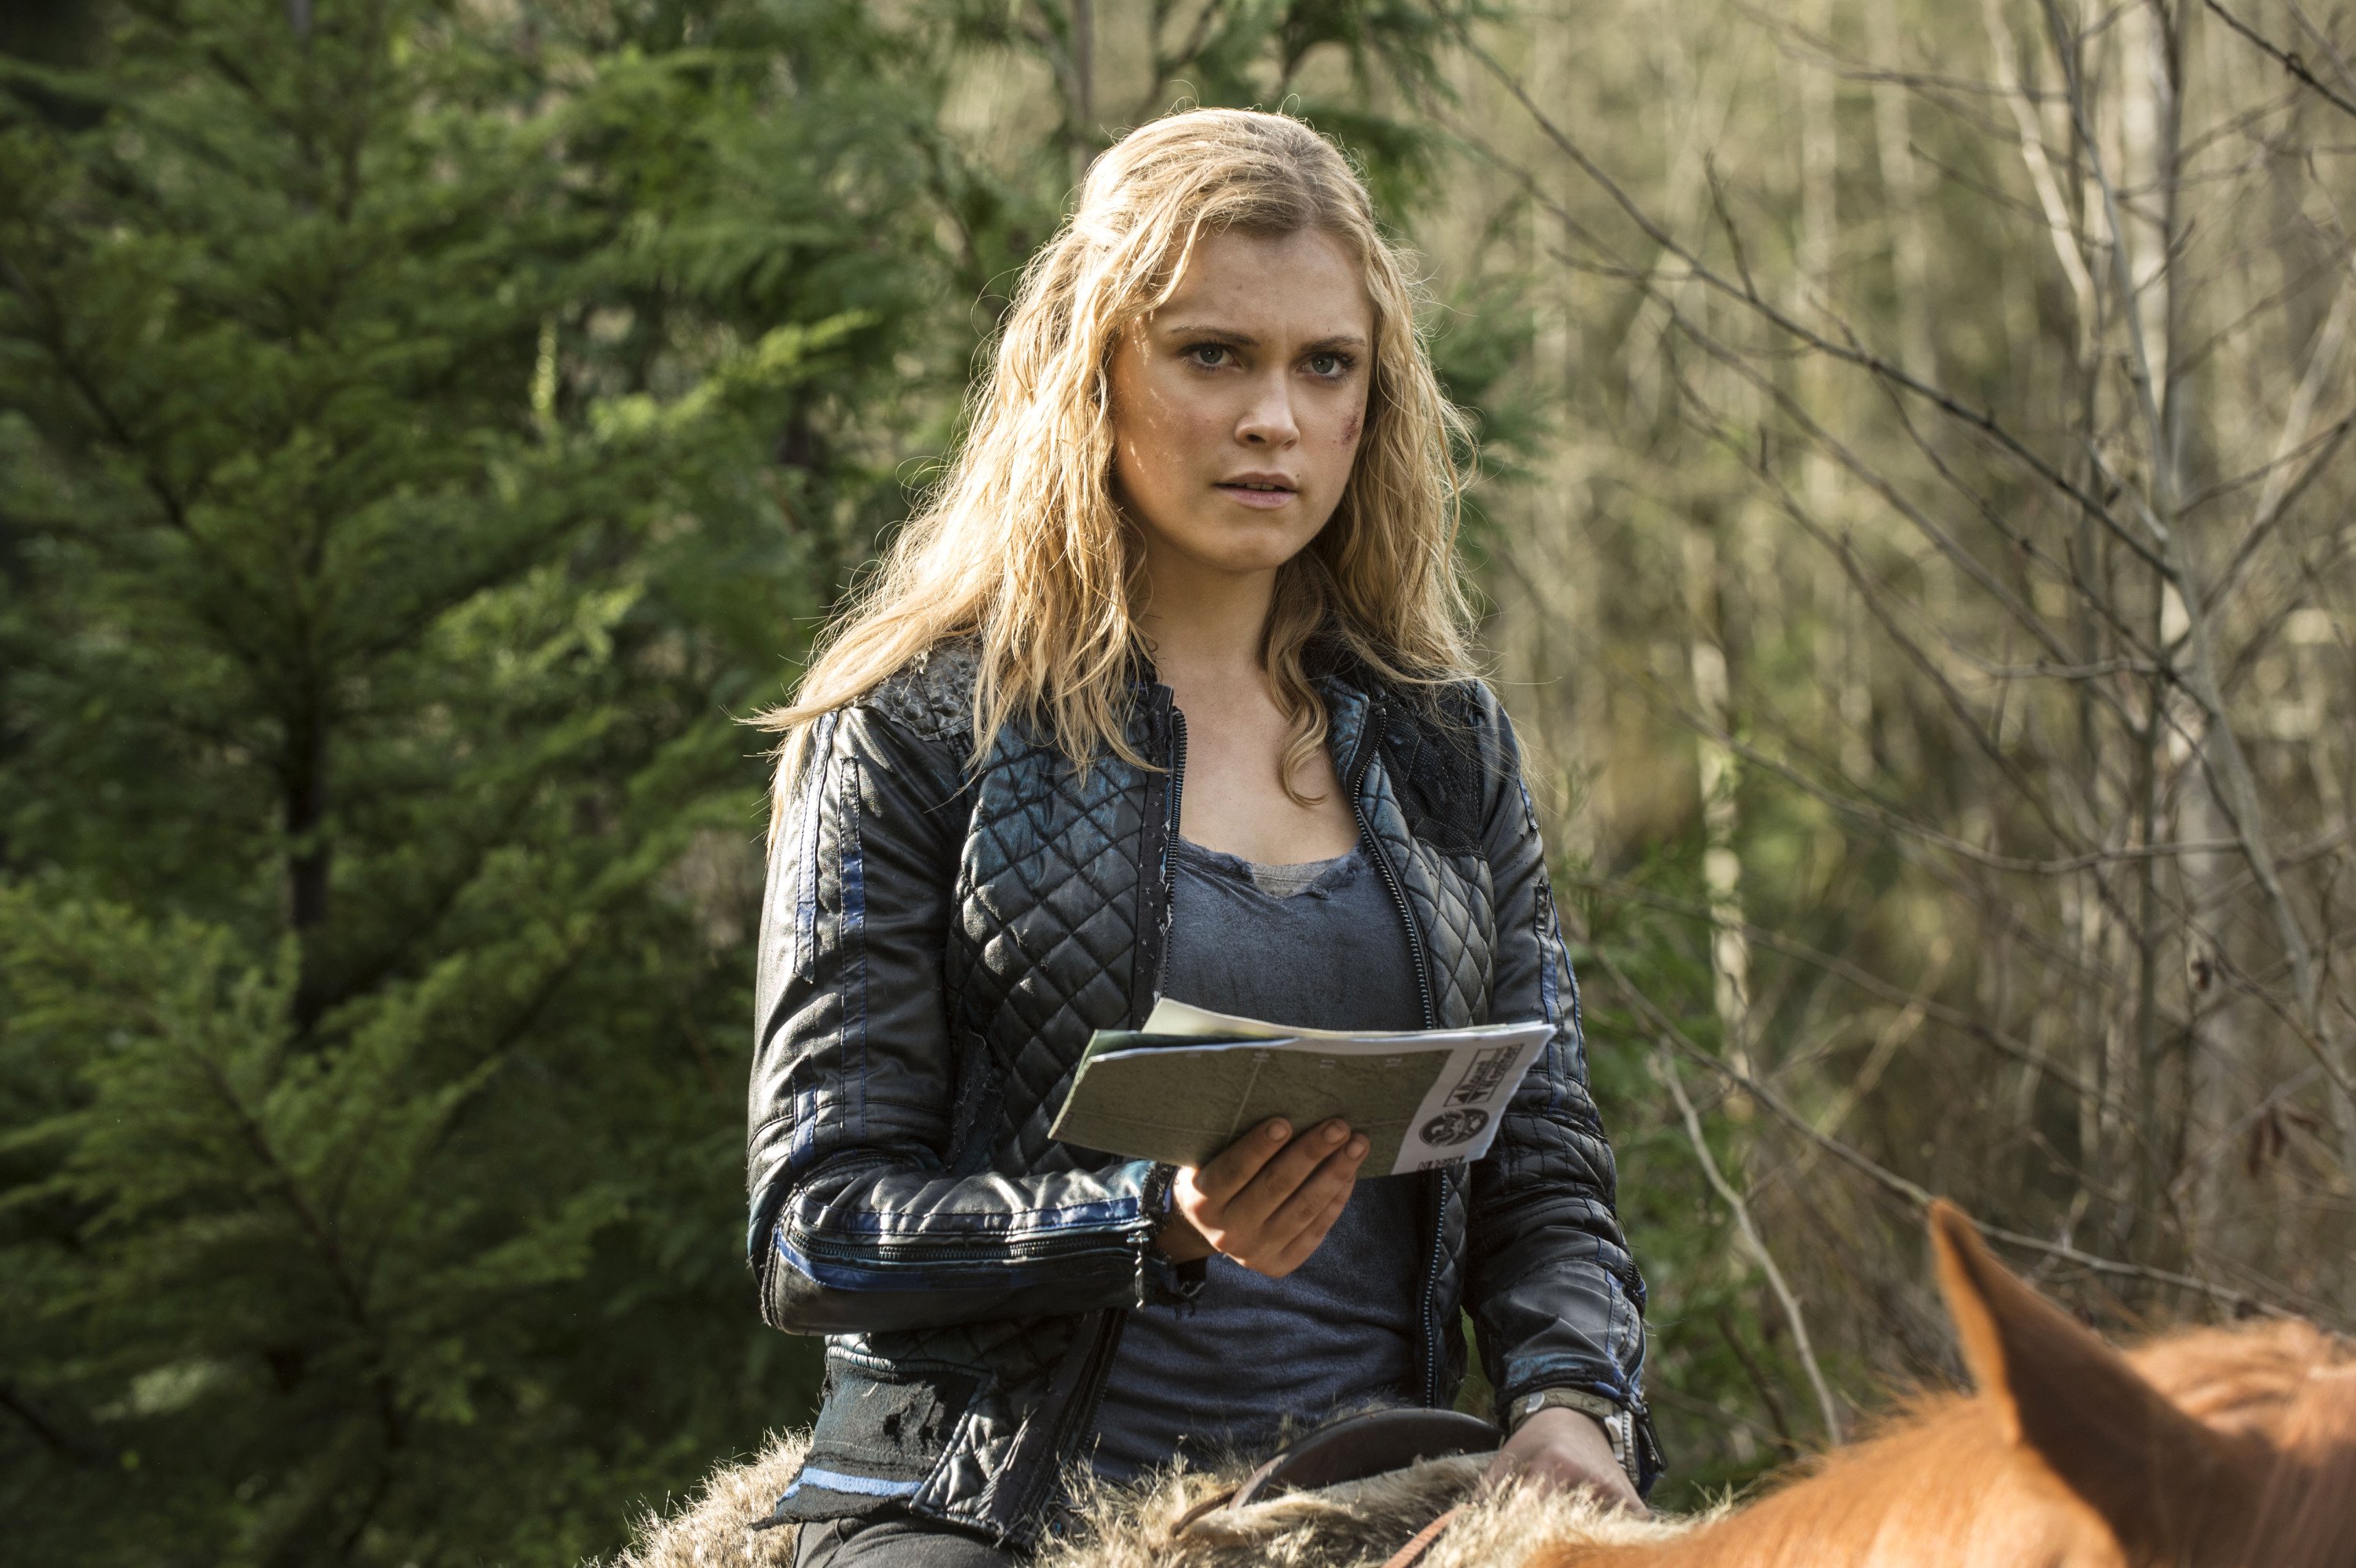 Clarke Griffin from the CW's The 100 Clarke Griffin from the CW's The 100 has more outfits than she does plot lines. It certainly provides a vast array of cosplay ideas to choose from when creating your own Clarke. Since I'm making this Cosplay for my girlfriend, Erin, it was her choice and she decided to go with season two's classic quilted bomber jacket with all the blue accents. We'll be adding other ensemble pieces to this jacket to create the whole Clarke Griffin for Erin as a Cosplay character, but today I'm going to focus on her bomber jacket since this really is the main piece.
I happened across the BCBG Maxazria Black Faux Leather Quilted Bomber Jacket on Ebay by chance. When I saw it I knew I had to snag it to save myself the hassle of building the jacket by scratch since it was the perfect base starting point. Of course I scoured the internet in search of several reference photos to use before I began to actually transform it. I attempt to get pictures from all angles if possible to be sure that my reference is accurate enough.
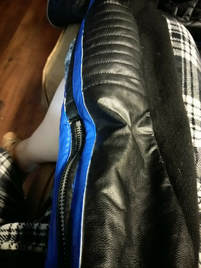
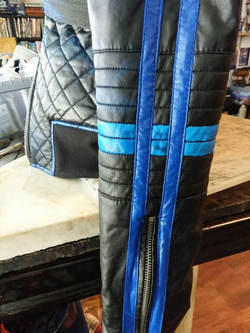
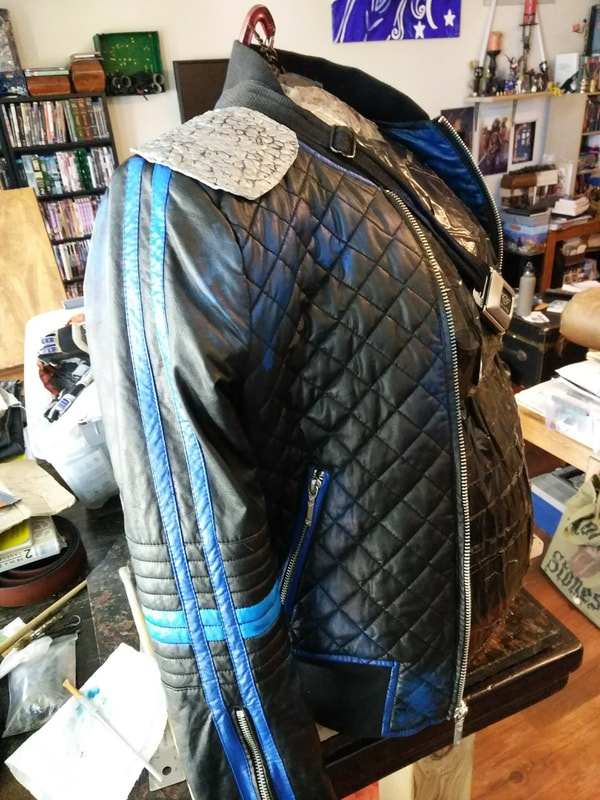
Since this jacket already had white accents where we needed to have blue ones, that's where I started. I used Angelus Blue Acrylic Leather Paint and craft paint brushes of various sizes to painstakingly make all the white areas blue. This took quite some time since you put on one coat of paint and then wait for it to dry before doing another, doing as many as are necessary to get the shade you want. I did 3 coats over the white until I was satisfied with the hue of blue. The black areas only required 2 coats to match the white stripes. For the horizontal arm bands on the sleeves I mixed Angelus Blue with a dab of Acrylic Heavy White to slightly lighten the blue to match the reference photos. The black faux leather only needed 1-2 coats of this color, especially since I wanted these arm bands to look more worn than the darker blue stripes. You can use a painter's tape when working on something this intricate to keep paint off the jacket and zippers, but I didn't simply because I knew that I would have to mess up my beautiful paint job in the end anyways. Once the initial transformation from white/black accents to blue ones was done I waited for it to fully dry, 24-48 hours.
The next step was to add the blue highlights that appeared to be spray painted onto the jacket. For this step I again used Angelus Blue and Acrylic White only a very small amount on a sponge so that I could lightly dab it over the jacket, which I zipped over my body double so that I could see exactly where I was highlighting with the blue in comparison to my reference photos. I didn't blend the paint on the sponge but rather used a downward motion while dabbing with the sponge to mimic a spary paint can pattern. When I was done with the first pass, and while I waited for it to dry, I checked my reference shots again to see how accurate I was on the first blotching. I felt that it required more color so on my second blotching I used a medium amount of pressure to dab the same spots with more blue paint before leaving it to dry another 24 hours.
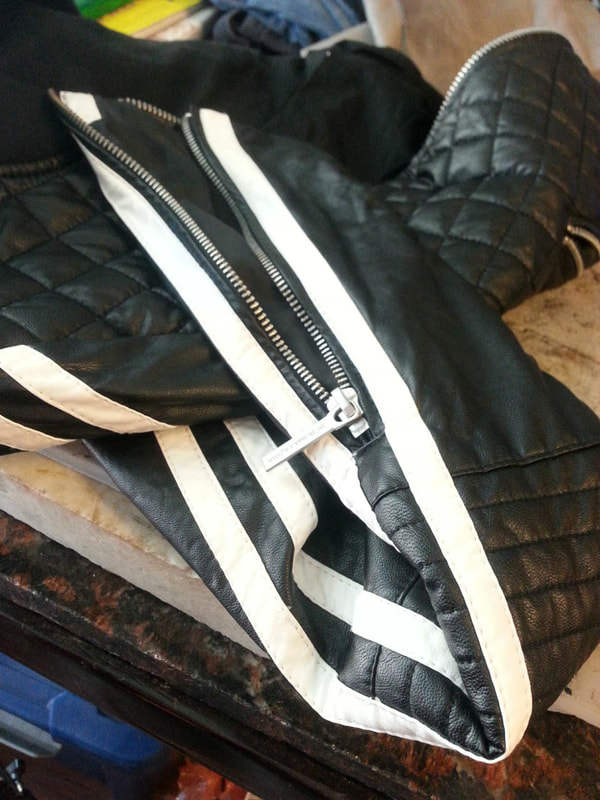
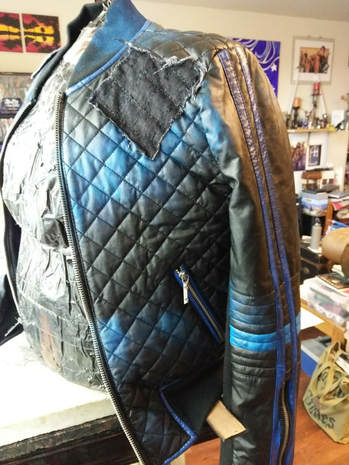
In the meantime I did some mild experimenting with different materials trying to figure out what would mimic Clarke's patches closely enough. For the left shoulder I found that using jean material would best match, only the scrap pair of jeans I had in my sewing scrap bin were blue. So, I took a good ol' Sharpie to the square of material transforming it into black denium. I left the edges to naturally fray, but colored them to match before hand sewing this patch into the diamond stitch pattern on the jacket. I realized after the fact that I didn't double check my reference picture, so my patch is diamond shape looking while Clarke's is actually a bit more square shaped... hence, the importance of checking your reference shots even when you think you know what you are doing. Alas. I wasn't going to undue all those hand stitches to turn it, so mine's a bit unique.
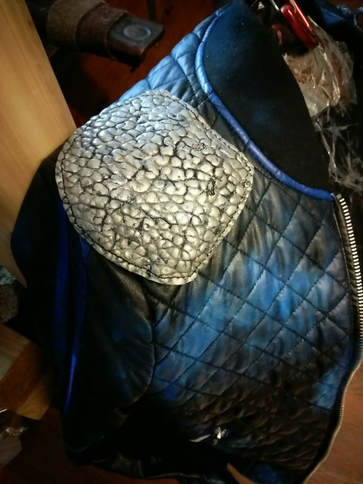
The right shoulder patch was tricker to mimic because whatever the material was that was actually used in the T.V. show is unknown to me. I first tried bubble wrap painted silver thinking that using some sort of alternative material would be more post apocalyptic, but it was too obviously bubble wrap. In the end I used a black Italian Lambskin with a bubbled texture that I painted with Angelus Silver. However, I was careful not to paint the leather fully, leaving the black leather in the cracks of the design black for a more weathered appearance. After it was completely dry this patch was also hand stitched onto the right shoulder.
Antique Black Leather Stain was used on a sponge to go over areas of the blue stripes to add some additional weathering before leaving it to dry fully yet again. The painted areas were then treated with Chamberlain's Leather Milk no. 3 to help protect and perserve it so that when Erin takes it into the woods to give it that final weathering effect all my hard work won't be undone.
This is how I created Clarke Griffin kom Skaikru's post Apocalyptic bomber jacket! If you too are a fan of CW's The 100, which character have or would you like to do as a Cosplay? Stay tuned for more blogs as I will be working on more Clarke Griffin in the future, as well as Lexa kom Trikru! "Aai badan yu op en nou moun (I serve you but no other)!" |
Willow EnrightI started crafting out of leather in 2011, and now I am making it my life's work. I am writing this blog to help myself remember some of the small steps in past projects, sharing my triumphs and failures, as well as my love of leather. Archives
November 2017
Categories
All
|

|
Cosplay DIY (Blog) |


 RSS Feed
