|
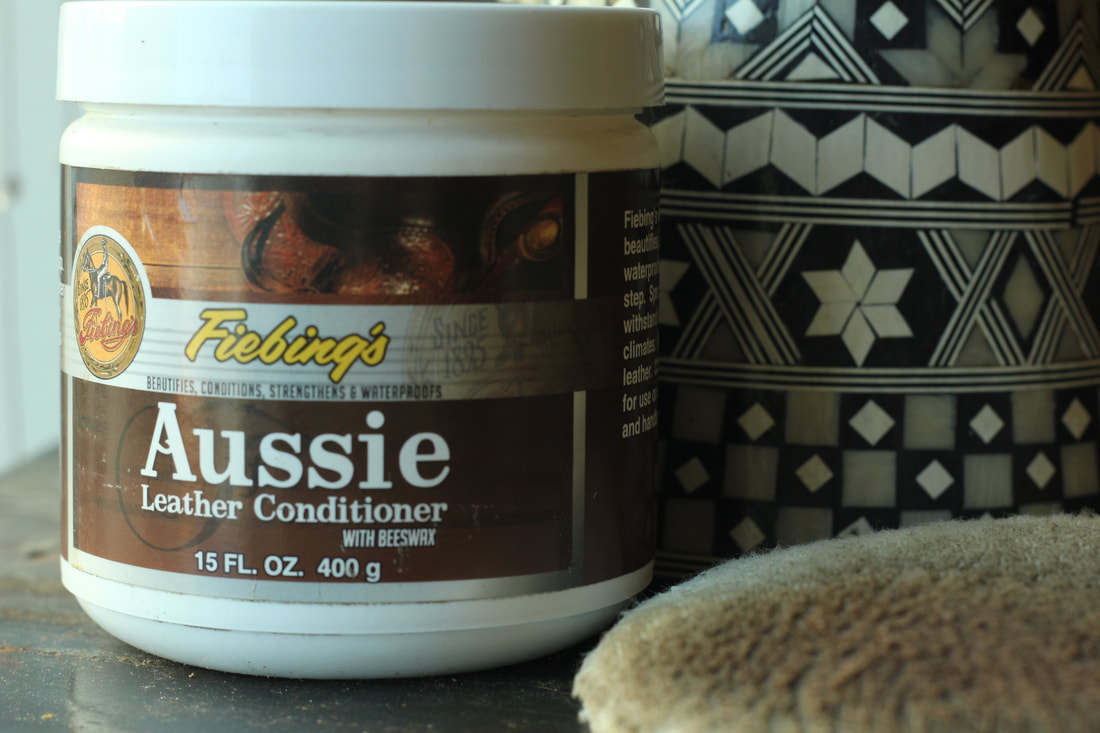
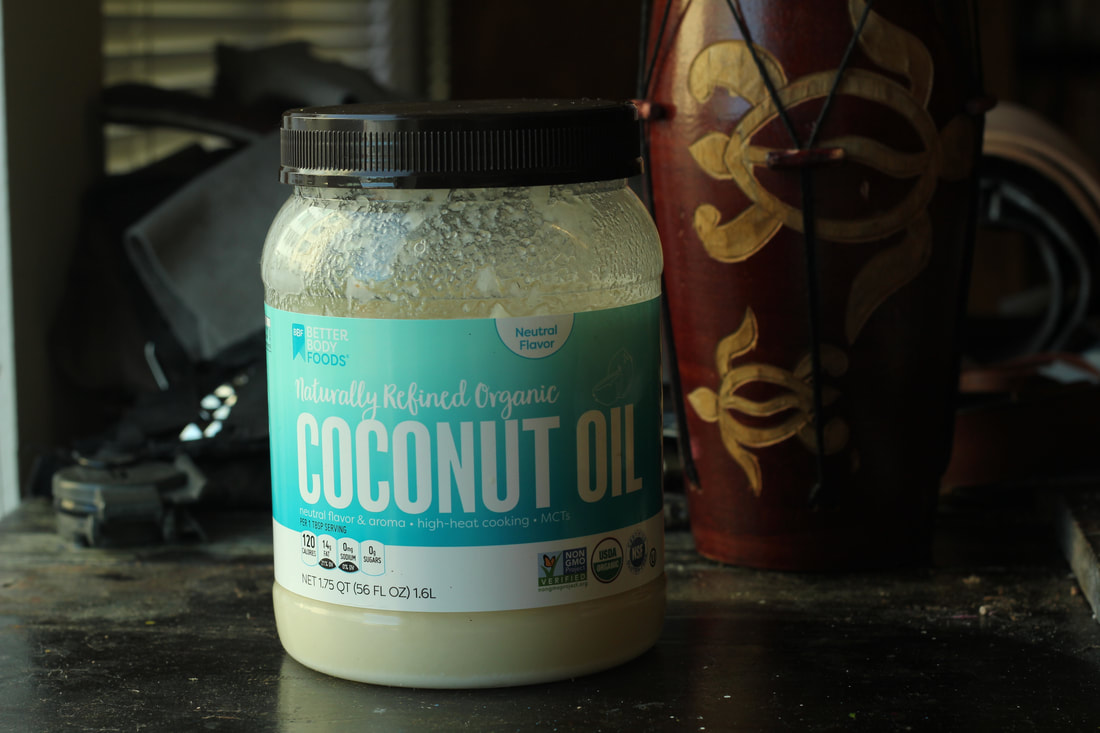
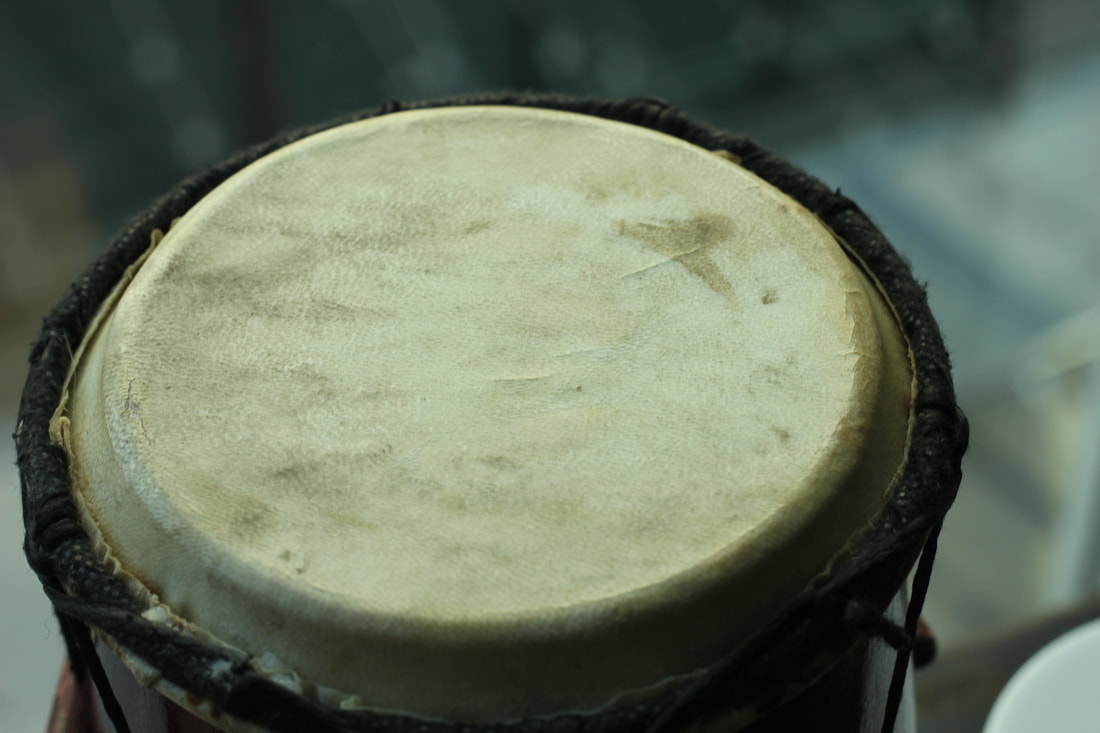
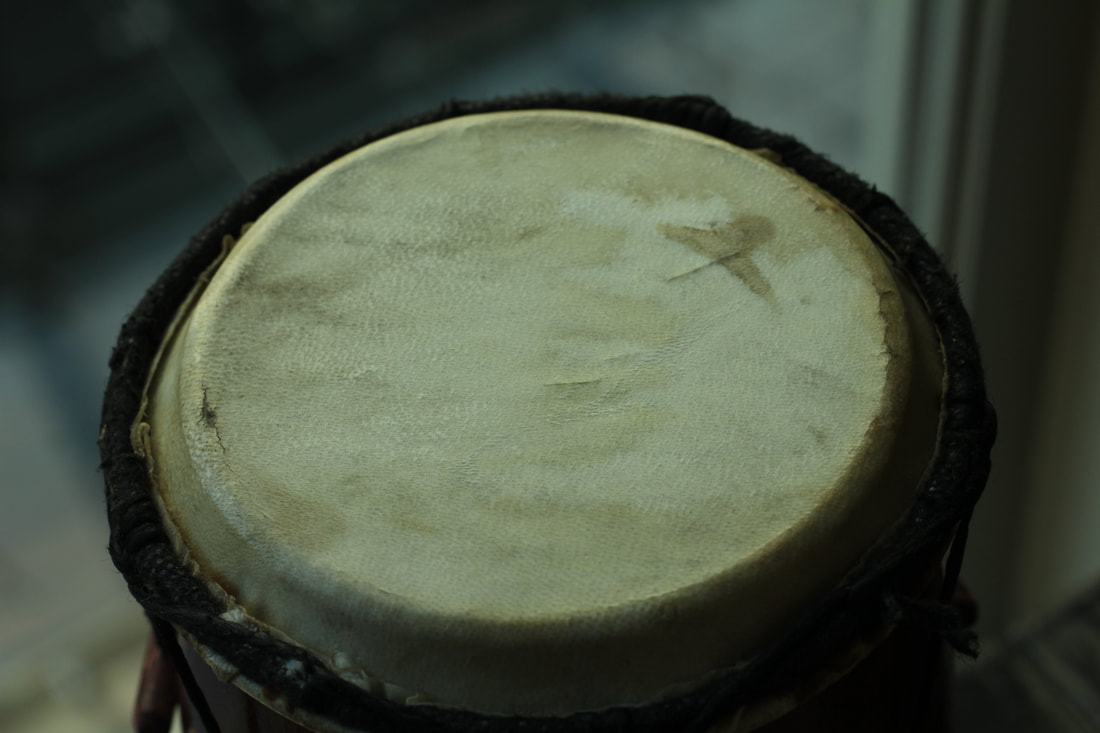
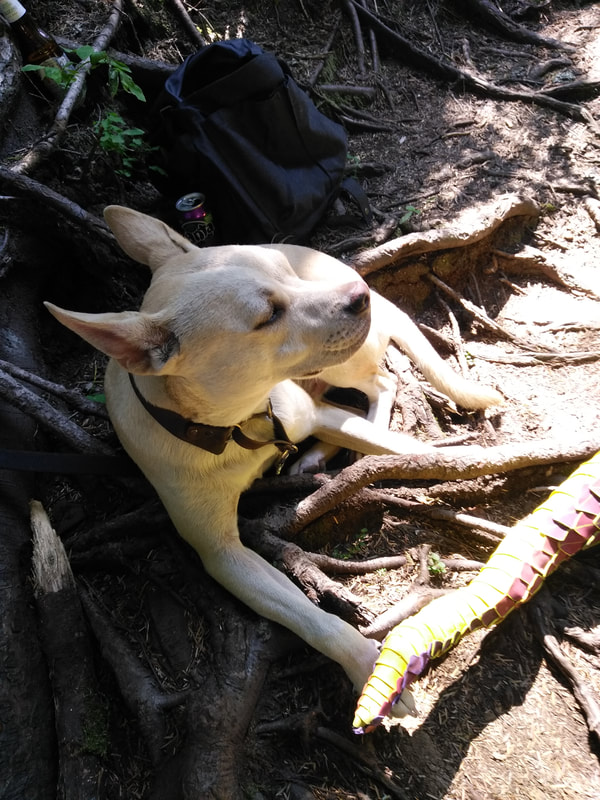
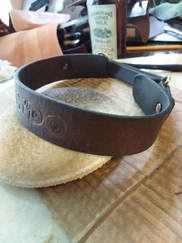
by Erin Bishop 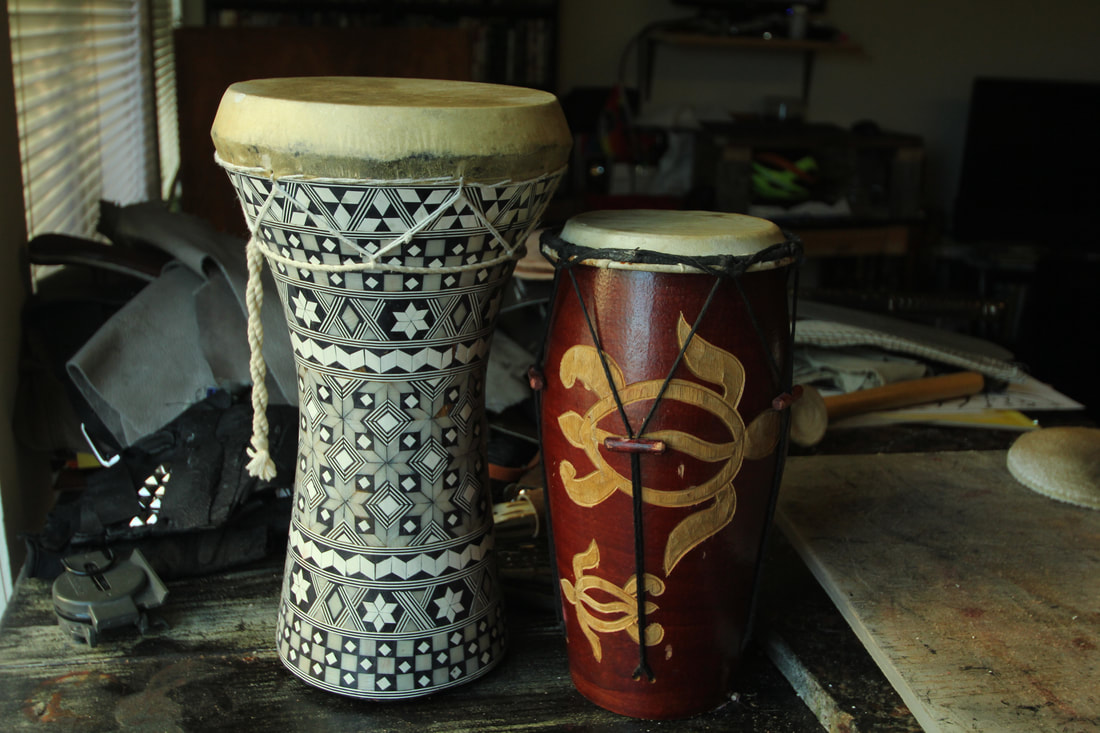 These are my two drums, the cracked one is the right, painted red and carved out sea turtles. I don’t know how many of you live in an area that has seen a hotter than average summer, but here in Seattle, we have. Because I live in a very temperate area, I’ve never thought about how frequent I should oil my drums. So I was shocked and in a panic that one of my hand drums started developing cracks. 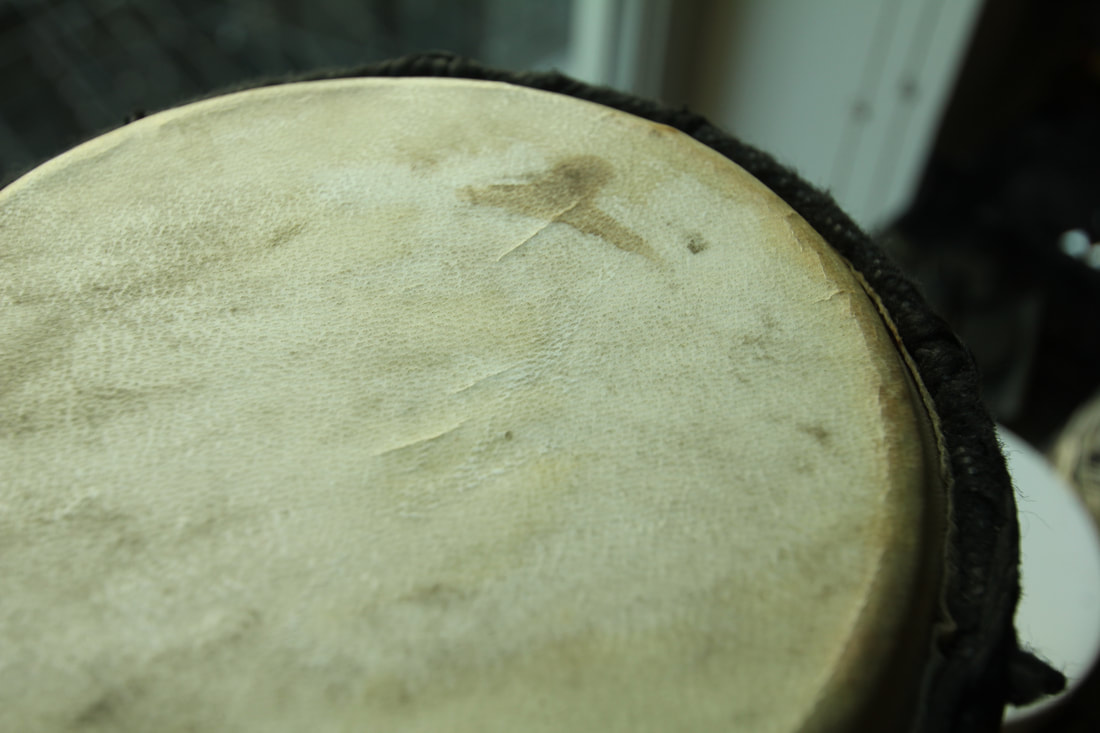 Close up of the cracks forming on my drums in the center as well as along the edges. Research, Research, ResearchI knew I needed to fix whatever the problem was and fast. I know that the rawhide material is made from the skins of animals and any cracks would have developed from a lack of moisture, just like our skin. But unlike our alive skin, it cannot repair itself and since it already developed a crack it will always have that crack. What I needed to do was to stop the spread, but what products do I use? And how can I obviously take better care in the future. For answers to those questions I did a simple search on Google by typing in “The rawhide on my drum is cracking what do I do?” I then read over the top 4 links to find out that drums need natural based oils like shea butter and coconut oil, or leather based conditioners like saddle soap. I wanted to jump into action right away, and not wait for a package to arrive or to make a trip to the store. I asked Willow what products would fit that description. She pointed out that we have an Aussie Conditioner and coconut oil.
No Time to Lose, Apply NOW!So Willow and I applied the Aussie Conditioner, a bees wax to the cracked drum. Neither of us were satisfied with the results so we switched to our coconut oil. Satisfied with the results of the coconut oil application. I then used the oil on my non-cracked drum, hopefully that will stop that one from cracking.
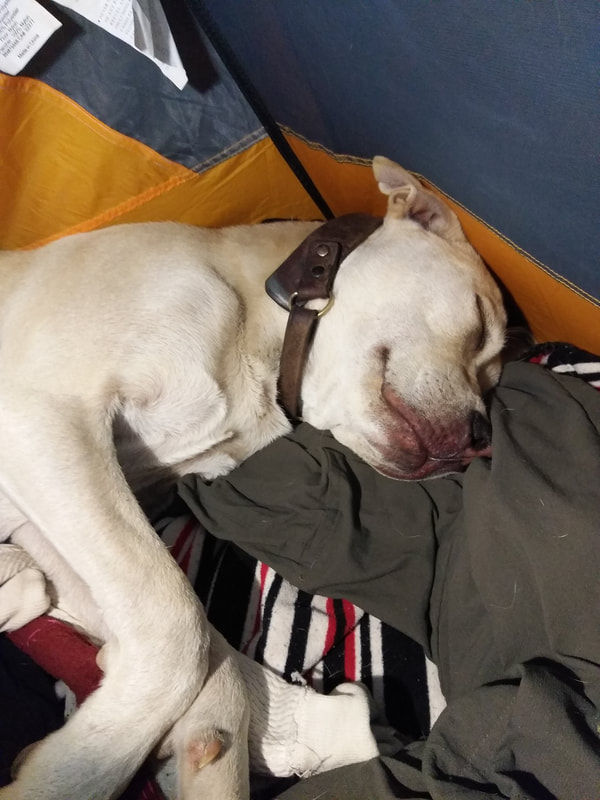
“If you've got a problem, take it out on a drum.” - Neil PeartOther tips I’ve learned from those sites, share that you should never keep your drums in a car, something I did while camping. Oil regularly, a practice that I will have to start. Store at room temperature, something I already do. Tuning your drum is important, wish I knew how to tune. It’s best to store them in a bag that breathes and is made out of a similar material. Happy Drumming! 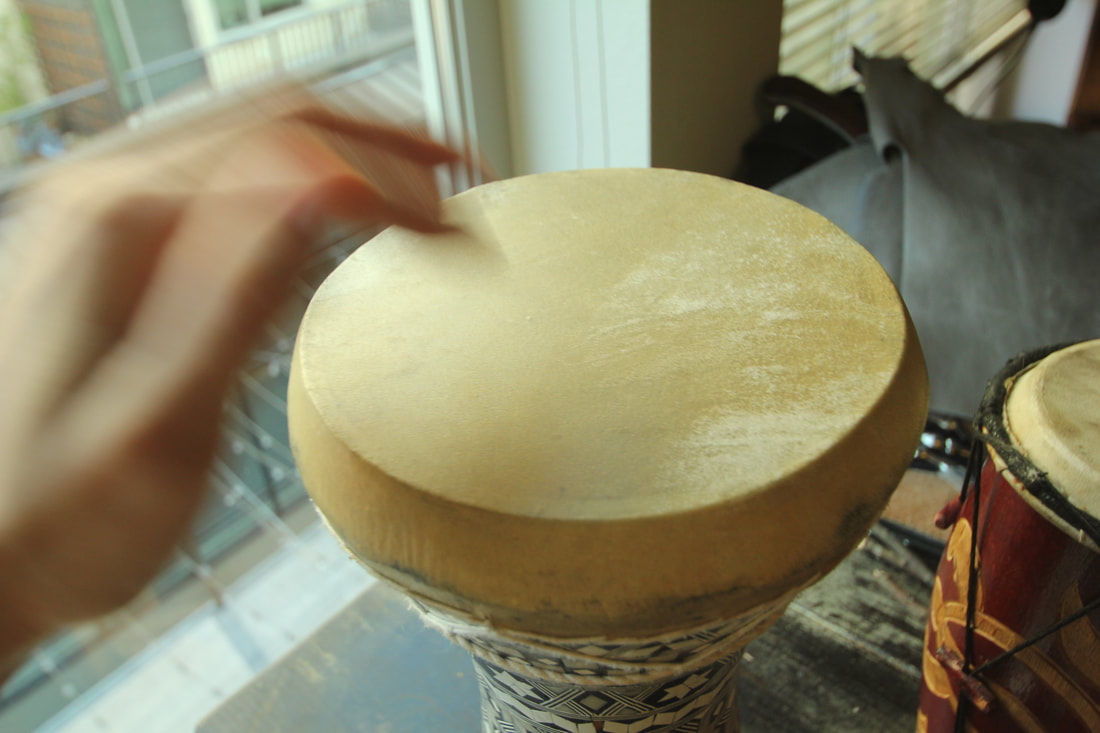 That's my me beating on my favorite drum, psst, don't tell the other drum. I am happy knowing that my drums are now well oiled!
1 Comment
By Willow Enright
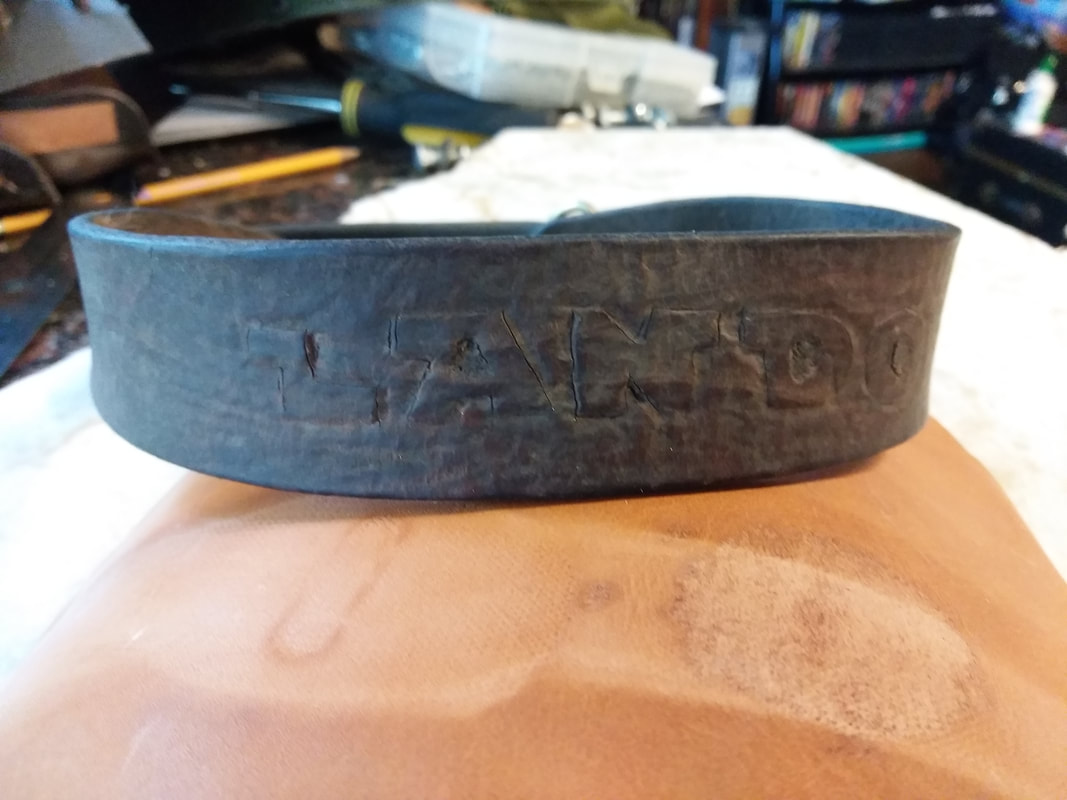
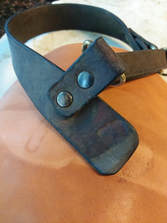
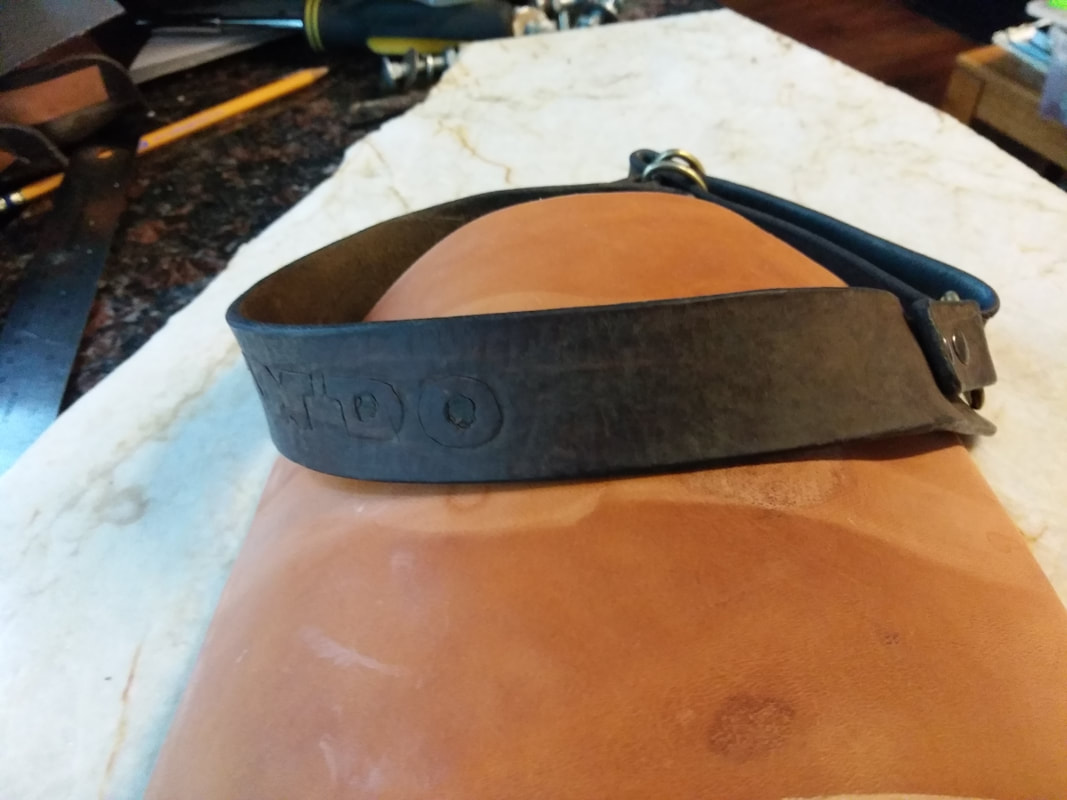
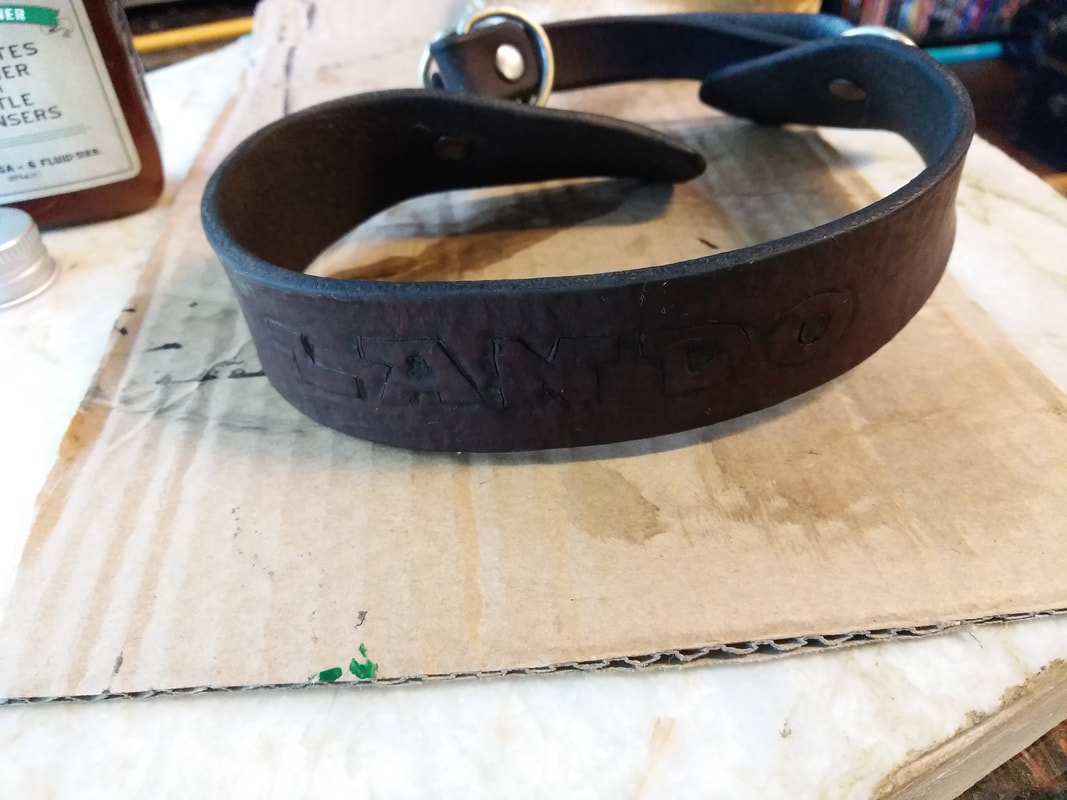
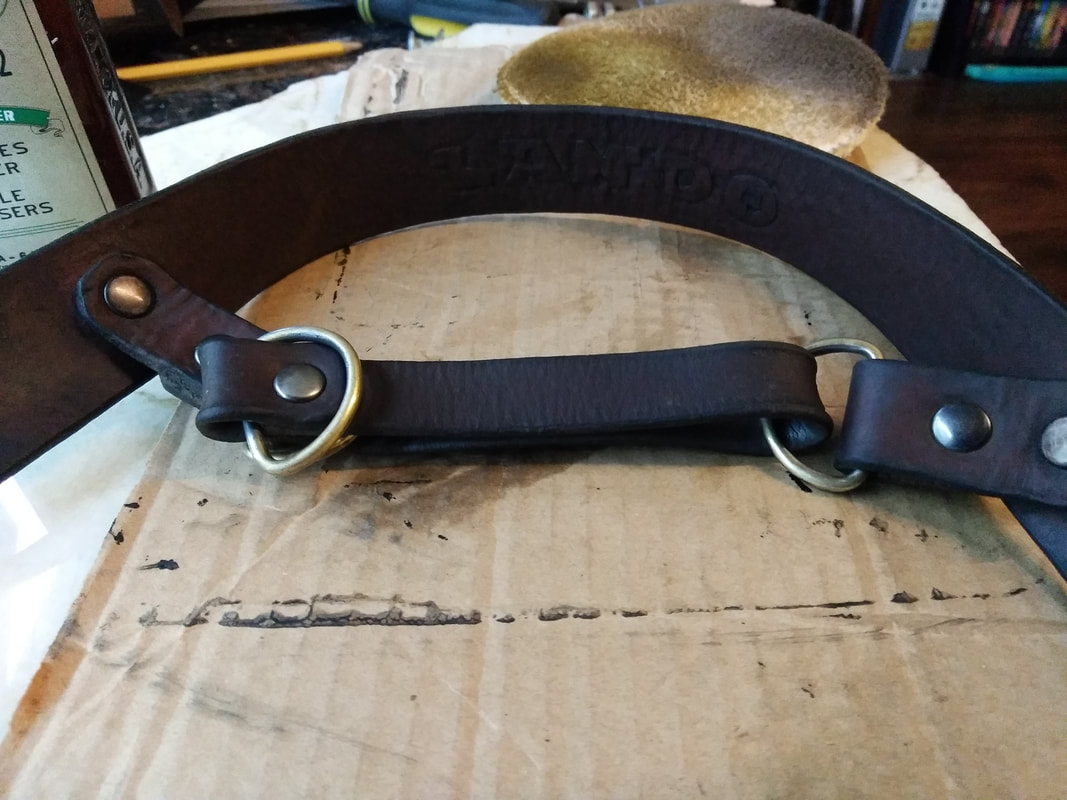
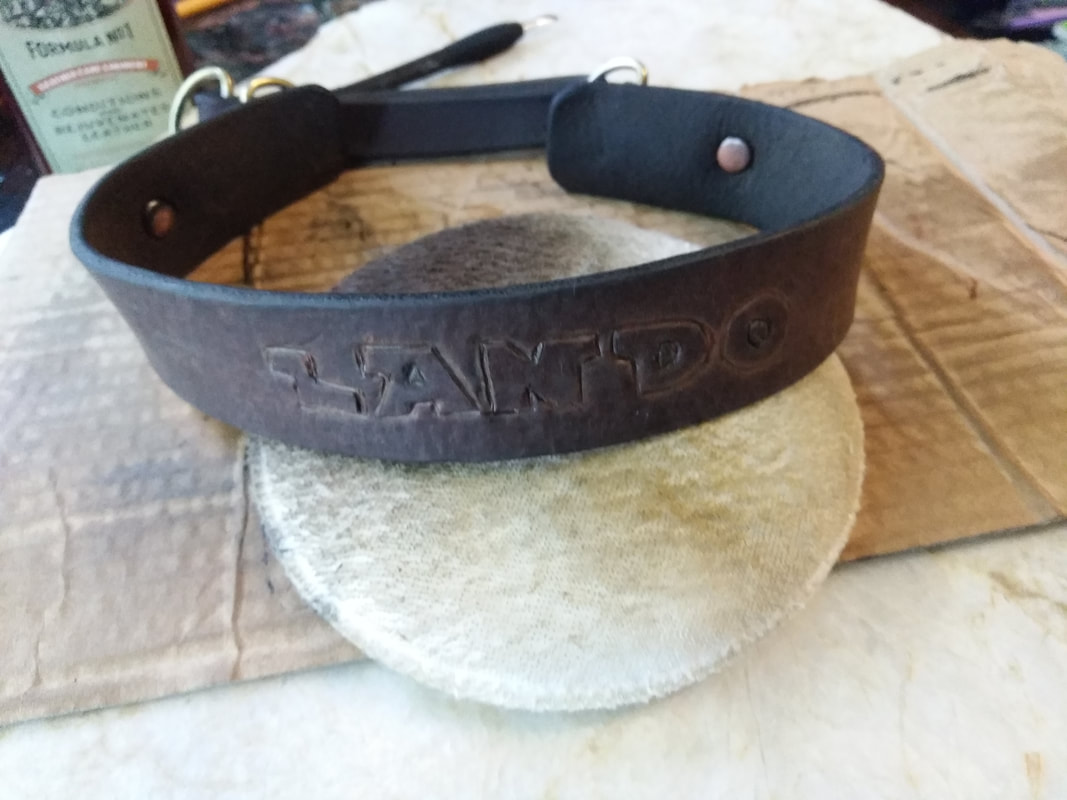
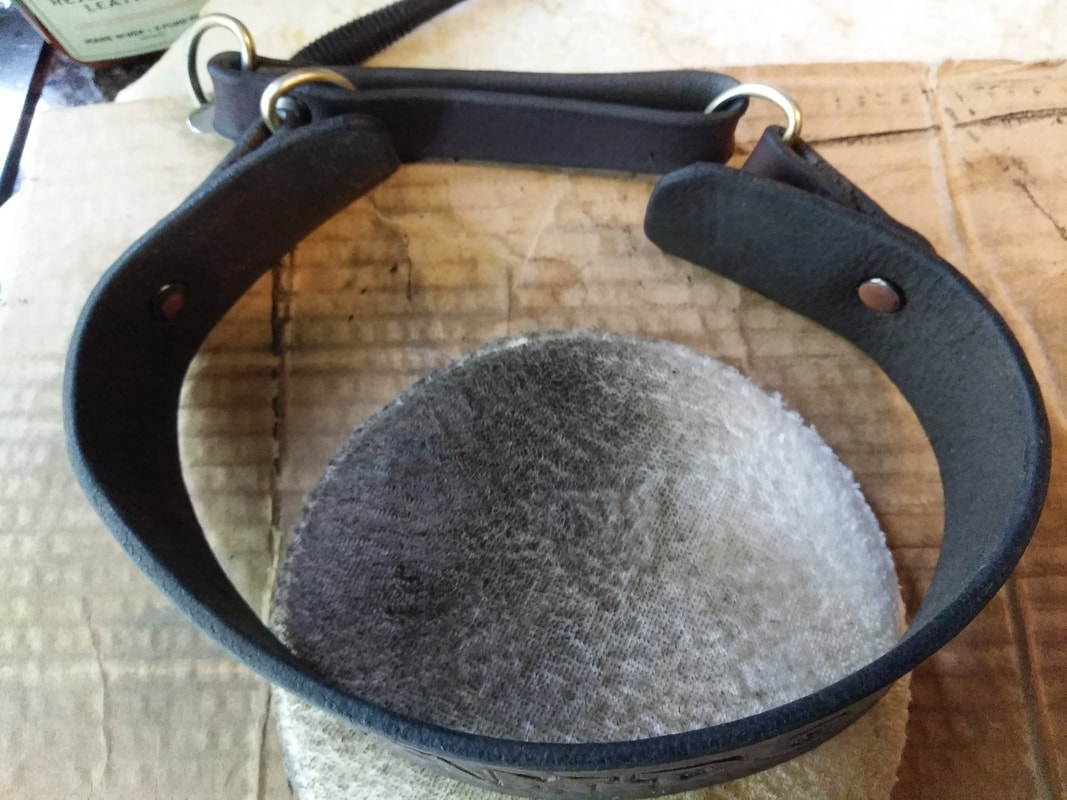
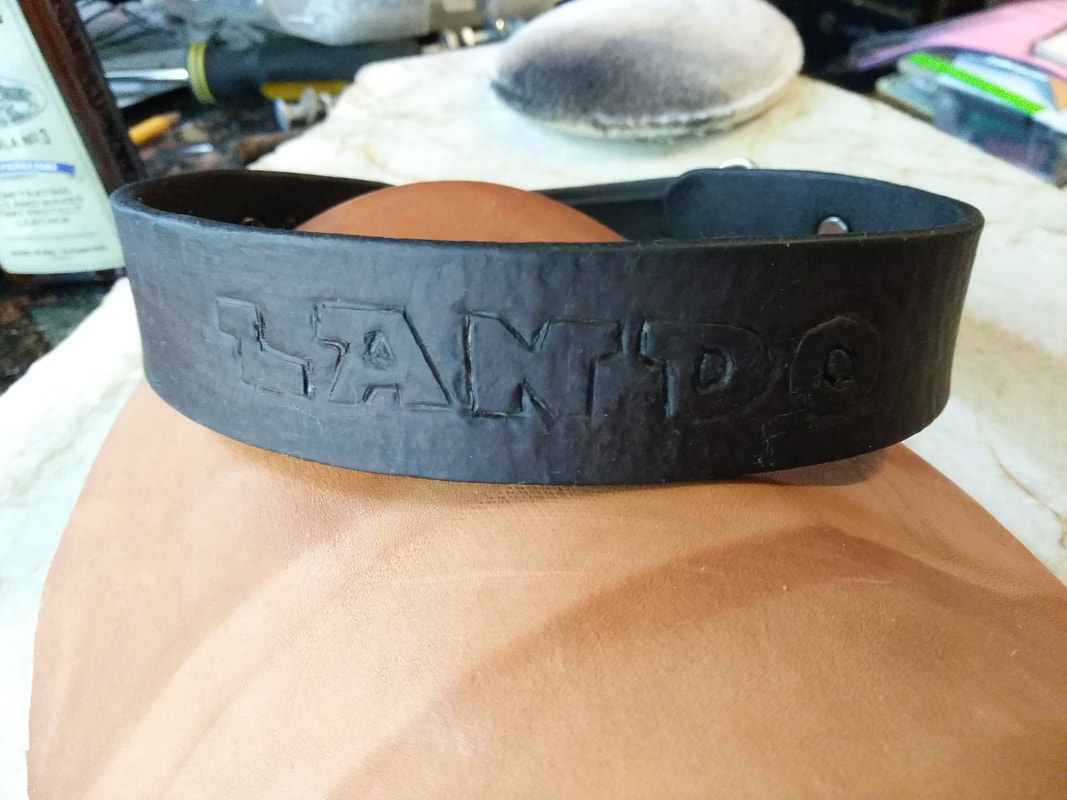
Fall is just around the corner, and it’s time to pull out all your favorite leather items in preparation for cooler temperatures. It’s important to clean, rejuvenate, and condition your leather goods regularly. The more you use them, the more care you should give them. The fall is a perfect time to give your favorite leather a round of loving care. I’m going to demonstrate how to do this with my puppy Lando’s leather Martingale collar. We recently went camping and Lando definitely gave his leather collar a run through the mud and elements. So, it was time to clean it and bring it back to life!
This collar was pretty caked with dirt and it required a damp cloth wipe down before using a leather cleaner. I used Chamberlain’s Leather Milk Formula No. 2, the straight cleaner. Applying a generous amount onto the sponge, use circular motions to work the cleaner into the leather. Since this is an unlined dog collar I also cleaned the inside of the leather collar in the same way. Once you give it a good scrub down, let it dry before deciding if you need another round of cleaning. I repeated the process twice before I felt that it was clean enough.
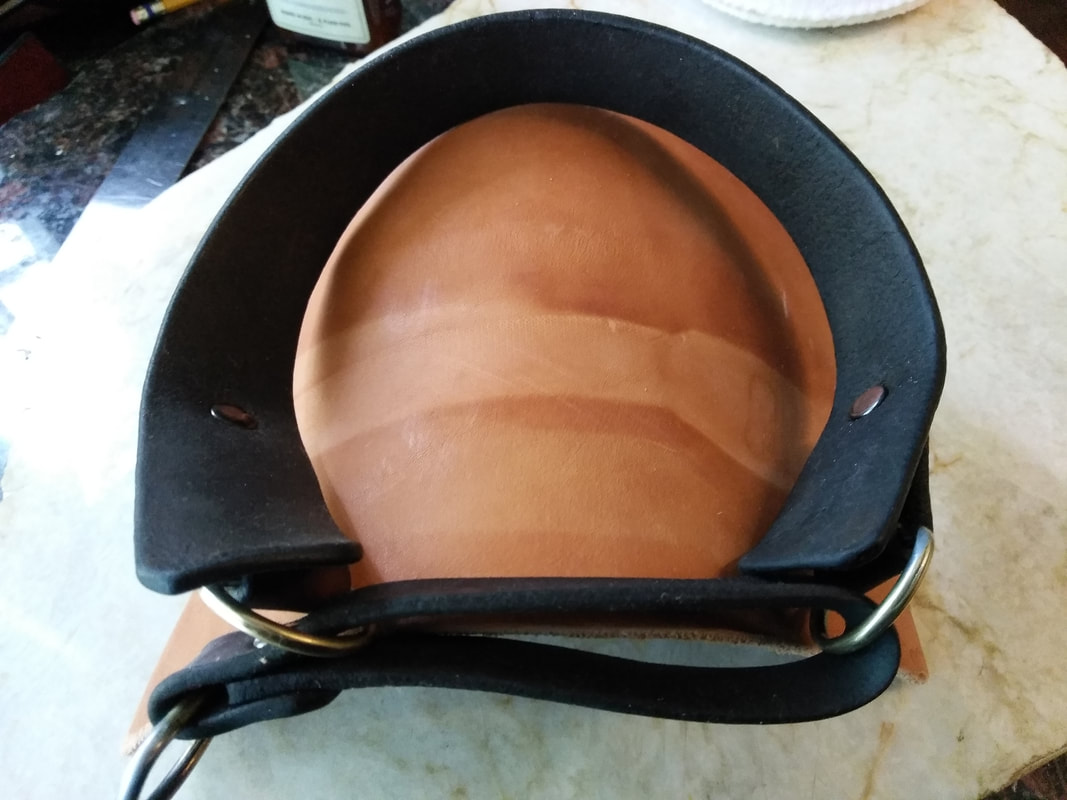
After cleaning the leather and letting it dry, it’s time to rejuvenate it! Another Chamberlain’s Leather Milk Formula No. 1, leather care liniment for rejuvenating the leather. Using a different sponge apply the same technique of liquid on the sponge and circular motions in order to work the cream into the leather. This process will darken your leather somewhat as it helps to replenish the natural oils in the leather. Since Lando’s collar was extremely dirty and required that I use a damp cloth as well as two rounds of the straight cleaner, I gave both sides of the leather a healthy amount of cream. Let it dry completely before moving onto the final conditioning.
Once you have cleaned the dirt and rejuvenated the natural oils in the leather, you can condition the leather to help protect it. I then used Chamberlain’s Leather Milk Formula No. 3, to penetrate the oils and waxes, as it rejuvenates the leather. It does this in such a way as to deeply condition leather while making it rather water-resistant. Some finished leathers will be much more water-resistant after application while a natural finished leather will actually absorb more of the recipe and become a bit less water-resistant. As the oils in the leather evaporate and the waxes wear off of the leather over time, the leather will become less water-resistant. How long that takes will depend on the exposure conditions and the type of leather. If you use it once a year then an annual ritual is plenty, however if you use it daily in the rain then once a month is better.
If you don’t have that many leather items and don’t want to spend $70-80 on supplies that will just sit in your closet until you forget why you bought them, I don’t blame you. This is where getting to know your local leather worker, researching their methods, looking at examples of previous works, can really save you some money. So dig out that leather jacket and have it cleaned just in time for Fall.
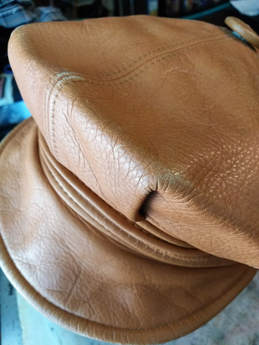
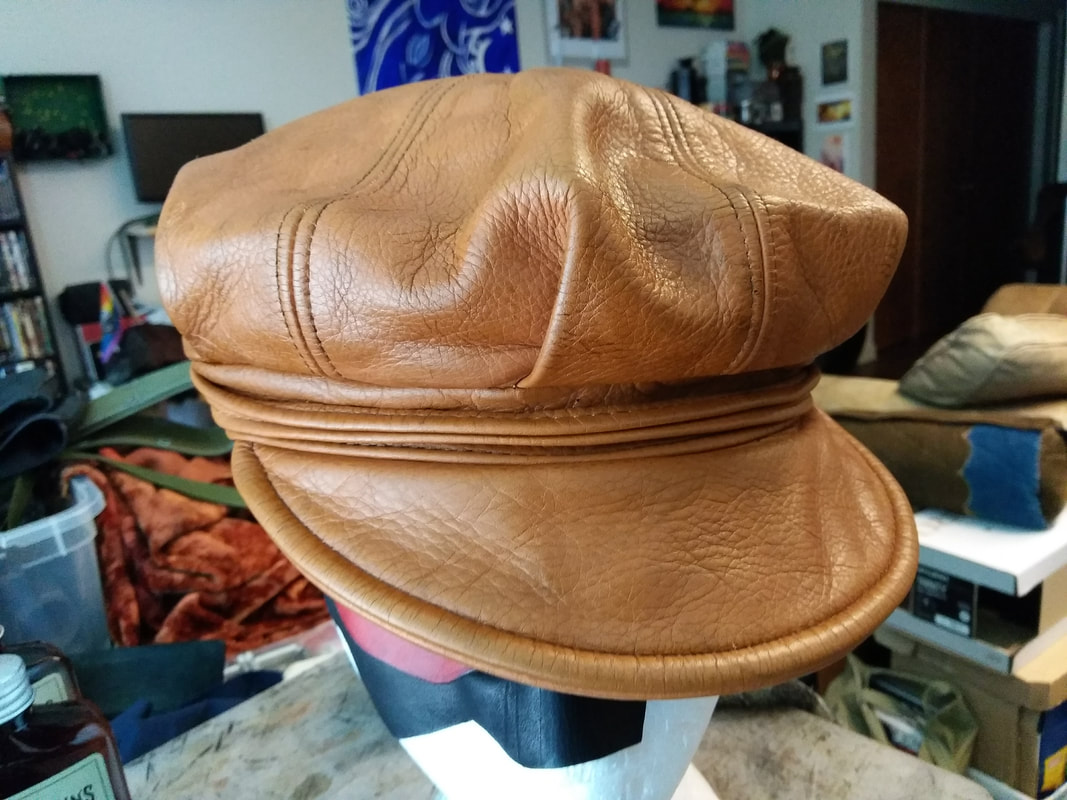
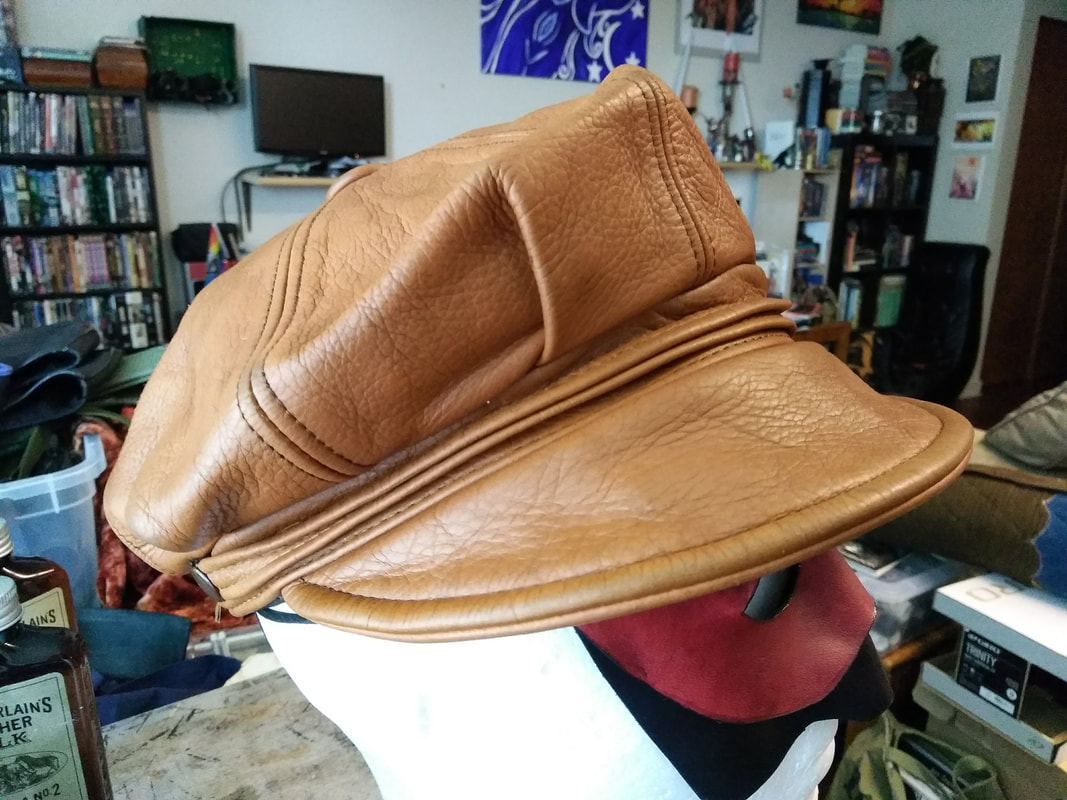
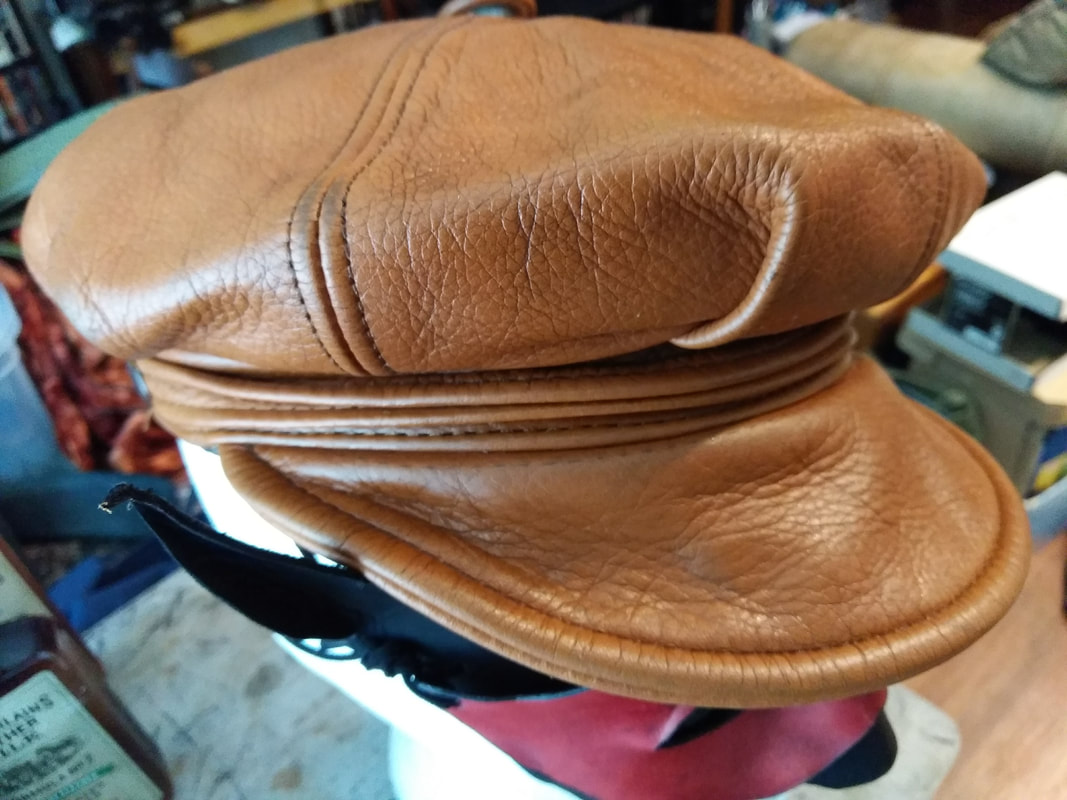
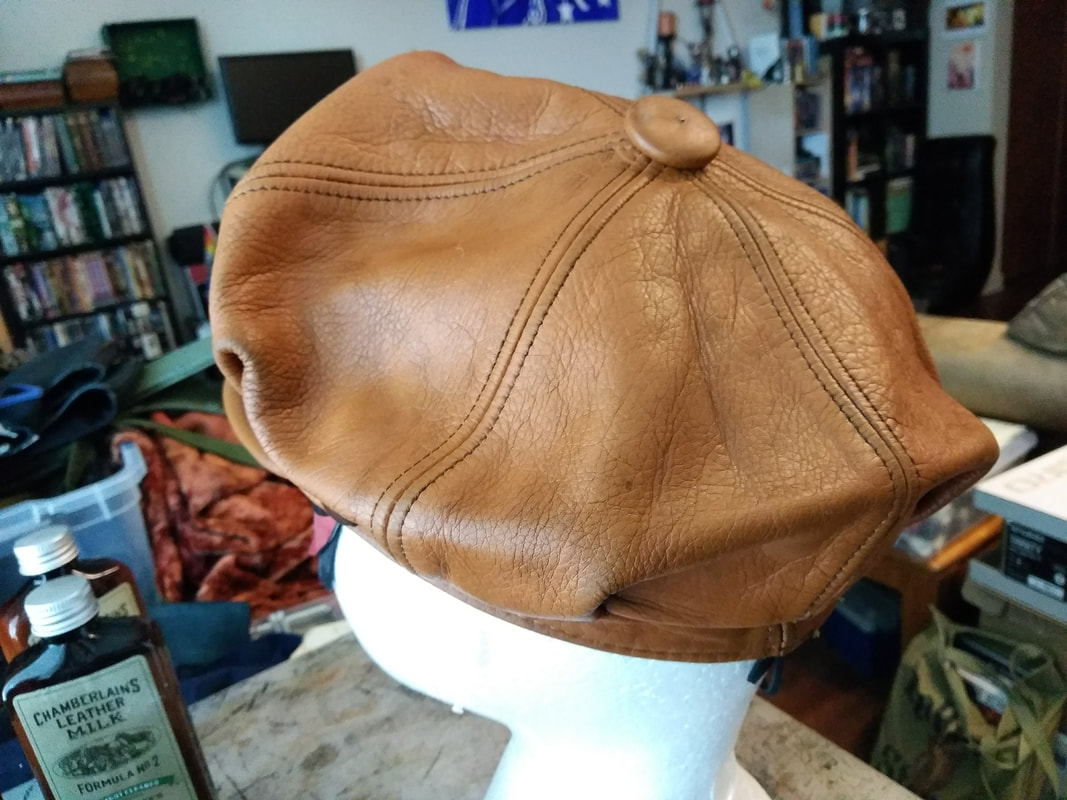
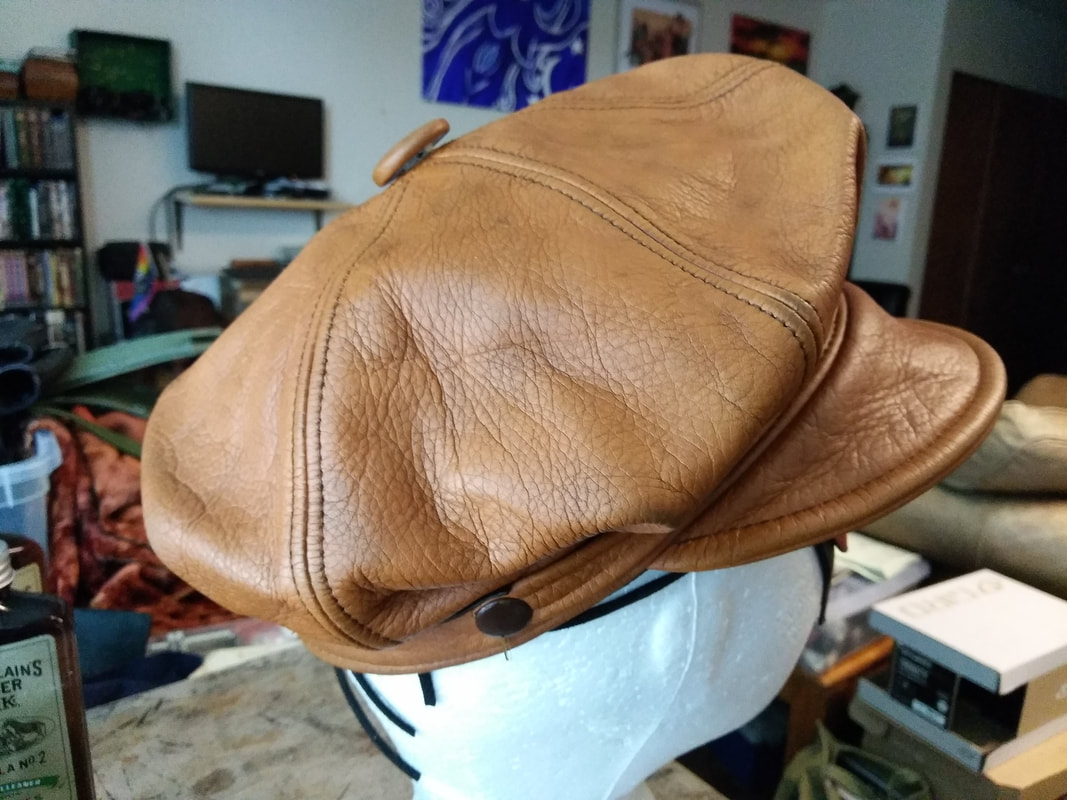
P.S. Just let your friend believe that your leather jacket is new, I won’t tell if you wont. by Willow Enright 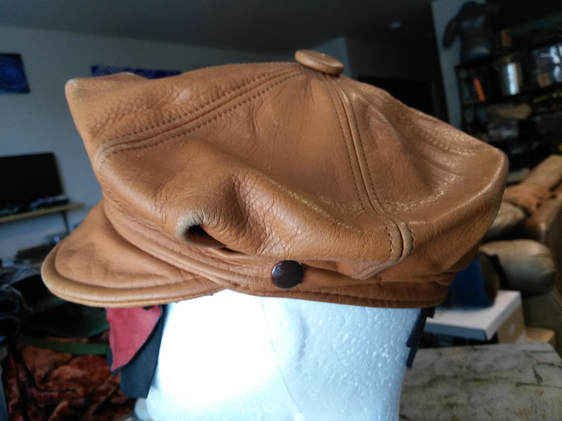 Second hand worn out cap Erin and I recently went second hand shopping and found a wonderful leather cap that was a bit down on its luster. We rescued it and I went to work on bringing it back to life. Below are the steps that I took to give this classic cap a nicely weathered flare.
1.) Clean the leather with a special leather cleaner. I used Chamberlain’s Leather Milk No. 2 formula. Use a sponge or the provided pad to work the cleaner in circles into the leather and let it dry. 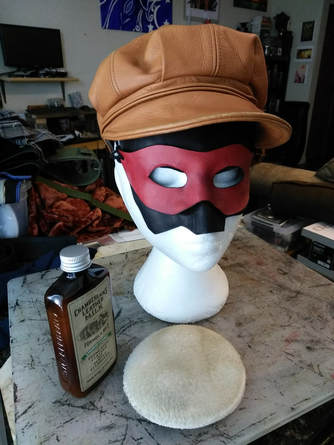 Leather is all clean! 2.) Condition the leather. I used Chamberlain’s Leather Milk No. 1 formula, conditions and rejuvenates leather, followed by Aussies Leather Conditioner. Use another pad to first work the leather milk no. 1 into the leather, leaving it to dry, before following that with the Aussie Leather Conditioner in the same application process but using another pad. Leave it to be absorbed before using a cloth to buff the excess conditioner off. Also buff in circular motions.
3.) At this point I had hoped that the areas rubbed down to the split suede would have been less worn out looking, however since they were still rather worn down I decided to give the simple cap a bit of color. I chose to use Eco-Flo Hi-Lite Chestnut to give the hat a more lived in feeling as opposed to the worn out look it still exuded. Add the hi-lite with a sponge in a circular motion followed by wiping the excess off with a cloth or paper towel. Leave it to dry.
4.) Finally, I applied Chamberlain’s Leather Milk No. 3 to protect the leather from further wear and damage. Again, use a different pad to apply the milk in a circular motion rubbing it into the leather. Leave it to dry, and afterwards you have a nicely weathered slightly retro cap!
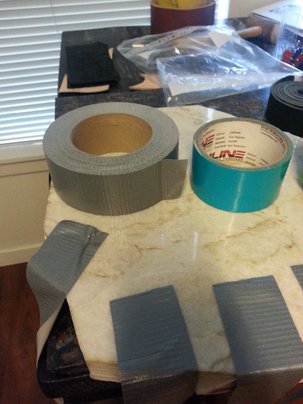
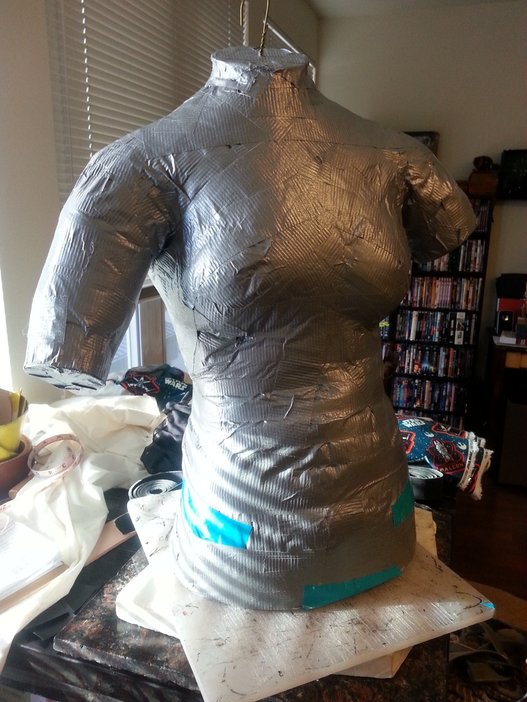
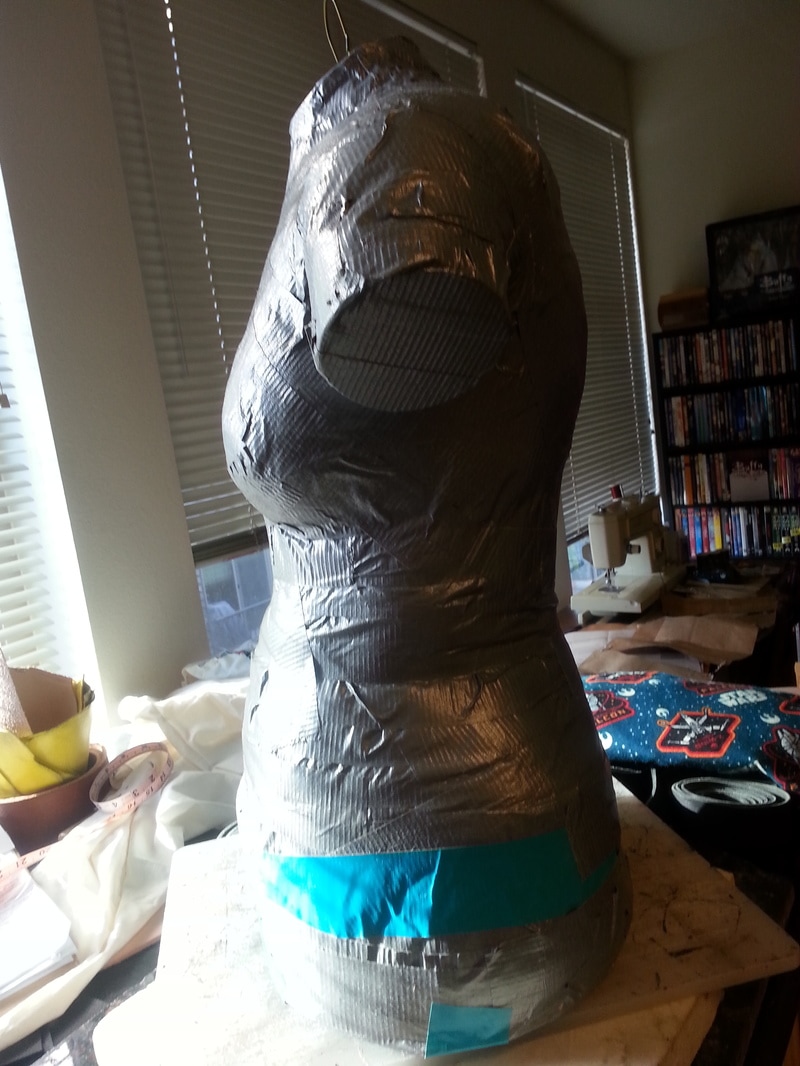
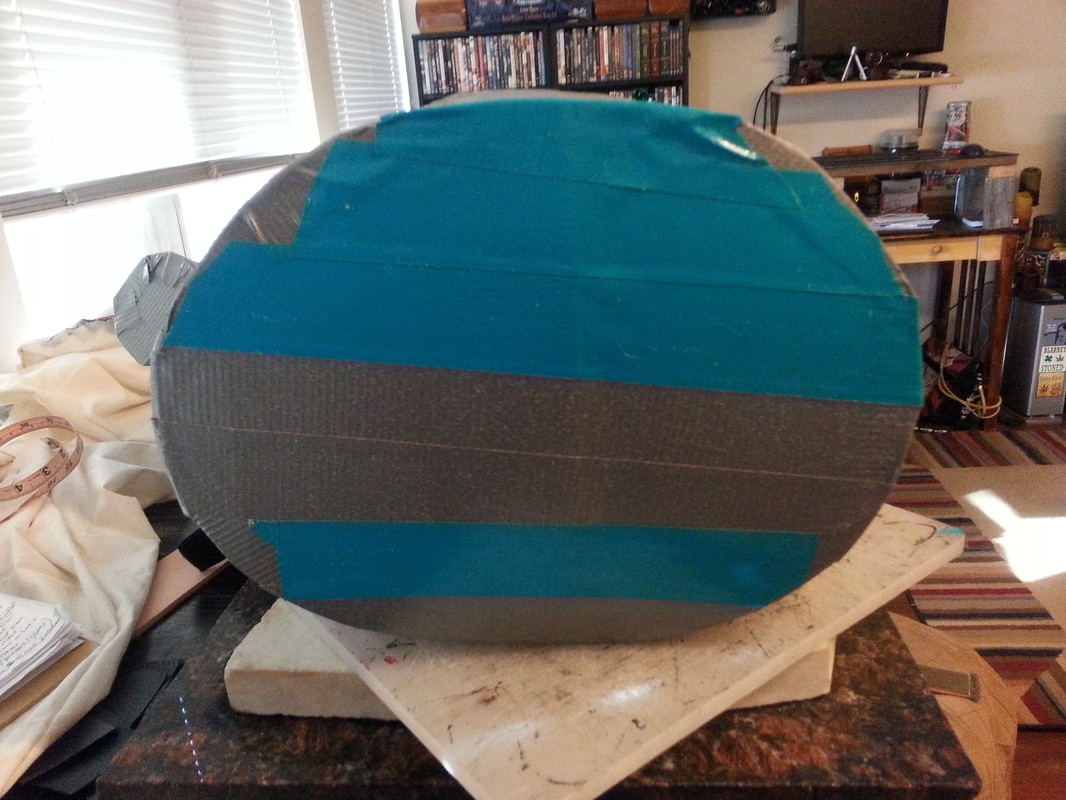
by Willow Enright 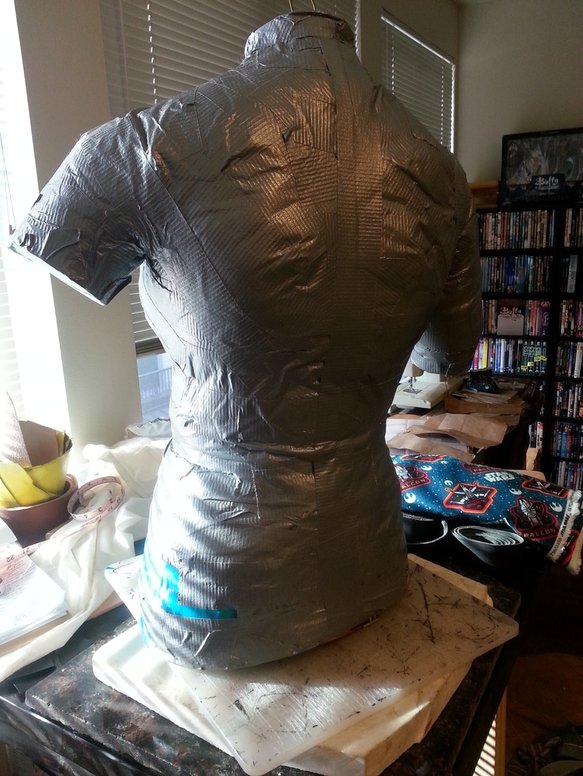 Backside of finished Duct Tape Body Double. Supplies
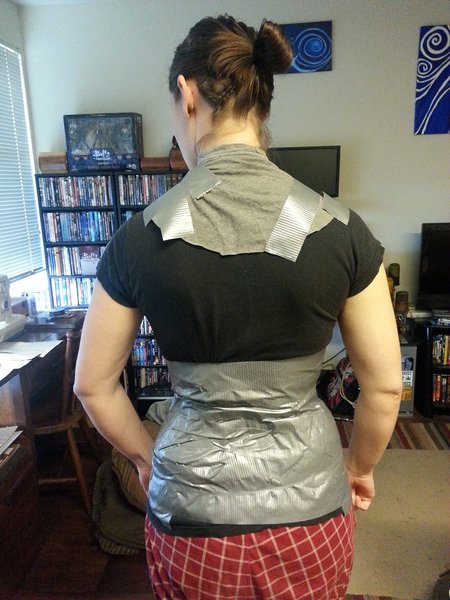
Having a Duct Tape Body Double is extremely helpful when building Cosplay armor. You can also use it as a dress form for sewing purposes. It's actually quite simple and quick to make as well. You can use as many recycled products as possible with this one, only I do recommend actual Duct Tape as opposed to any other sub-par tape. When you are all done you'll be able to create your Cosplay costumes with relative ease since you will have a body double to work with. 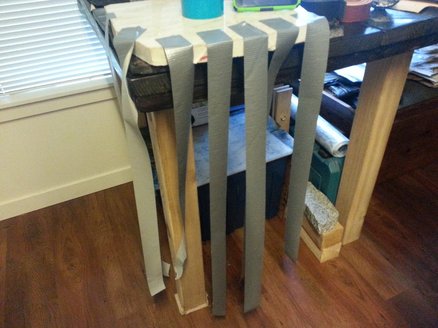 Make several long lengths of tape to drape from a table or countertop. Start your Duct Tape Body Double with several long lengths of duct tape, drapped from a tall table or countertop. This allows you to make nice, even applications of the duct tape so that you don't end up pulling too tight as you wrap it around the individual. Pulling the tape from the roll as you wrap tends to pull too tight and can really restrict the person's breathing. Being tightly taped in duct tape requires a lot of trust since the material is extremely binding and can cause one to panic if not properly done or monitored. If your voluteer does panic, you can cut off the t-shirt in the back and once they have recovered you can simply tape them back into it.
When you are using a t-shirt start taping at the bottom to anchor your t-shirt. If you are using saran wrap instead of a t-shirt you can start with the crisscross motion over the breasts for a woman and the hip for men. Make sure to cover evenly and don't get too close to the edges, you can tape those after you remove your voluteer. When you work over shorter, smaller areas such as the breasts cut your long tape strips into six inch sections or so to avoid having to crease the tape too much. If you plan to do any collor work be sure to create a section up the neck so you'll have a neck line in the end.
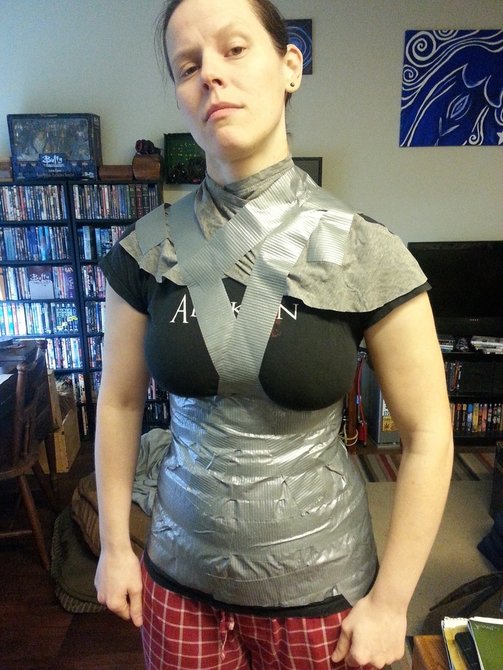
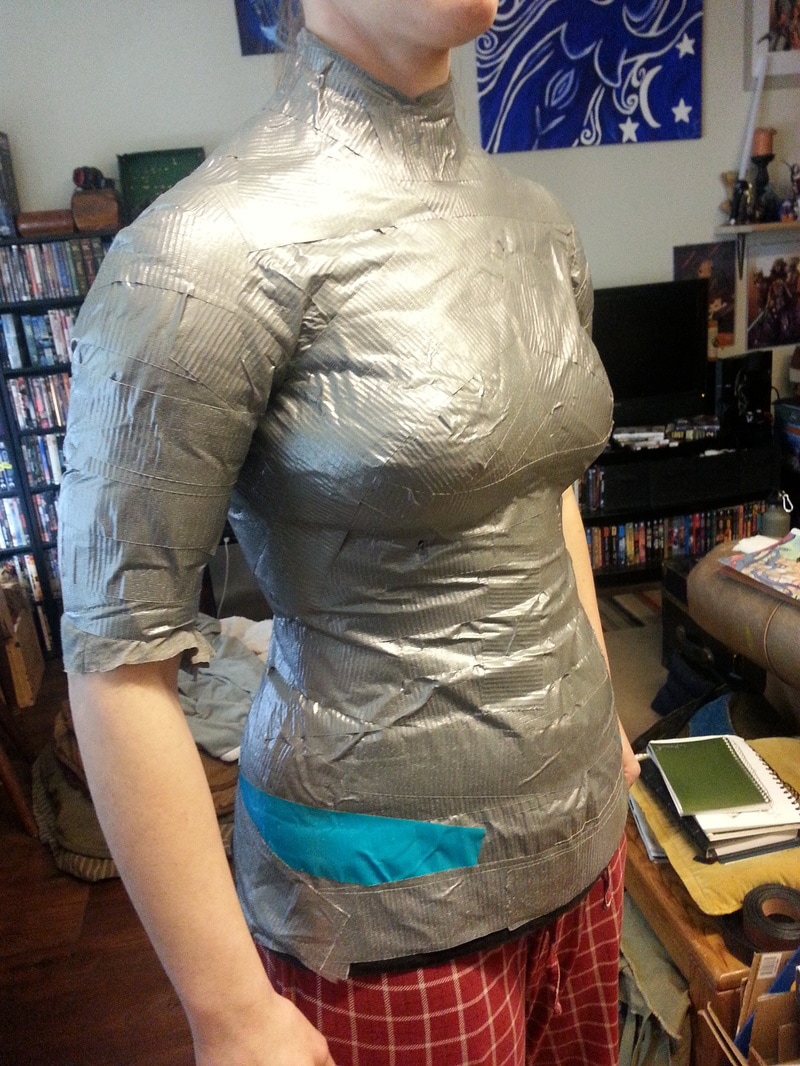
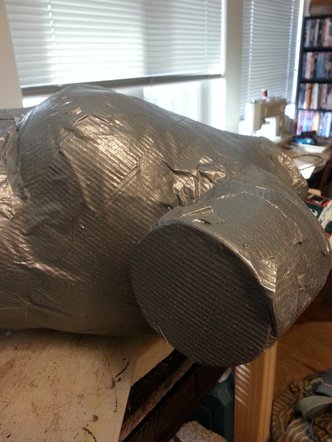
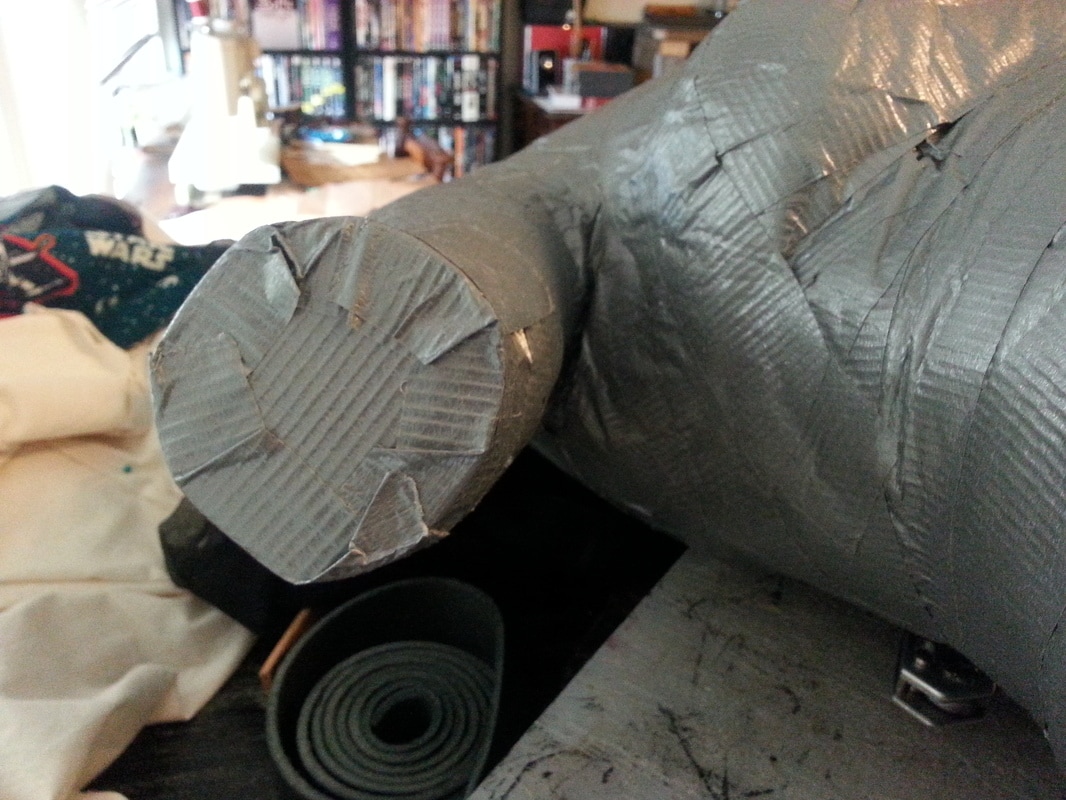
I wanted to have one of the arms just a bit longer than the other so I used a scrap piece of a left over t-shirt to extend the one sleeve slightly. This is helpful for builiding shoulder pauldrons. I also wanted to specifically mark her hip line with a different colored tape so that when I'm making her chest armor I don't end up building it too long so that she cannot sit down. This is a good technique for keeping track of important measurements. If you have enough tape, and the person has enough patience, go over the person twice to ensure that your body double won't come apart at the seams. 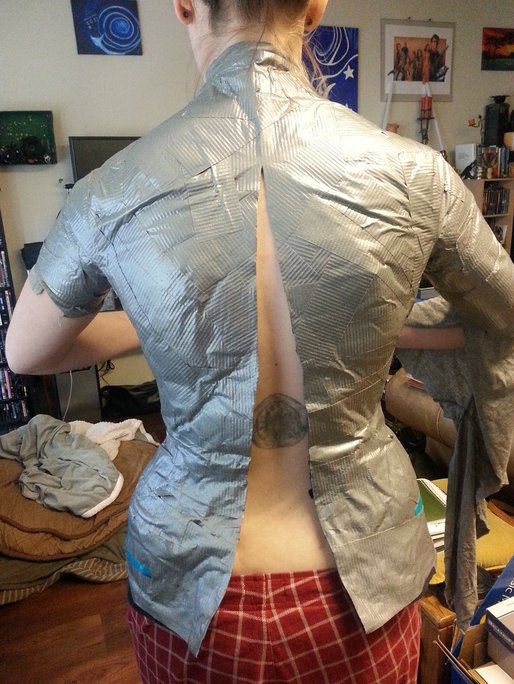 Cut from the bottom but guide the scissors with your hand. Once you have successfully wrapped your voluteer completely you will want to remove them from the shell you have made. Start cutting at the bottom, using your hand to guide the scissors but being careful not to cut your own fingers. Make a straight cut line all the way up to the neck, and then you can gently pull off the duct tape form.
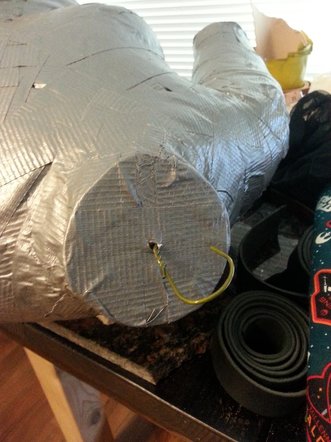
Retape your body double back together and create the cardboard ends for the neck, arms and torso. Use duct tape to secure the cardboard ends over the body double. Make a small hole in the neck cardboard area for your wire hanger to thread through from inside your duct tape body double. Put the wire hanger inside your body double before you begin to stuff the inside with the poly fill. Tape up your arm holes next, continuing to stuff the poly-fill inside. Every once in a while you should check the measurements of the body double to make sure that you don't over or under stuff it. When you are done stuffing, tape on the bottom piece of cardboard so that your torso will sit flat.
I like to add the hanger so that it's easier to pick up or hang while storing it. Keep in mind you will want to create a loop with the hanger handle if you will be adding lots of weight to your duct tape body double, so that you can add a carabiner clip instead. That will hold up better for long term hanging purposes with added weight. Creating a duct tape body double will prove to be extremely useful for pretty much all Cosplay creating purposes. You can also make a full body duct tape replica if your costume is more extensive. May the crafting Force be with you!
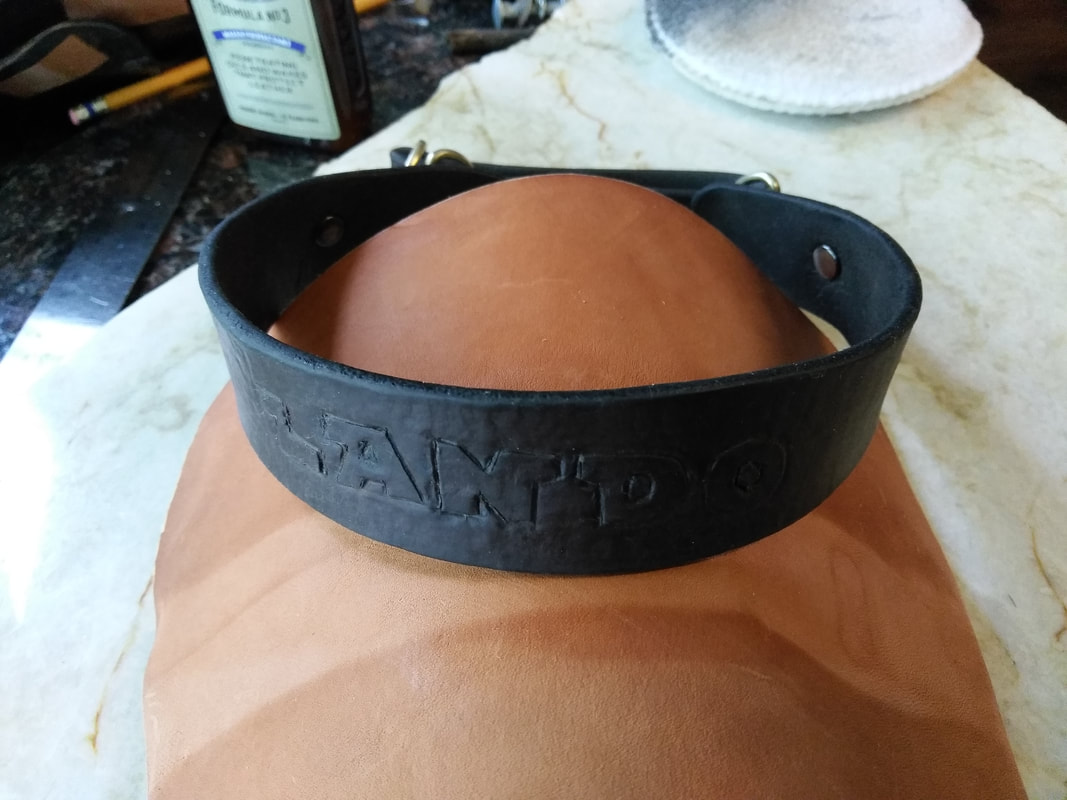
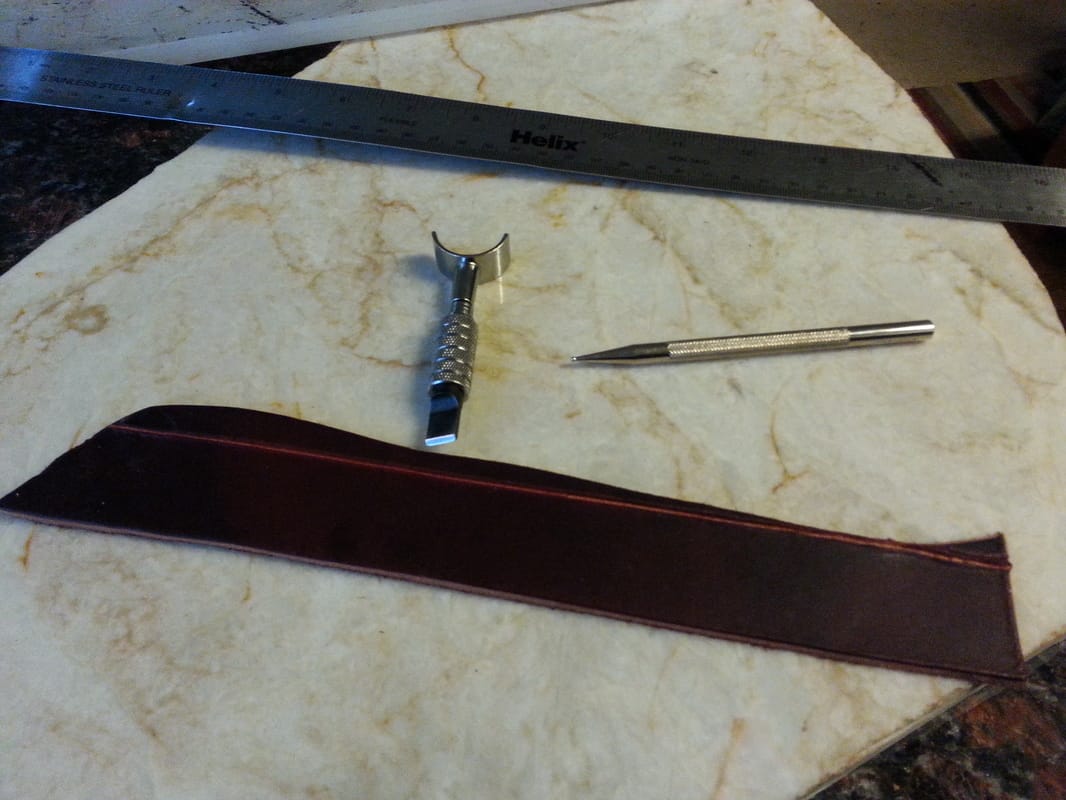
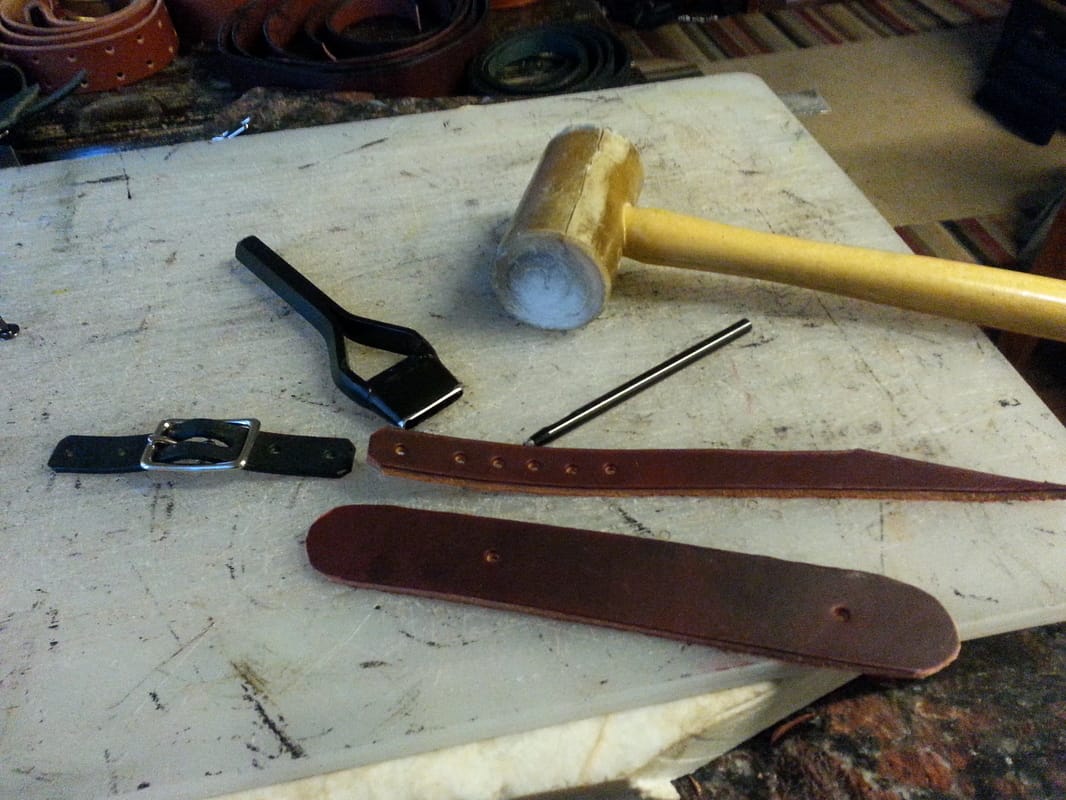
by Willow Enright 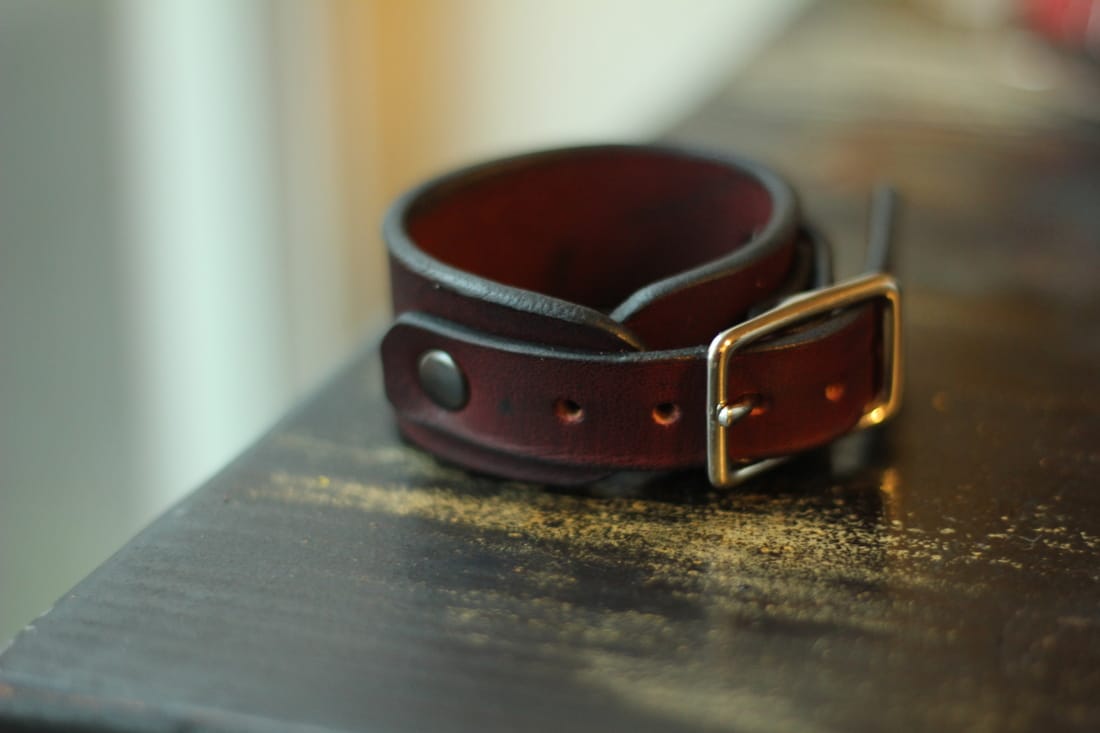 Custom leather bracelet. It seems that most leather lovers are rather fond of the classic leather bracelet. There's much to be said for the simple elegance of a nicely crafted bracelet. It goes with practically everything, and it's not too terribly difficult to make one yourself. So, if you've been wanting to craft homemade gifts for those you love, you should try out this classic beauty! Supplies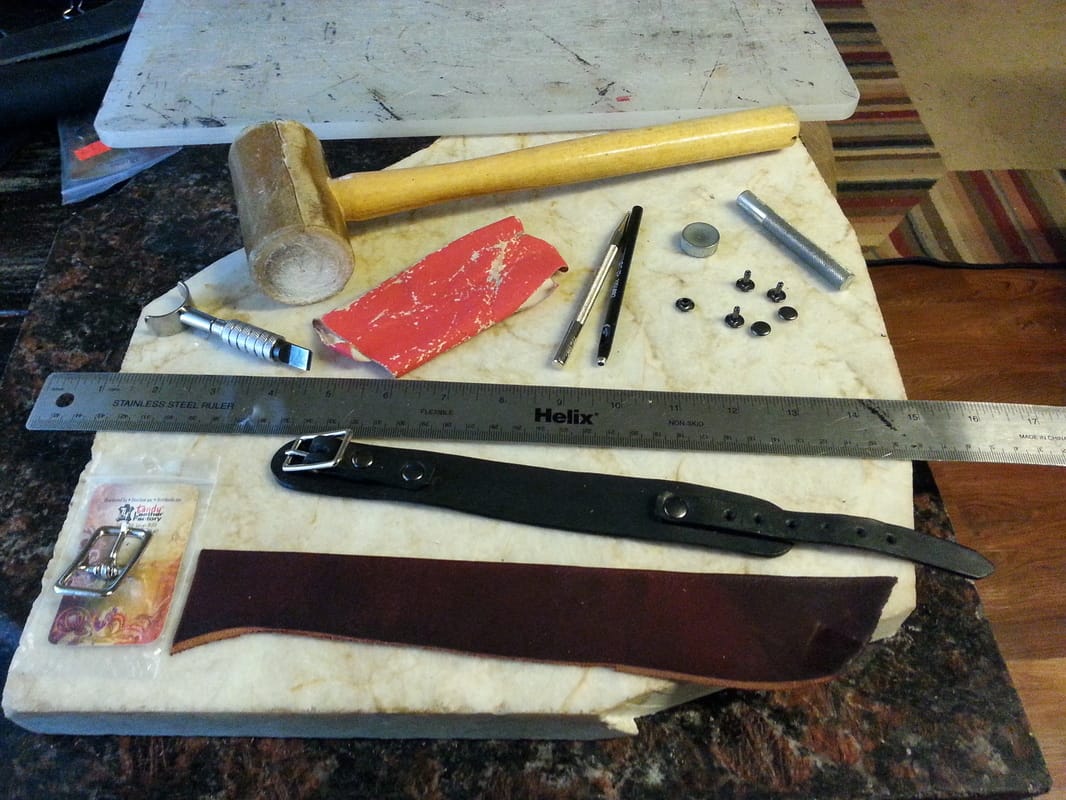 Supplies for creating your classic leather bracelet. Cutting Board Hole Punch Rivets/Rivet Setter & Anvil Mallet Swivel Knife or Scissors Buckle 1/2" or 1" Straight Edge Ruler Leather Sandpaper Oval Belt Punch (or just cut groove for belt tongue)
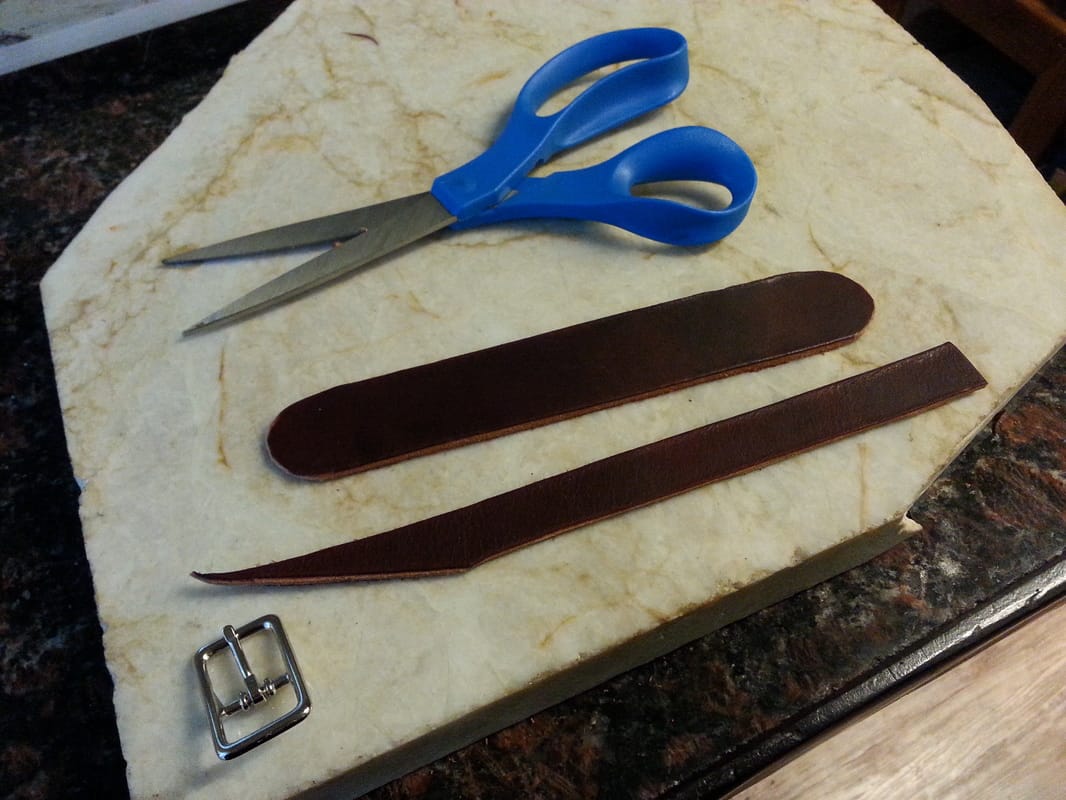
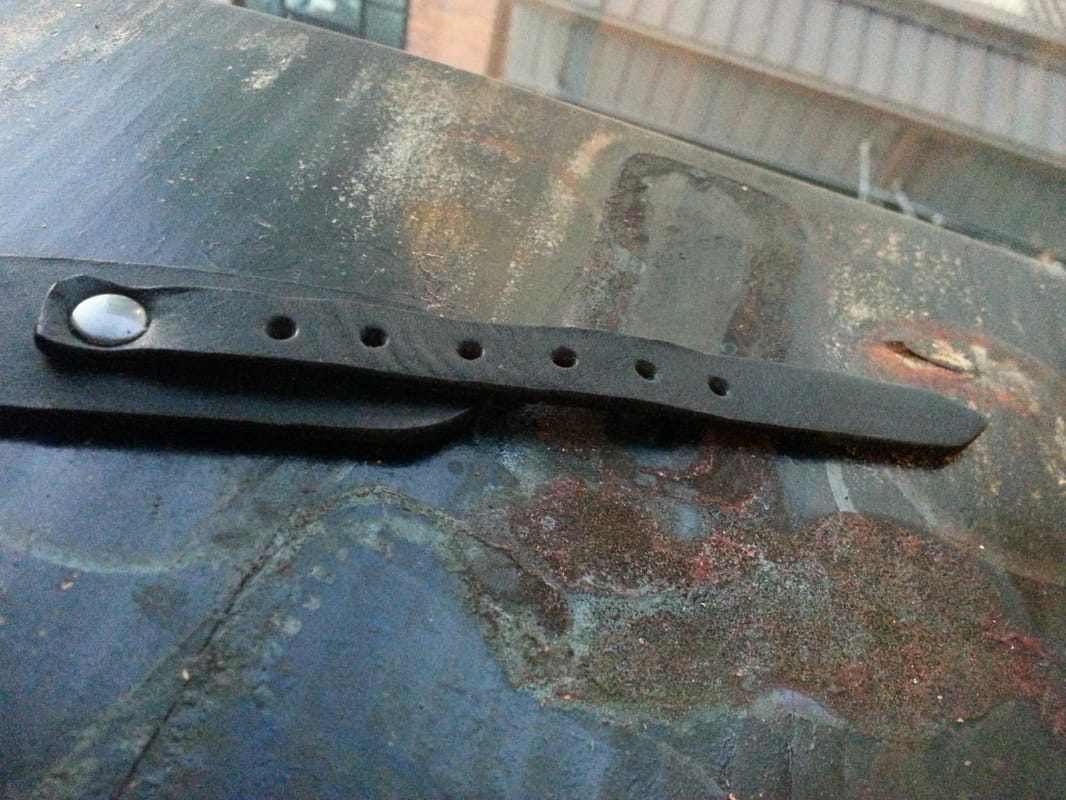
I usually choose a piece of scrap leather that will be long enough, and usually of a thicker ounce like 5-9 oz. You can use vegetable tanned if you want to dye it a specific color, or get fancy with design. Today however, we are staying simple and classic with a pre-dyed leather. I made two bracelets, the finished product you'll see is a 8-9 oz Double Austin Shoulder black leather and the build example is a 5-7 oz burgundy Latigo. Measure your bracelet length, making it at least 1" wide, and 6"-7" long for ladies, and 7.5"-8.5" in length for men's. Also, cut your strap at least 1/2" wide, if your bracelet is thicker than 1" then just make sure that your strap is at least 1/2" less in width than your bracelet. This way your buckle won't hang off the sides when you are done. You will want to cut the strap about an inch and a half longer than you cut your bracelet; this will let you cut that same strap into the two parts for the buckle and its counter strap. You can also round off the edges for a more comfortable fit.
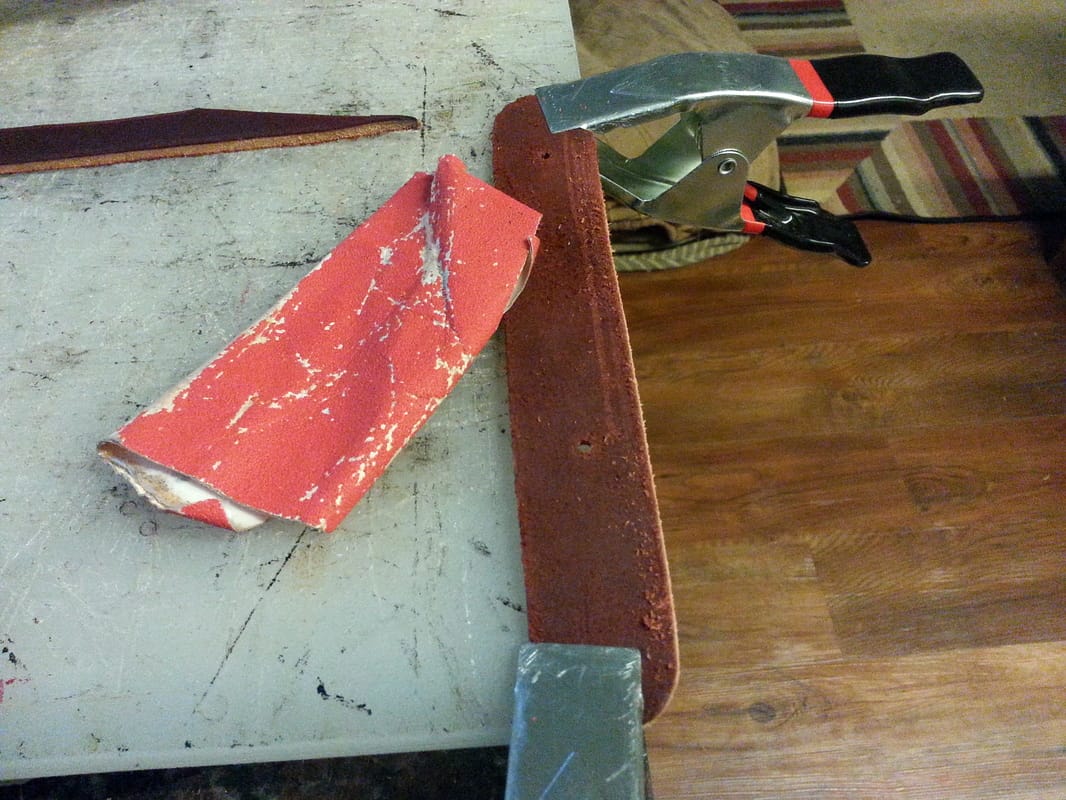
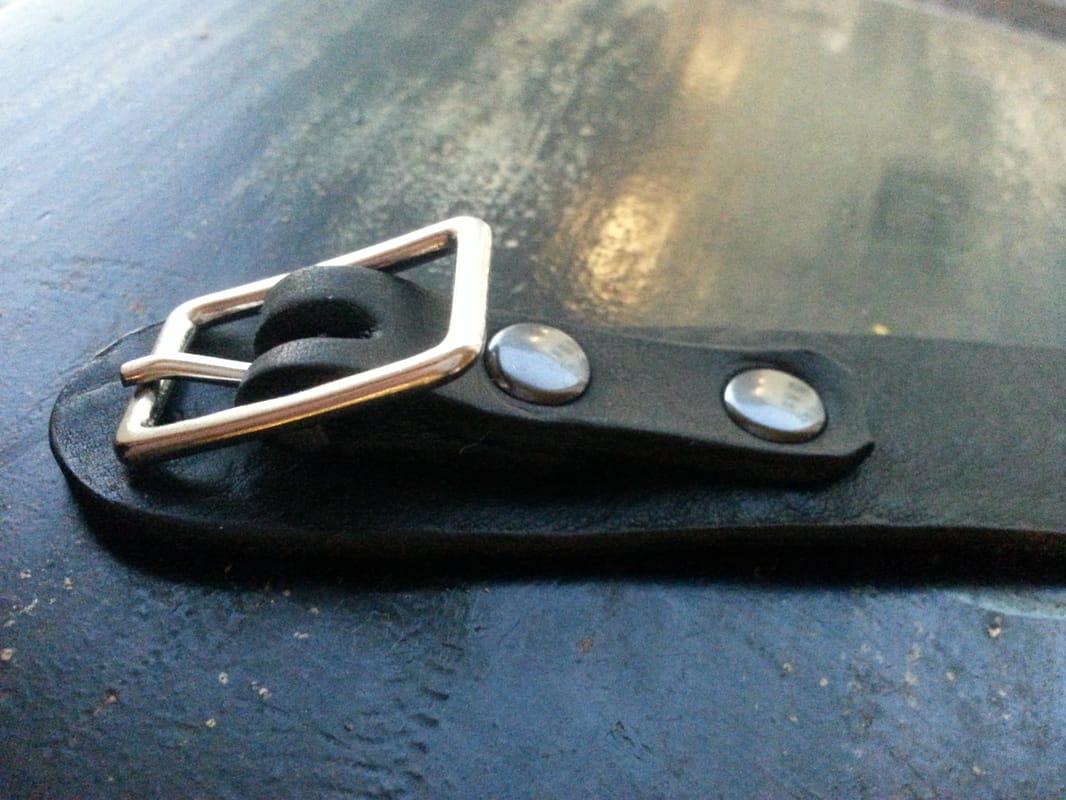
I like to use a buckle that already has a built in keeper to hold down any excess strap. Line up your buckle so that it sits close to the edge but not off the edge, and fold your strap over to create the buckle loop you will need to hold your buckle and fix it to your bracelet (left picture below). Measure and punch all your holes. I like to set my strap holes about 1/2" apart and do at least 5-6 holes for a comfortable but adjustable fit. I like to set my buckle strap about 2-2.5" from the edge, and afix it with one rivet to the bracelet and one rivet to secure the buckle to the buckle strap itself. Once everything is cut, sand the edges of the leather until smooth. If you like the rougher look to your end product then leave the edges raw after sanding, otherwise you can be fancy and use an edge kote and burnish them nice and smooth.
To make the oblong hole for your buckle tongue you can use an oblong hole punch or just use your regular one to punch most of the leather out of the way, and then use sissors or an exacto knife to clean up the edges. Use your rivet setter and anvil to set your strap rivet, fix your buckle to the strap and then the strap to the bracelet. The end result will be a classic leather bracelet that will be loved and cherished for years to come! 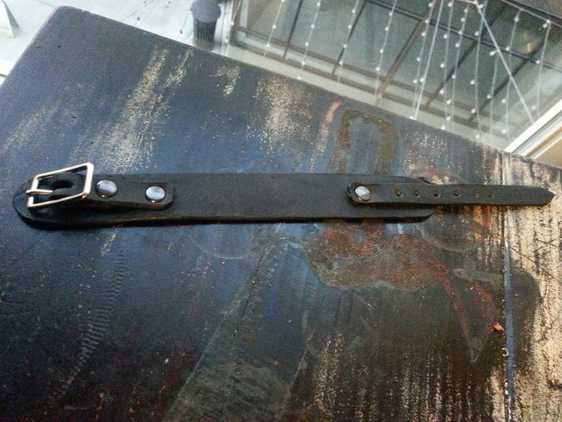 Black Classic Leather Bracelet by Willow Enright 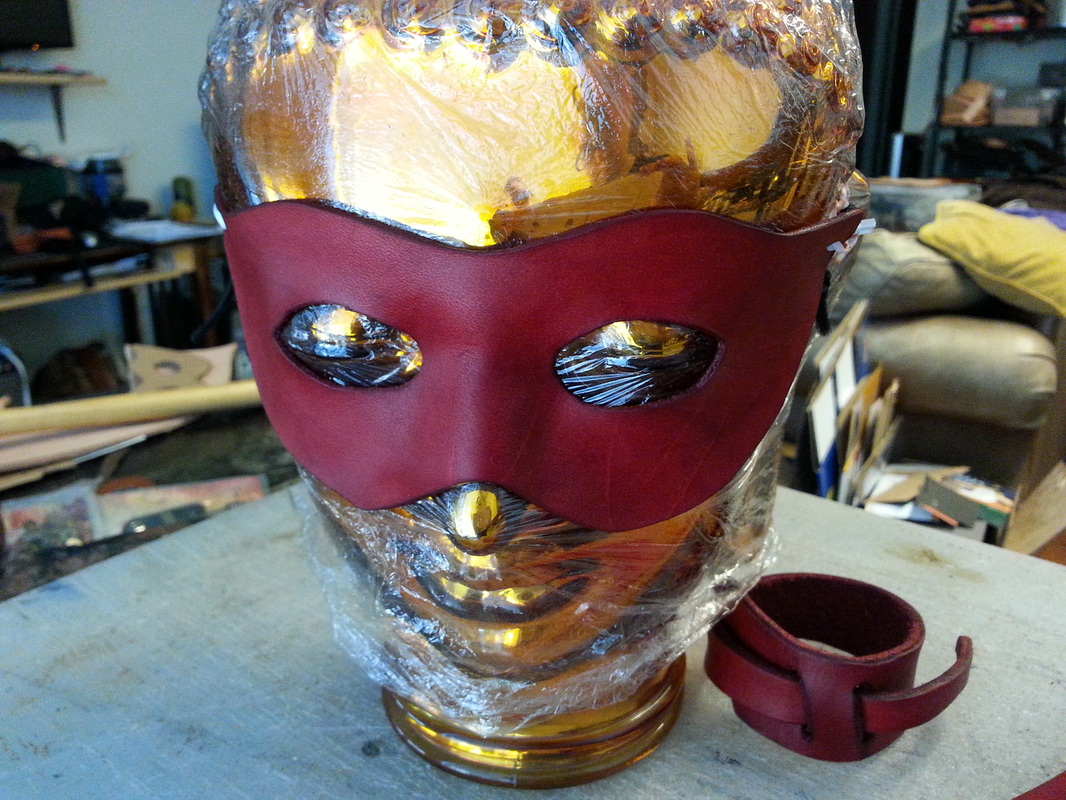 Supplies: Vegetable tanned leather (2-3 oz, or 4-5 oz are best, but any weight will work.) Scissors/Craft knife Ballpoint Stylus or Pencil Tracing Film or pencil rub transfer technique Optional Supplies: Styrofoam Head, Feathers, Pine cones, Markers, Stains, Paints, Beads, Glitter, and pretty much anything else you might want to craft into your mask.  Instructions: Step 1: Trace a mask pattern onto paper using pencil or onto tracing film using a permanent marker. You want to ensure that the mask will fit over the area on your face that you are attempting to cover. 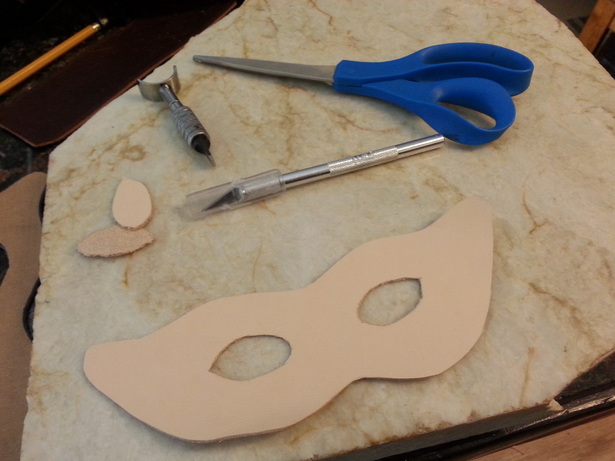 Step 2: Wet leather lightly with a spray bottle or sponge, and let the leather dry slightly. Once it has lightened again in color transfer the pattern from the tracing film to the leather using the ballpoint stylus, or you can use the pencil drawing technique to rub the design onto the dried leather. Just remember that your design will be like a mirror image and it will be the opposite of what you drew, so you’ll need to pay attention with this method. Cut out the mask pattern, and put holes in the temple area for your tie to be attached. 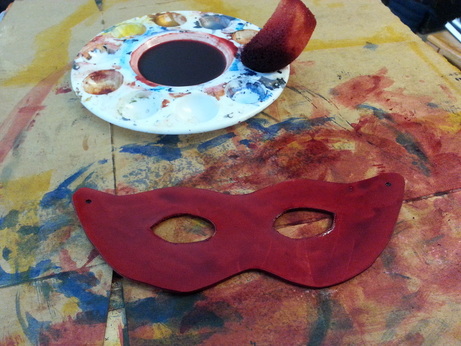 Step 3: Wet the mask again with the spray bottle or sponge, and carefully shape the mask by hand to fit the contour of the face. If you choose to use a Waterstain, you can substitute it as your wetting method instead of using the sponge or spray bottle of water. Continue to check on it to ensure shaping is done well. Allow the mask to dry completely. You can also take the time to cut a design into the leather before shaping it. This is best done after the leather has almost dried again after being slightly moistened. 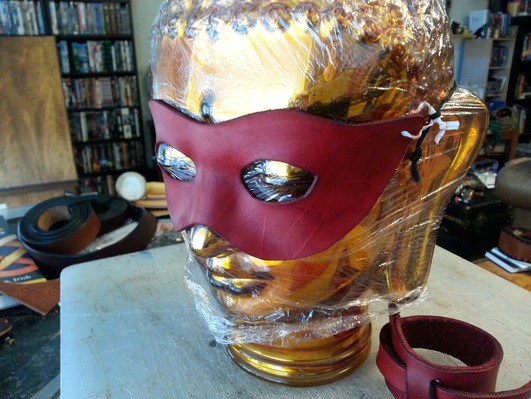 If you can acquire a Styrofoam or glass head to use for the shaping and drying process it will be very helpful. This way you can stain or dye the mask prior to shaping it, thus skipping a step. Otherwise, you can use your own face to shape the mask, but keep in mind that if you do use a Waterstain or dye beforehand it will dye your skin, too. I recommend you wait until after the mask is dry to stain or dye it if you are using your own face to mold the mask.  Step 4: Add any additional items for details such as feathers, beads, cogs, or glitter. You can also do fine detail painting once the mask is all dry. 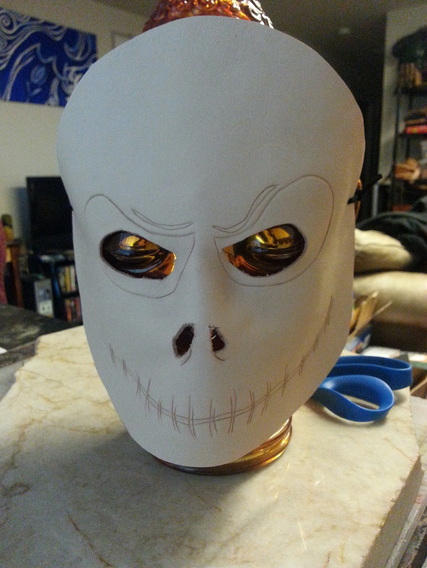 Other Options:
Cut an oversized mask and cut the edges to make fringes for different effects of hair, flames, or ears. Try adding faux fur or a mustache and eyebrows. Add beads and feathers to make an elaborate headdress. Use the suede side of the mask on the outside for a different texture, or try gluing sand or glitter to the outside. by Willow Enright 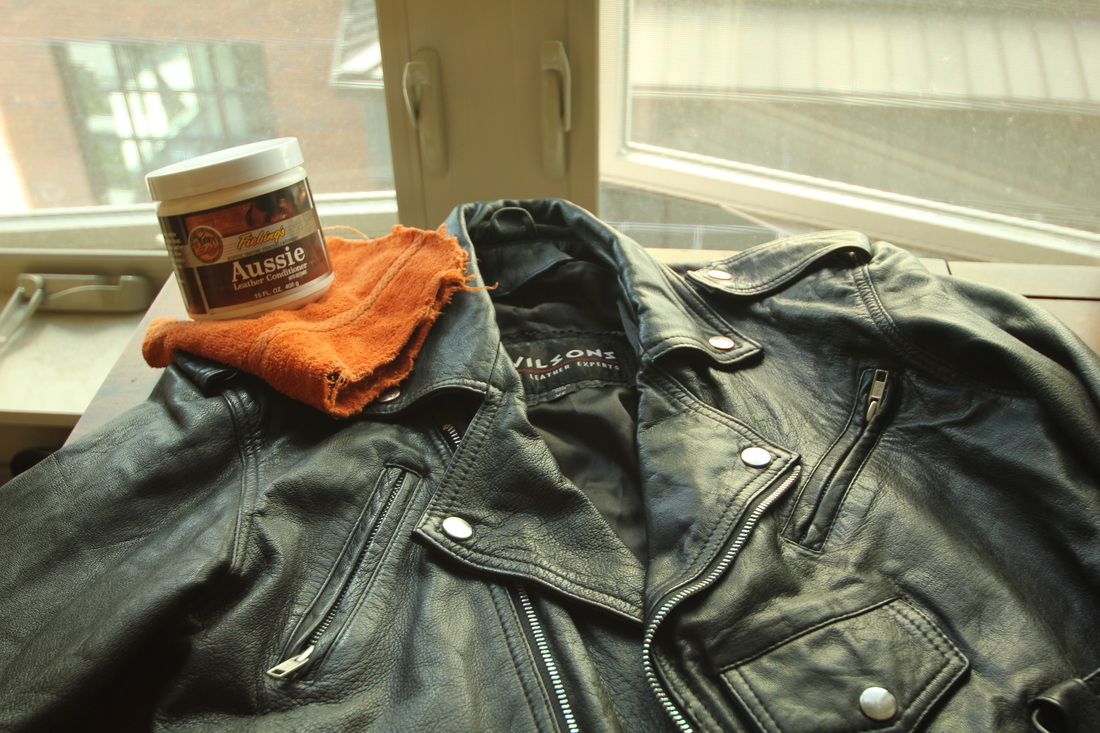 You’ve finally acquired that dream leather item you fawned over for what seems like an eternity. You want to love those boots and bags for years to come. Now the question is, “How do I take care of it?” If you take good care of your leather, it will take good care of you! Keep it dry, clean, conditioned and stored appropriately and you’ll find that your leather might just out live you. 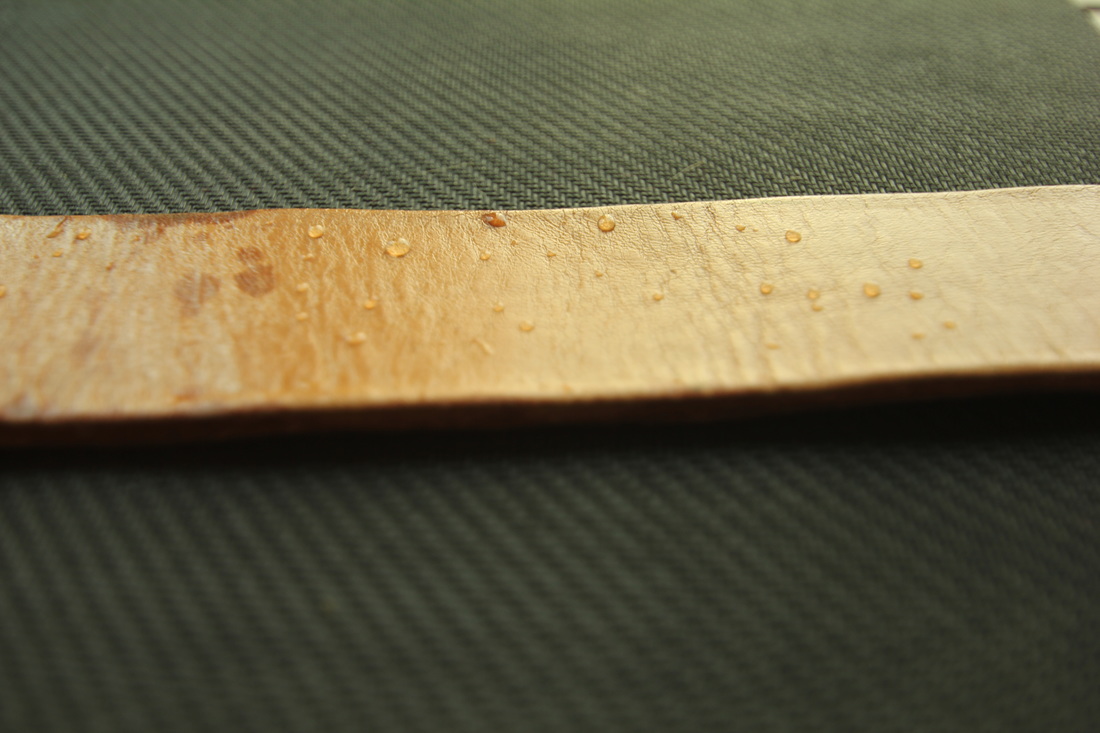 “What do I do when the leather gets wet?” Everyone agrees that you want to keep your leather dry. If it gets damp take a dry cloth to it and then leave it to dry at room temperature. If it gets water logged stuff it with newspaper. Keep in mind that wet leather can stretch, so don’t hang your leather jacket over the kitchen chair because it will reshape the shoulders to fit the chair and not you. Make sure to keep the leather in its natural shape as it dries. Don’t expose the leather to the sun or to direct heat in order to dry it out faster, the leather is likely to crack. Drying naturally at room temperature is best. 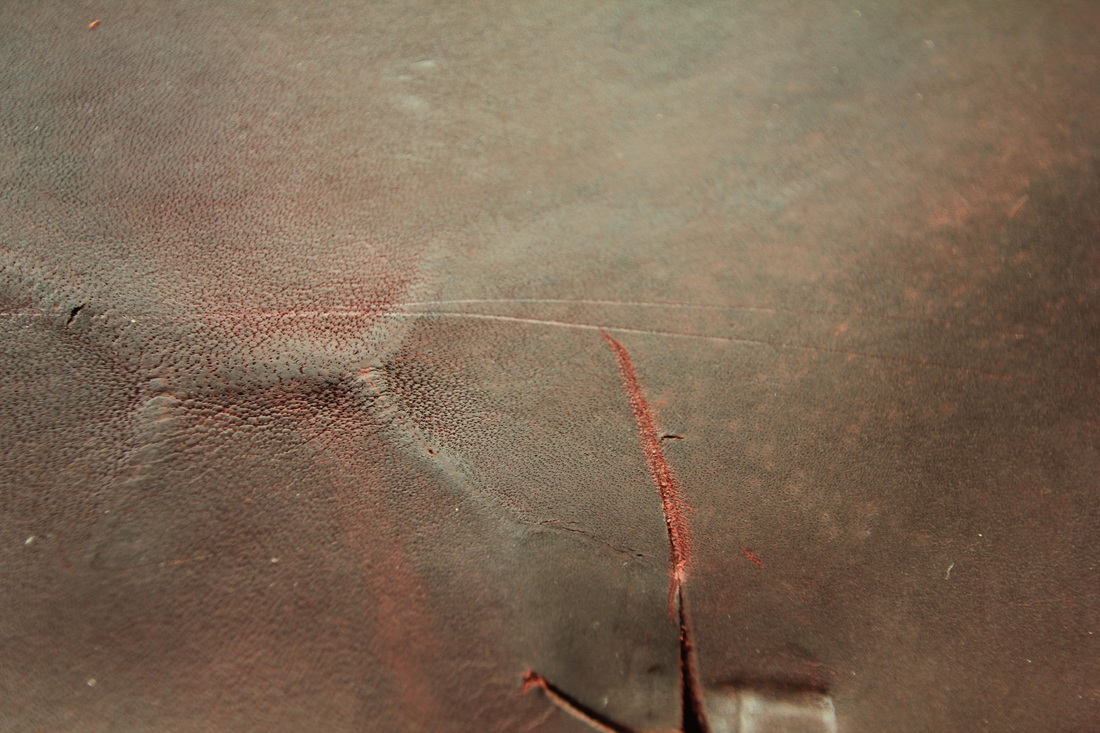 “How can I prevent stains and scratches?” There’s really no good way to prevent stains or scratches on your leather, that’s simply part of life and the natural aging process known as Patina. You can condition, buff and waterproof to help reduce the effects of wear and tear, plus it adds longevity to your leather, but scratches and stains will happen. 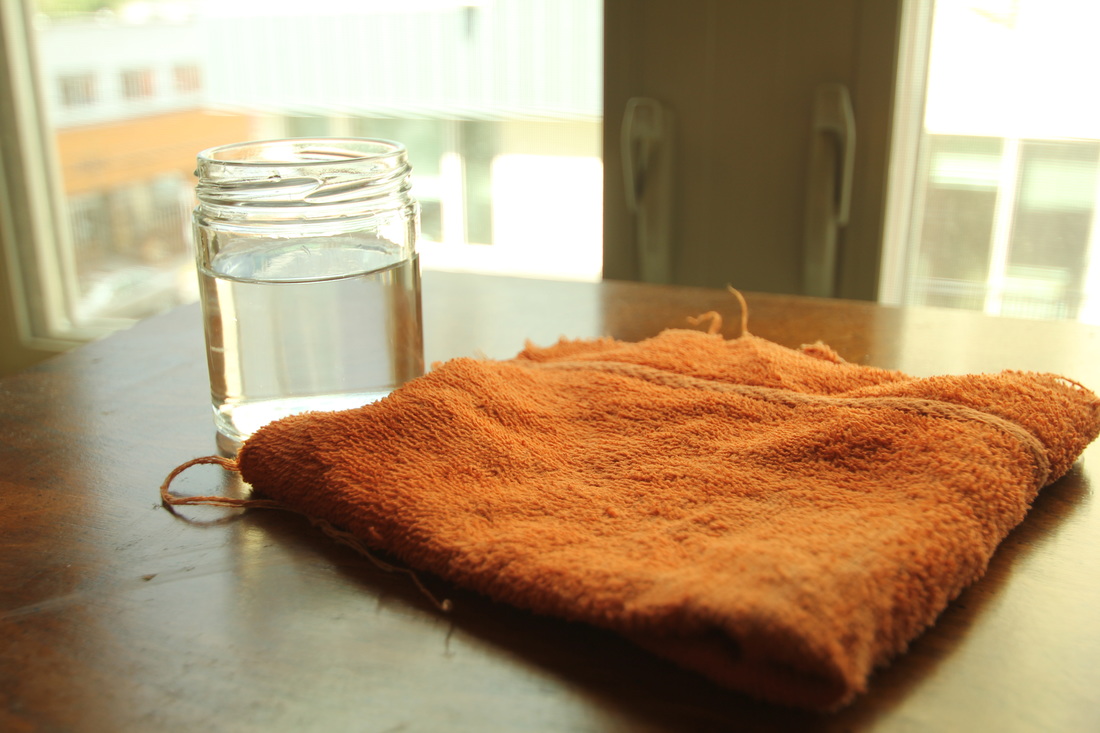 “What’s the best way to clean my leather?” The best way to clean your leather is with a dry clean cloth or damp cloth if your item is extremely dirty. Wipe off the dirt gently, don’t scrub or you might rub the particles into the leather instead. There are also leather cleaners you can use but I find simply wiping with a cloth works the best. If your leather has hardware (buckles, D-rings, etc) take care to clean that regularly as well. 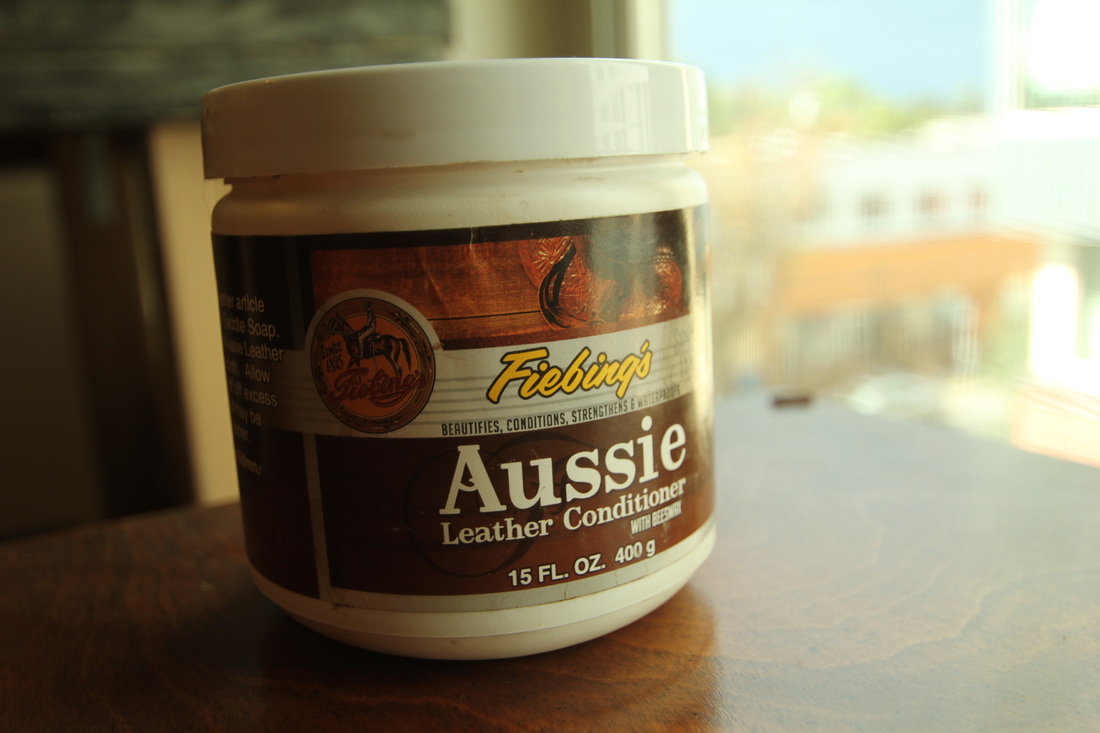 “How often should I condition the leather?” Think of conditioning your leather like a moisturizer for your skin. If you don’t moisturize you will dry out over time, your leather items are the same. Prevent flaking, peeling, cracking, and wrinkling by conditioning regularly. Try Aussies Leather Conditioner, which supplements the natural oils of leather. Dab a small bit of conditioner on a soft cloth and rub gently all over. Leave overnight, and then wipe off the excess with a dry clean cloth. You should condition every 6 months or so to keep your leather looking shiny. If you use your leather items more often, then condition them every month or even more often if necessary.  “Where do I properly store my leather?” Keep your leather in a dry room temperature area. Never store your leather in plastic, cardboard, or in direct sunlight. Confining the leather without air to let it breathe can cause mold or mildew to develop. Leaving leather in the sun can cause bleaching or warping. If you have leather shoes or boots you can use cedar tree shoes which help to absorb moisture and scents and help to retain the shape. 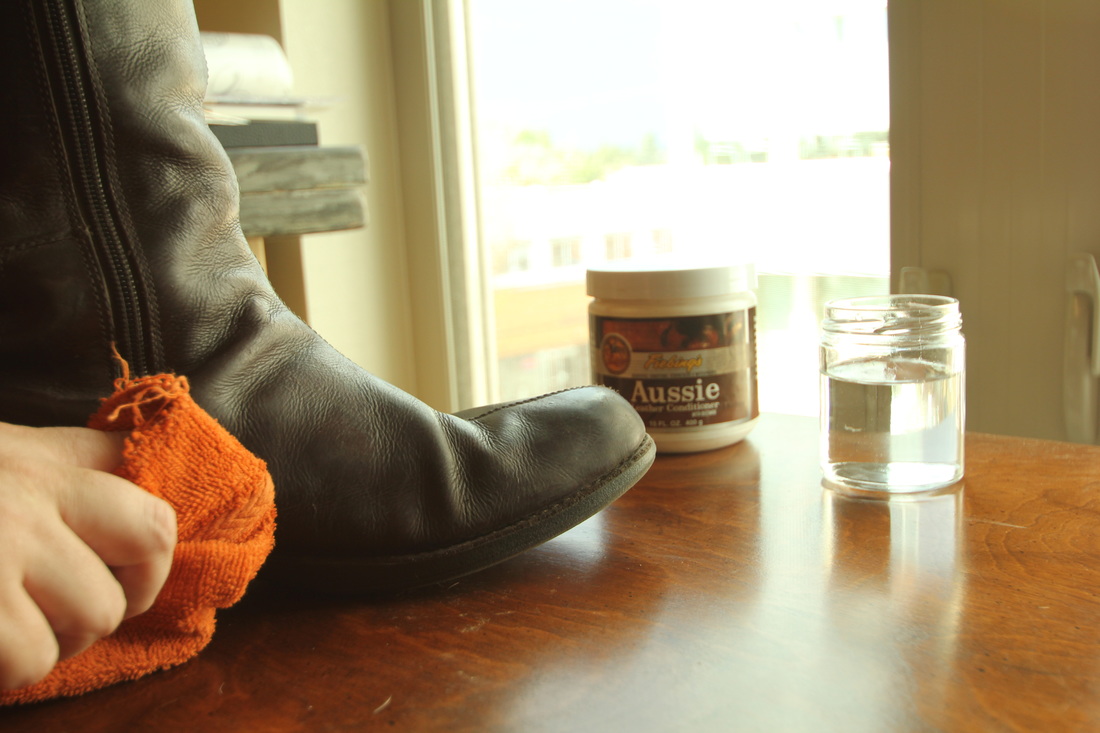 In summary you want to keep your leather dry, and if it gets wet let it dry naturally. To prevent wear and tear be sure to clean, condition, buff, and waterproof to prolong the life of the leather. Condition every six months or so depending on use. And when storing your leather, keep it out of the sun, at room temperature, and in an area where it can breathe. Now that you know how to make that leather last, you’ll want to update your last will and testament so the kids stop fighting over your favorite leather satchel.
by Willow Enright  https://static.pexels.com/photos/7743/pexels-photo.jpg I admit it. I’m addicted to leather. Who hasn’t lusted after a pair of good fitting leather boots? The problem is that they never fit well when you first get them. So how do you get leather boots to fit like a glove? You insure proper support, shape them the way that cowboys did, and condition them for longest life possible. First you’ll need to assess whether or not you need arch support. This can be done quite simply with a piece of cardboard larger than your feet and some water. Dip just the bottom of your feet into the water and then stand up for a few seconds onto the piece of cardboard. After your wet foot prints are made, study them to see which of the general three categories you fit, high, neutral, or low arches. You can view the picture below for a reference. Once you know if you require support you can acquire the correct insert at most sporting stores. There are even different variations based on what you plan to do while wearing them, ie… hiking, walking, running. You don’t want to attempt the Cowboy Method to fit your boots without your arch support insert, or you won’t be wearing them. 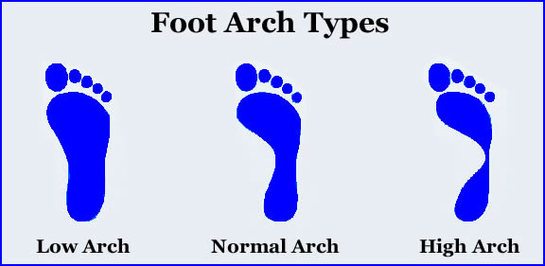 http://underpronation.org/wp-content/uploads/2011/08/foot-arch-types.jpg What is the The Cowboy Method? The Cowboy Method is where you put your boots on, and stand in water until your feet are wet, then continue to wear them until dry. This tradition goes back many generations. Leather can be stiff and unyielding at first, and you have to work it in to get that worn, comfortable fit. I know that this method will sound outlandish to some, but many can attest to its tried and true traditional method, one that will not hurt properly tanned leather. After all, a steer did wear it out in the rain long before it became your boots. 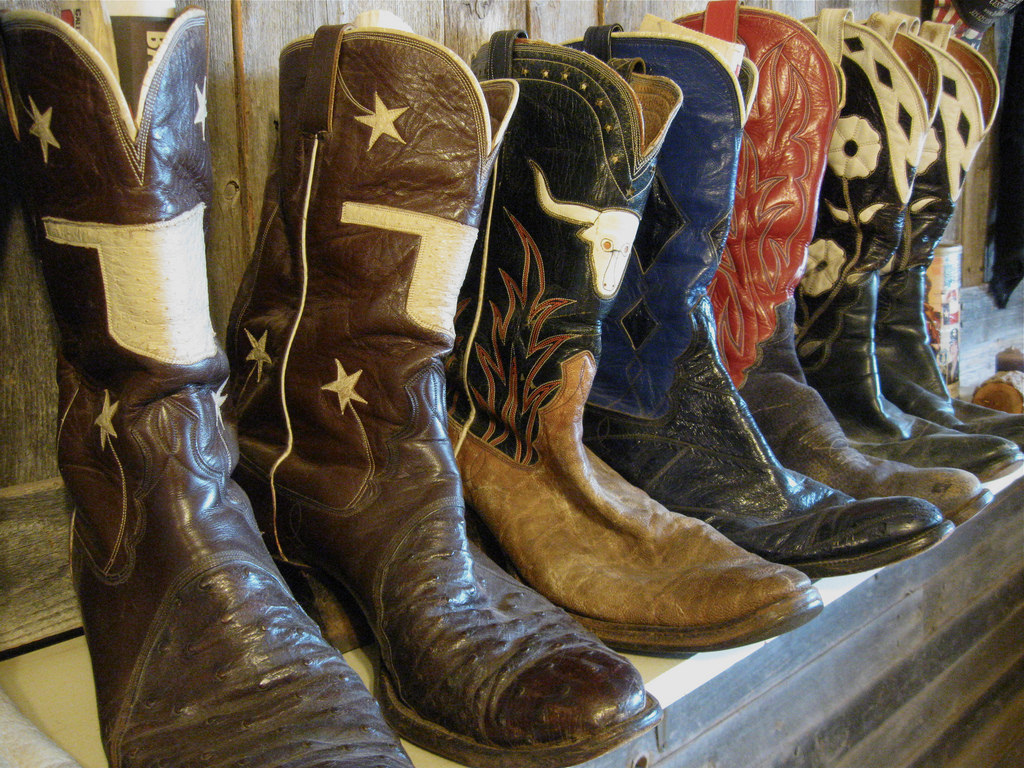 https://farm4.staticflickr.com/3027/2938498826_71d1b8c2a4_b.jpg Let’s break this down into detail: 1. Put on the thickest socks you own with your boots and get them wet, as in saturated. If you don’t have thick socks, you’ll want to wear two to three pairs. Stand in the bath tub with warm (not hot, warm) water up over your ankles until you feel your feet are good and wet. 2. Leave them on for as long as possible, all day is best. As they begin to dry they will conform to your foot shape and ease tension points out by stretching the leather. 3. At the end of the day remove them and if they are still wet stuff them with newspaper to retain the shape you spent all day making. Be sure to keep them out of direct sunlight and away from any heat sources. You want them to dry naturally. 4. Allow them to completely dry while you are wearing them, likely over several days. Repeat the process if necessary, but only after they have completely dried out (a week later at the earliest.) 5. Once they have dried out keep in mind that leather does shrink up as it dries, so don't panic if they are a bit snug when you put them back on. Just wear them for an hour or so before you decide if you need to repeat the method.  http://orig00.deviantart.net/250d/f/2010/349/c/5/leather_boots_by_agapetos-d34x01a.jpg Remember to condition the leather after the boots are dry, and continue to condition them on a regular basis. Just like any skin, when it dries out it can crack, so you want to moisturize. If you live in the desert you’ll want to do this more often, and if you wear your boots daily you’ll want to do this monthly or bi-weekly.
Take a clean dry cloth to your boots to remove any dirt or debris before you apply the leather conditioner. You can use a variety of products, but most importantly you want something that will work into the leather and not just sit on top. Use Leather Honey or Leather Milk followed by Aussie Leather Conditioner. Water treating your leather isn’t necessary if you are properly conditioning your boots. Keep in mind that conditioners can slightly darken your leather, but conditioning your boots properly will extend the lifespan of them and keep them worn to perfection. by Willow Enright  Bracelets made from my first Mord-Sith armor. In my experience I have found that there are two types of repurposing of old items, modification and transformation. This can be for leather items, denim, wood, and anything else you can craft with, because I am a leather worker my focus will be there. Modification is taking an existing item and adding to it, without changing the basic structure. Transformation is taking your basic structure breaking it into separate elements and creating something completely new, for example taking your T-shirt and making it into a bag. Modifying a perfectly serviceable leather item so that it can fit a specific genre or character is not only fun, but a rather easy way to get started creating your own unique pieces. This type of project requires a leather item such as boots, jacket, bag, journal, belt or other. My favorite modification, and this is one that I have done numerous times, is changing the color of my leather boots.  My custom colored blood-red Mord-Sith boots to match my armor. I have a pair of nubuck leather boots that I bought in a brown color, and then dyed them to match a blood-red armor suit, this is the Mord-Sith if you are curious. I used Angelus Scarlet red paint for the first layer and Fiebings Antique black stain to darken the red and followed it up with a Resolene to seal them. I wear them everyday and they have gone camping, hiking, and to the beach and could use a shine to clean off the dirt, but otherwise look just as great as the day I bought them.
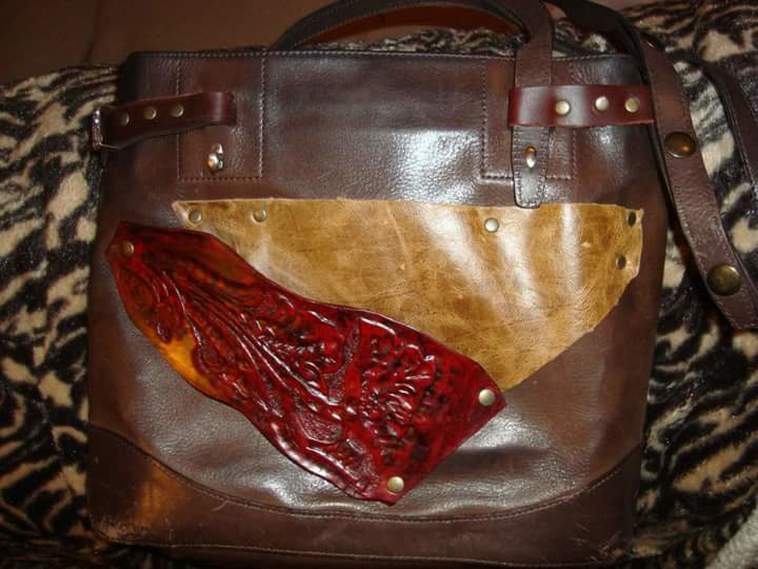
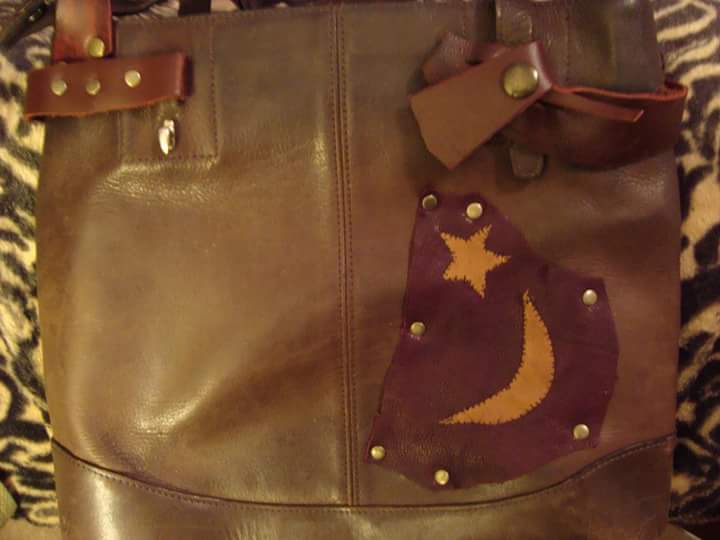
Another time I took a second hand leather purse that my sister called “an old lady bag,” with a broken handle, and I modernized it with a bit of leather embellishments for my mother. I tooled a design to add on each side and mixed some different leathers together to give it a mottled bit of color and riveted it all onto the purse. I also made a new anchor for the handle. Her one complaint was that it didn’t have enough pockets for her liking. Apparently, it wasn’t “old lady enough” with its lack of extra pockets. *chuckle*
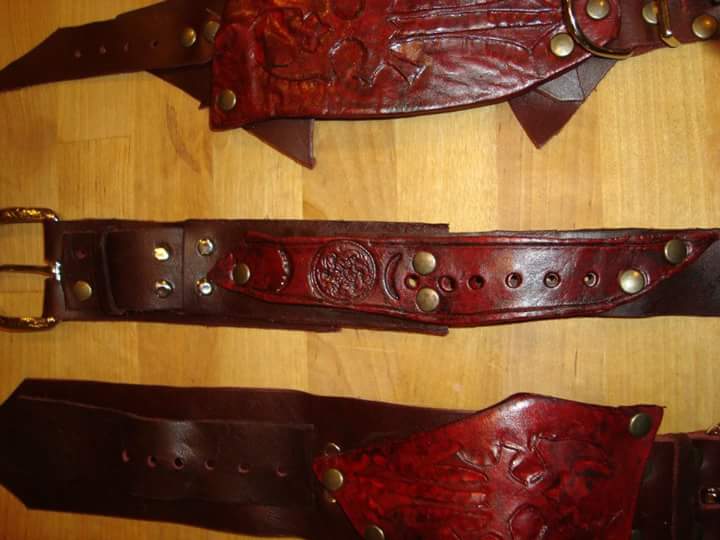
One Christmas I transformed my first Mord-Sith waist cincher armor so that I could make bracelets for everyone for the holiday. I tooled individual designs into new pieces to add to the 4-5 oz mahogany leather that the armor was made from, and added buckles or snaps. When I told my friends and family that I had used my first Mord-Sith armor for most of the bracelets they were very touched.
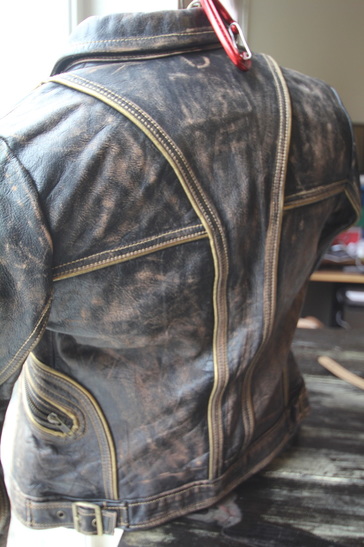
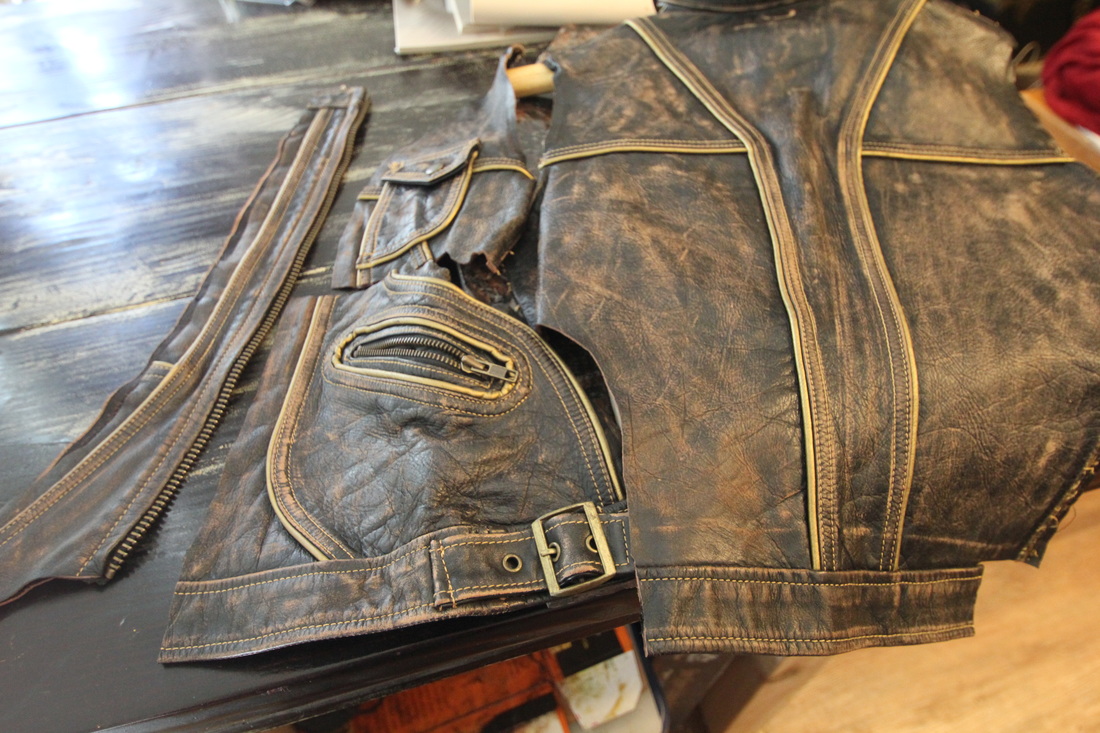
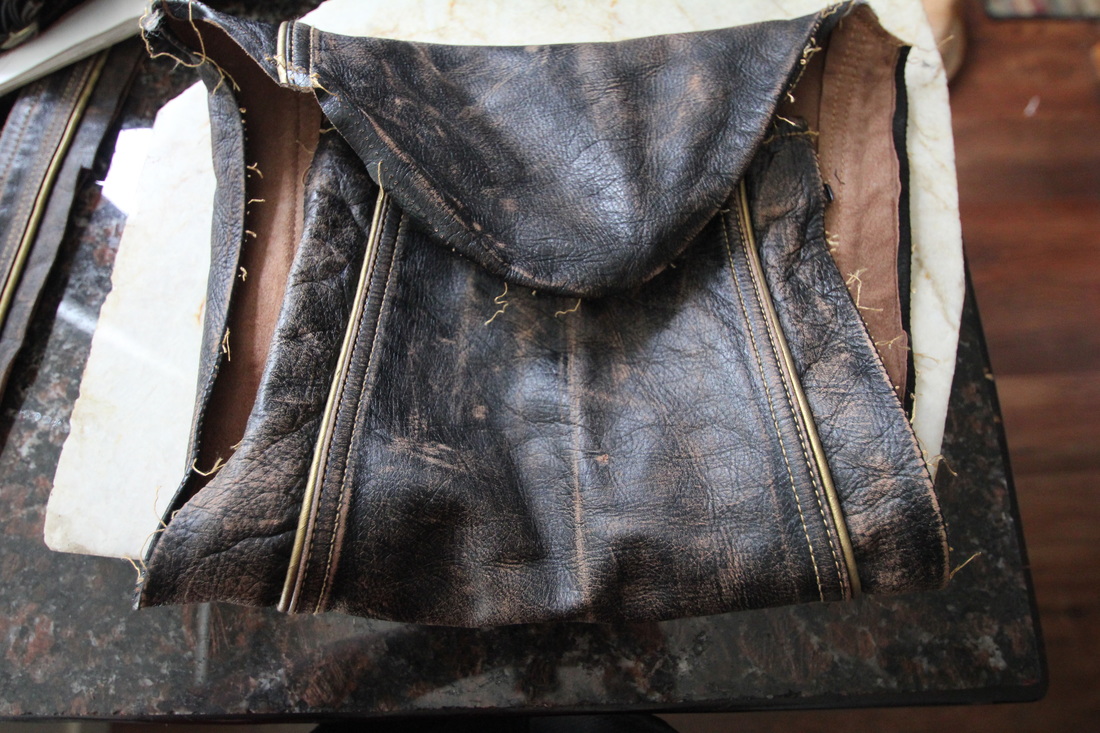
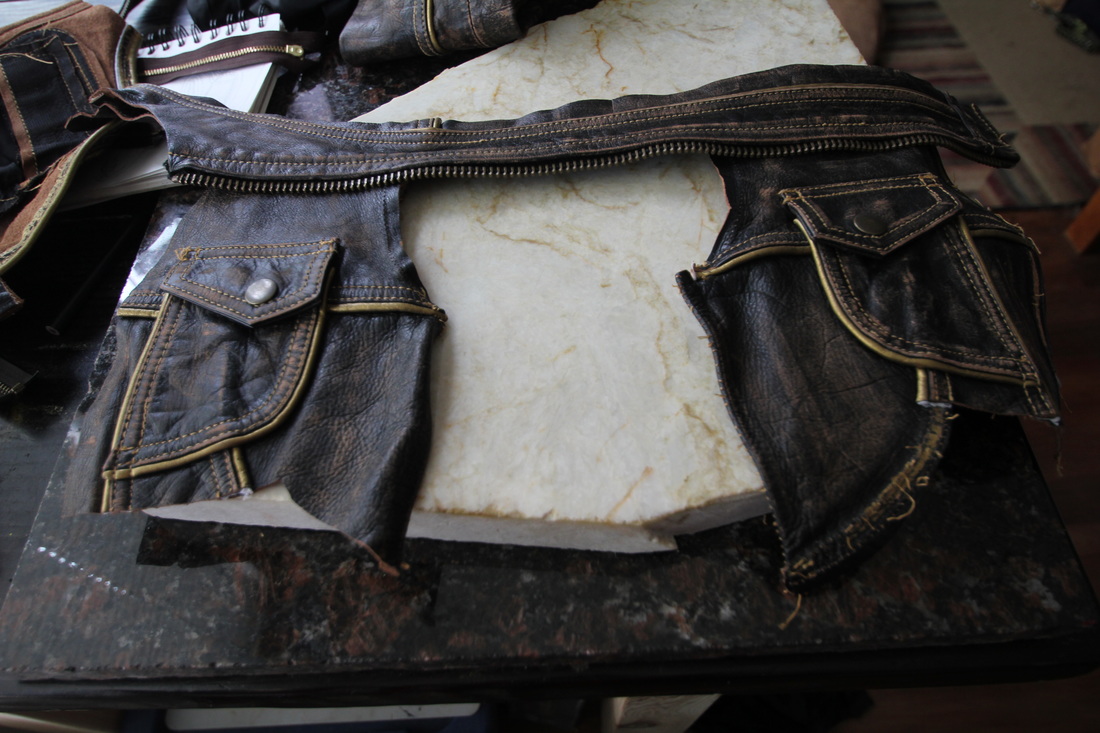
Currently, I’m tearing apart a second hand leather jacket so that I can use it for other hip bags and utility belts. I’m considering using the collar of the jacket to line the neckline on an elaborate Steampunk full arm armor. One sleeve will be turned into a handbag, the other into an archery quiver. I’m going to make an apothecary bracelet with the bottom back hem section. The two lower front pockets will end up as hip bags with a zippered pocket behind them and possibly a flap pocket behind that. The two smaller pockets and one edge of the zipper will be part of a utility belt. I can’t decide if I will use the back section for a journal cover or as the back of another vest. *shrug*
That’s the beauty of repurposing leather. Your limit is your imagination! Please send me any projects that you have transformed or modified to make it your own. I would love to see what your minds create.
by Willow Enright 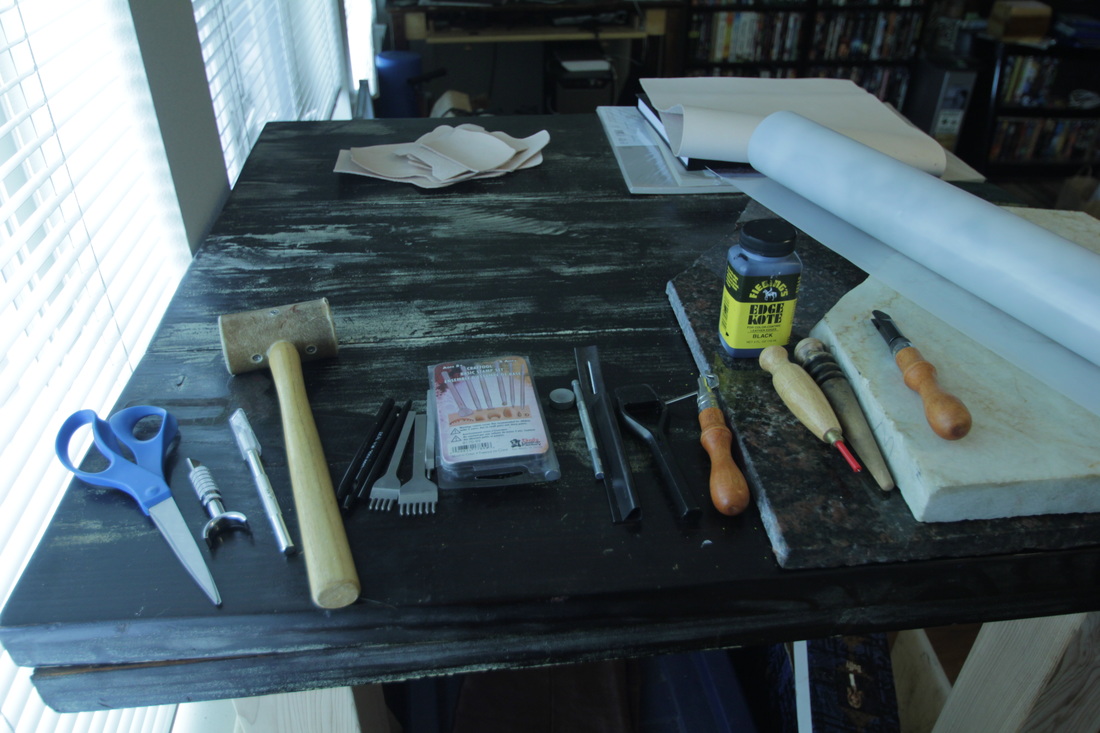 One of the hardest things to figure out when I first started working with leather was which tools to invest in. I wasn’t able to afford all of the things on this list all at once. I had to build my tool arsenal up slowly, in fact, I’m still building it. Knowing some of the basic tools that you’ll need and why, will help you feel more confident about investing your time into doing the leather work. I’m going to discuss ten basic tools and seven bonus tools that I find useful in my projects. 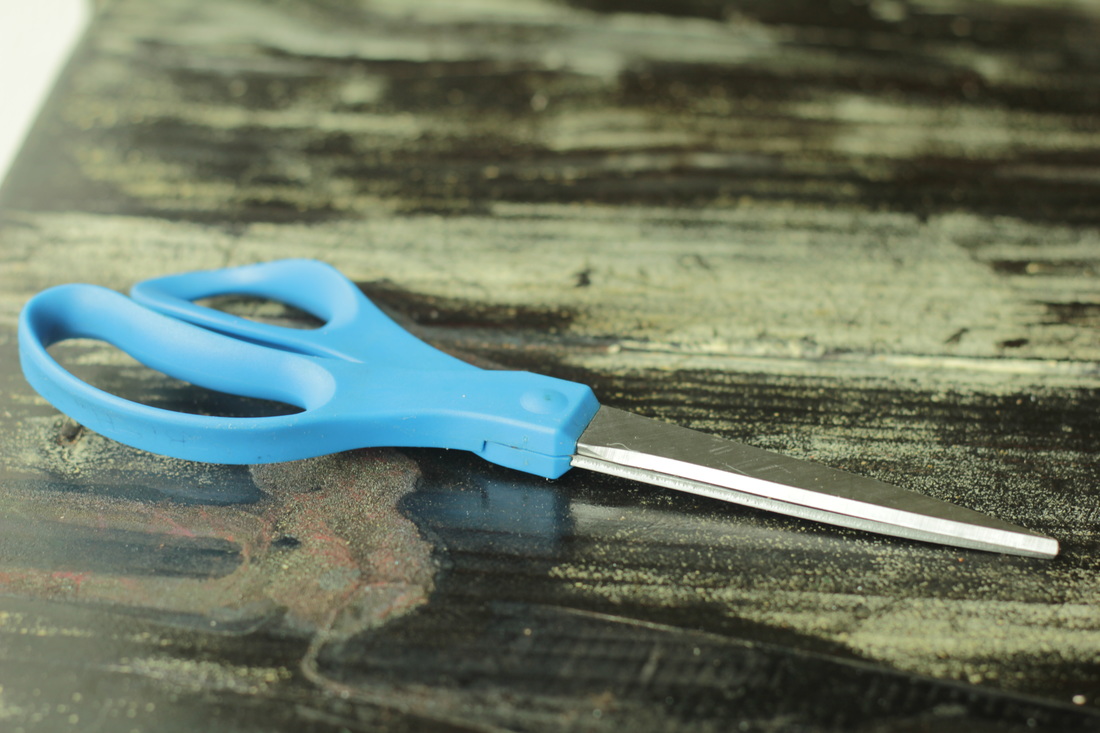 1) ScissorsI started with my everyday household scissors since I was cutting 2-4 oz leather. I find that as long as they are sharp they will work for the 1-5 oz leathers. I have Cutco scissors that will cut through a penny, but the blue handled office scissors work the best. Scissors are great for thinner leathers or trimming difficult edges. 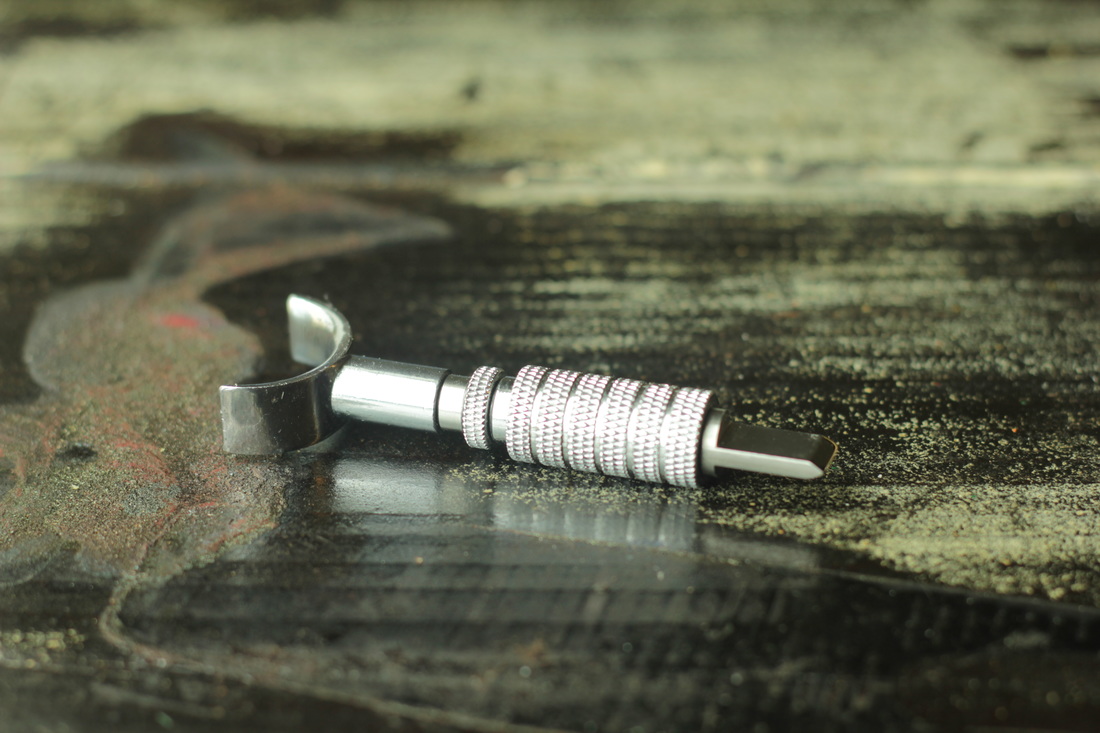 2) Swivel KnifeWhen you are using hides that are 6 oz or more you want something that will cut through thick layers. Some leather workers use a head knife, but I prefer the swivel knife. It is more versatile in that you can use it to cut large sections of leather such as a belt, or use it with detailed tooling designs. You can also keep it sharp by getting some jewelers rouge and using some cardboard or a scrap piece of leather to strop it each time you use it. 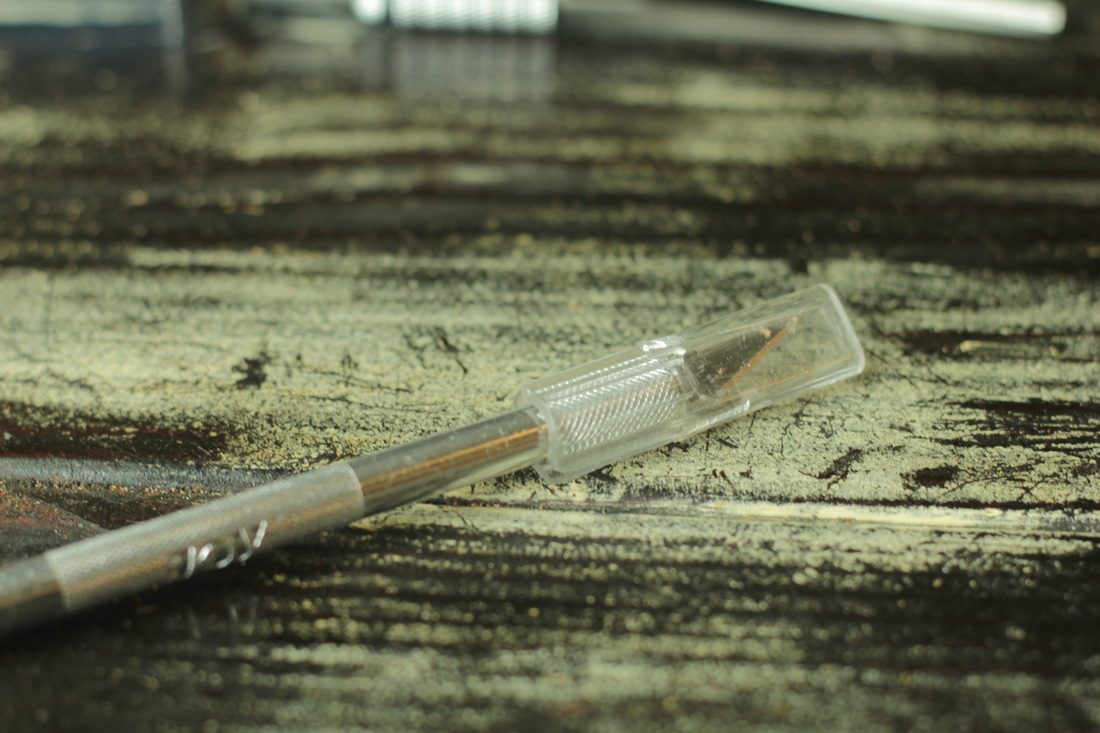 3) Exacto KnifeThis thin sharp blade can be very useful for small carving details. I find it extremely helpful in extracting corner cuts from a hide, leftover belt punches, or pretty much any time I have a limited amount of space but have to cut. 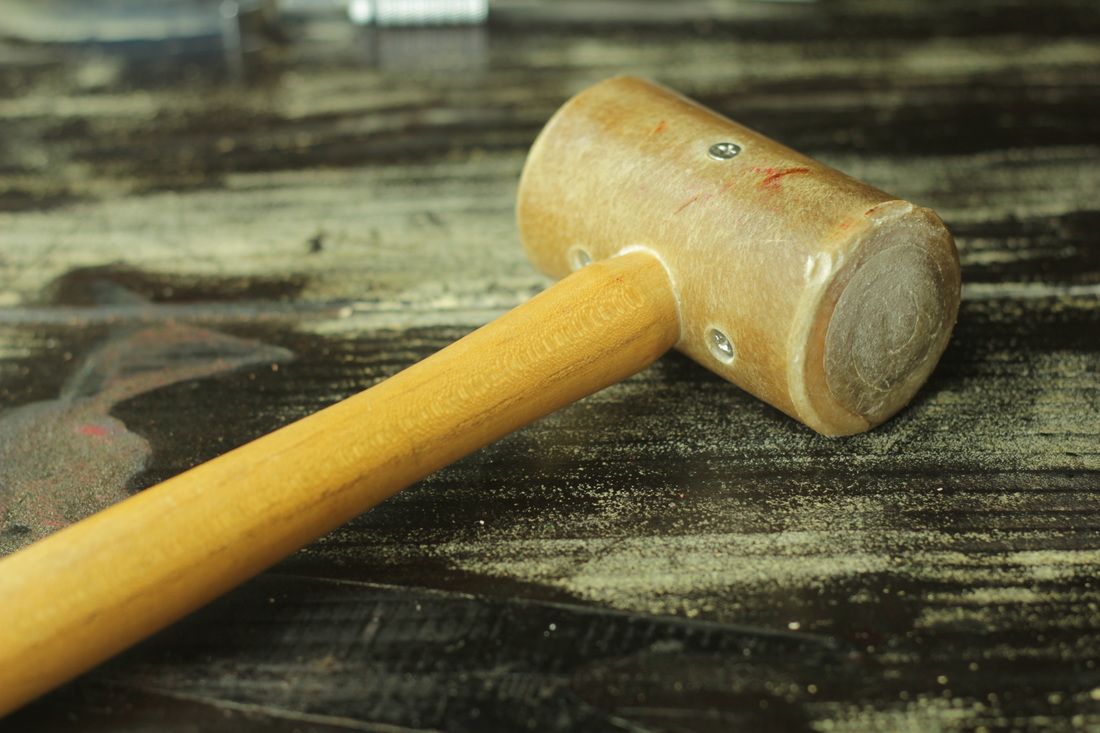 4) Raw Hide MalletSome people prefer poly headed mallets to the raw hide one, but as long as you don’t use a wood mallet or your household hammer you are good. The hammer is loud and will damage the ends of your stamps and other tools, and the wood mallet doesn’t provide enough weight to make nice rivets. I love the raw hide mallet because it isn’t too heavy but it gives a good solid pounding, and it doesn’t overly burden my elbow or wrist.  5) Stone SurfaceYou can purchase a granite slab, but I would recommend finding a place near you that cuts counter tops. They usually have scrap pieces for free or a reduced fee. Having a stone surface will give your rivets a more solid pounding. Using a wood or plastic surface by itself absorbs too much of the impact.  6) Cutting Mat6) Cutting Mat Having a surface to cut on that won’t dull your blade additionally is always good. You can use a self healing mat, poundo board, or a plastic cutting board. This can also come in handy when you are trying to decrease the amount of noise you are making while pounding. I place my cutting board between two pieces of granite to help absorb some of the sound without losing the solid surface that the stone provides. Note: don’t punch holes, cut, or have any sharp implements make contact with your stone surface, because it will dull your blade so fast it will make your head spin. 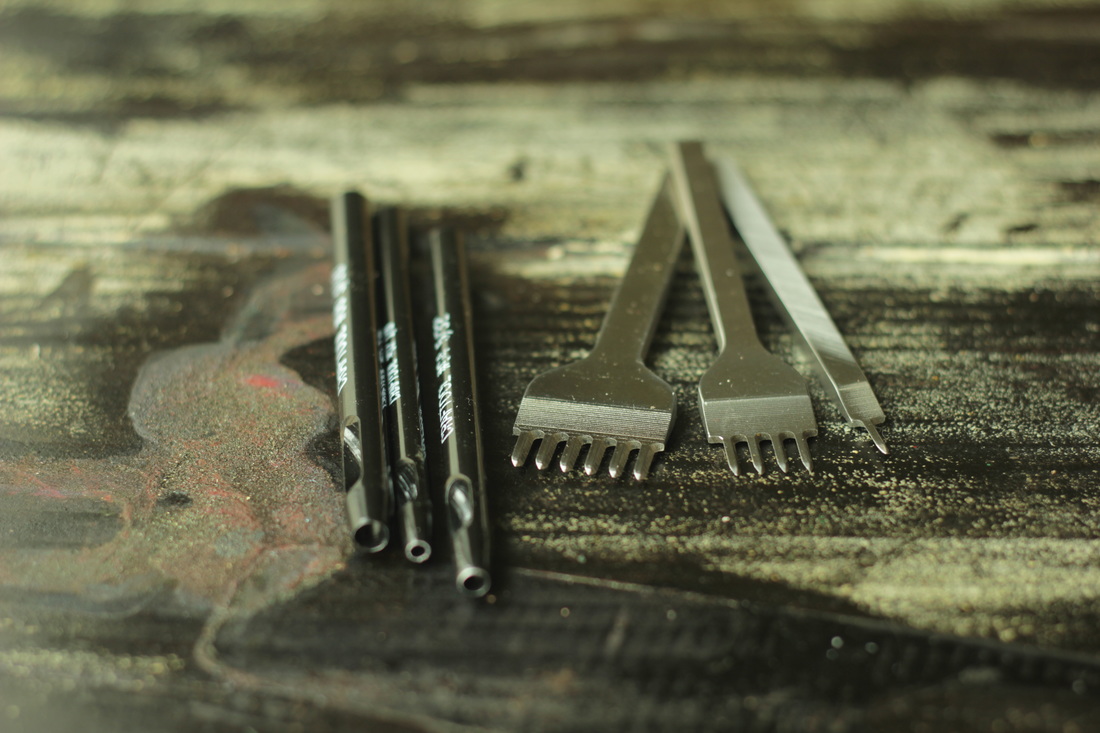 7) Hole Punch/Stitch Hole SetsIf you plan on using rivets or doing any stitching then both of these items are a good investment. I prefer the individual hollow punches for pounding a solid clean hole instead of the rotary ones. You can get more force behind the mallet swinging at the hollow hole punch than you can generate with just your one hand squeezing. The stitch hole punches usually come in sets of one, two, four and six punches and are very helpful for stitching through thick leathers. 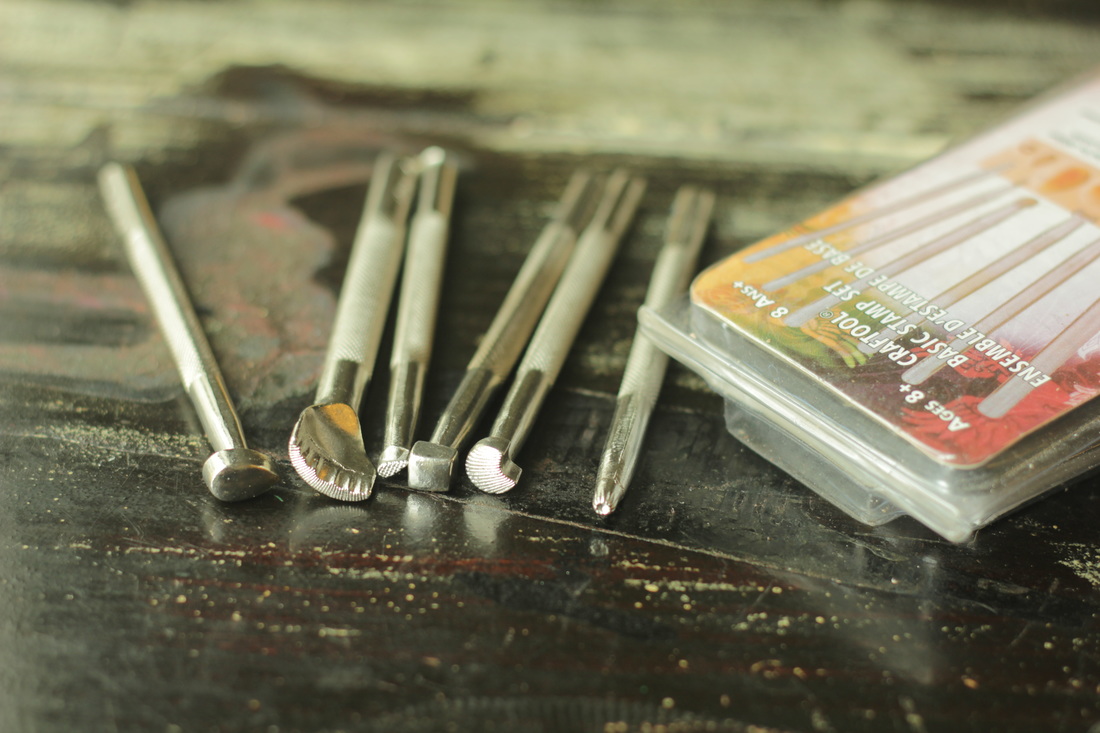 8) Six Piece Craftool Basic Stamp SetIf you plan to do any tooling you will definitely want to invest in a set. This one comes with a small sunburst circle, a background stamp shaped liked a tear, pear bevel, sea shell background, square bevel, and flower vein. You can actually use these six tools to create many beautiful designs. 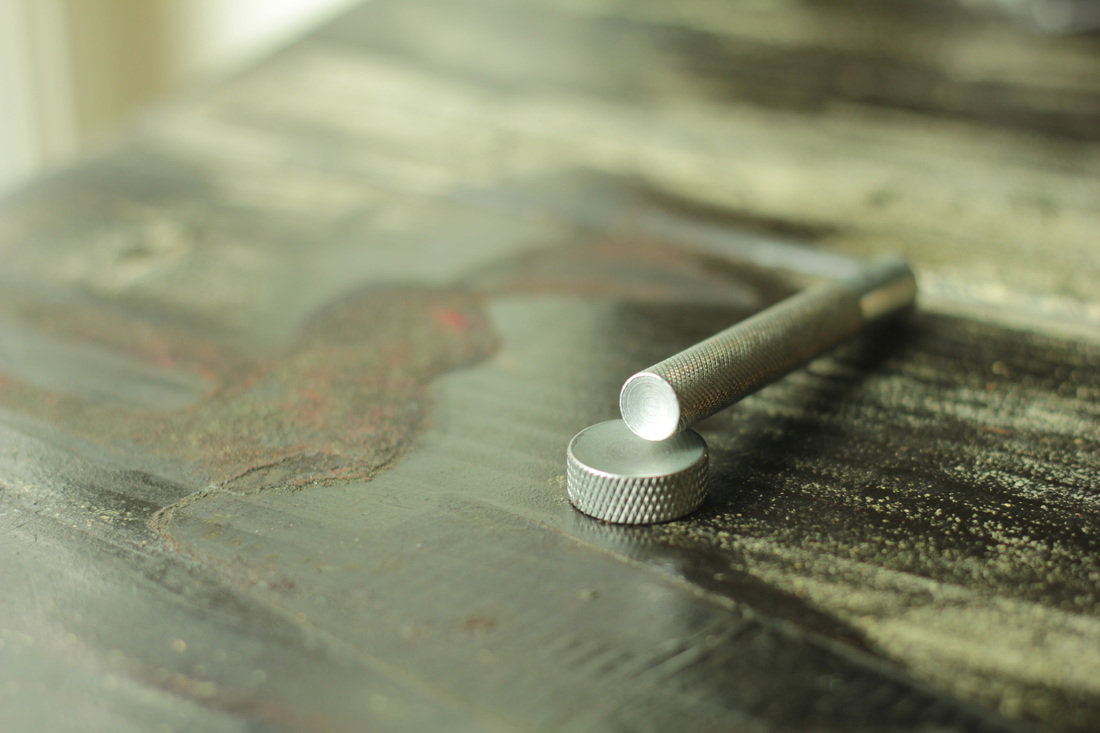 9) Rivet Setter & AnvilIf you plan to set any rivets you’ll need this set. The domed anvil helps you to keep the dome shape that some rivets have and the setter also has a domed side to give your rivet a nice tight fit. Using rivets can add shiny to your leather, as well as serve the function of holding pieces of leather together. 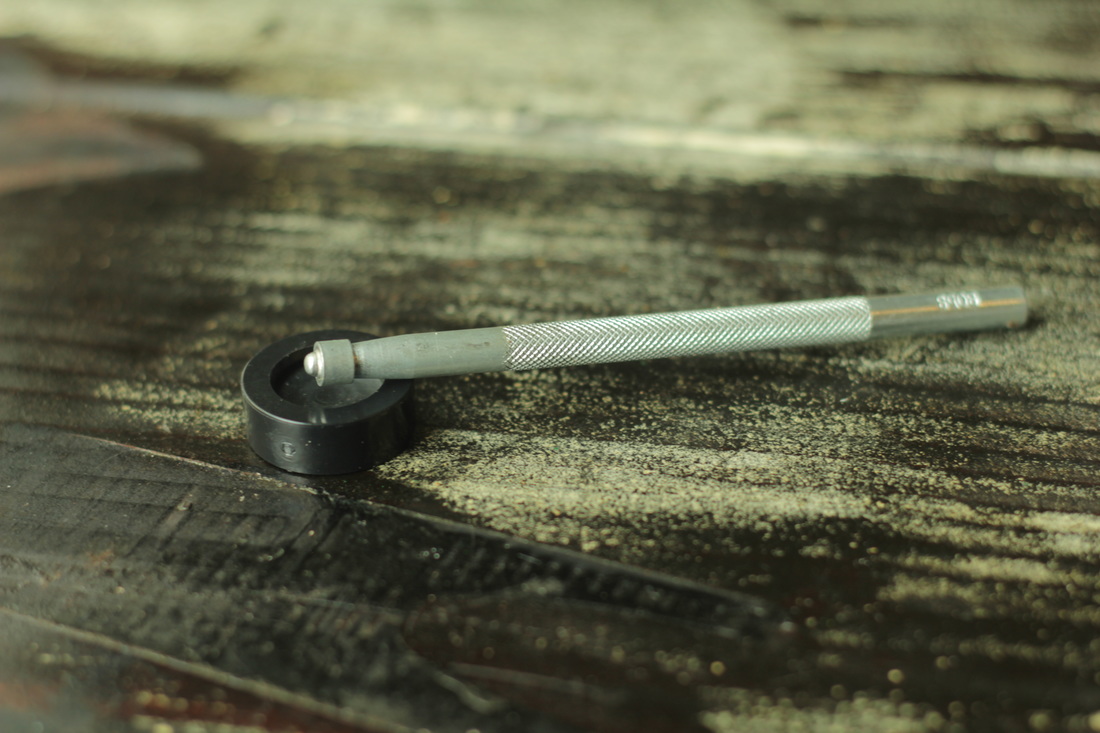 10) Snap SetterThere are several sizes of snaps and if you want the variety of different sizes then you should purchase a multi-size set. Otherwise, choose which size you like and be sure your tool and snaps match. Setting snaps can be tricky since you have to first pound down once or twice, then around in a circle to create a lip with the stem, then down again over the bed of the snap. However, they are extremely helpful for closing things such as bags, bracelets, and belts where you want to be able to showcase your buckle collection. Bonus Tools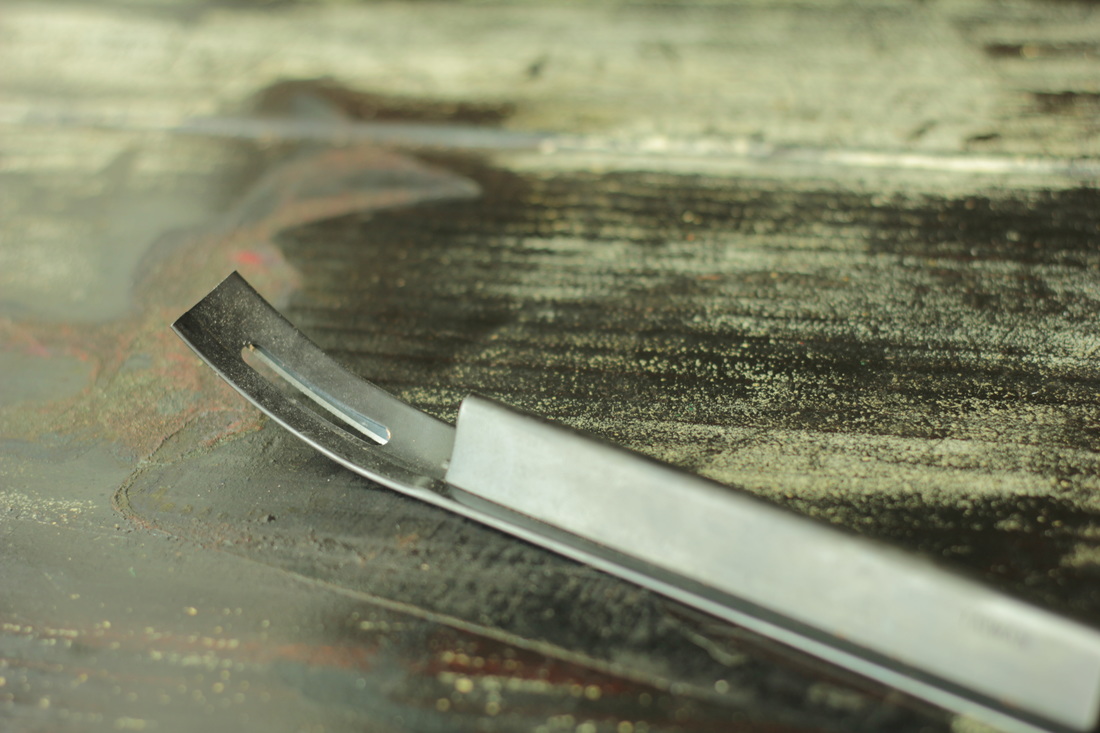 BevelerGetting the safety beveler was one of the best bonus tools to acquire. It’s shaped to prevent cutting leather too deeply and skives leather easily. You can also splice leather lace safely and with precision. I find it helps give belts, straps, bags and journals an extra nice edge. 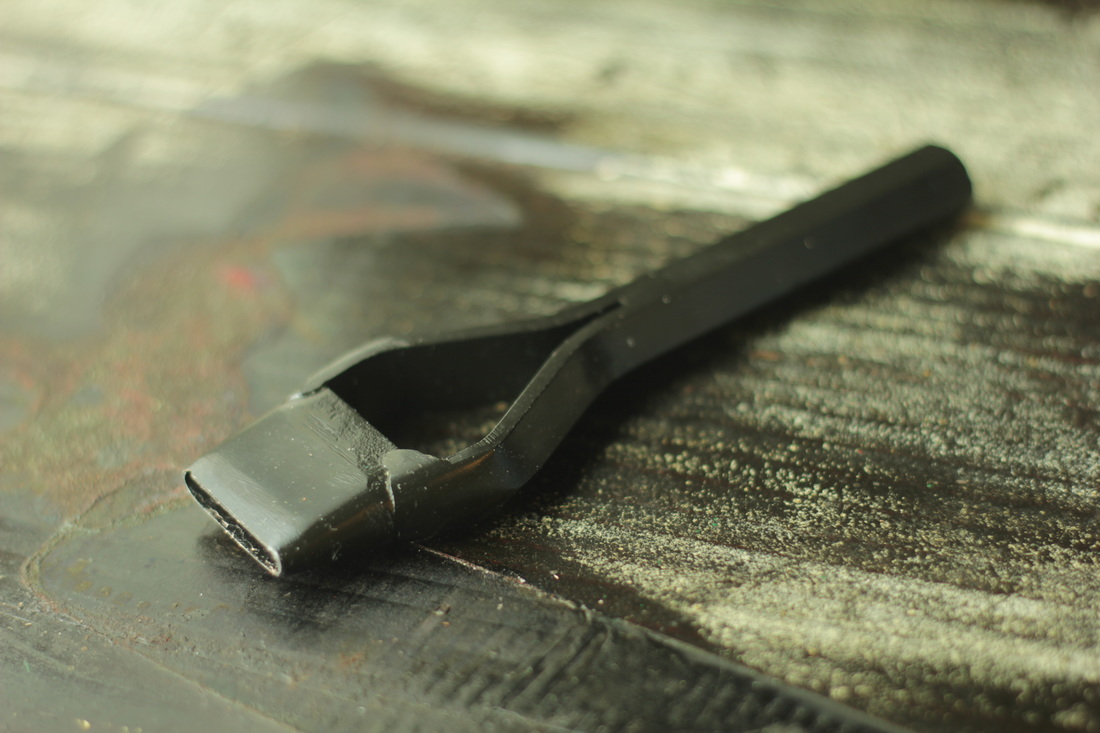 Oblong Hole PunchThis is used for making belts. I haven’t found another use for it yet, but it’s a time saver when creating belts. You can get various sizes, but I use the 1” one for various sized belts, preferring to just use the same punch more than once on the same belt when they are larger than 1” in width. 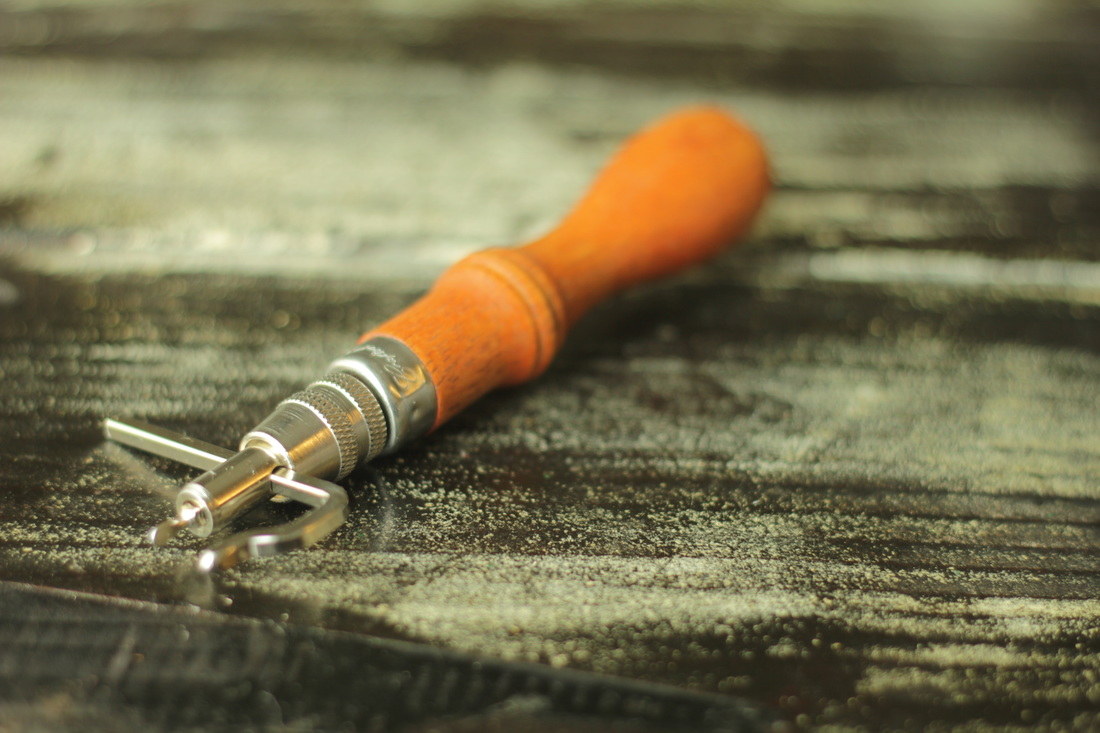 Stitch GrooverI love the stitch groover for two reasons. One, you can create straight stitch lines which really improves the end look of your stitch. Two, you can use it to create different width borders up to one and a half inches. This is great, especially around rounded edges where using a ruler isn’t possible. 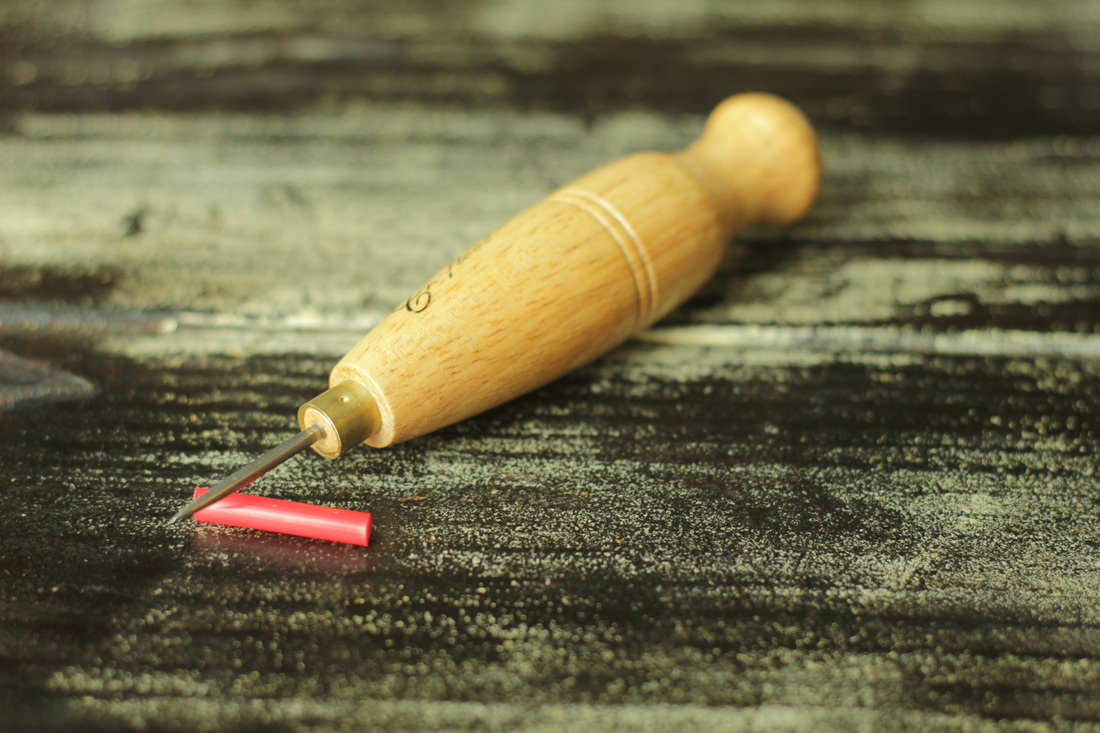 Stitch AwlBeing able to free hand poke holes into thinner leathers can save you time, broken needles, and finger soreness. Sometimes trying to get your dull thick leather needle through the layers of leather can be very difficult. Especially if you are using an oil tanned leather where the oiled hide will make your punch holes disappear. The stitching awl makes sewing easier and is worth the investment. 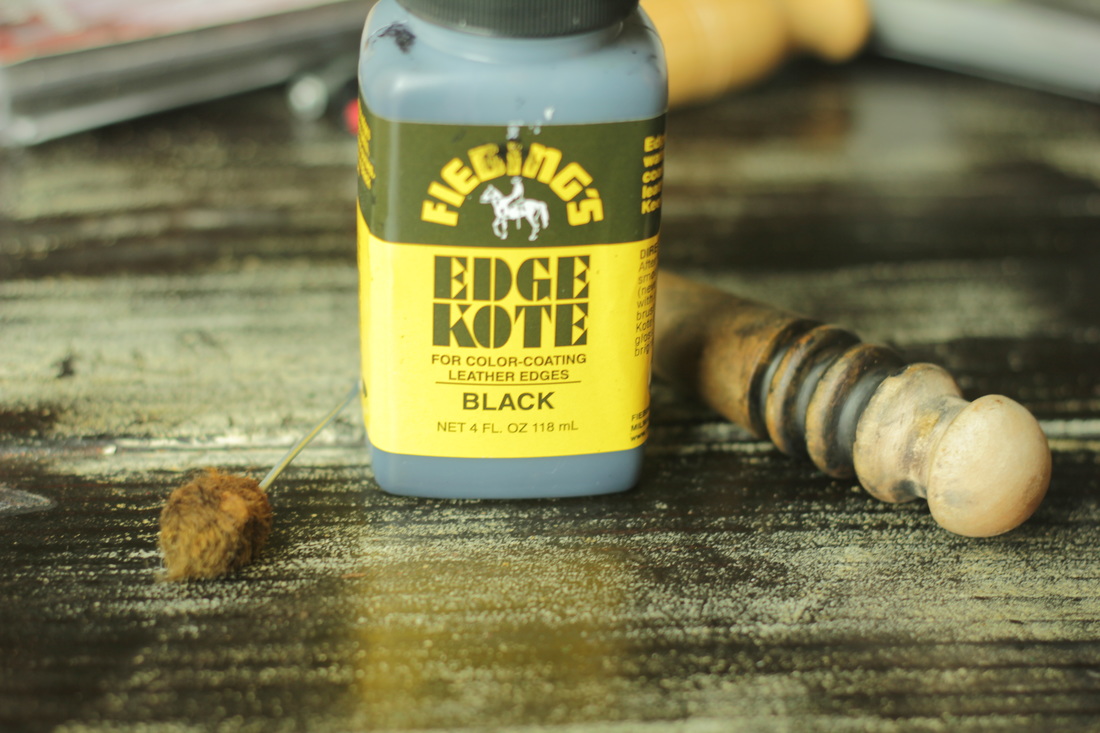 Wood BurnisherThis simple piece of rounded wood has various thicknesses for smoothing out the edges of leather. It takes some elbow grease to get the job done but it really makes your edges look rather smart. You’ll also want to get the Black or Brown Edge Coat with this tool. You will paint the edge with the edge coat and once it’s dry you’ll re-wet the edge with water, and then run the wood burnisher over the edge until you create a nice smooth finish. 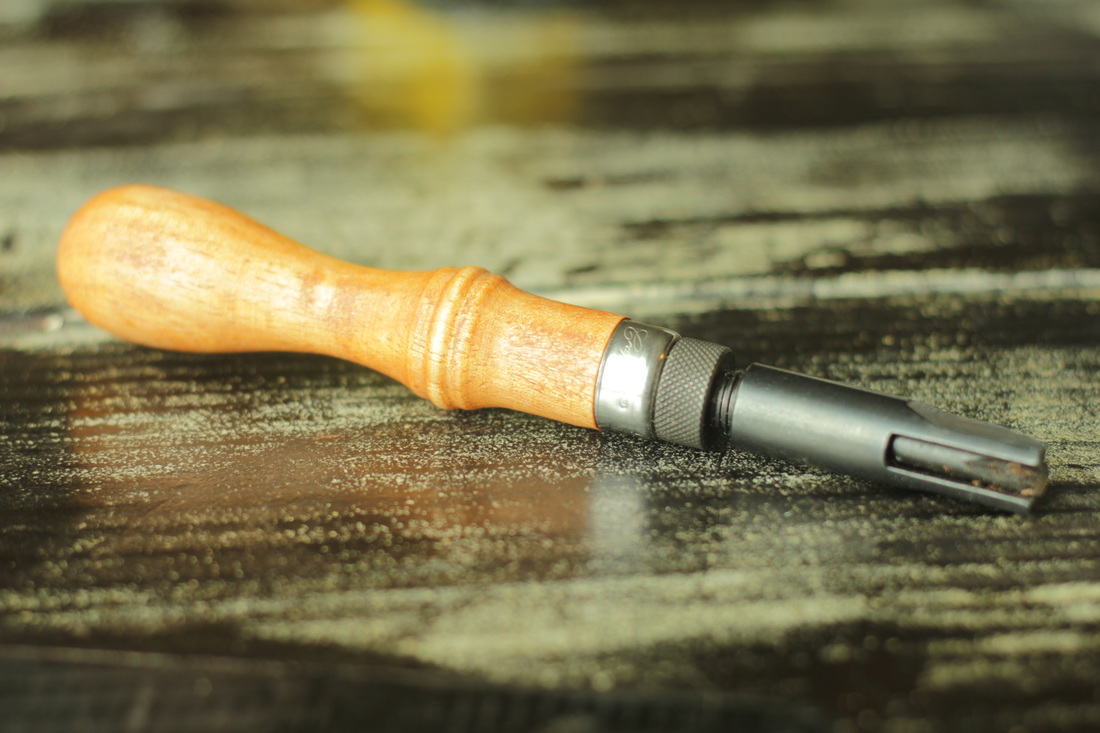 V-GougeThis tool makes the creating of belts easier. Usually a good belt is made with a 7-9 oz leather, and when you fold it over for the belt buckle the fold can be cumbersome, or create additional pressure on the rivets. The V-Gouge allows you to create a v-shaped channel where the belt buckle will fold so that the leather will set more flush together.  Stylus & Tracing PaperI put these two items together because they go hand and hand. While the stylus can be used without tracing paper. For example freelance drawing, marking holes to punch, and temporary marking where to use the V-Gouge, I mainly think of this tool as my tracing pen. Since neither of these two tools leave a lasting impact, it allows me to design with less mistakes.
|
Willow EnrightI started crafting out of leather in 2011, and now I am making it my life's work. I am writing this blog to help myself remember some of the small steps in past projects, sharing my triumphs and failures, as well as my love of leather. Archives
November 2017
Categories
All
|

|
Cosplay DIY (Blog) |


 RSS Feed
