|
by Willow Enright 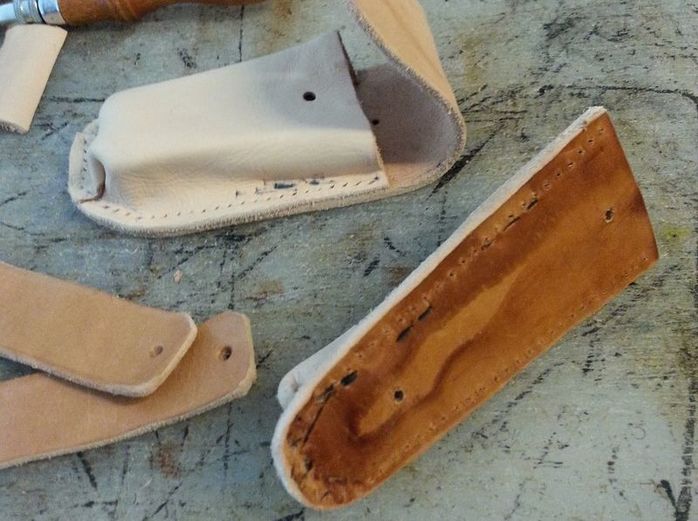 Glued, Wet Formed, Beveled, Sanded and Hole Punched Leather pouches. Supplies: Water Based Contact Adhesive (Eco Weld) Leather Plastic Knife or Glue Tool Clamps Paper Towels Wax or Parchment Paper Wet Work Cloth Stylus or Pencil 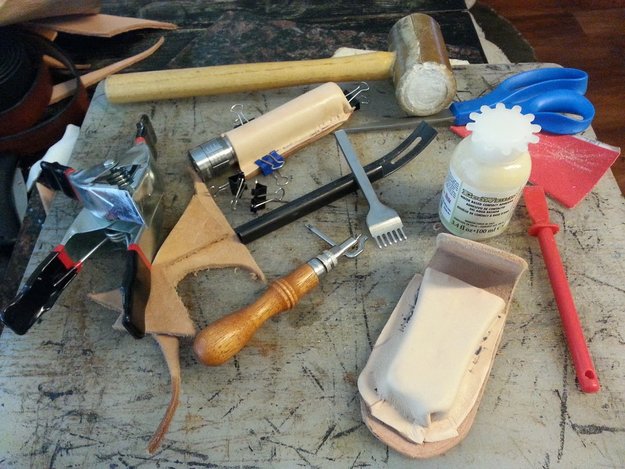 Water Based Contact Adhesive, Glue Tool, Clamps, Stitch Groover, Safety Bevel, Scissors, Mallet, Sewing Hole Punch When you first start working with leather you don't always see the benefits of doing something like gluing your leather before sewing it. Only, sewing thick pieces of leather together can be really tough. Especially trying to match up your holes in opposite pieces for the needle. However, there is a helpful technique of gluing your leather before punching holes that makes sewing thick leather much more enjoyable. The best part is that it's actually rather simple! 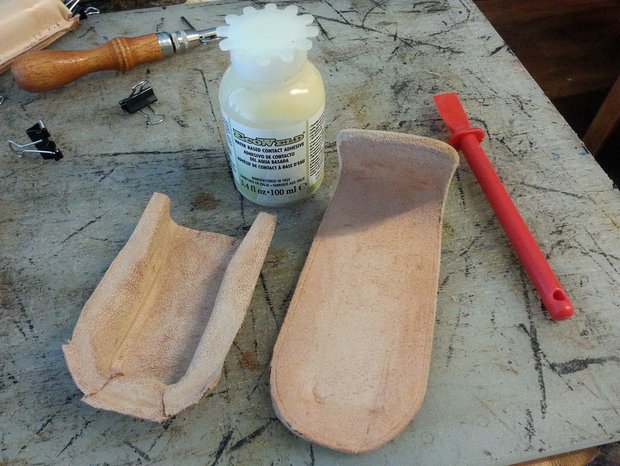 Water Based Contact Adhesive, Glue Tool, and Leather Project Start with your leather cut into the shape you want for your project. If you are simply gluing two thicker pieces of leather flesh side to flesh side (this is the side of the leather that would be pressed against the muscles of the animal) then you won't need to do much to prepare your area for gluing. However, when you are gluing the flesh side of the leather to another grain side be sure to use some sandpaper on the grain side of the leather to rough it up to ensure maximum gluing capabilities. The glue needs something to bind to and the grain side of the leather is simply too smooth to stick well. You can also use a sciver or safety bevel to rough the grain side up some. If your corresponding top piece will be wet formed over your object before gluing then check out my Wet Forming blog here. 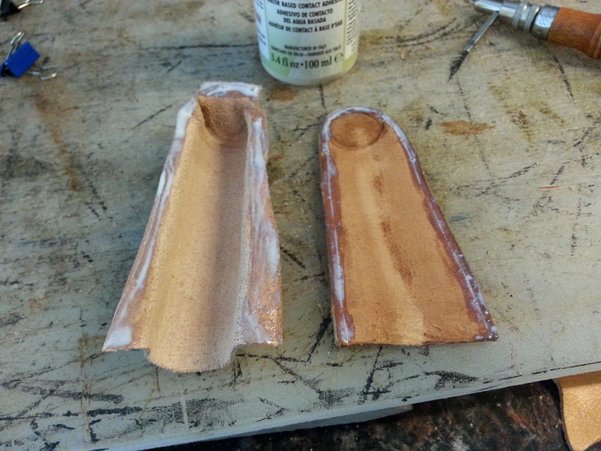 Contact Cement applied around leather edges Once you have your leather pieces ready to be glued, measure along the edge where you want to apply your glue. I use my stitch groover to mark where I plan to punch the holes for sewing. Then I apply the contact cement at least a quarter inch (1/4") on either side of the stitch line. Apply it to both surfaces and let it air dry until it is sticky enough to bond to itself and stay on its own. You can use wax or parchment paper to mark your cut off line which will ensure that you don't over apply the glue, or you can wing it with a pencil mark if you are comfortable. Either way, just be sure to not get any glue on your grain side of the leather. If you do then your leather won't absorb oils, waxes, dyes or stains in that place leaving a permanent blemish where the leather won't accept anything. I keep a wet work cloth handy at my work bench in case I get any glue on my hands. 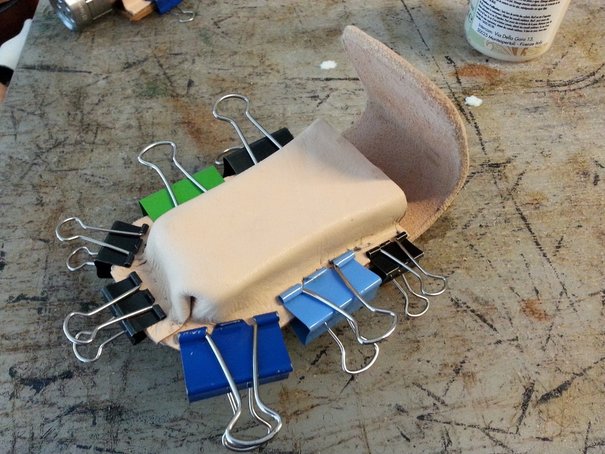 Clamped Leather pieces. I didn't use a cloth or paper towels to buffer my clamps since this project is for my girlfriend who doesn't care about markings. Once the glue has been applied to both sides of the leather it's time for clamping. If you want to keep your leather free of clamp marks, then use paper towels, scrap leather or a work cloth to keep your clamps from making marks in your leather project. Be sure to line up your leather pieces before you press them together, you only have a few seconds to move it before it starts to set. Use your cloth or paper towels to buffer your clamps and set them as evenly around the project's edge as you can. If you don't have enough clamps, spread them out as best as you can and then just rotate them every 5-10 minutes along the edge to ensure even pressure. 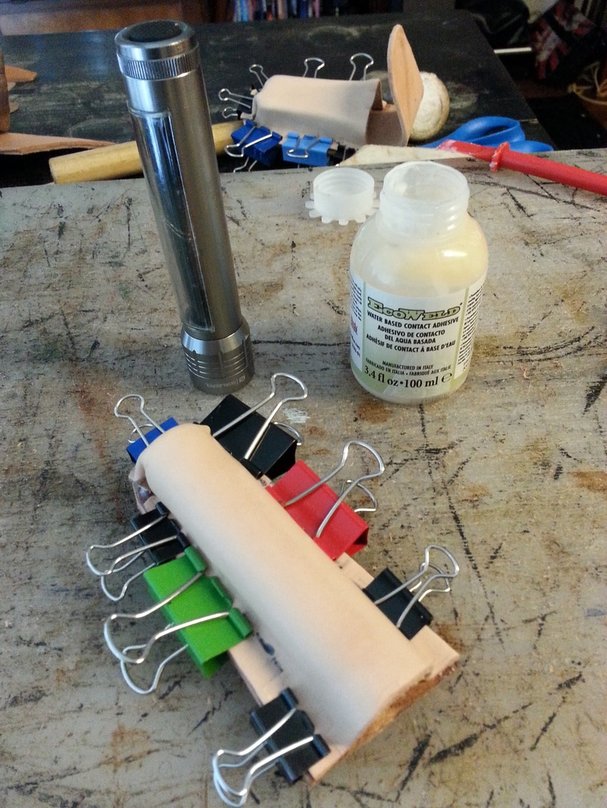 Clamped Flashlight Holder with Contact Cement. Leave your project clamped for a minimum of 30 minutes before removing the clamps, and then leave the project for 24 hours to completely dry. This will give the glue it's maximum adhearing potential. If you can't wait a full 24 hours before punching your holes then be sure to wait at least 6-12 hours for the bond to have started. Since this is a contact cement it is possible to punch holes as soon as 6-12 hours later, but for optimal bonding results it is recommended to wait a full 24 hours. Once your project is dry you can trim and bevel your edges for a nice smooth transition!
1 Comment
12/31/2022 08:45:52 am
Thanks for sharing the article, and more importantly, your personal experience of mindfully using our emotions as data about our inner state and knowing when it’s better to de-escalate by taking a time out are great tools. Appreciate you reading and sharing your story since I can certainly relate and I think others can to Leave a Reply. |
Willow EnrightI started crafting out of leather in 2011, and now I am making it my life's work. I am writing this blog to help myself remember some of the small steps in past projects, sharing my triumphs and failures, as well as my love of leather. Archives
November 2017
Categories
All
|

|
Cosplay DIY (Blog) |
 RSS Feed
