|
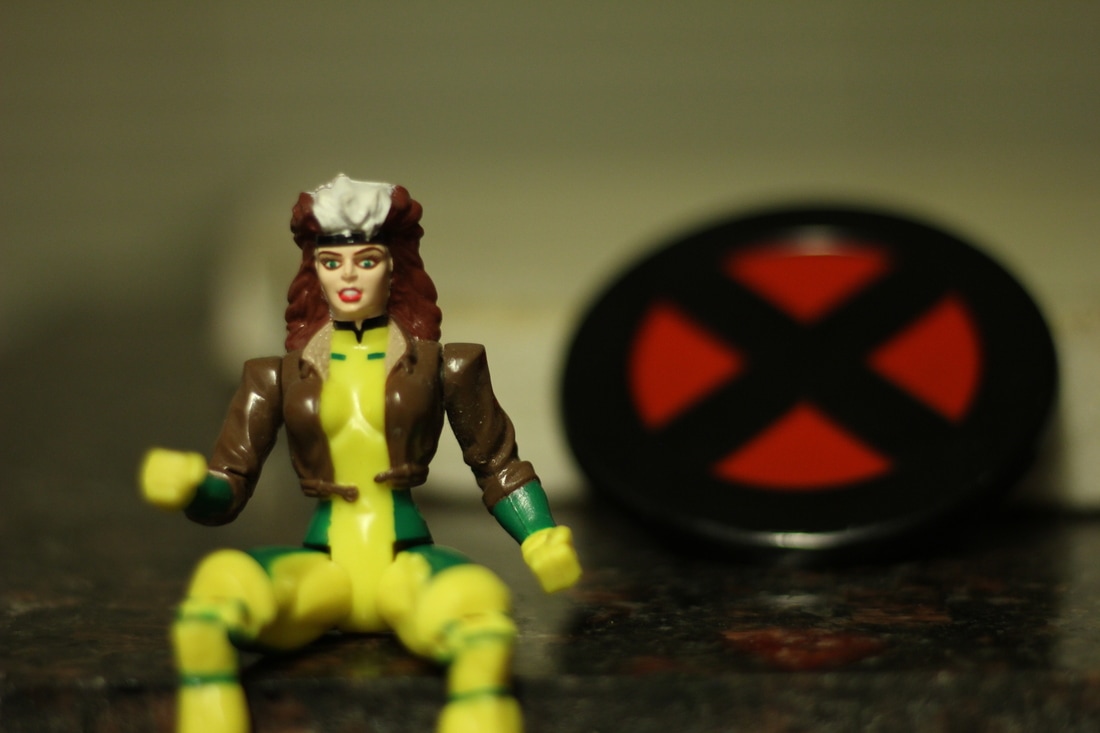
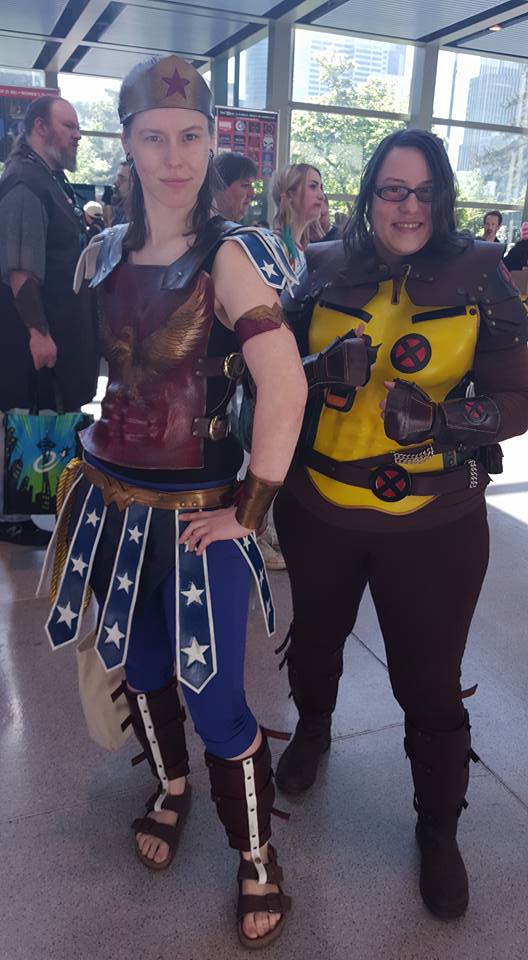
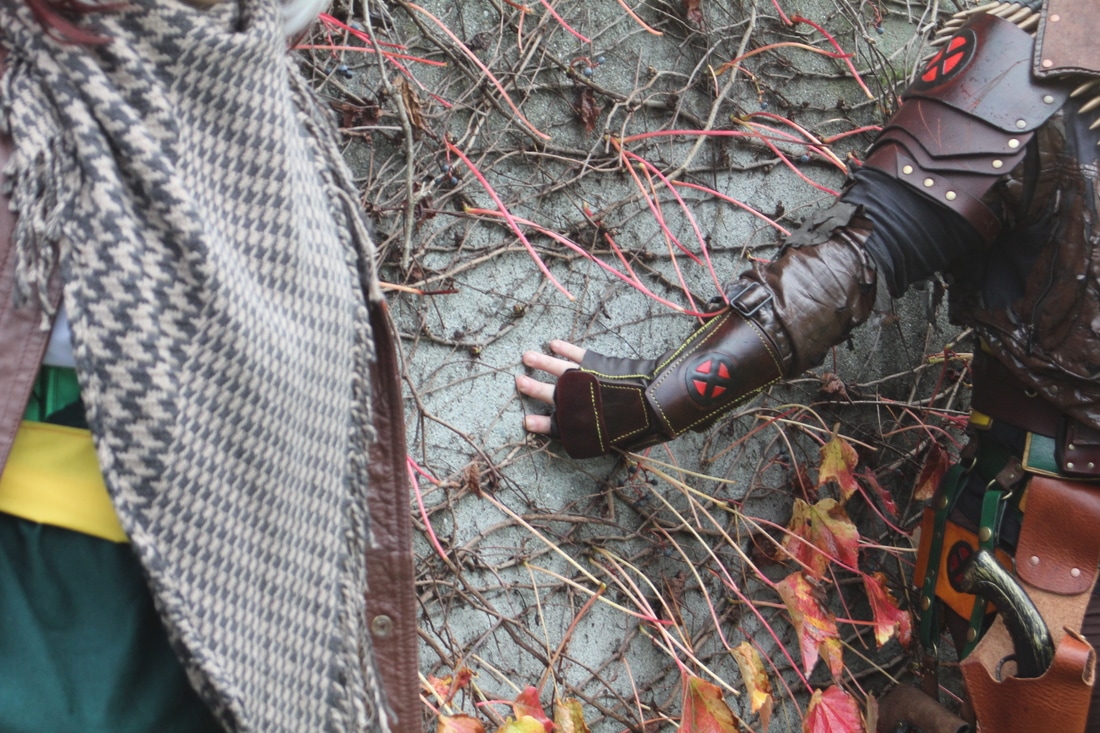
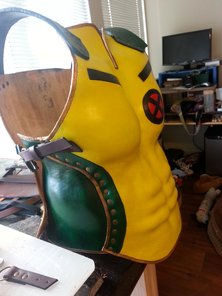
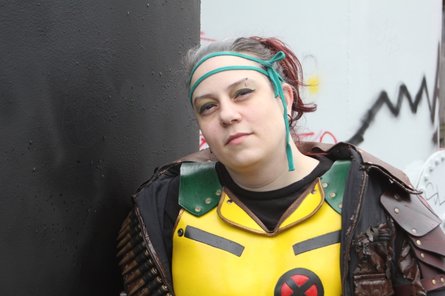
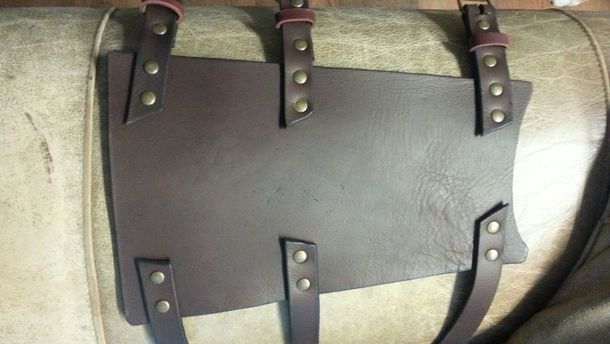
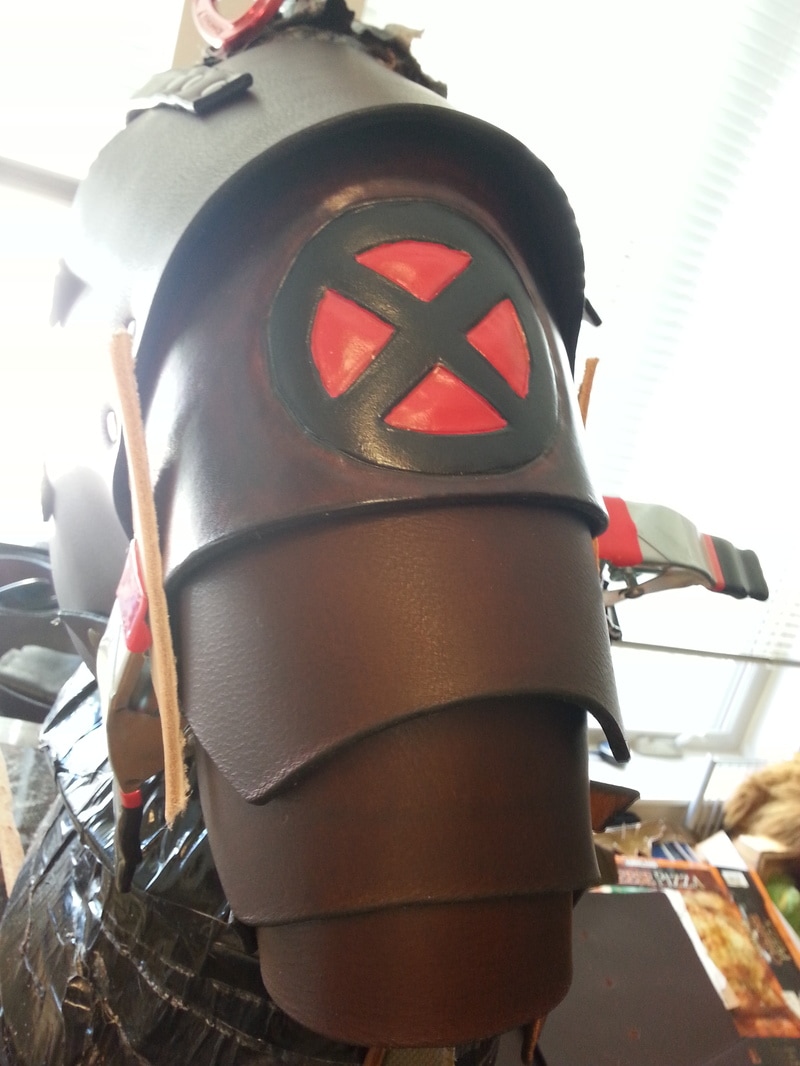
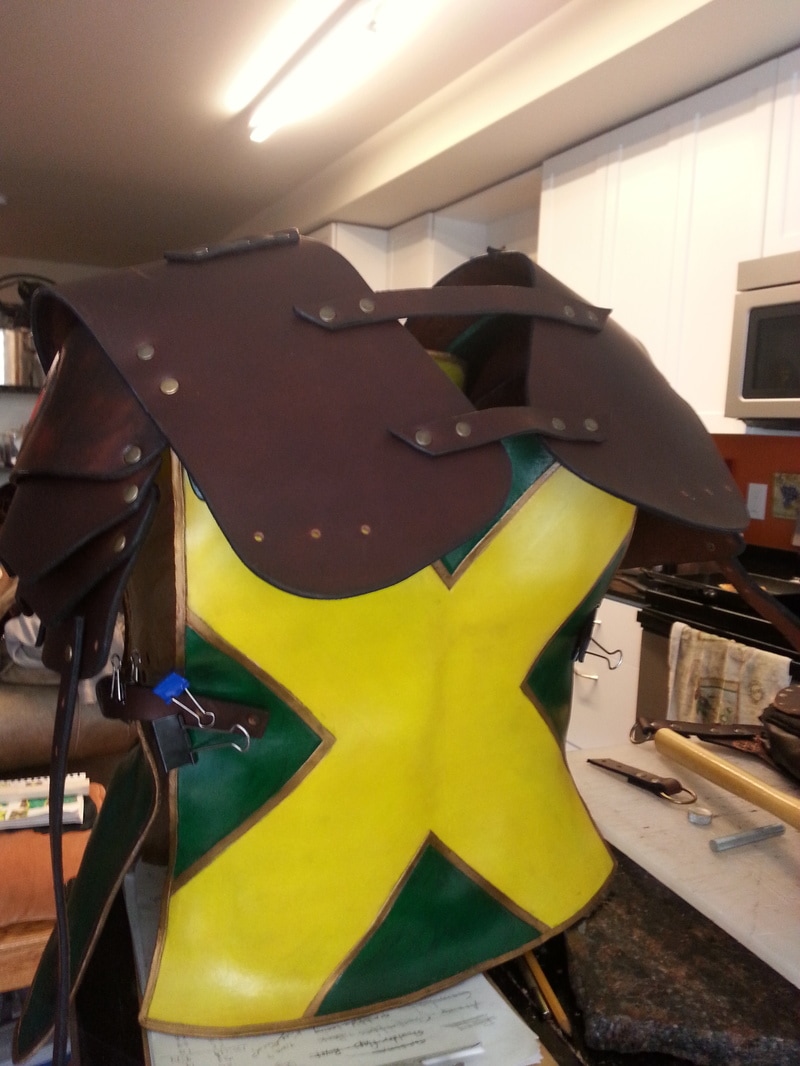
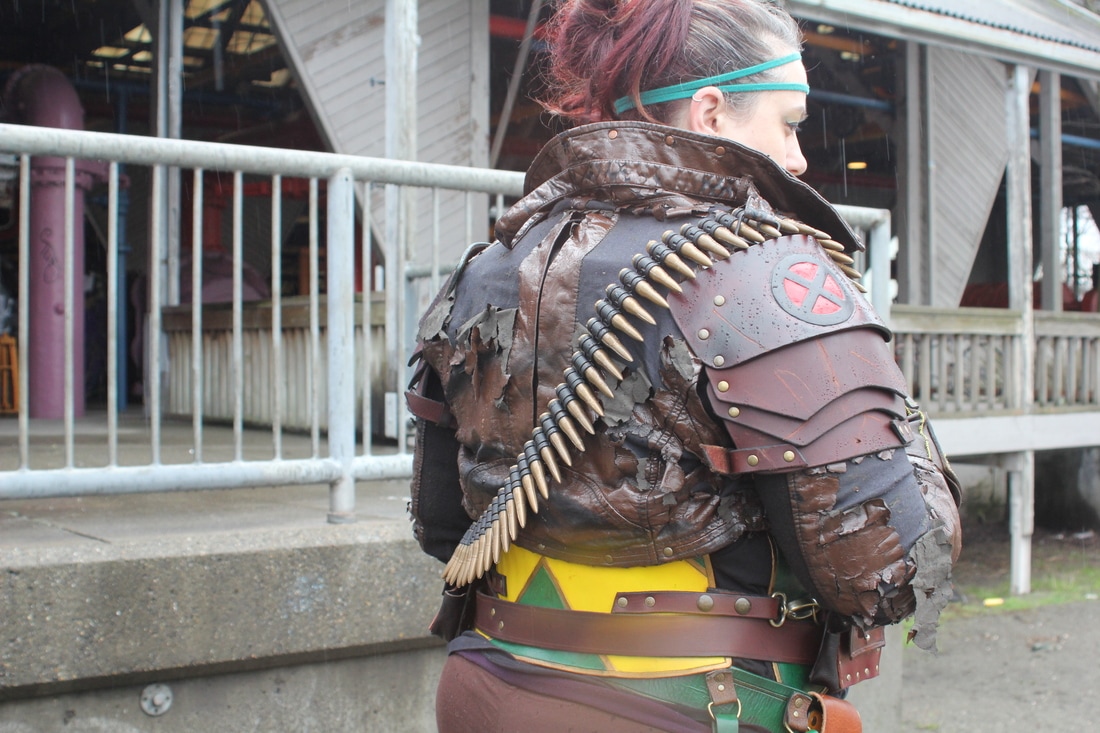
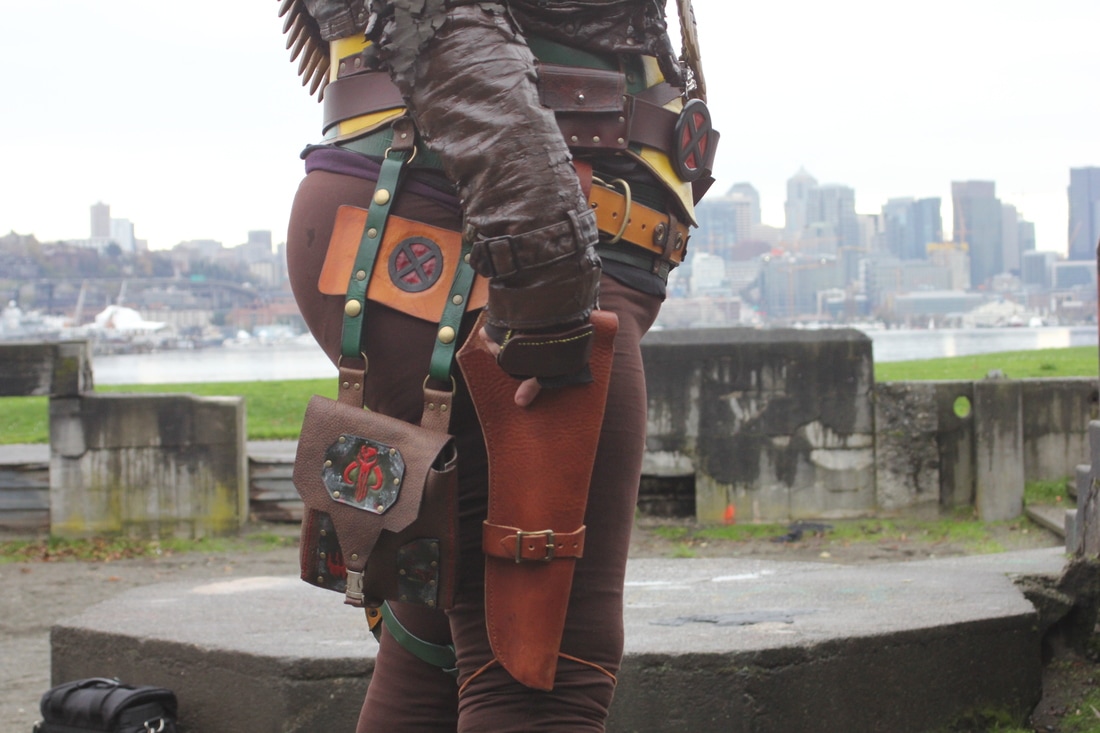
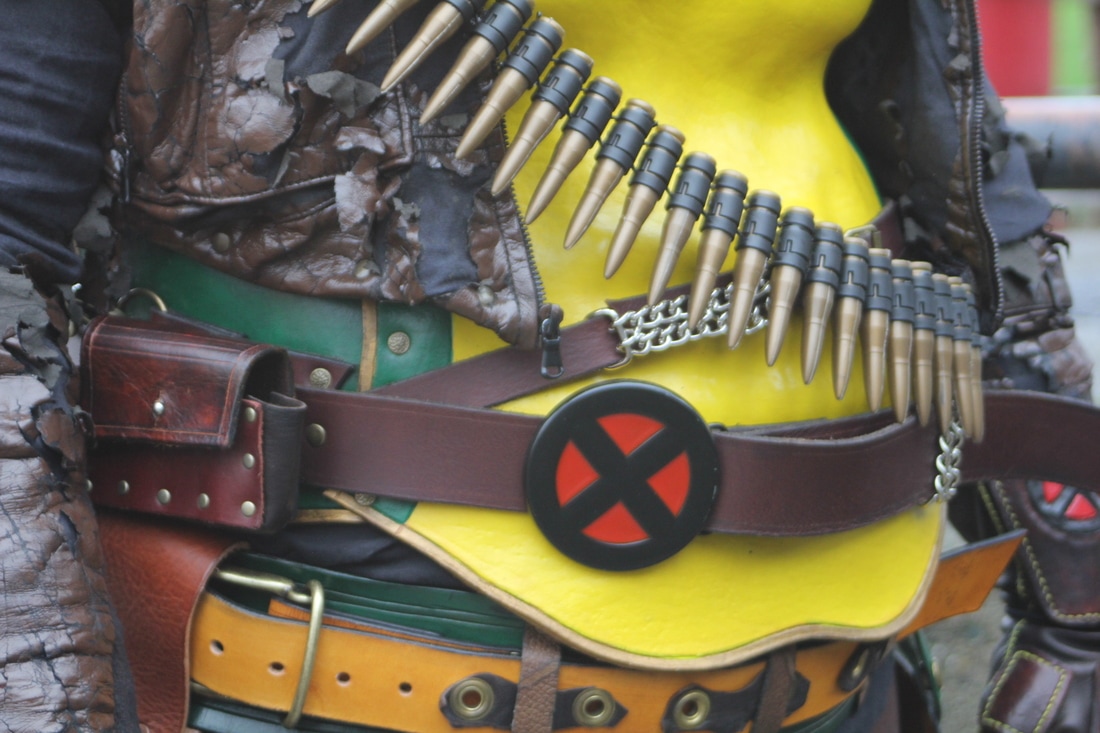
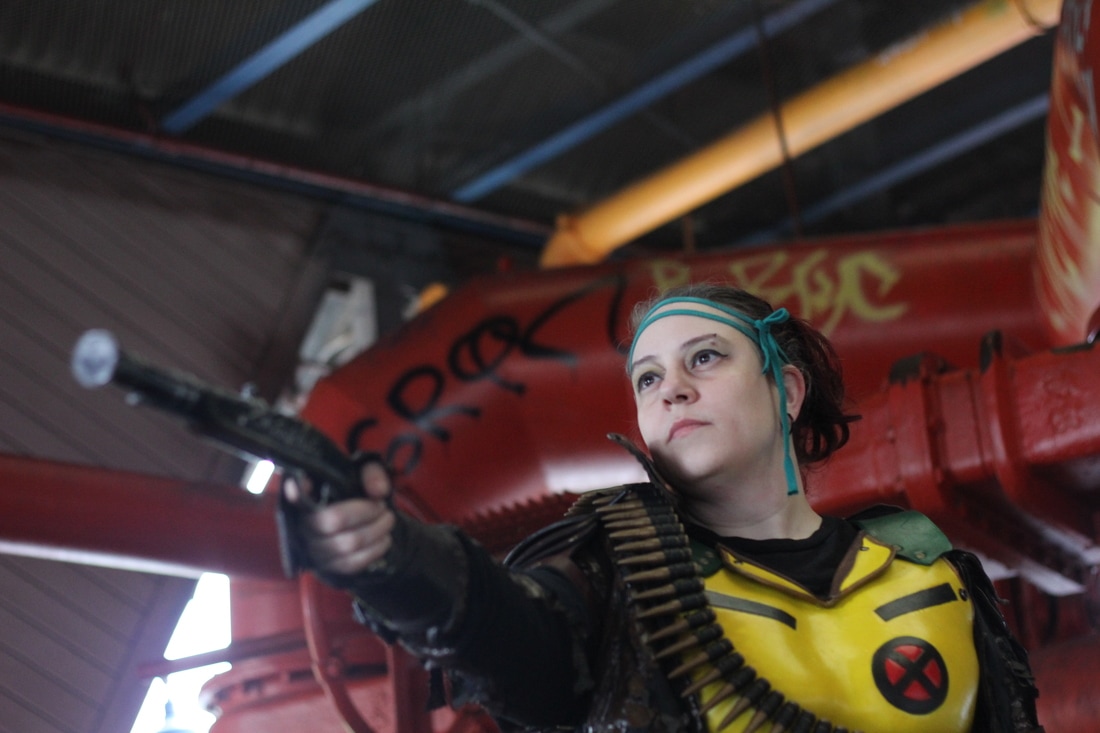
by Willow Enright We all grow up with an assortment of childhood memorbilia surrounding us. Comic books and graphic novels were among mine, one in particular was X-Men. One of my favorite comic book characters is Rogue, or Anna Marie from Caldecott County, Mississippi. There was just something about a sweet Southern Belle kicking some major ass that spoke to my sensibilities. As a grown up, I decided that I wanted to create a unique take on the Rogue Cosplay, and came up with an armored Post Savage Land Rogue. It's an apocolyptic take on the mutant after her stent in the Savage Land. The creation of my armored X-Men mutant Rogue has gone through two stages previously with a third stage in developement. When developing a cosplay character it is common to have to adapt or add to your costume to enhance the end result for the optimal cosplay experience. This particular cosplay allows for maximum fun because my additions are purely my own creations, except for the double belt, and the traditional yellow and green body suit which I plan for the third stage. First StageIn the first stage of my armored cosplay I found that the following three items really worked out pretty well for me. The two piece Chest Armor, Armored Gauntlets, and my double Belt w/Pouches. Both the Gauntlets and double Belt with pouches turned out the first time without needing any adjustments. The Chest Armor required a bit of trimming in the neck line, I reformed my collar so that I could have full range of motion for my neck, and a bit of trimming at the bottom of the front plate since I wanted to be able to sit down. What I kept...The Guantlets were created from a traced pattern made from an outline of my hand. I created the template with both a front and a back, I also included an additional inch for the depth of my hand. The 3-4 oz Chocolate Brown Deerskin was chosen for ease of hand sewing and for comfort and flexibility. The added armored pieces were 7-9oz Veg Tanned Leather so that I could use the Wet Form process to mold them into armored sections that would fit my knuckles, hand, and wrist. Each piece was dyed and or tooled before being hand sewn onto the fingerless gloves. The double Belt with Pouches were made from 8-9 Oz Rustic Brown Water Buffalo, 3-4 oz Chocolate Brown Deerskin, and 7-9oz Veg Tan Leather. The belts are rugged and sturdy, and designed after the classic double belt that Rogue wore with her traditional costume. I acquired an X-Men buckle, along with some silver chains to use as belt keepers to add some extra Rogue flair. The pouches are made with a thiner leather for the sides and then dyed veg tanned leather for the front and back, and each closes with a small button stud. The front and back plate for the Chest Armor were both created with the 7-9oz Veg Tanned Leather so that I could use the Wet Form process (Click the link to see more). I am going to cover both my first attempt as well as my later adjustments, just for ease of storytelling. Each piece was cut and designed prior to being wet formed using a duct tape body double. After the wet form process was dry the leather was painted with Angelus Leather Paints. The sides are held together with straps made of 8-9 Oz Rustic Brown Water Buffalo, and squeeze clasps and 3/4" buckles. Orignially the neckline was too tall, and made moving my neck and head difficult so I trimmed and constructed a new collar from the pieces removed. They were riveted and then sewn with a section of Utility Side. The bottom of the front plate was trimmed to allow me to sit down in the armor. What Didn't Work...The Shin Guards simply blended in too much with my brown pants and black pants and ox blood boots. They were constructed as a simple, single piece shin gaurd with three sets of straps and buckles for each to hold them to my shin. They were made entirely from 8-9 Oz Rustic Brown Water Buffalo, and each strap and buckle were riveted, with the base of each shin piece curved for comfort. The Shoulder Pauldron was made from 7-9oz Veg Tan Leather, and 8-9 Oz Rustic Brown Water Buffalo. The Veg Tanned section was for the shoulder pieces where the X-Men symbol was carved and tooled and then wet formed around my arm. Each piece was riveted to the next, including the shoulder joint which should have been made with a moveable connector such as a chicago screw. Originally I planned for the Shoulder Pauldron to look like a half leather jacket, but instead it turned out more like football padding making me into a Teenage Mutant X-Men Turtle, Rogue in a half shell.
Because I wasn't as pleased with my first attempt at a Post Savage Land Rogue, I didn't take as many photos of me in the finished costume. Instead I went back to the drawing board to create something worth writing home about. You can see my second attempt at Rogue in my next blog due out on Feb 4th.
1 Comment
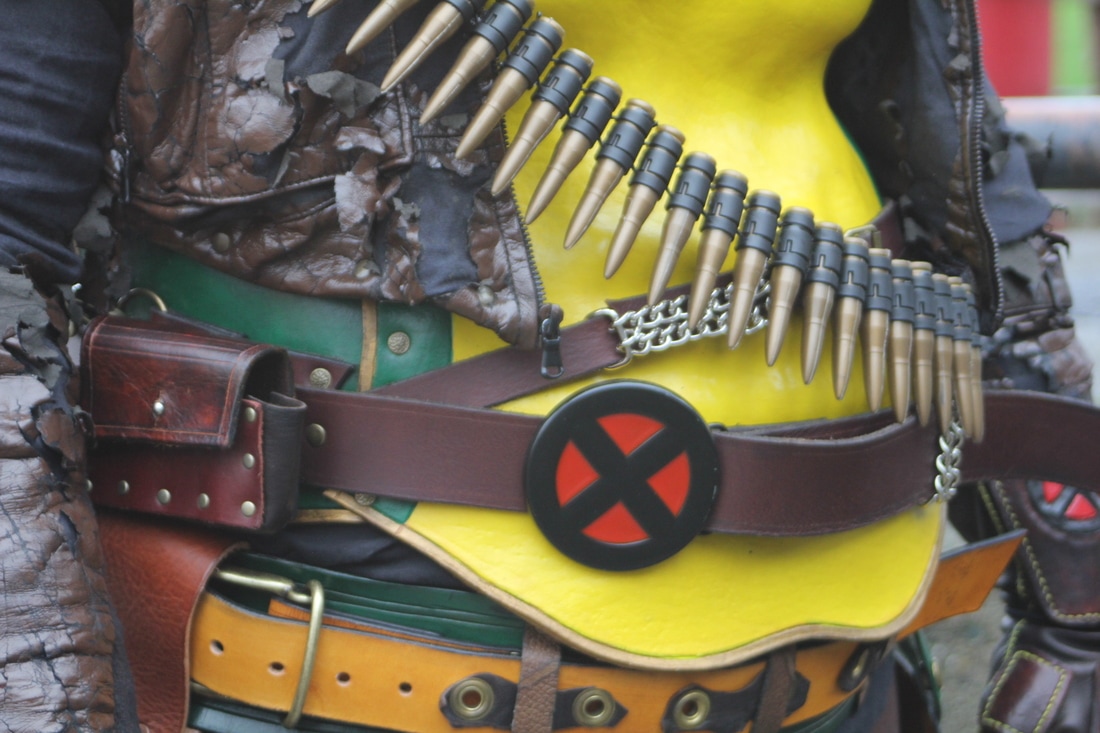
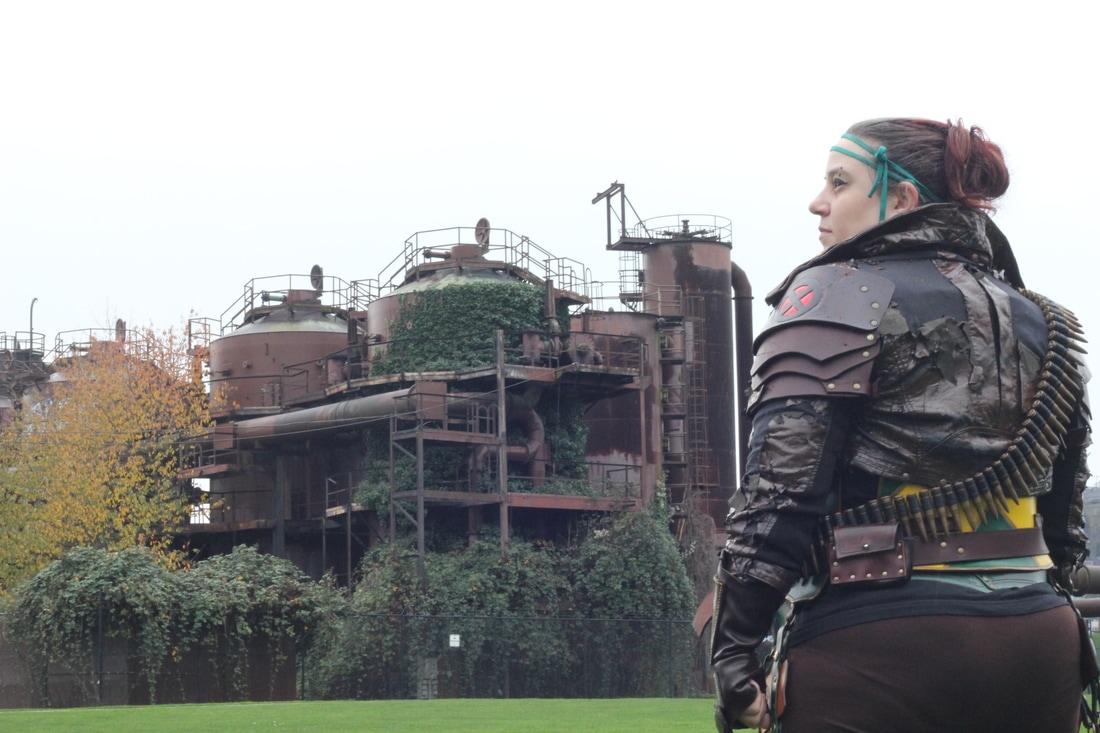
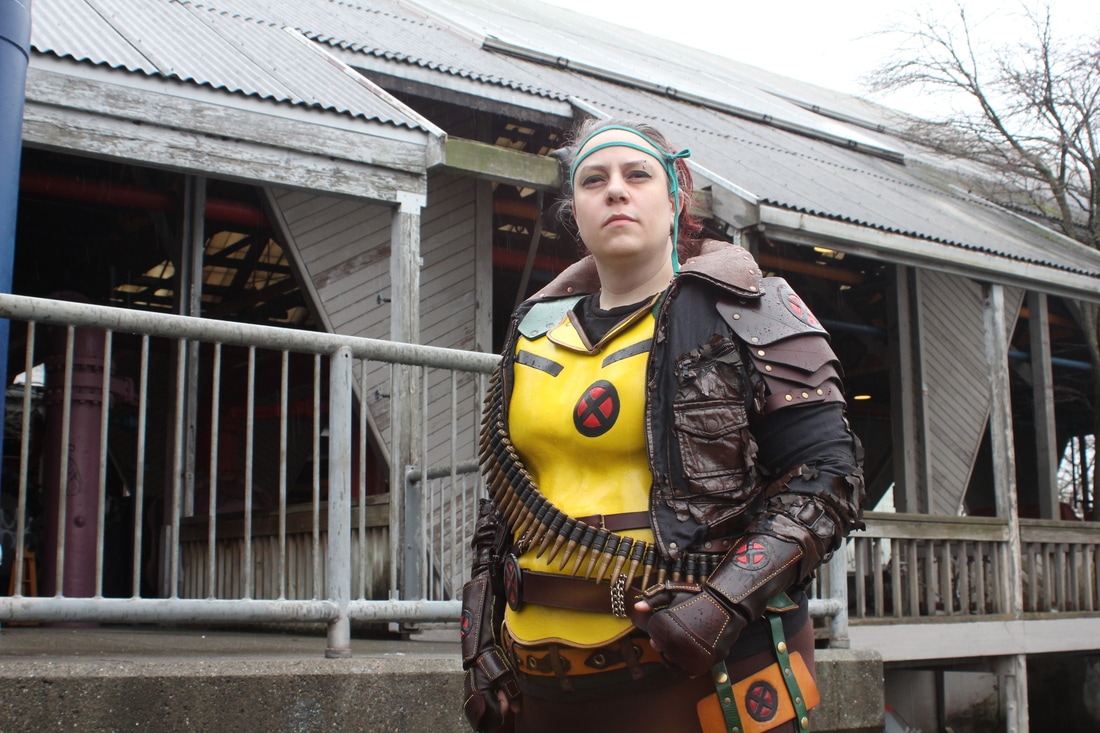
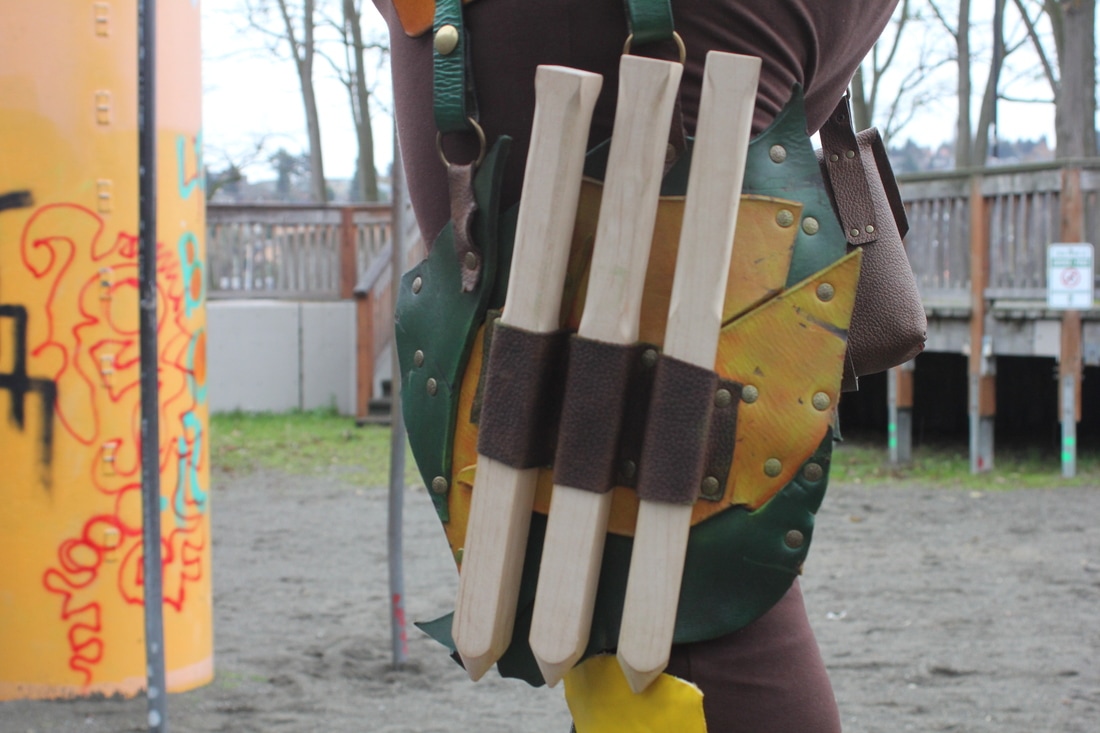
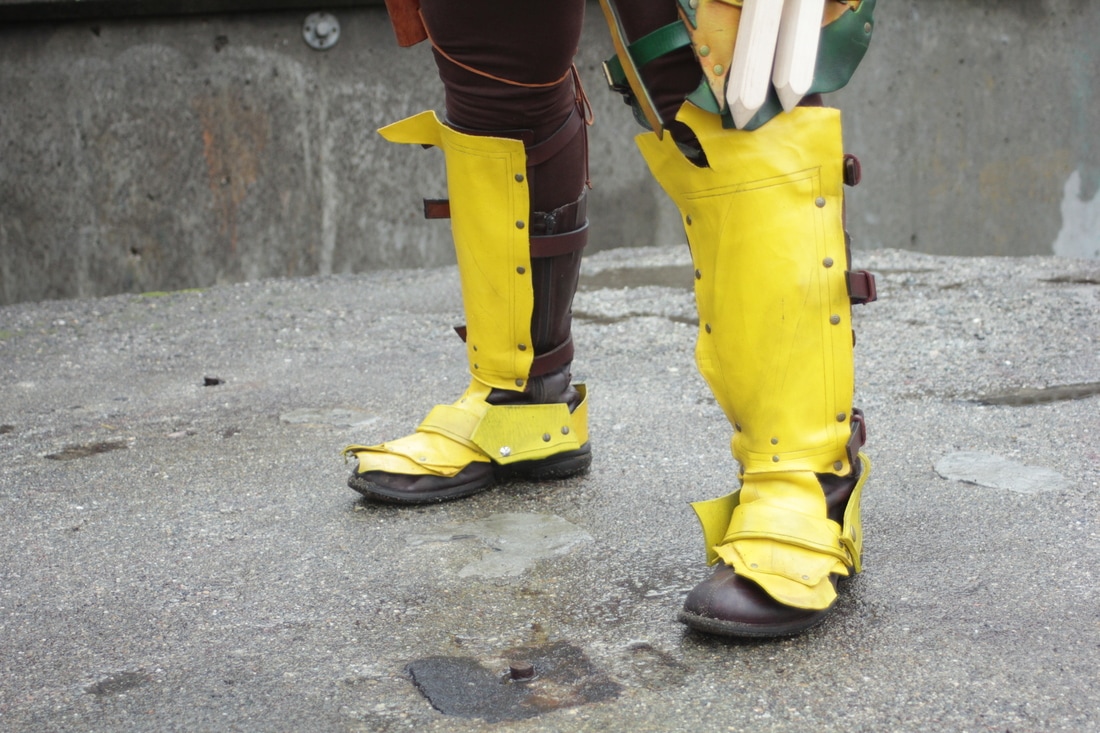
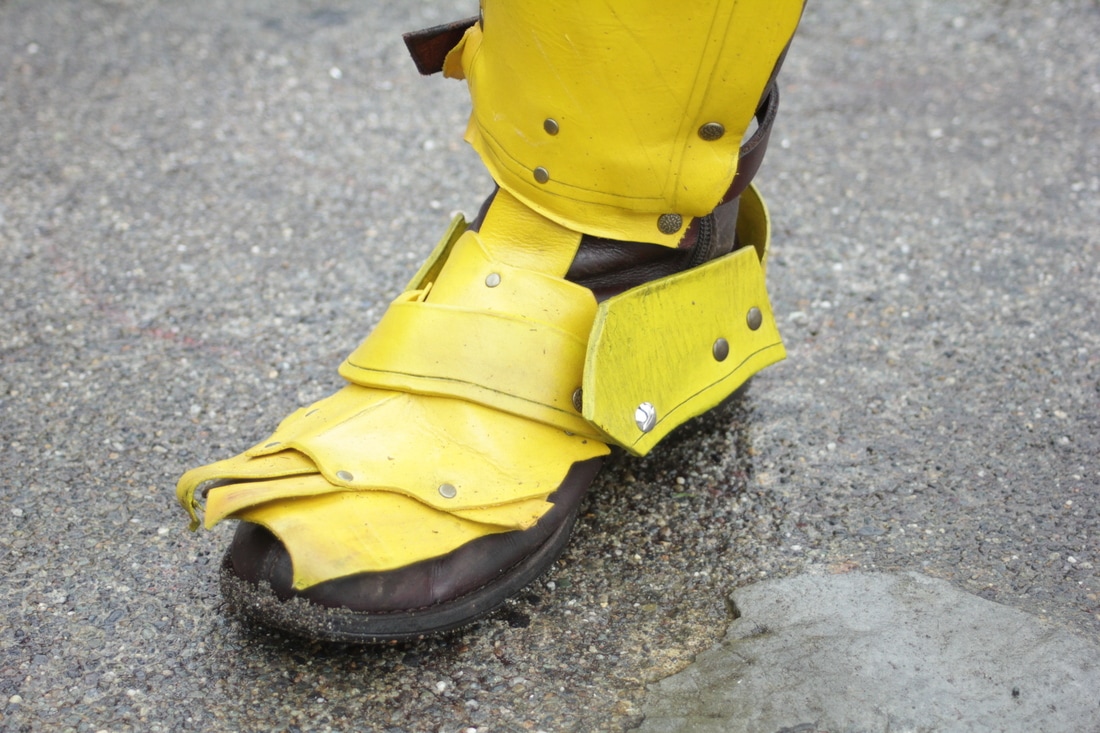
by Willow Enright As I stated in my former blog, Rogue is a childhood hero that I have always felt a connection to. Instead of paying homage to Rogue through an amazing interpretation costume, I initially created a crossover Mutant that didn't do justice to either properly. I am, of course, referring to my first attempt which turned out more Teenage Muntant X-Men Turtle, Rogue in a Half-Shell. On the second attempt I tired to stay closer to the classic character costume rather than simply armor it up. The Second Stage involved the addition of the second hand faux leather jacket in combination with the dismantling of the Shoulder Pauldron, creating the Sugah Stick Holster, and the Armored Shin Guard additions. Unfortunately, the second hand jacket wasn't actually leather like I had thought and when I used the Krylon spray paint to color it brown, it disintegrated. This gave the jacket a severe post apocalyptic look however which looked authentic. I also shortened the jacket and riveted it so it would be a half jacket. As well as added the utility side leather to the collar to cover some of the disintegration and for additional standing up collar flare. The Shoulder Pauldron was dismantled at the shoulder sections and the side sections were riveted to the leather jacket. This gave the more classic Rogue jacket look, only armored. Very awesome! The Sugah Stick Holster and Belt were made with 7-9oz Veg Tan Leather, and a 3-4 oz Chocolate Brown Deerskin. The holster was riveted together from various scraps of the veg tanned leather that I had left over from other projects. The three wooden stakes were from a Buffy the Vampire Slayer cosplay that I never put together, and they needed reappropriating and Sugah Sticks seemed perfect. They are secured to the holster with the deerskin. I dressed up the belt with some grommets and multiple deerskin keepers, and added some d-ring connectors so that I could hang bags and the Sugah Stick Holster from the belt. The holster also has two leg straps which keep it around your thigh, and close with a 3/4" antique brass buckle. The colors were acheived with Waterstains and Angelus Acrylic Leather Paints. The Shin Gaurd armored additions were done with a 3-4 oz Veg Tan Leather. This allowed for the traditional color of Rogue's yellow boots which made them more distinct, especially after adding the two green striped straps to add to the classic comic book look. The sections were riveted to the 8-9 Oz Rustic Brown Water Buffalo shin guards, and colored with Angelus Leather Paint. The foot sections were wet formed over my boots to hold shape. Planned 3rd Stage: New Leather Jacket for Shoulder Pauldrons Shoulder Bandolier for Bullets Additional Leg Armor or Hip Bag Traditional Yellow and Green Body Suit In honor of one of my childhood heros, I've enjoyed creating my original armored Post Savage Land Rogue with it's apocolyptic take on the X-Men mutant!
by Erin Bishop First and foremost, the term small business is being used so frequently that I believe that one must first clarify what they mean by “small.” So, what is a mirco-business? A mirco-business is company that has one or two people working for it and that it is not physically located at a shop, but is a booth, a website, or a corner of a local consignment shop. In other words really small. There are many things that an owner of micro-business must constantly juggle and attempt to balance: pure supplies vs finished products, saving for bigger equipment vs buying supplies, working vs free time, and last but not least physically building and socializing. Word of mouth is the best way to get known, but what do you do if no one is talking about you? Start a conversation through social media. If you have a business and haven’t started at least one social media account for the business, follow these three points for success.
Once you have these basics down and you feel comfortable, it’s time once again to become uncomfortable. Branch out into new social media sites, start blogging, join groups, and make new goals. Your business isn’t growing if you aren’t reach out and exploring new avenues. Don’t be discouraged by others or feel like you aren’t measuring up, no one knows your life or your micro-business like you do.
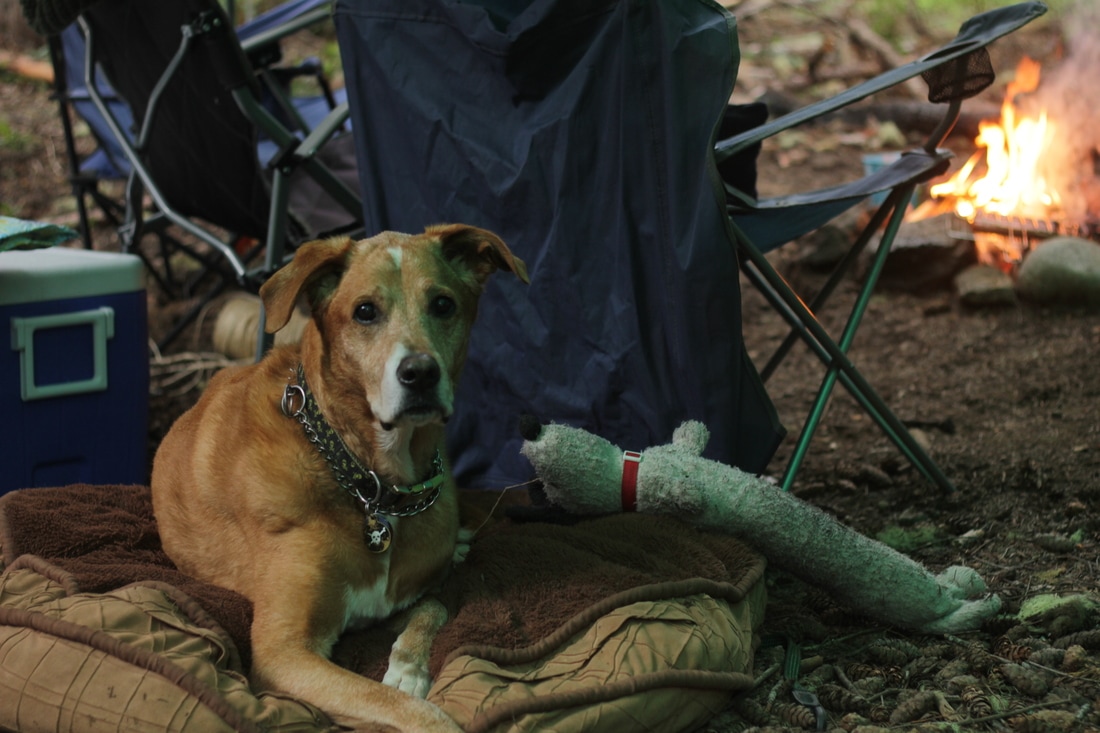
by Erin Bishop The boy scouts have the motto of always being prepared, but how does one prepare for life? Simple answer: You don’t. You do the best you can and hope for the best. How does one focus when life becomes overwhelming? You can hunker down and try your best, wait for a better time, or fall back on already prepared materials. “Life happens when you least expect it.” - Jane Harvey Barrick Back in October of 2016, my twelve year old Rhodesian Ridgeback/Labrador Retriever starting feeling ill and shortly after had to be put to sleep. Thankfully, Leather Works by Willow’s Facebook page didn’t need my attention because I had planned out what posts were coming out and when. I was able to fall back on my planning and I could wait for a better time to compose more cheery posts. Other than the emotional turmoil, the hardest part was focusing on two upcoming panels for comic cons. I had to hunker down and focus on what I felt like I couldn’t. Looking back, I know that I could have done a better job, but I did the best that I could at the time. I was used to working on a project for two-three hours then taking the dog outside to pee, but with all that was going on I could only focus for ten to forty-five minutes. My long focus became short and erratic which I sure showed in my work, but I had obligations that I had to attend to. “If you fail to plan, you are planning to fail” - Benjamin FranklinMy girlfriend had a harder time, he was hers from four weeks until his dying breath. She was responsible for writing blogs, she would sit down and start writing a blog one or two days before we released each blog. When he’s sickness and subsequent death came upon us she had to wait for a better time, she was unable to hunker down and she hadn’t planned ahead. I also had to put some of the more outgoing social media efforts aside as I dealt with his death. I eventually feel behind when we got a puppy, because puppies need a lot of attention. They pee everywhere until, you understand, that they are telling you, that they need to go out. Not to mention the constant checking on them, because you hear a riping noise coming from the bedroom, and you know that they brought their toy squirrel in there, but you’re not quite sure that they don’t know, not rip up your bed. A few months later, I am back to scheduling my life so that I may have a life. Plan for a LifeI already briefly covered planning for the future, but this is where the real life saver comes into play. When you plan more and further out, you’ll be able to handle more of life’s little unexpected journeys. I sit down at the end of the month with Willow, and we plan out what we are posting, tweeting, writing on the blog, copywriting for Etsy, for the next month. We discuss which items, posts, tweets, and blogs that we want to promote. We also talk about any events, promotions, sales, or contest that we want to be apart of the following month. We make a to do list that helps shape what we are doing today, so that tomorrow will be easier.
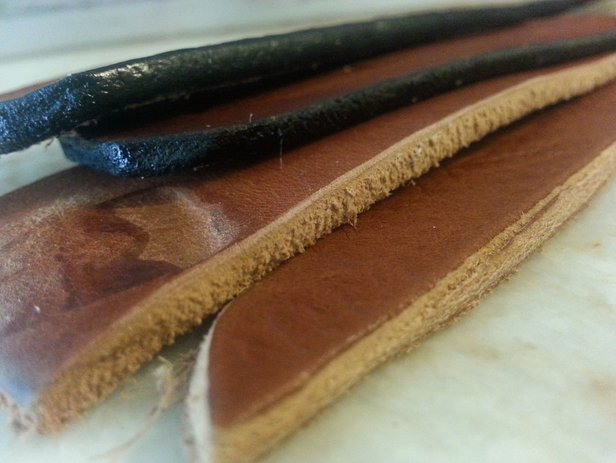
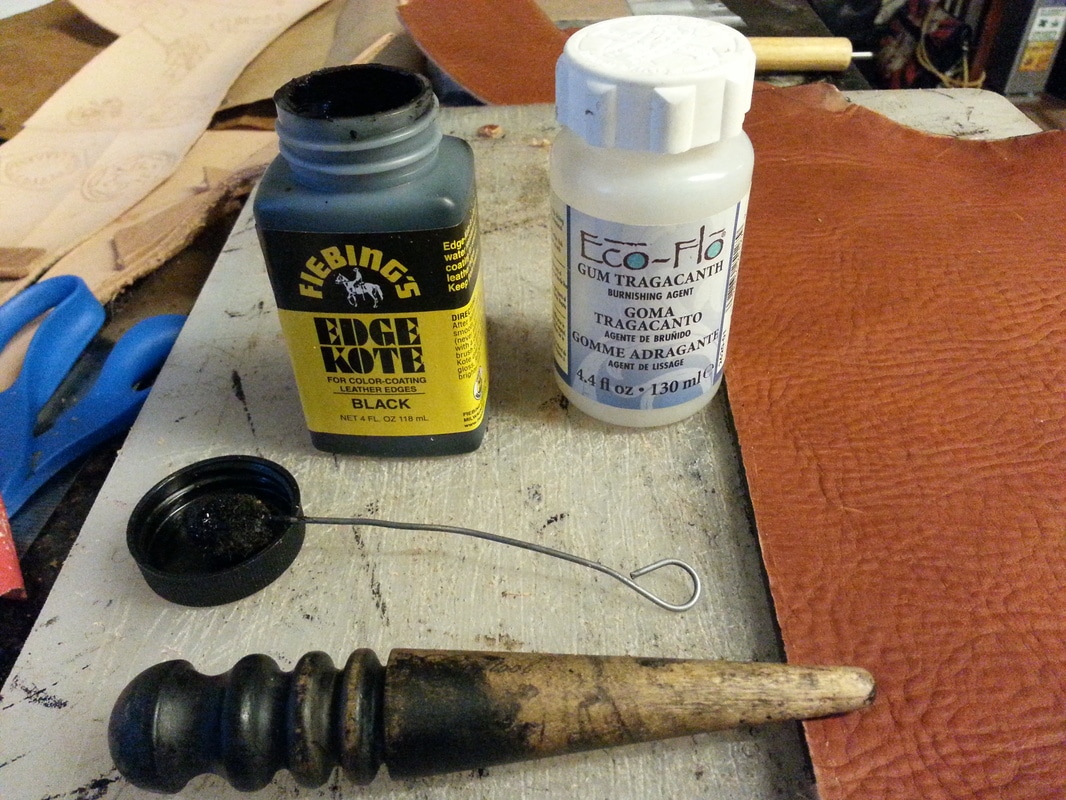
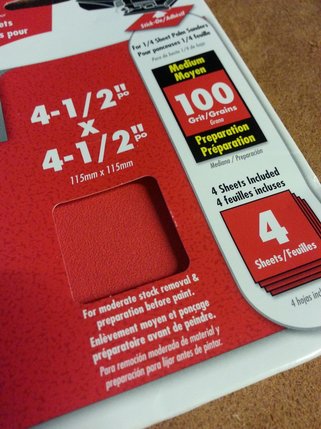
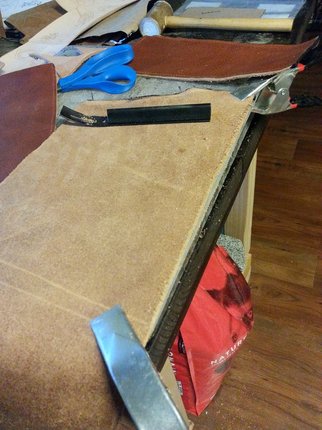
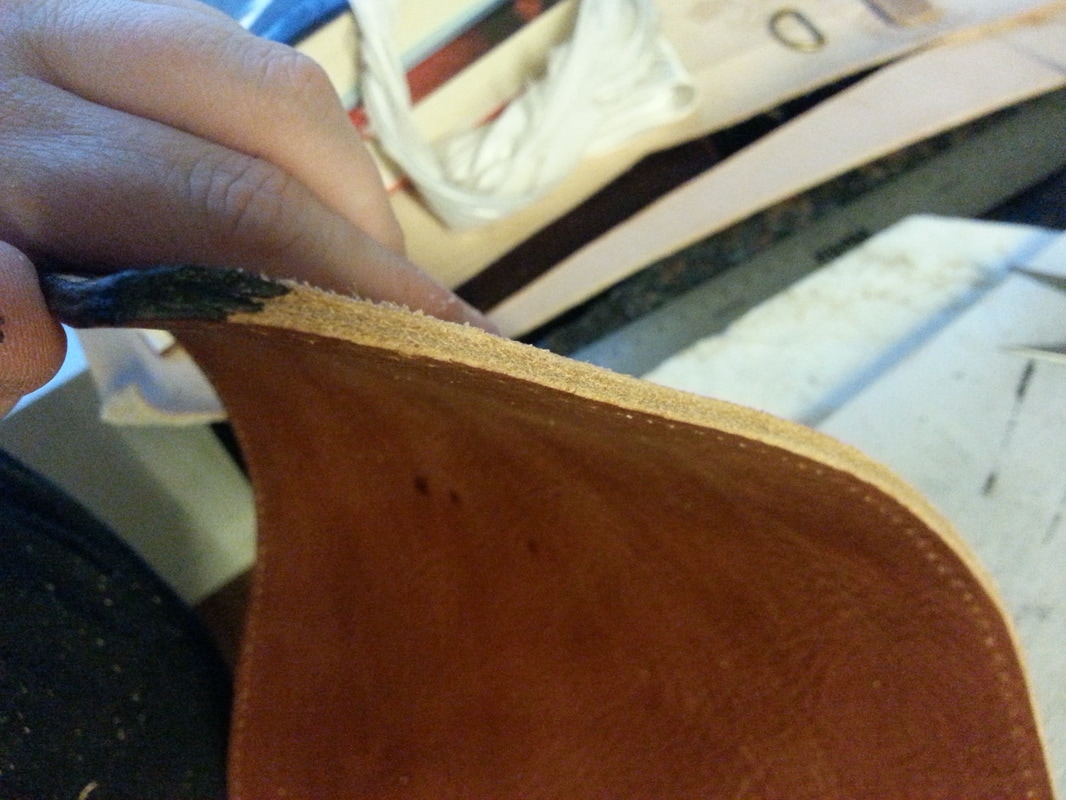
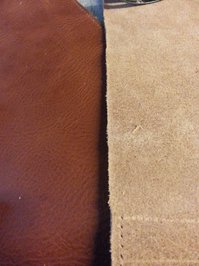
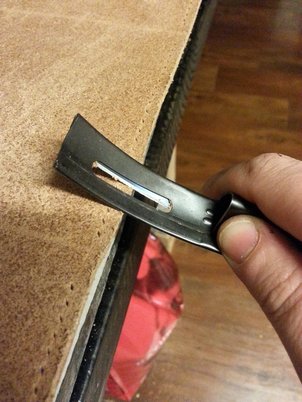
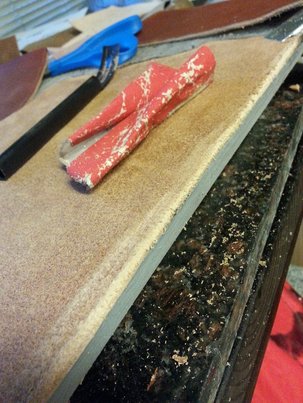
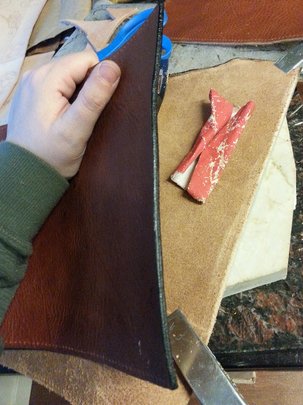
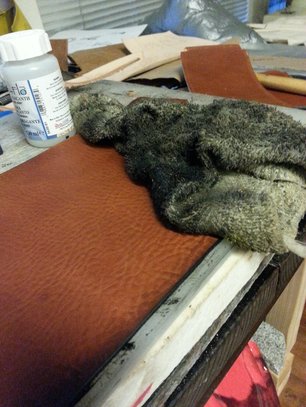
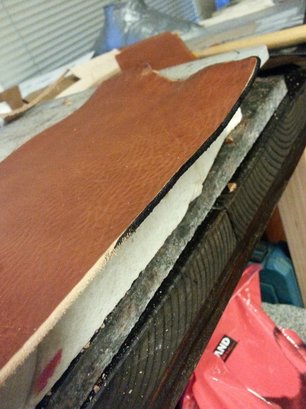
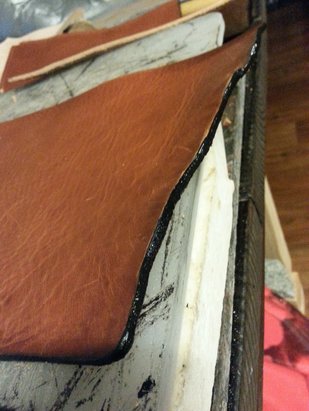
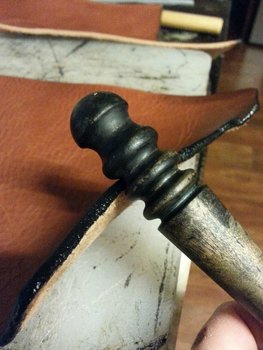
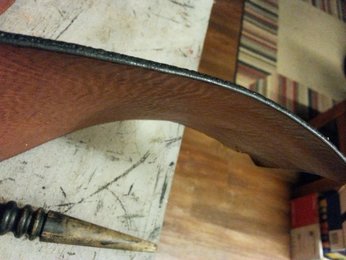
I recommend planning your 140 character tweets for a month out of planned content. I recommend writing as many blogs as you can, but a good minimum is two out. If you have to write product descriptions, I would have about 3-5 depending on the frequency of the release. I have planned what I am going to work on and on what day from now until OCTOBER, and I use the to-do list as a road map when figuring out how far out I need to plan, and what I need to do now. Then when that’s all done it’s time to relax watch some TV, go swimming at the lake, or party with your friends, because you already did what you needed to do. by Willow Enright Working with leather edges can be a challenge, and when you first start off it may not be as important to you that they look great. However, as you continue to leather work you will eventually want your edges to look as smart as the rest of your leather creations. There are multiple steps to getting just one edge looking fabulous. We'll cover the basics of beveling, sanding, edge coating, and burnishing to take your leather edge work to the next level of amazing. Supplies5-10 oz Leather Swivel Knife/Head Knife/Scissors Safety Beveler Sand Paper 100 grit Wood Burnisher Edge Coat Gum Tragacanto Wool Dauber or Paint Brush Wash Cloth/Paper Towel Clamps Cutting Board Cut your leather with your swivel knife/head knife/scissors, and then clamp it at either end to your cutting board. Leave the edge just barely hanging over the side of the cutting board, about 3-4mm. This is to give you just enough room to bevel without compromising your supporting surface, or damaging your safety beveler. Use your Safety Beveler at about a 45 degree angle to trim the leather in order to round out your straight cut edge. Do this to all under sides of your exposed edges, but don't use the beveler on the front of the leather or you may remove too much by accident. This process takes some time, and you need to be extremely careful so as to avoid cutting yourself with the beveler. Follow up the beveling with 100 grit sand paper to the edges for a smoother finish. Sometimes you will need to repeat the beveling and sanding if your edges don't end up being smooth enough. If they are smooth enough you can begin with the edge coating. This comes in clear, black and brown. Apply the edge coat with a wool dauber or medium paint brush. Use a damp work cloth or some paper towel to wipe away any excess edge coat that you may get on the front of the leather as you work. Let the edge coat dry before continuing. Use the Gum Tragacanth, applying it with either a wool dauber or paint brush. Leave it for a few moments to get tacky before using the wood burnisher, moving it along the edge between the appropriate sized groves. Do this until your leather edge appears nice and smooth. Repeat the Gum Tragacanth until you are satisfied with the smoothness of your edges. Finishing your raw edges with this lengthy process will be well worth the effort. Your edges will look amazing, and wear better over time!
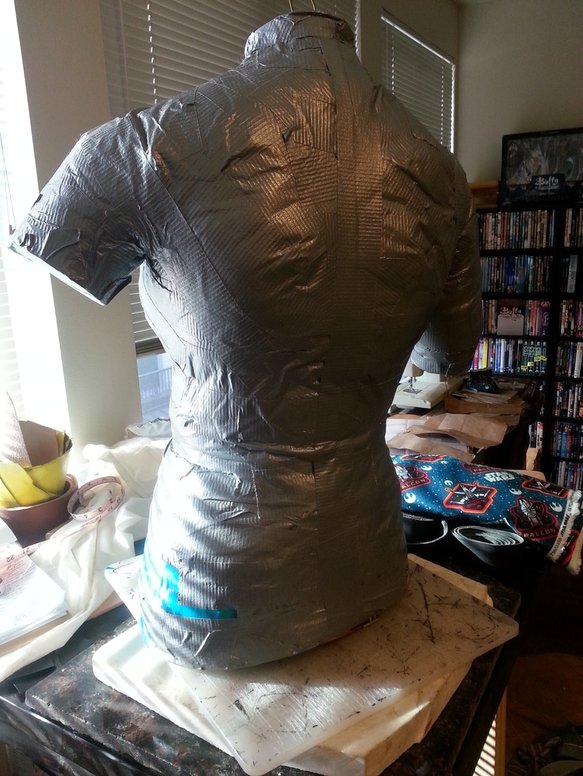
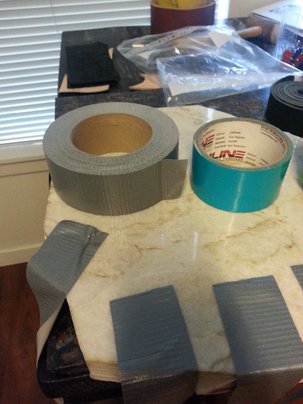
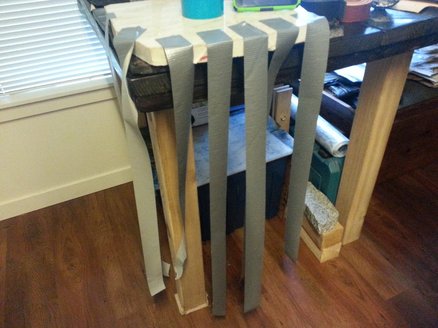
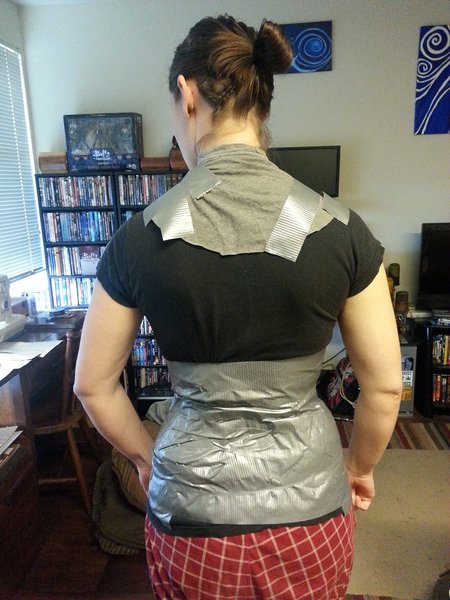
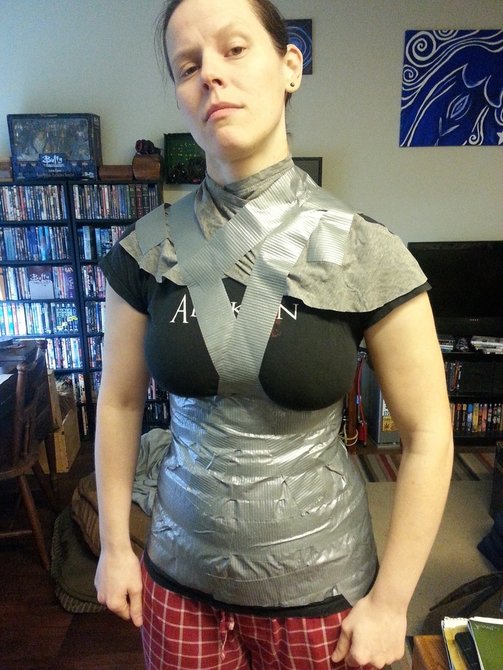
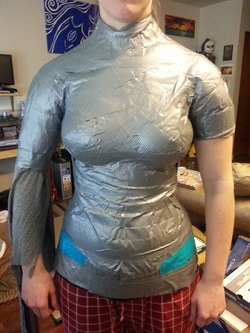
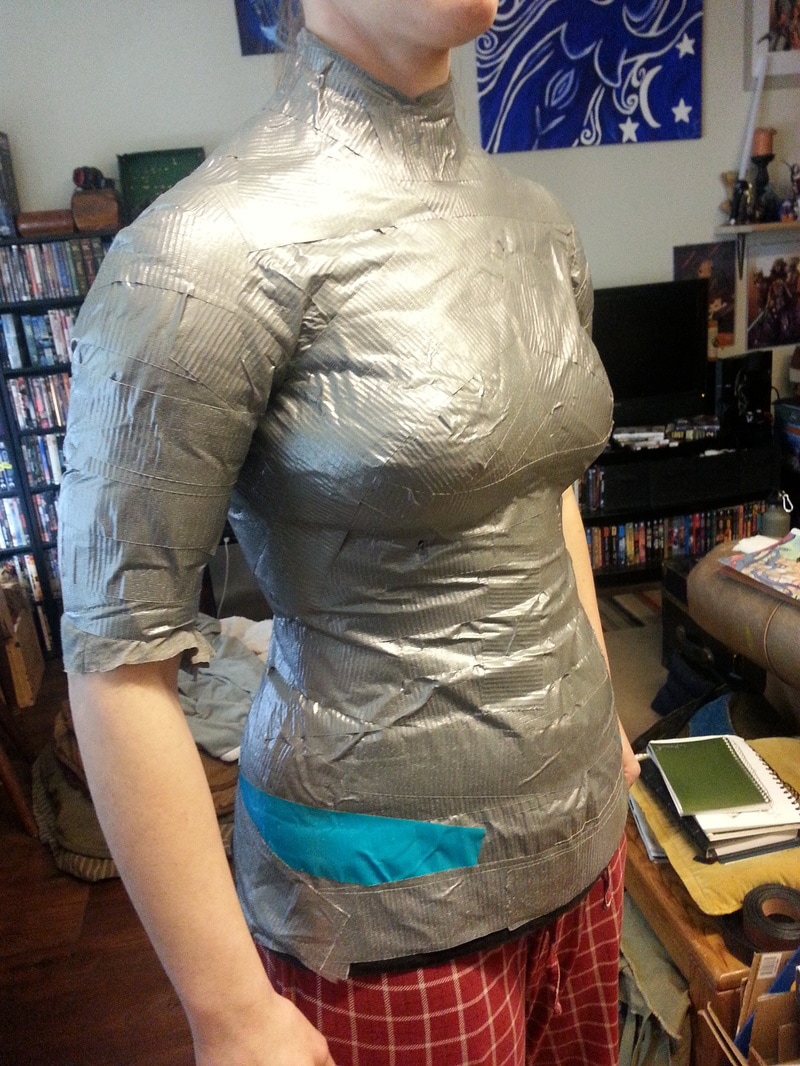
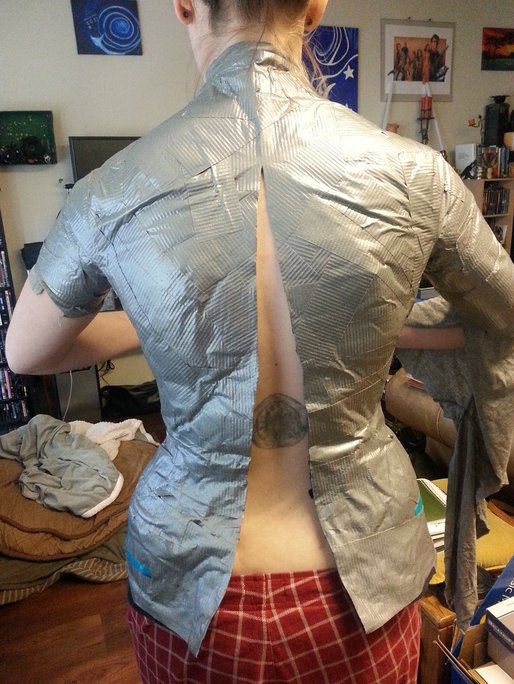
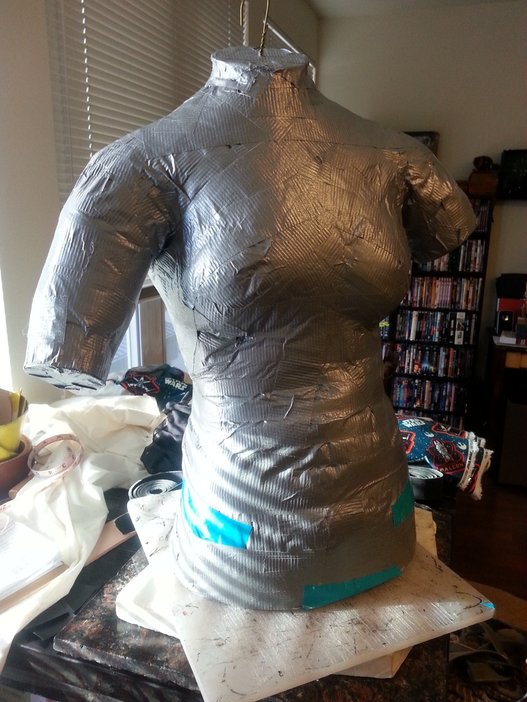
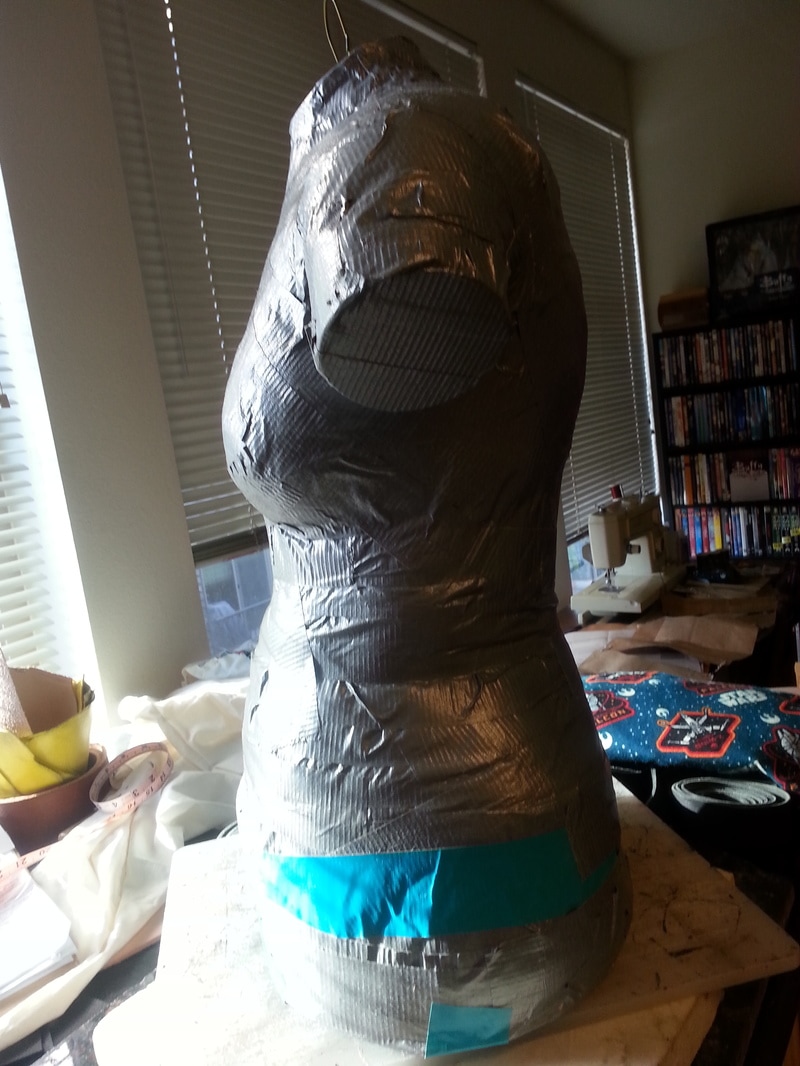
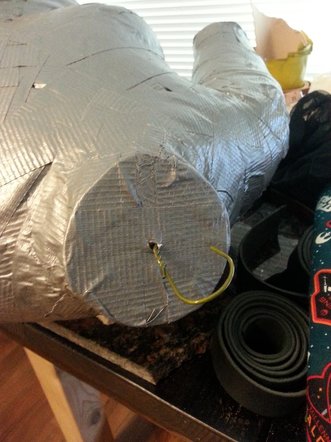
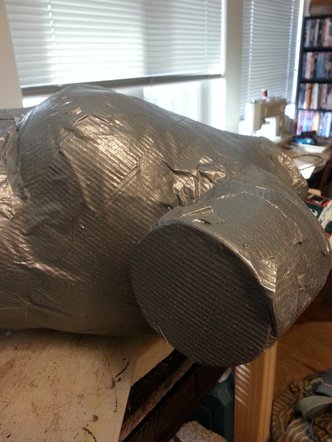
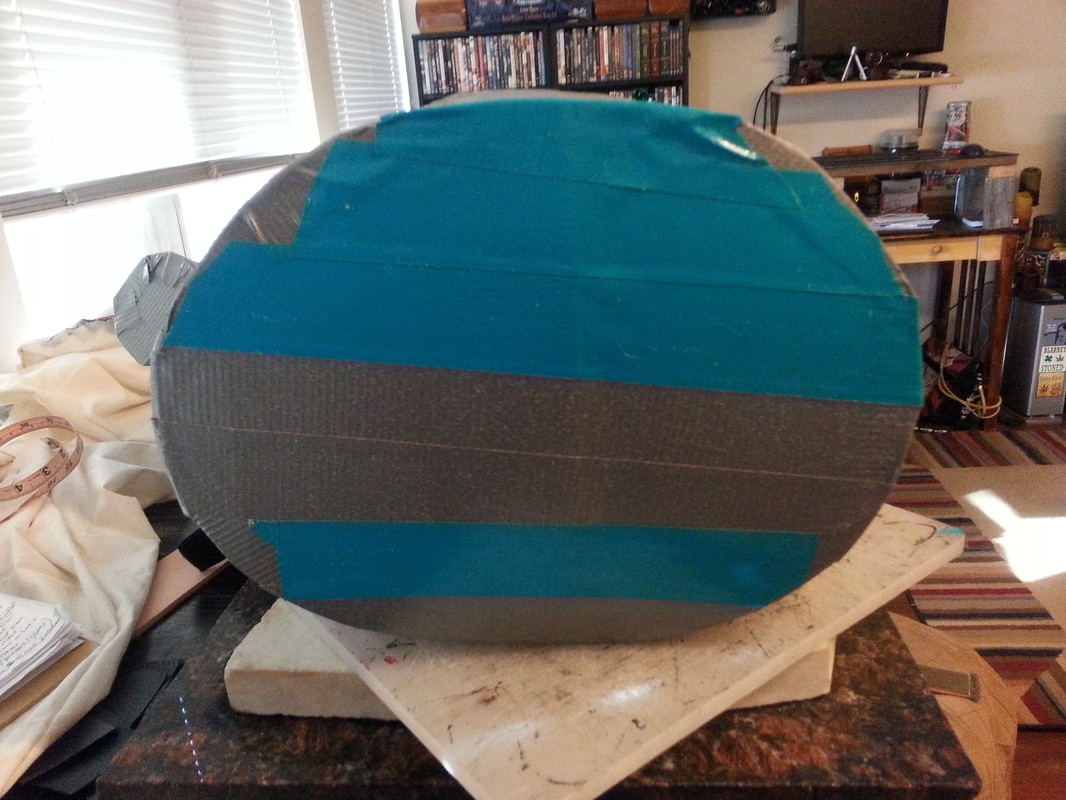
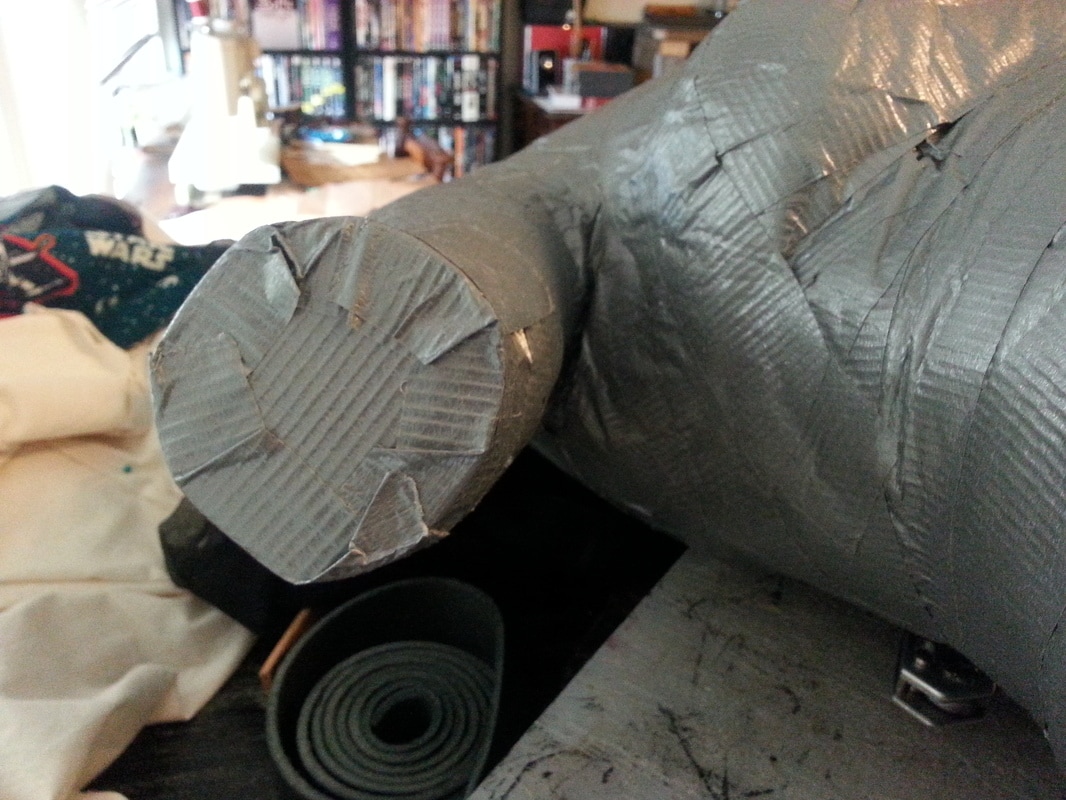
by Willow Enright SuppliesHaving a Duct Tape Body Double is extremely helpful when building Cosplay armor. You can also use it as a dress form for sewing purposes. It's actually quite simple and quick to make as well. You can use as many recycled products as possible with this one, only I do recommend actual Duct Tape as opposed to any other sub-par tape. When you are all done you'll be able to create your Cosplay costumes with relative ease since you will have a body double to work with. Start your Duct Tape Body Double with several long lengths of duct tape, drapped from a tall table or countertop. This allows you to make nice, even applications of the duct tape so that you don't end up pulling too tight as you wrap it around the individual. Pulling the tape from the roll as you wrap tends to pull too tight and can really restrict the person's breathing. Being tightly taped in duct tape requires a lot of trust since the material is extremely binding and can cause one to panic if not properly done or monitored. If your voluteer does panic, you can cut off the t-shirt in the back and once they have recovered you can simply tape them back into it. When you are using a t-shirt start taping at the bottom to anchor your t-shirt. If you are using saran wrap instead of a t-shirt you can start with the crisscross motion over the breasts for a woman and the hip for men. Make sure to cover evenly and don't get too close to the edges, you can tape those after you remove your voluteer. When you work over shorter, smaller areas such as the breasts cut your long tape strips into six inch sections or so to avoid having to crease the tape too much. If you plan to do any collor work be sure to create a section up the neck so you'll have a neck line in the end. I wanted to have one of the arms just a bit longer than the other so I used a scrap piece of a left over t-shirt to extend the one sleeve slightly. This is helpful for builiding shoulder pauldrons. I also wanted to specifically mark her hip line with a different colored tape so that when I'm making her chest armor I don't end up building it too long so that she cannot sit down. This is a good technique for keeping track of important measurements. If you have enough tape, and the person has enough patience, go over the person twice to ensure that your body double won't come apart at the seams. Once you have successfully wrapped your voluteer completely you will want to remove them from the shell you have made. Start cutting at the bottom, using your hand to guide the scissors but being careful not to cut your own fingers. Make a straight cut line all the way up to the neck, and then you can gently pull off the duct tape form. Retape your body double back together and create the cardboard ends for the neck, arms and torso. Use duct tape to secure the cardboard ends over the body double. Make a small hole in the neck cardboard area for your wire hanger to thread through from inside your duct tape body double. Put the wire hanger inside your body double before you begin to stuff the inside with the poly fill. Tape up your arm holes next, continuing to stuff the poly-fill inside. Every once in a while you should check the measurements of the body double to make sure that you don't over or under stuff it. When you are done stuffing, tape on the bottom piece of cardboard so that your torso will sit flat. I like to add the hanger so that it's easier to pick up or hang while storing it. Keep in mind you will want to create a loop with the hanger handle if you will be adding lots of weight to your duct tape body double, so that you can add a carabiner clip instead. That will hold up better for long term hanging purposes with added weight. Creating a duct tape body double will prove to be extremely useful for pretty much all Cosplay creating purposes. You can also make a full body duct tape replica if your costume is more extensive. May the crafting Force be with you!
|
Willow EnrightI started crafting out of leather in 2011, and now I am making it my life's work. I am writing this blog to help myself remember some of the small steps in past projects, sharing my triumphs and failures, as well as my love of leather. Archives
November 2017
Categories
All
|

 RSS Feed
