|
by Willow Enright 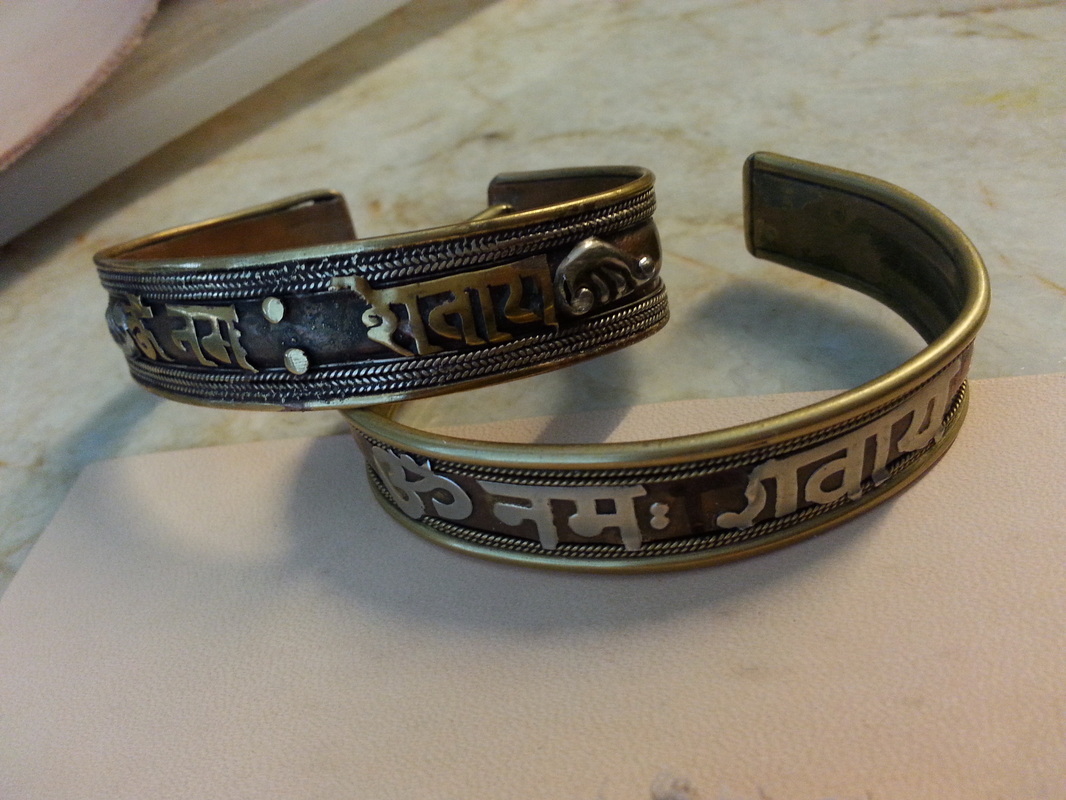 Om bracelets that we are imitating with our leather bracelet. Sometimes trying to get your bracelets to fit just right is tough. Not every wrist is made the same, even your right is different from the left, and what feels comfortable for one just isn’t for the other. In an effort to find an easy solution I decided to run an experiment to take a pre-tooled and painted vegetable tanned leather bracelet and see if I could wet mold it to fit the wrist without any clasp. This is a documentation of my experimentation and my findings. Read the whole article before deciding to follow along, because I have several findings that will help you with own experimentation. 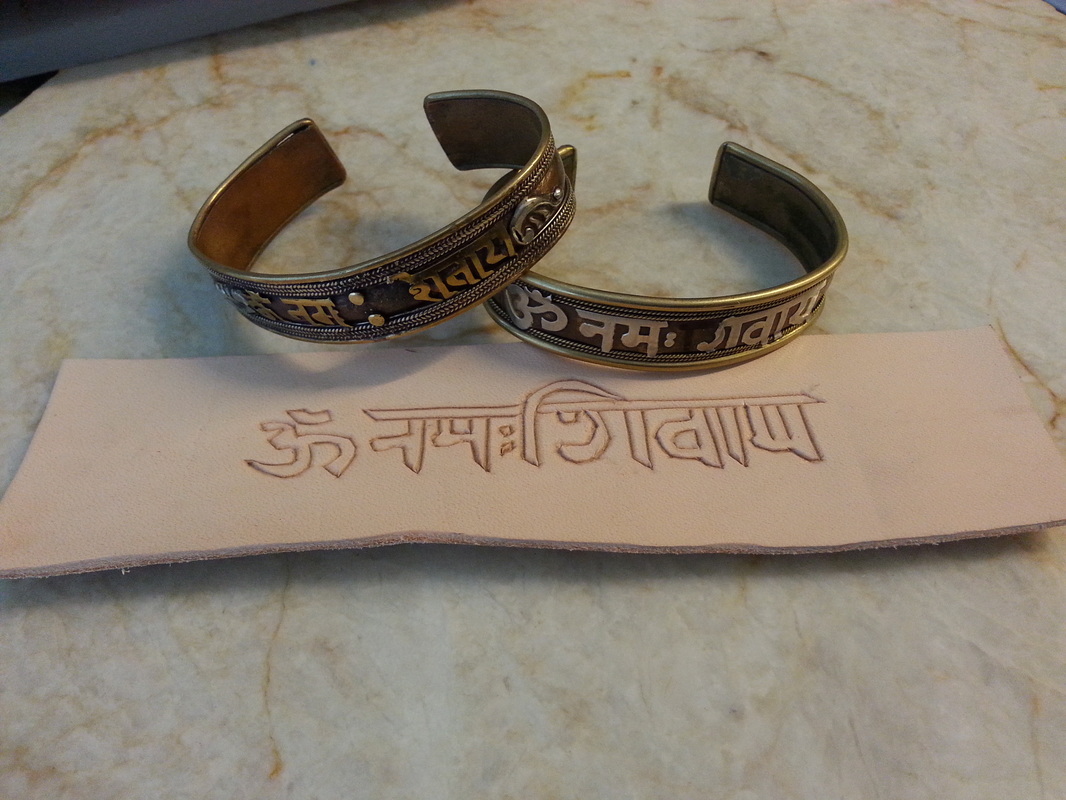 Bracelet cut with Om design. I started with a scrap piece of 2-3 oz vegetable tanned leather. I wet the leather with my spray bottle and waited for it to appear dry again. I used my stylus and tracing paper to transfer the Om design to the leather. My swivel knife is what I cut the pattern with, followed by pounding with my rawhide mallet to tool the design. Again, case the leather using the spray bottle, then waiting for it to appear dry again before actually tooling. I used two of the six piece Tandy crafttool set, the background stamp and the square beveler. 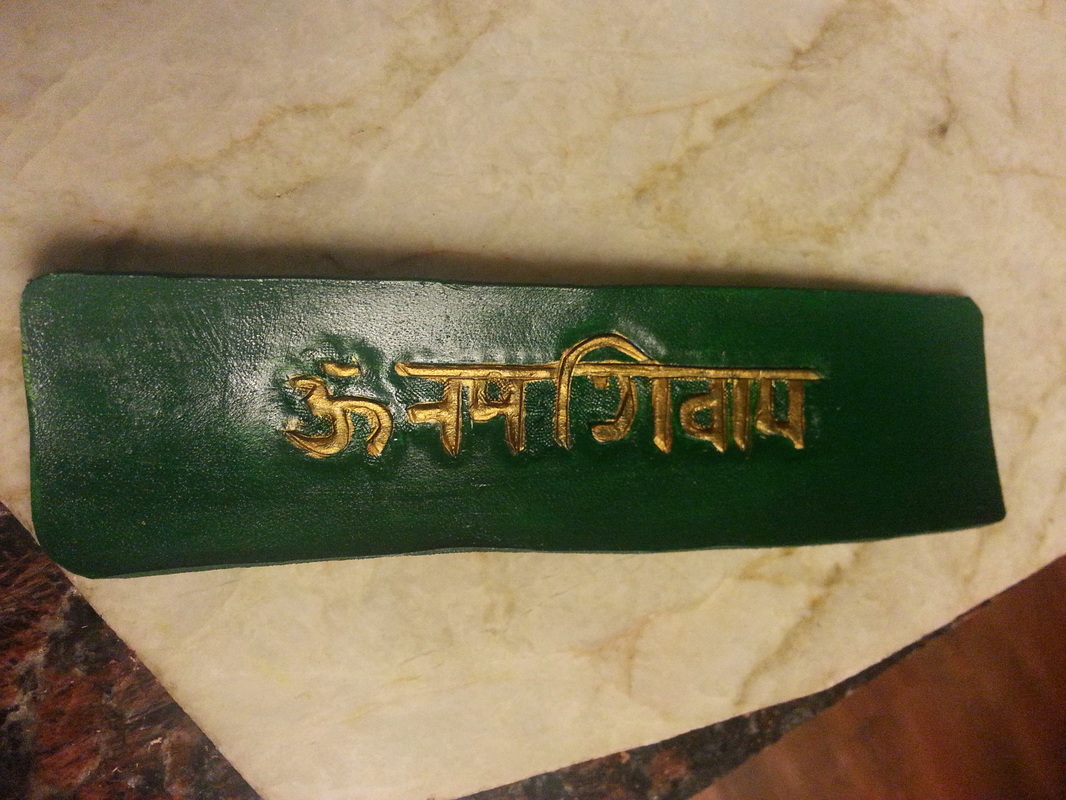 Painted bracelet before wet forming. Angelus green acrylic leather paint is what the bracelet was painted with, and the lettering highlighted with Waterstain gold. The top of the bracelet was then coated in Resolene to help keep it from running. The underside of the bracelet was left the natural raw leather to help absorb the water. 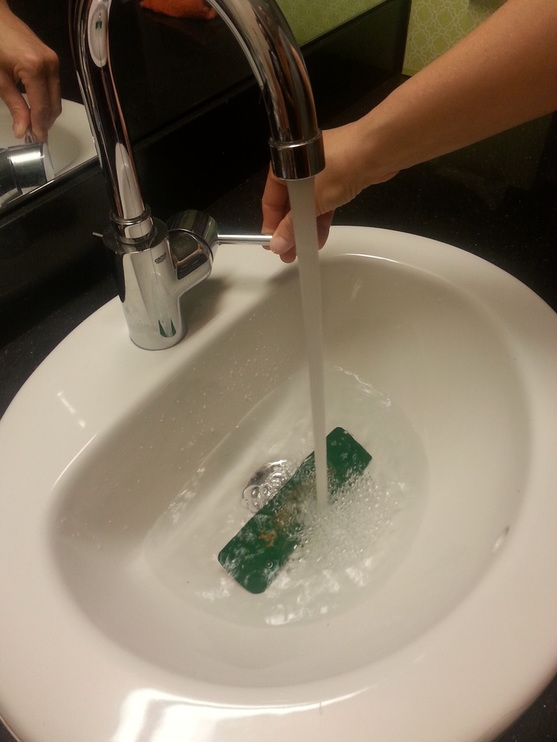 Running water over the leather before soaking I filled the sink with water and set the bracelet on top with the raw leather exposed to the water. I left it in the water for 5-10 minutes. Once it was good and soaked I took it out of the water and molded it around the desired wrist. You can use a sweat band or scarf to secure the leather in place, if you want to follow along. Let the leather dry partially before you remove it. 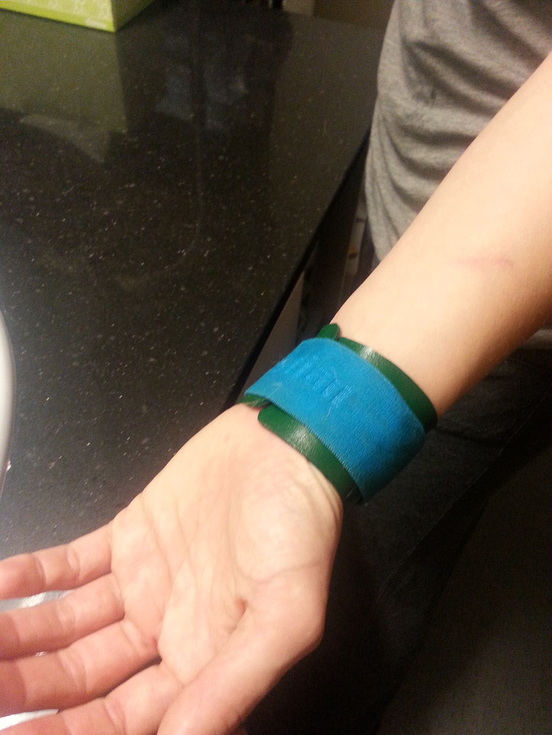 Bracelet with sweat band over it to mold it to wrist shape. This is the time when you would need to leave the unsealed side of the leather open to air to allow it to dry thoroughly. This can take anywhere from 12-72 hours depending on how thick the leather happens to be. The trick is to figure out how to keep it in the shape you’ve molded until it is done drying. This is the difficult part given the different variations found between individuals. I used the sweat band, once the leather had the general shape. You could use the lid of a jar, the top of a wine bottle, or whatever suits your needs. 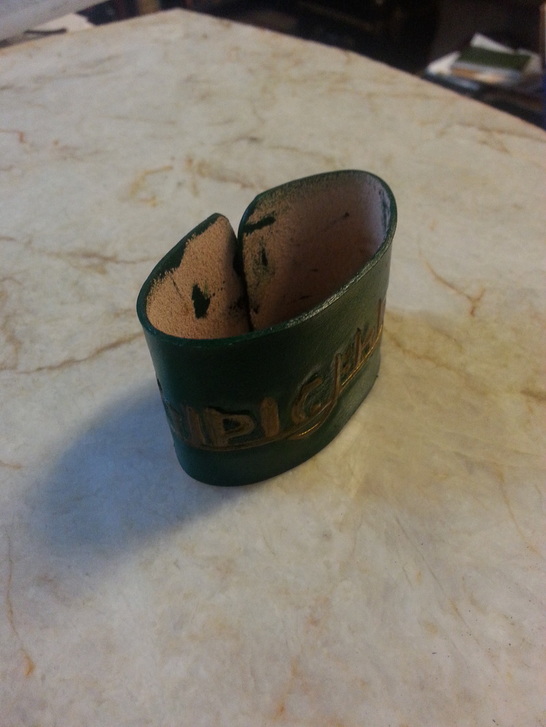 Dry bracelet still in formed shape. The 2-3 oz leather I used turned out too flimsy to truly hold shape even after it was completely dry. I have wet formed partially painted 7-9 oz thicker leather and it worked rather well. Perhaps, next time I will attempt to use a 5-6 oz and see if that thickness will hold out. If you try this at home please let me know how it works out for you. 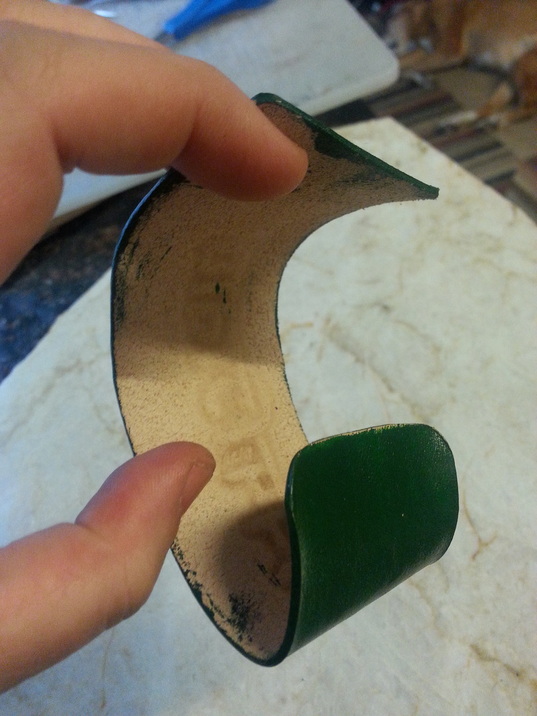 The flimsiness of the dry bracelet.
1 Comment
by Willow Enright 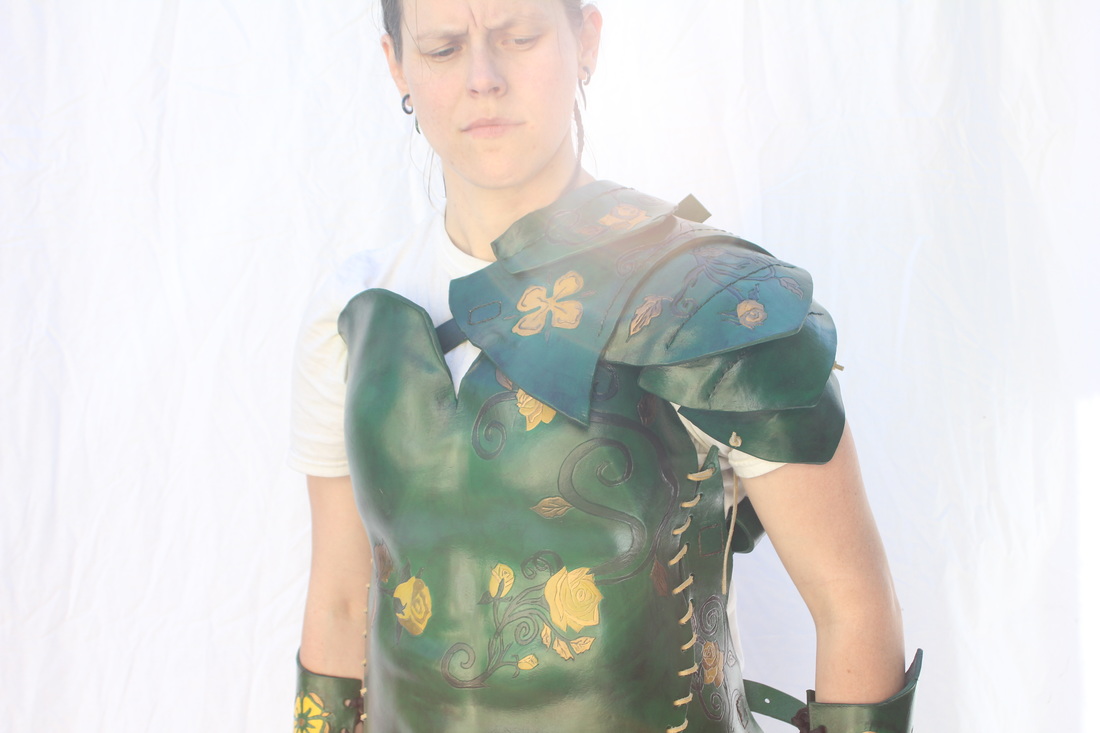 Erin in the Tyrell Armor, aka Game of Thrones. "For Highgarden!" Starting a new cosplay or Halloween outfit is fun. Drafting ideas, looking at inspirational photos on Etsy and Pintrest, rifling through drawers that you haven’t looked at for months, can breathe life into your everyday and make you feel like you have a purpose. Then the questions and doubt start to set in. What if I can’t pull off the character on time? What if I don’t have enough money? Should I have a realistic looking pulse rifle, or a toy nerf gun? I’d have to have to buy so many items. Creating a great cosplay costume doesn’t have to mean all or nothing. True, if you plan to cosplay as Master Chief, you have to go big or go broke, but not every cosplay has to be that grand. It is possible to create awesome characters piece by piece. The trick is to choose your character with that in mind. A good option is something in the dystopian or post-apocalyptic verse. Often times these characters have multiple versions of their outfits, or have interchangeable bits and pieces to add or subtract easily. Mad Max, Hunger Games, Book of Eli, Terminator (after Judgement Day), The 100, The Walking Dead, Borderlands, and Fallout are a few examples of these types of universes.  Max and Furiosa from Mad Max: Fury Road (http://www.themarysue.com/wp-content/uploads/2015/12/mad_max_fury_road_wallpaper_1920x1080_by_sachso74-d8r49ti.jpg) Once you pick your character, research them and find out what you can about them. What are their outfits usually made with? What type of footwear do they usually sport? Do they have weapons or props that can be used? Do you have some of the items your character might wear or use already? If you do, all the better. If not, that’s okay. You are going to plan this cosplay for the long haul so you’ll have time to find or make what you need, plus some of it will be improvised while you are creating and perfecting the character. You’ll want to decide how much of your cosplay will be found objects, and how much of it you will want to make. Your time table and budget will both influence your choices, so figure out which event will be your first debut, and how much in the way of funds you’ll need to plan to put into your cosplay. Also, look into last year’s rules for the event before you plan any weapons your character might use as regulations can change for entrance into that event. Then choose what items will cost the most verses those you already have or can acquire for relatively cheap at second hand stores. 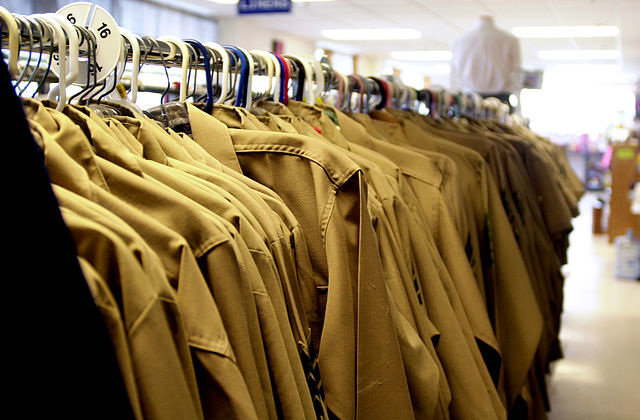 A rack of thrift store shirts (https://upload.wikimedia.org/wikipedia/commons/thumb/a/a4/USMC-05518.jpg/640px-USMC-05518.jpg) I like to divide my cosplay items between easiest pieces and iconic pieces. Identify the top three iconic items for the character and then the three easiest pieces. Determine whether you already have the iconic item, or if you know where to buy it within budget, or if you can make it yourself? For the first version of your character, focus on one iconic piece accompanied by as many of the easy pieces as possible. Your pocketbook will thank you. Once you have your one iconic item and the many easy pieces, and you’re still within your timeframe and budget. Then you can choose to add another iconic piece to increase your character’s recognition, but pacing is the name of the game. If you’re having a hard time choosing what iconic piece to pick, always go for the weapon. What’s Luke without a lightsaber? Cloud without his gigantic sword? Or Daryl without his crossbow? For an example of how to improvise as you create, let’s talk pants. Say your character wears grey pants but all you have are black pants. You can swap the grey for black until you can find or afford the perfect grey pair. Or you can attempt to alter the black pants to appear more grey with sun weathering, rubbing baby powder into them, or aging the material with excessive wear and tear like rubbing them along rocks or beating them with chains. Make sure to protect any zippers you have on the item with some masking or duct tape. A sticky zipper is better than no zipper.  Amber Benson in Attack of the Gryphon. As much as we love Amber, this movie has the worst fake chain mail, ever! Funniest thing is this movie has real armor, just not for the leads. (http://www.chud.com/nextraimages/gry05.jpg) If your character wears metal armor, you don’t want to pick some flimsy material to replace the metal with. Choose an equally sturdy material to emulate metal. Leather, foam, or worbla would work, and there are various tutorials online for how to make these materials look like metal. Unless you’re a professional costumer, don’t use fabrics that look like metal, they never look like metal.
To wrap it up, you want to first look at what you own, then determine what you need to buy. Again Iconic item first, followed by a few easy items, only to be followed by more iconic items, until you are satisfied or until something falls apart. Modifying, making, and finding are the easiest and cheapest way to finish a character, but might take longer than buying. So follow your heart and your budget and have a great time planning your Steampunk Flash outfit. by Willow Enright 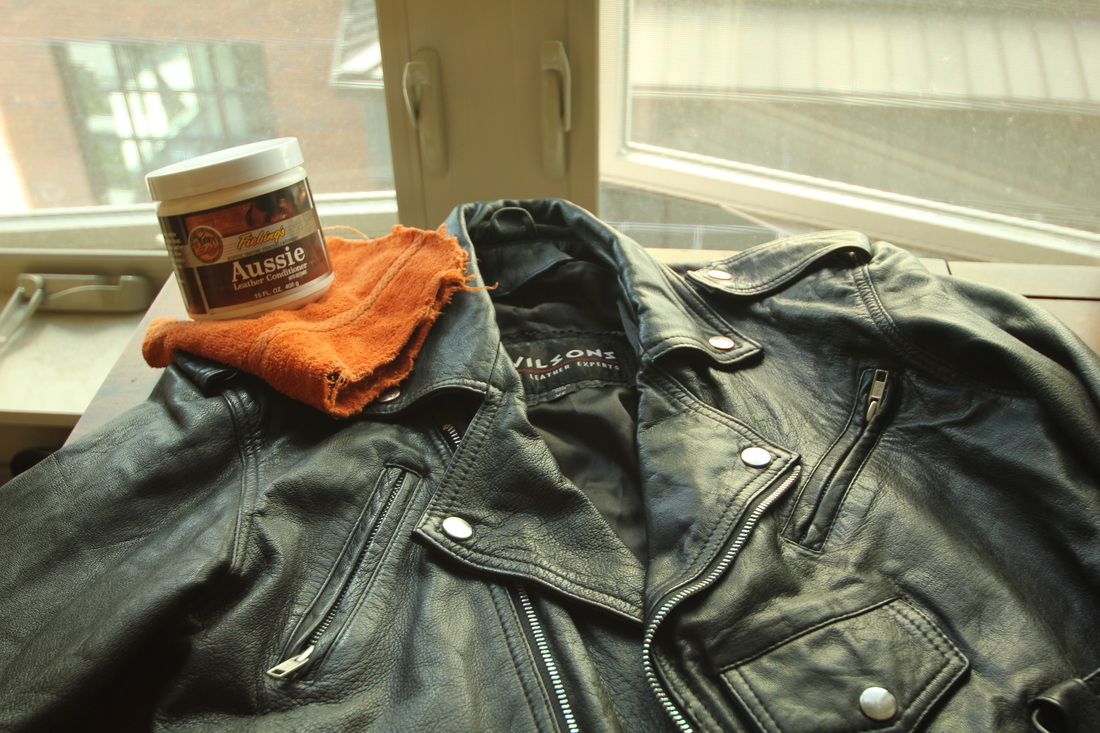 You’ve finally acquired that dream leather item you fawned over for what seems like an eternity. You want to love those boots and bags for years to come. Now the question is, “How do I take care of it?” If you take good care of your leather, it will take good care of you! Keep it dry, clean, conditioned and stored appropriately and you’ll find that your leather might just out live you. 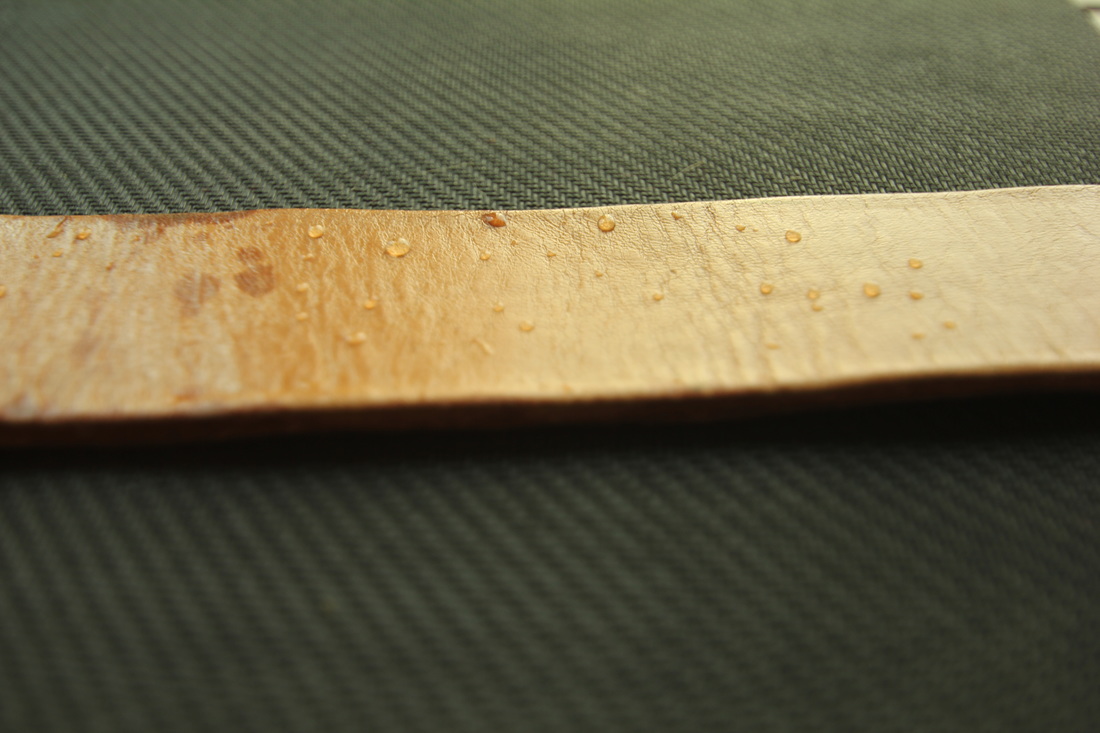 “What do I do when the leather gets wet?” Everyone agrees that you want to keep your leather dry. If it gets damp take a dry cloth to it and then leave it to dry at room temperature. If it gets water logged stuff it with newspaper. Keep in mind that wet leather can stretch, so don’t hang your leather jacket over the kitchen chair because it will reshape the shoulders to fit the chair and not you. Make sure to keep the leather in its natural shape as it dries. Don’t expose the leather to the sun or to direct heat in order to dry it out faster, the leather is likely to crack. Drying naturally at room temperature is best. 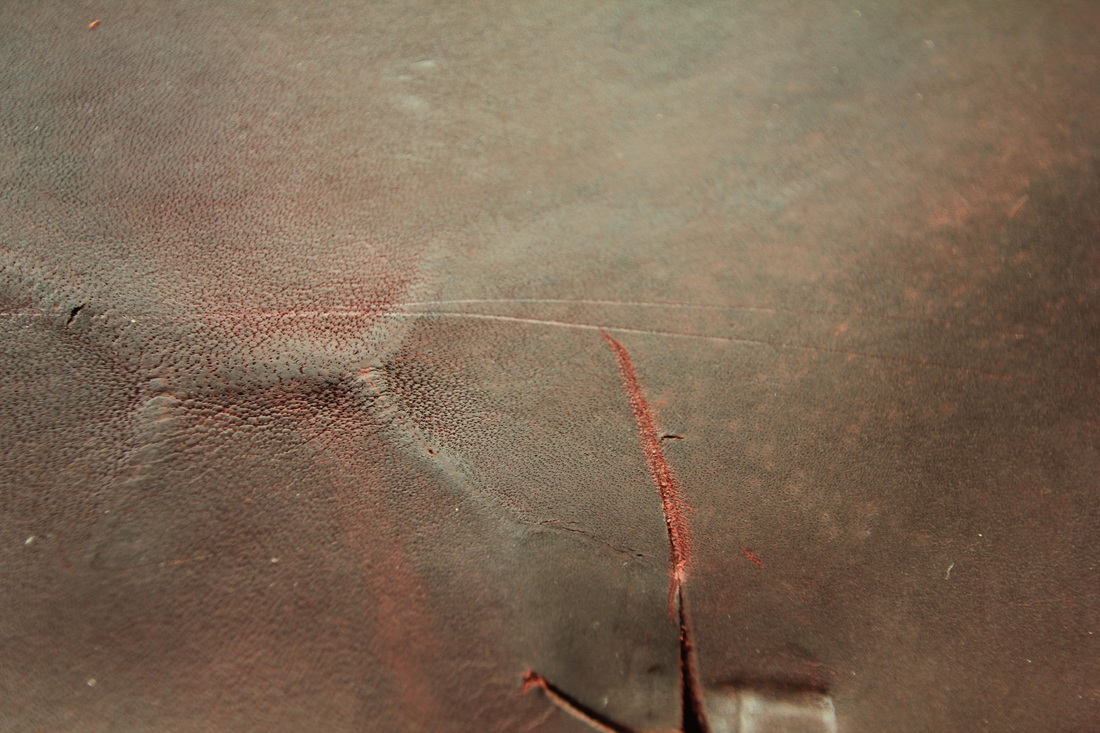 “How can I prevent stains and scratches?” There’s really no good way to prevent stains or scratches on your leather, that’s simply part of life and the natural aging process known as Patina. You can condition, buff and waterproof to help reduce the effects of wear and tear, plus it adds longevity to your leather, but scratches and stains will happen. 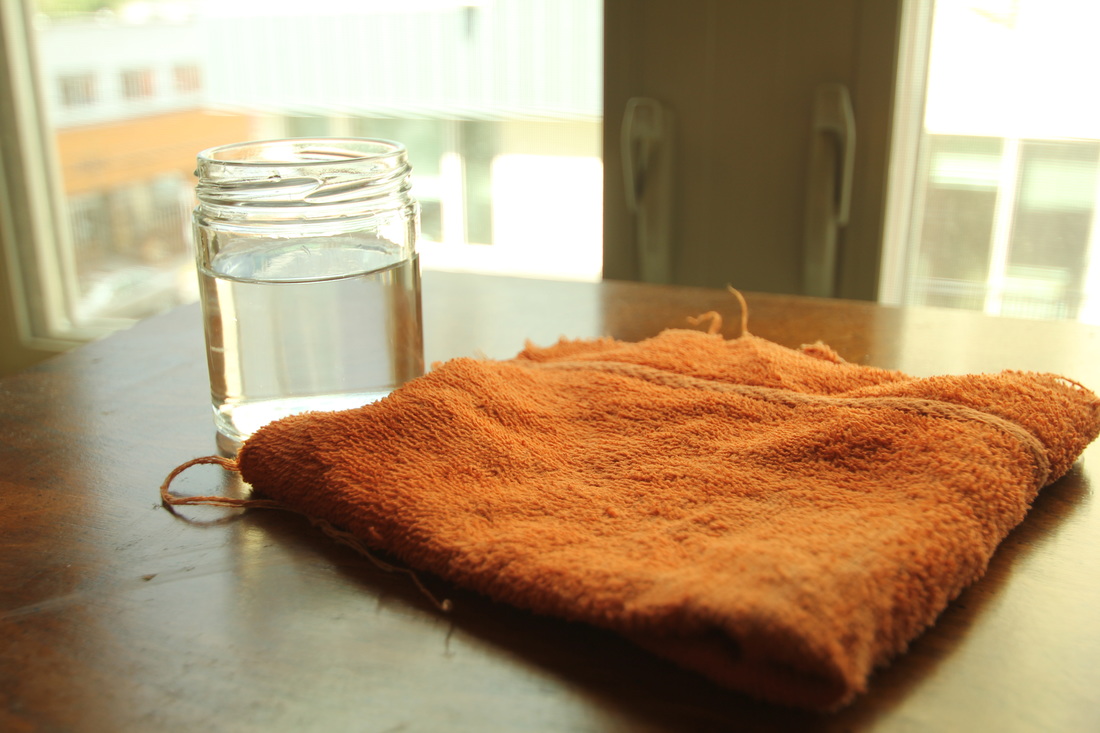 “What’s the best way to clean my leather?” The best way to clean your leather is with a dry clean cloth or damp cloth if your item is extremely dirty. Wipe off the dirt gently, don’t scrub or you might rub the particles into the leather instead. There are also leather cleaners you can use but I find simply wiping with a cloth works the best. If your leather has hardware (buckles, D-rings, etc) take care to clean that regularly as well. 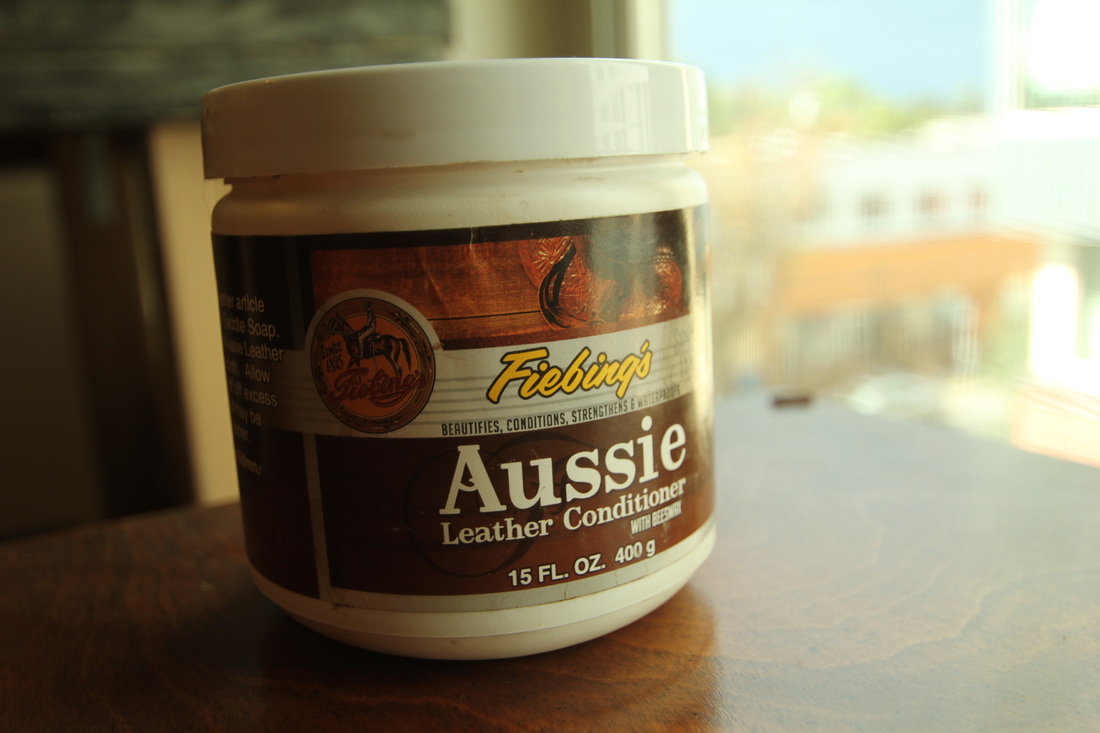 “How often should I condition the leather?” Think of conditioning your leather like a moisturizer for your skin. If you don’t moisturize you will dry out over time, your leather items are the same. Prevent flaking, peeling, cracking, and wrinkling by conditioning regularly. Try Aussies Leather Conditioner, which supplements the natural oils of leather. Dab a small bit of conditioner on a soft cloth and rub gently all over. Leave overnight, and then wipe off the excess with a dry clean cloth. You should condition every 6 months or so to keep your leather looking shiny. If you use your leather items more often, then condition them every month or even more often if necessary.  “Where do I properly store my leather?” Keep your leather in a dry room temperature area. Never store your leather in plastic, cardboard, or in direct sunlight. Confining the leather without air to let it breathe can cause mold or mildew to develop. Leaving leather in the sun can cause bleaching or warping. If you have leather shoes or boots you can use cedar tree shoes which help to absorb moisture and scents and help to retain the shape. 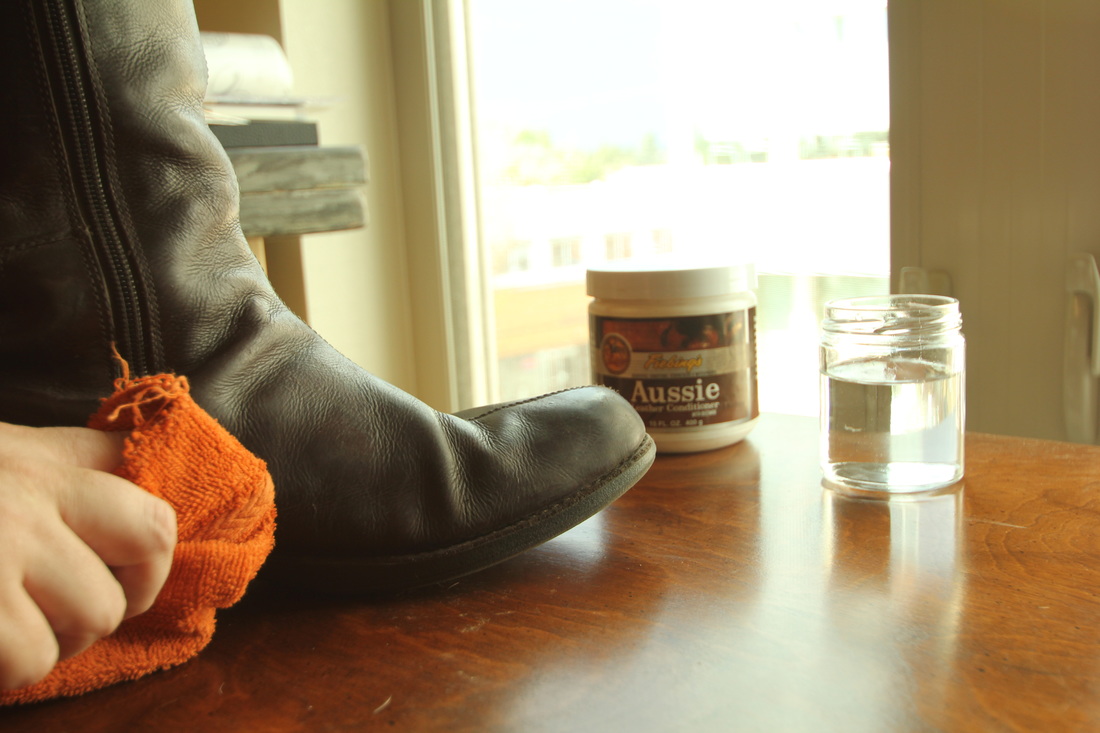 In summary you want to keep your leather dry, and if it gets wet let it dry naturally. To prevent wear and tear be sure to clean, condition, buff, and waterproof to prolong the life of the leather. Condition every six months or so depending on use. And when storing your leather, keep it out of the sun, at room temperature, and in an area where it can breathe. Now that you know how to make that leather last, you’ll want to update your last will and testament so the kids stop fighting over your favorite leather satchel.
by Willow Enright  https://static.pexels.com/photos/7743/pexels-photo.jpg I admit it. I’m addicted to leather. Who hasn’t lusted after a pair of good fitting leather boots? The problem is that they never fit well when you first get them. So how do you get leather boots to fit like a glove? You insure proper support, shape them the way that cowboys did, and condition them for longest life possible. First you’ll need to assess whether or not you need arch support. This can be done quite simply with a piece of cardboard larger than your feet and some water. Dip just the bottom of your feet into the water and then stand up for a few seconds onto the piece of cardboard. After your wet foot prints are made, study them to see which of the general three categories you fit, high, neutral, or low arches. You can view the picture below for a reference. Once you know if you require support you can acquire the correct insert at most sporting stores. There are even different variations based on what you plan to do while wearing them, ie… hiking, walking, running. You don’t want to attempt the Cowboy Method to fit your boots without your arch support insert, or you won’t be wearing them. 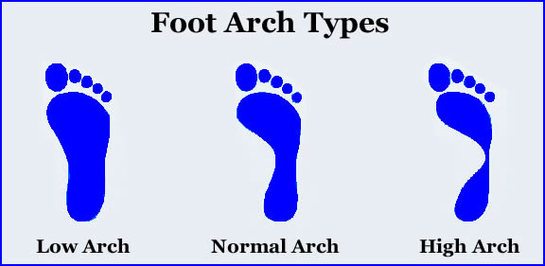 http://underpronation.org/wp-content/uploads/2011/08/foot-arch-types.jpg What is the The Cowboy Method? The Cowboy Method is where you put your boots on, and stand in water until your feet are wet, then continue to wear them until dry. This tradition goes back many generations. Leather can be stiff and unyielding at first, and you have to work it in to get that worn, comfortable fit. I know that this method will sound outlandish to some, but many can attest to its tried and true traditional method, one that will not hurt properly tanned leather. After all, a steer did wear it out in the rain long before it became your boots. 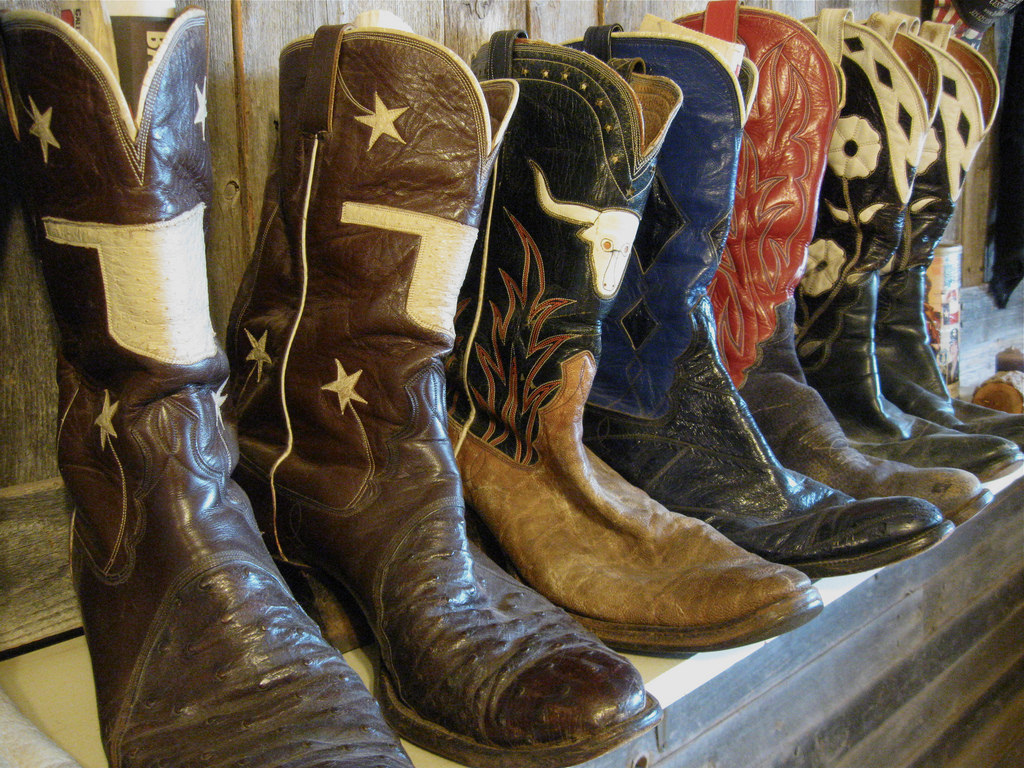 https://farm4.staticflickr.com/3027/2938498826_71d1b8c2a4_b.jpg Let’s break this down into detail: 1. Put on the thickest socks you own with your boots and get them wet, as in saturated. If you don’t have thick socks, you’ll want to wear two to three pairs. Stand in the bath tub with warm (not hot, warm) water up over your ankles until you feel your feet are good and wet. 2. Leave them on for as long as possible, all day is best. As they begin to dry they will conform to your foot shape and ease tension points out by stretching the leather. 3. At the end of the day remove them and if they are still wet stuff them with newspaper to retain the shape you spent all day making. Be sure to keep them out of direct sunlight and away from any heat sources. You want them to dry naturally. 4. Allow them to completely dry while you are wearing them, likely over several days. Repeat the process if necessary, but only after they have completely dried out (a week later at the earliest.) 5. Once they have dried out keep in mind that leather does shrink up as it dries, so don't panic if they are a bit snug when you put them back on. Just wear them for an hour or so before you decide if you need to repeat the method. 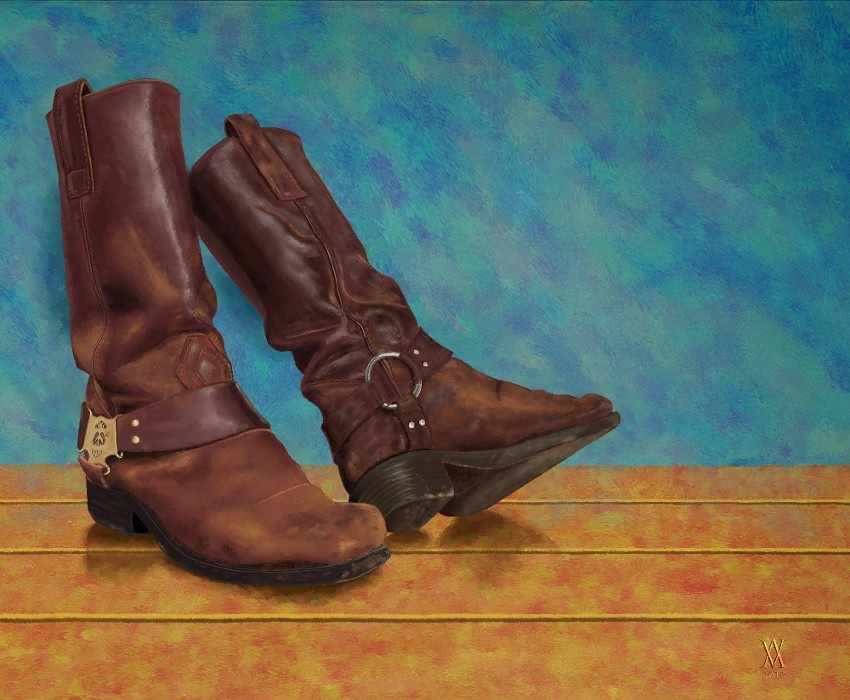 http://orig00.deviantart.net/250d/f/2010/349/c/5/leather_boots_by_agapetos-d34x01a.jpg Remember to condition the leather after the boots are dry, and continue to condition them on a regular basis. Just like any skin, when it dries out it can crack, so you want to moisturize. If you live in the desert you’ll want to do this more often, and if you wear your boots daily you’ll want to do this monthly or bi-weekly.
Take a clean dry cloth to your boots to remove any dirt or debris before you apply the leather conditioner. You can use a variety of products, but most importantly you want something that will work into the leather and not just sit on top. Use Leather Honey or Leather Milk followed by Aussie Leather Conditioner. Water treating your leather isn’t necessary if you are properly conditioning your boots. Keep in mind that conditioners can slightly darken your leather, but conditioning your boots properly will extend the lifespan of them and keep them worn to perfection. by Willow Enright 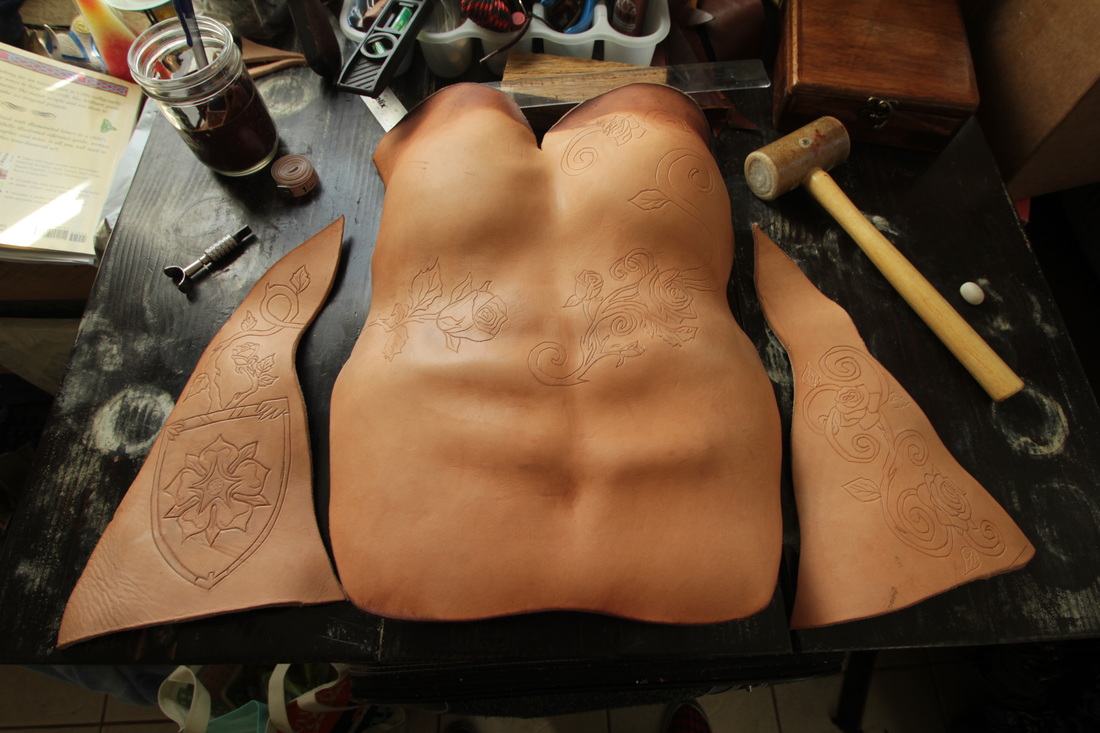 Tyrell Armor all dry after Water Hardening. The process of water hardening leather is a time old tale which the French commonly came to refer to as Cuir Bouilli, or boiled leather. It’s not a particularly difficult process, but it does require some knowledgeable finesse. I’ve narrowed it down to five steps. Mostly, you need some water, leather, a large enough pot to soak the item you are working with, something to protect your hands, and nowadays a thermometer is recommended for consistency. 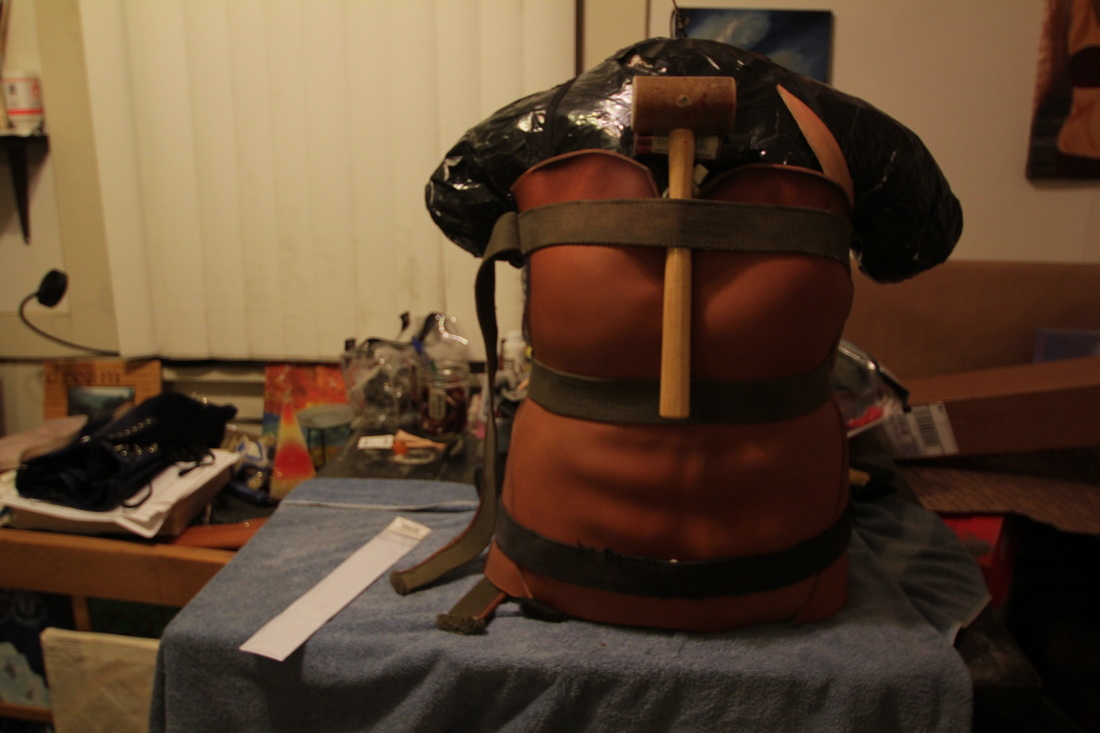 This is the Tyrell Armor after being Cuir Bouillied and is being held and shaped into place. How to Water Harden Leather
 This is the Tyrell Armor with a little burnt edge. BE CAREFUL! This was amazingly difficult to shape and cut. So whether you call it boiled leather, Cuir Bouilli, or water hardening we are all talking about the same thing. There’s also the use of wax to harden, but I haven’t yet experimented with this way, if you have I would love to hear about it. There is also, the basic wet forming which I covered in a previous blog. Click the words Wet Forming for the link. For further questions you can leave a comment or send me a message on Facebook.
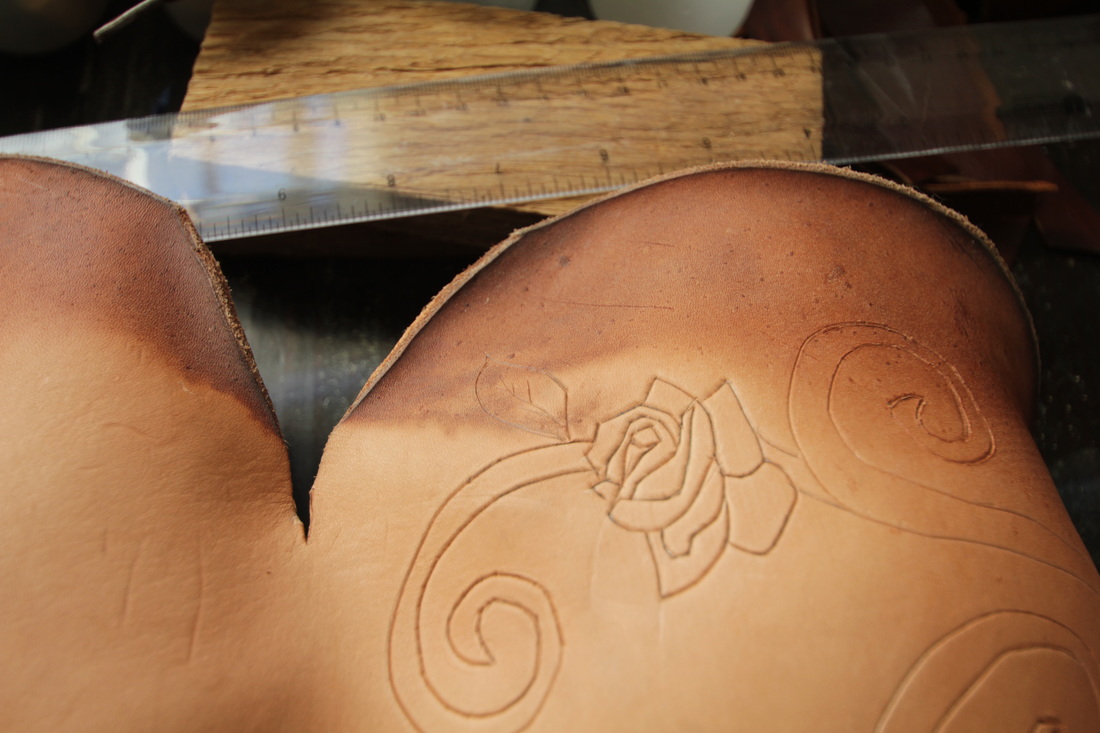
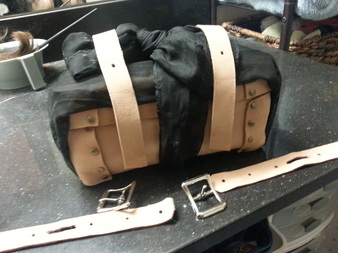
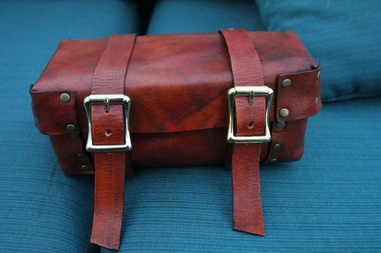
by Willow Enright 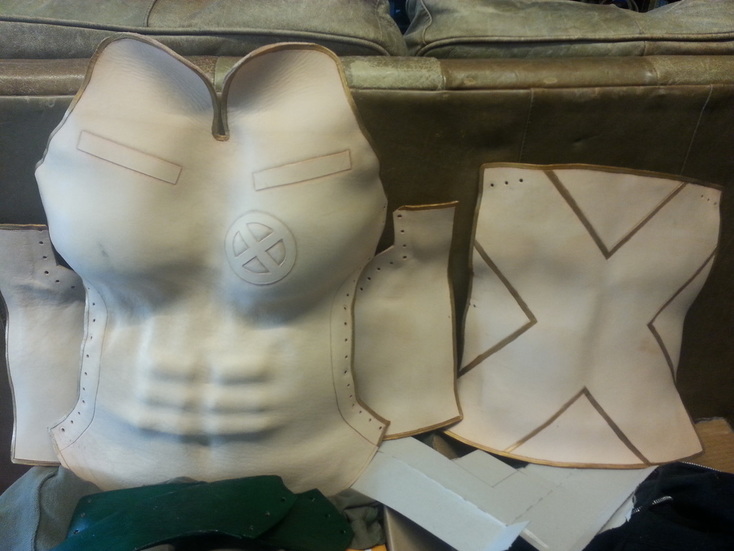 Rogue Body Armor front and back chest plates wet formed over a duct tape body double. When I first started working with leather I discovered that there are many different ways to work with the versatile material. One of the best aspects of working with leather is the ability to wet form mold it into different shapes. You can wet form bags, boxes, pouches, armor, masks, mugs, and sheaths. Sharing the time old secret to wet forming is simpler than you would think. The best leather that works well to wet form mold is the vegetable tanned leather. With a wide variation of thickness veg tan leather serves well to create a vast array of durability based on the wear of the item. You can wet mold wallets and pouches with a thinner veg tan, or masks and boxes with a medium grade, and sheaths and armor out of the thicker hides. Figure out what leather you’ll need for what you want to make then choose your mold. 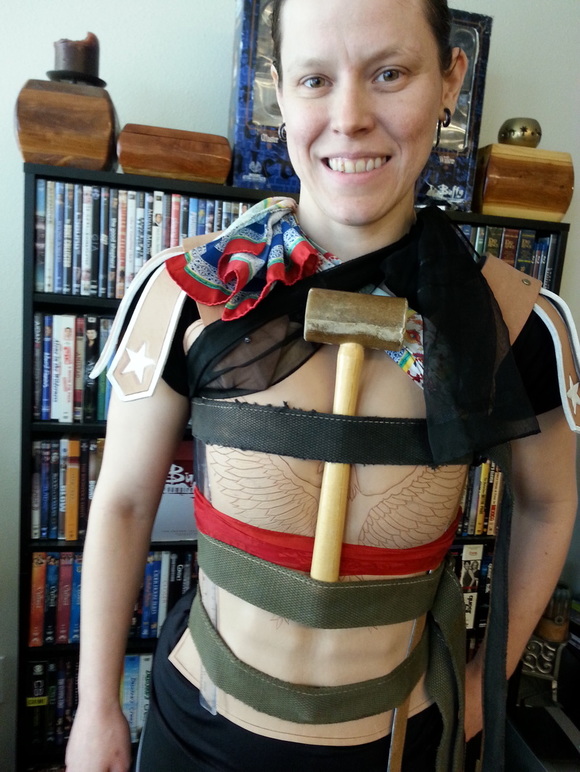 Wonder Woman wet formed over live subject. Wet form molding can be done with multiple items, but creating wood molds are the best. The wood absorbs the moisture and lets your mold dry faster, but you can use whatever is handy. I like to use jars, plastic items, wooden boxes, and emptied food containers such as coffee cans. It’s important to know what you are going to use to form your leather before you start preparing it. 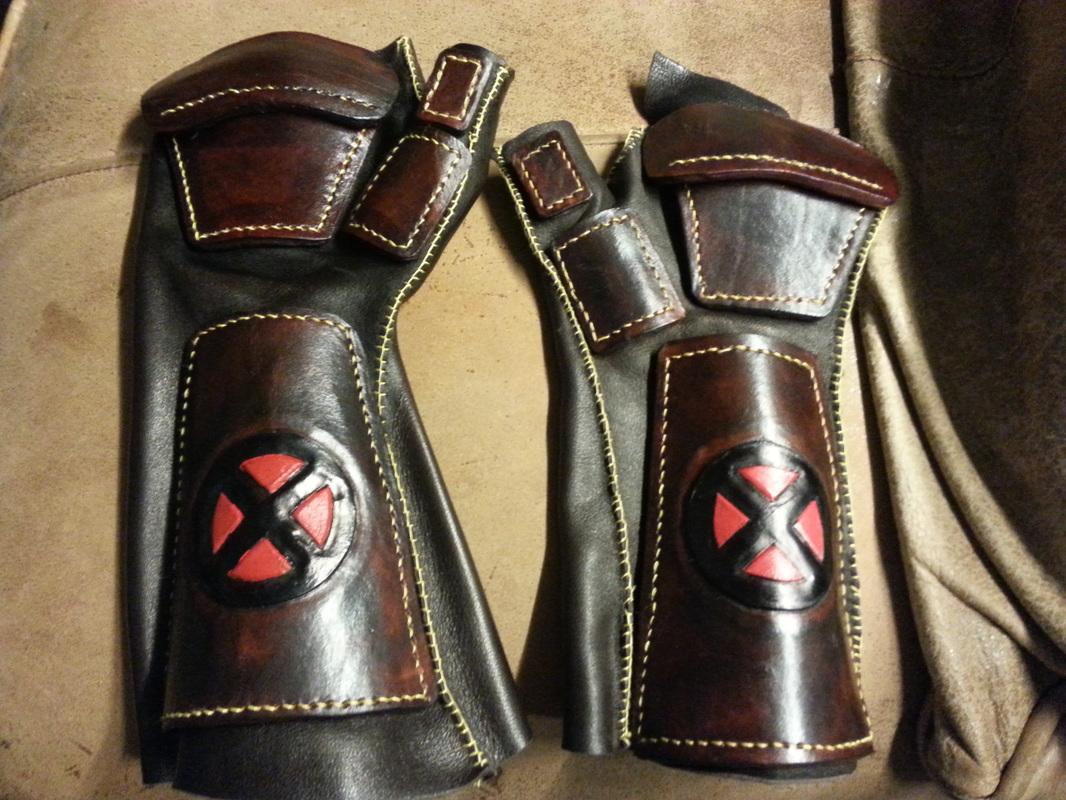 Rogue armored gauntlets shaped with wet forming. It’s rather simple to prepare your veg tan leather for wet forming. You need to cut the leather large enough to stretch or fold over your mold. Cut more than what you think you’ll need because you can always cut off extra, but you can’t add to the leather. Then fill the kitchen sink with water for smaller pieces and the bathtub for larger ones. Leave your leather to soak for about 10-15 minutes. This will change the fibers of the leather making them elastic and pliable so that you can mold away! 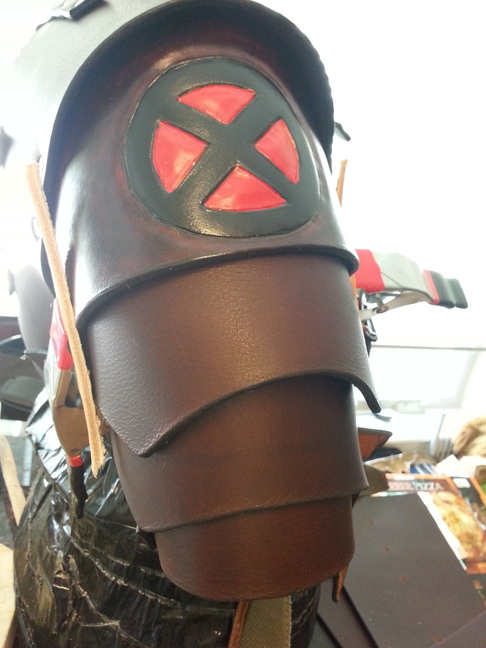 The piece of the pauldron with the X-Men symbol was also wet formed. You’ll need to leave the leather on the mold as long as possible, or until it is dry to help it retain the shape you want it to have. Sometimes you will need to pin the leather down, or create a press down wooden mold. I use sewing pins for thin leather and tacks or nails for thick leather. I often use scarves or canvas belts to help the leather hold shape, and I have a duct tape body double for doing chest armor. Once it is all dry, presto! 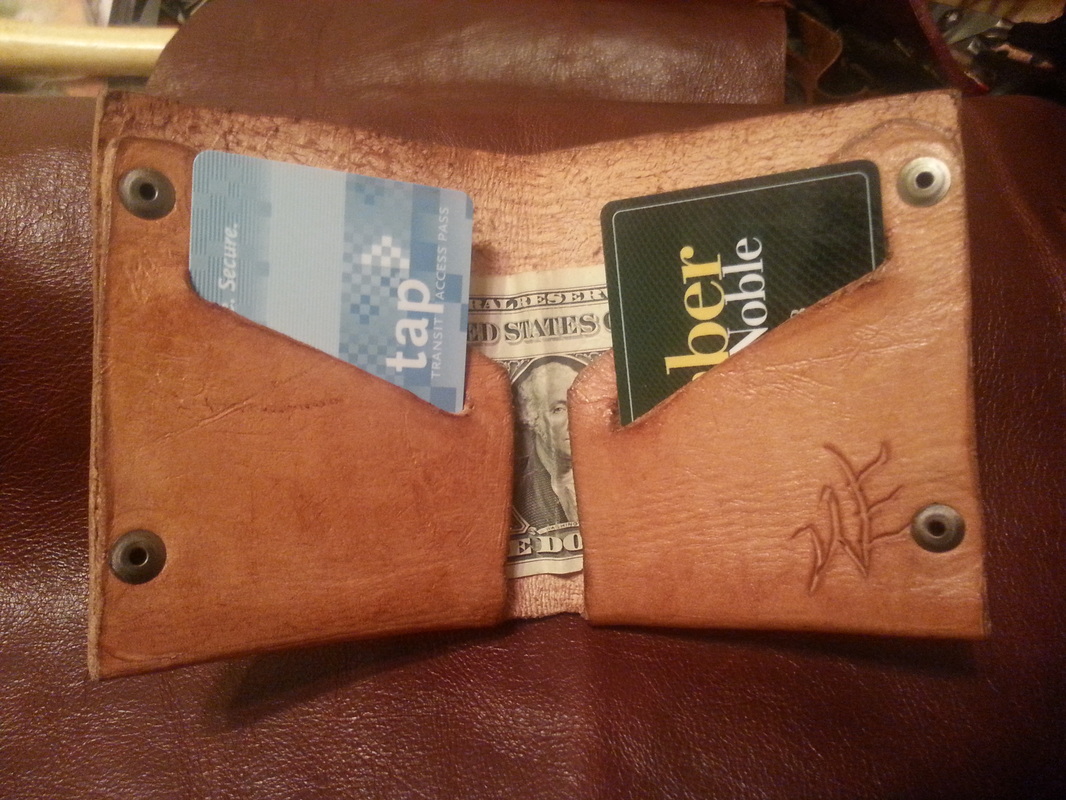 Wallet done with wet forming. So that’s it, determine the thickness needed, cut to size, submerge it in water, and you can mold it to your desired shape. This is just a part of the leather working process. If you need to rivet or sew the leather to other pieces this can be done either before or after. You’ll need to determine whether you should do them before or after, this is a personal preference based on the project and skill level. Don’t wait forever, once the leather is dry it’s harder to cut, puncture, and stretch. I prefer to sew before hand, and rivet while it’s still a little damp.
 Rogue and Wonder Woman armor molded with wet forming technique. by Willow Enright 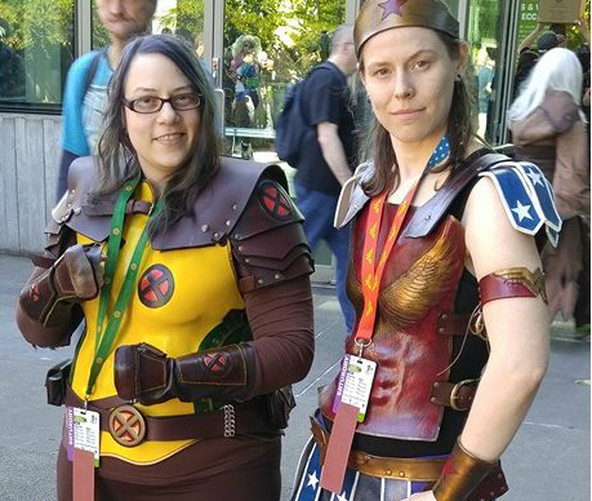 Myself and Erin as Rouge (from X-Men) and Wonder Woman Panels are something that are very confusing for me, yet I find myself preparing for one. I’ve got just over a week to figure this out. I know that I have to draft up a paragraph or so to introduce myself and my company. The panel that I am participating in on July 16th is at the Tacoma Public Library it’s FREE to attend, and it’s called Atomic Comic Con. It’s focus is on getting the youth to read more, so bring your children, kid brother, or niece. I know that this panel will mainly be a Q&A so I have searched the internet for some common questions posed to cosplayers. I’m hoping that in writing out the answer to these questions I will be more prepared for Atomic Comic Con. I took the questions from the two links below: http://cosplaylife.blogspot.com/2011/07/102-cosplay-questions-originally-from.html http://www.aminoapps.com/page/cosplay/2589982/questions-to-ask-cosplayers-in-interviews 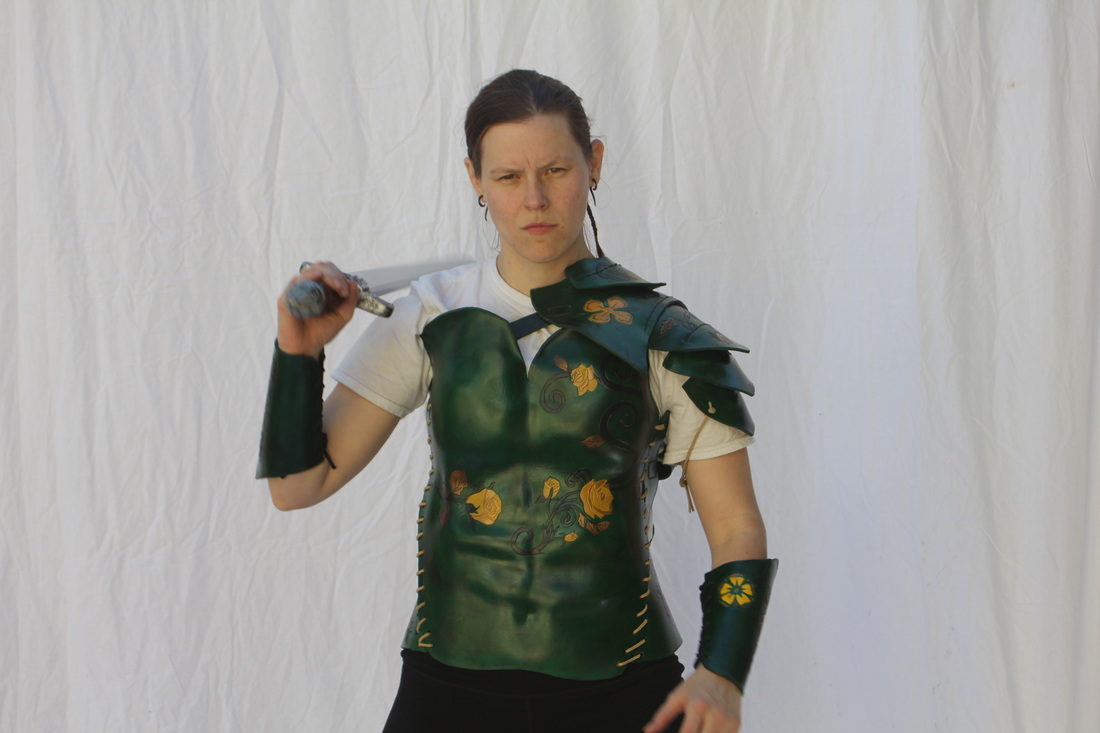 Erin as Margarey Tyrell, if Maragarey had ever gone into battle. For Highgarden!  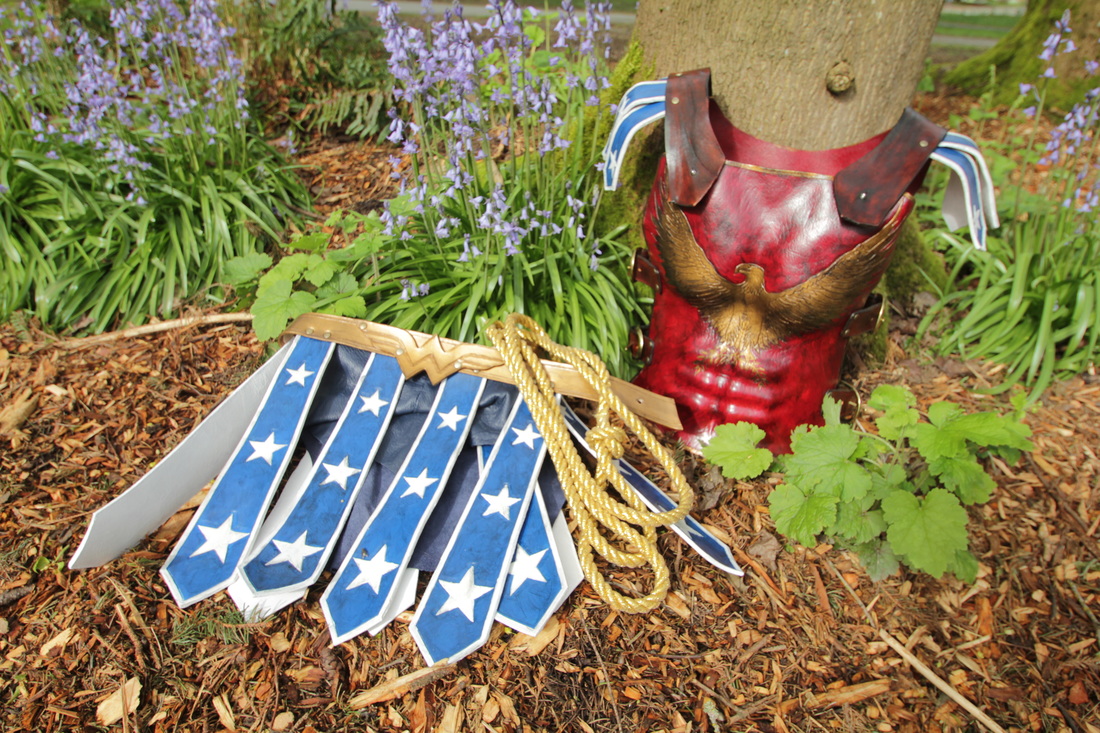 by Willow Enright 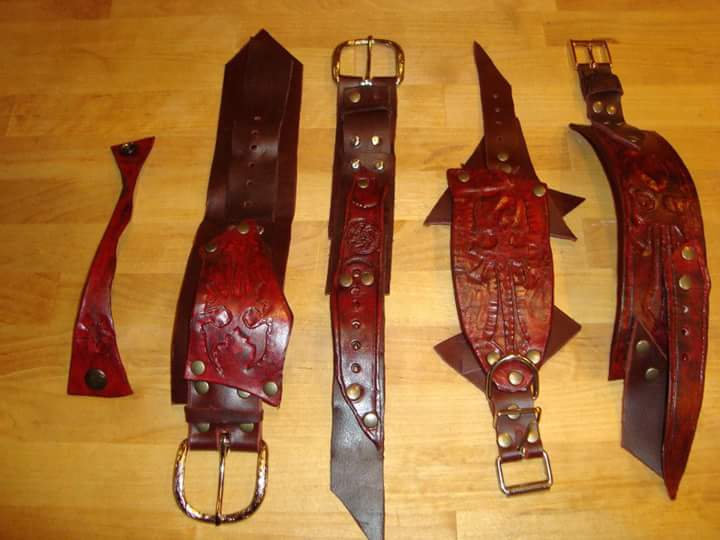 Bracelets made from my first Mord-Sith armor. In my experience I have found that there are two types of repurposing of old items, modification and transformation. This can be for leather items, denim, wood, and anything else you can craft with, because I am a leather worker my focus will be there. Modification is taking an existing item and adding to it, without changing the basic structure. Transformation is taking your basic structure breaking it into separate elements and creating something completely new, for example taking your T-shirt and making it into a bag. Modifying a perfectly serviceable leather item so that it can fit a specific genre or character is not only fun, but a rather easy way to get started creating your own unique pieces. This type of project requires a leather item such as boots, jacket, bag, journal, belt or other. My favorite modification, and this is one that I have done numerous times, is changing the color of my leather boots. 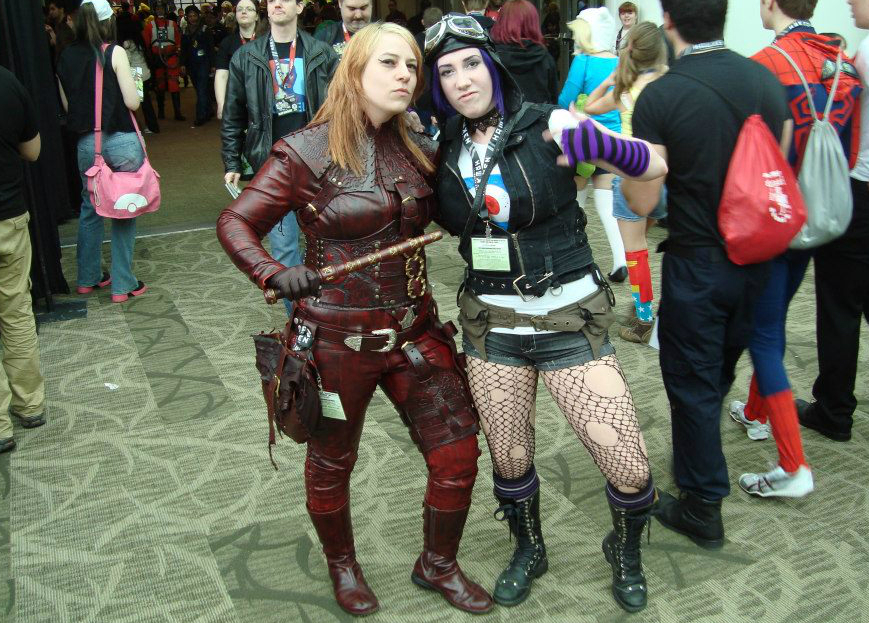 My custom colored blood-red Mord-Sith boots to match my armor. I have a pair of nubuck leather boots that I bought in a brown color, and then dyed them to match a blood-red armor suit, this is the Mord-Sith if you are curious. I used Angelus Scarlet red paint for the first layer and Fiebings Antique black stain to darken the red and followed it up with a Resolene to seal them. I wear them everyday and they have gone camping, hiking, and to the beach and could use a shine to clean off the dirt, but otherwise look just as great as the day I bought them.
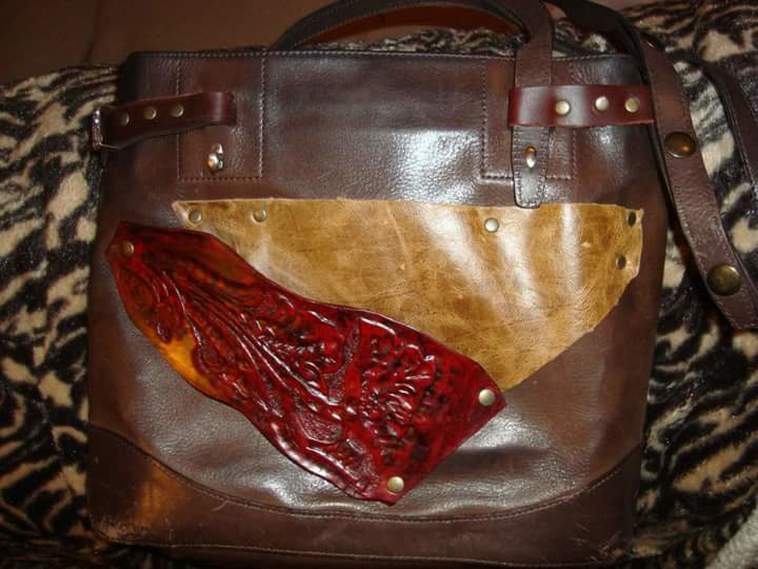
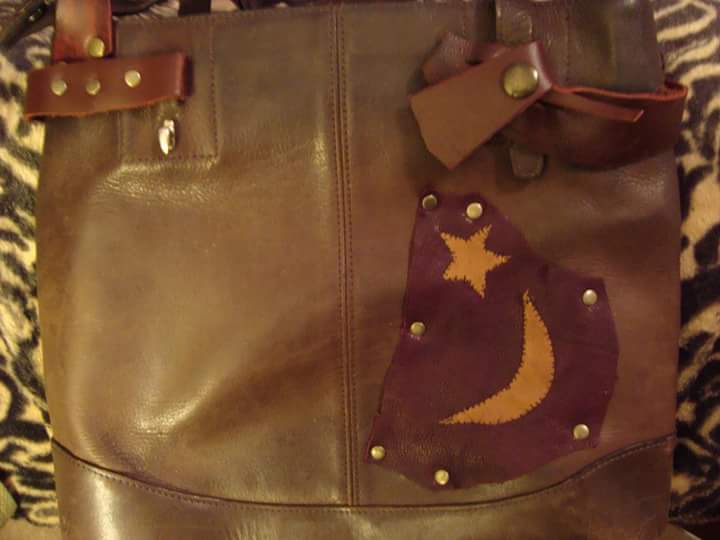
Another time I took a second hand leather purse that my sister called “an old lady bag,” with a broken handle, and I modernized it with a bit of leather embellishments for my mother. I tooled a design to add on each side and mixed some different leathers together to give it a mottled bit of color and riveted it all onto the purse. I also made a new anchor for the handle. Her one complaint was that it didn’t have enough pockets for her liking. Apparently, it wasn’t “old lady enough” with its lack of extra pockets. *chuckle*
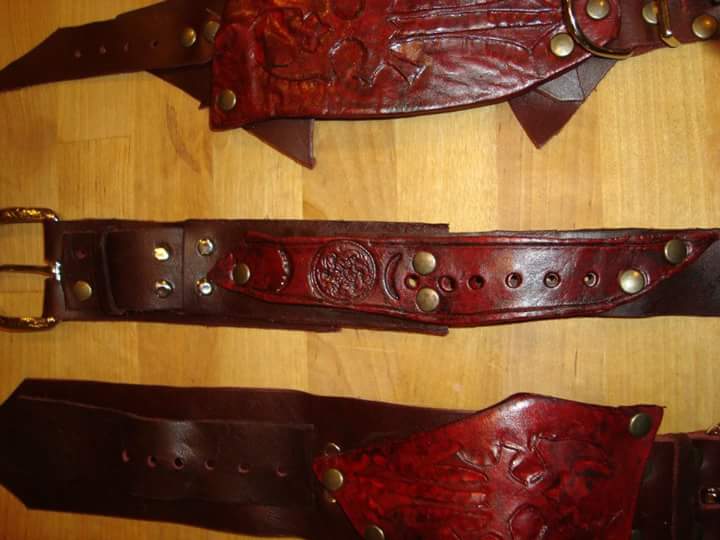
One Christmas I transformed my first Mord-Sith waist cincher armor so that I could make bracelets for everyone for the holiday. I tooled individual designs into new pieces to add to the 4-5 oz mahogany leather that the armor was made from, and added buckles or snaps. When I told my friends and family that I had used my first Mord-Sith armor for most of the bracelets they were very touched.
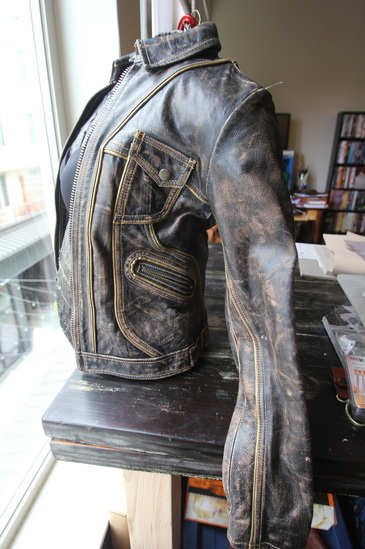
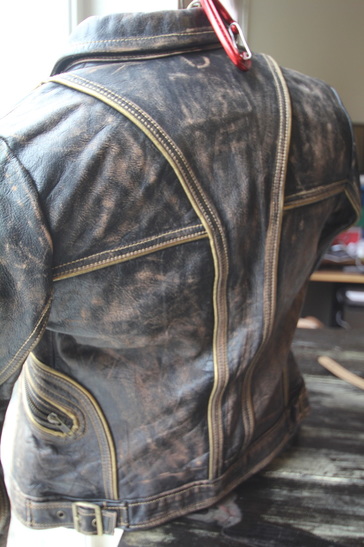
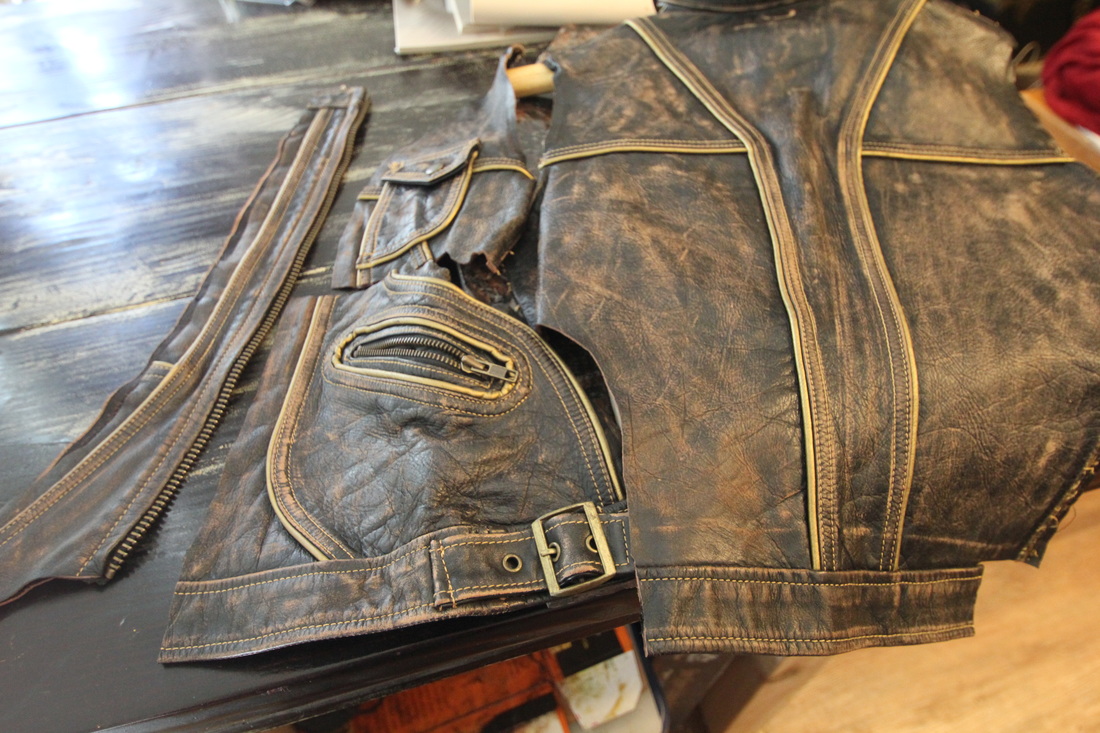
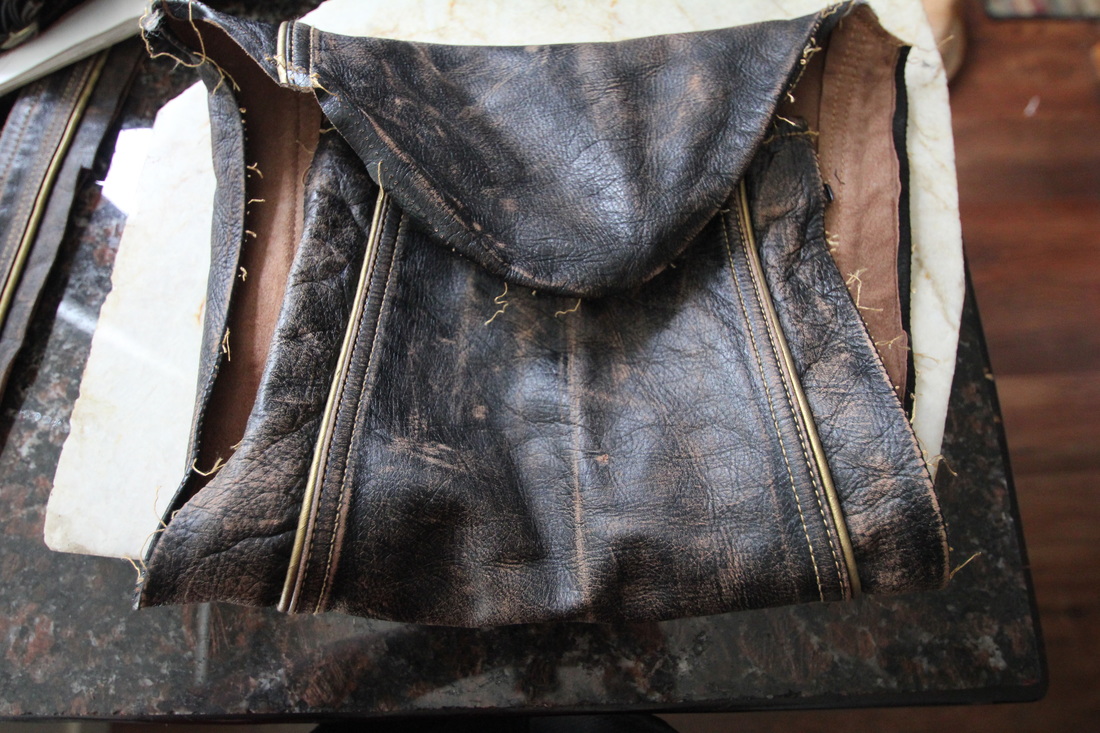
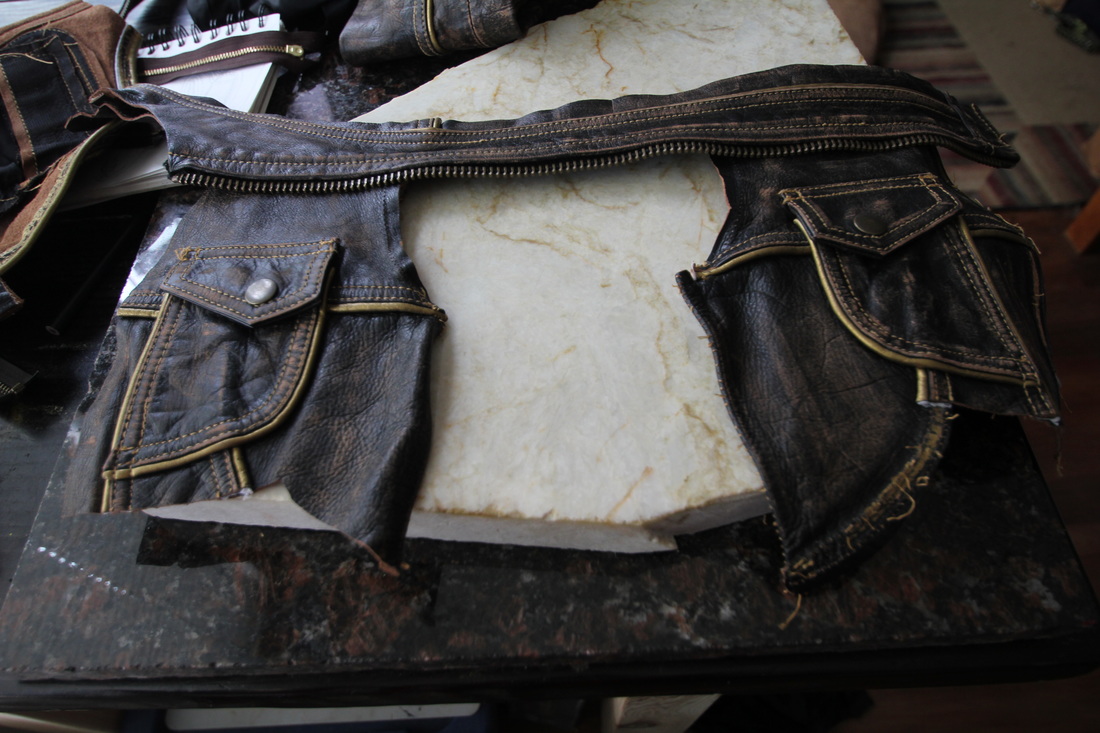
Currently, I’m tearing apart a second hand leather jacket so that I can use it for other hip bags and utility belts. I’m considering using the collar of the jacket to line the neckline on an elaborate Steampunk full arm armor. One sleeve will be turned into a handbag, the other into an archery quiver. I’m going to make an apothecary bracelet with the bottom back hem section. The two lower front pockets will end up as hip bags with a zippered pocket behind them and possibly a flap pocket behind that. The two smaller pockets and one edge of the zipper will be part of a utility belt. I can’t decide if I will use the back section for a journal cover or as the back of another vest. *shrug*
That’s the beauty of repurposing leather. Your limit is your imagination! Please send me any projects that you have transformed or modified to make it your own. I would love to see what your minds create.
by Willow Enright 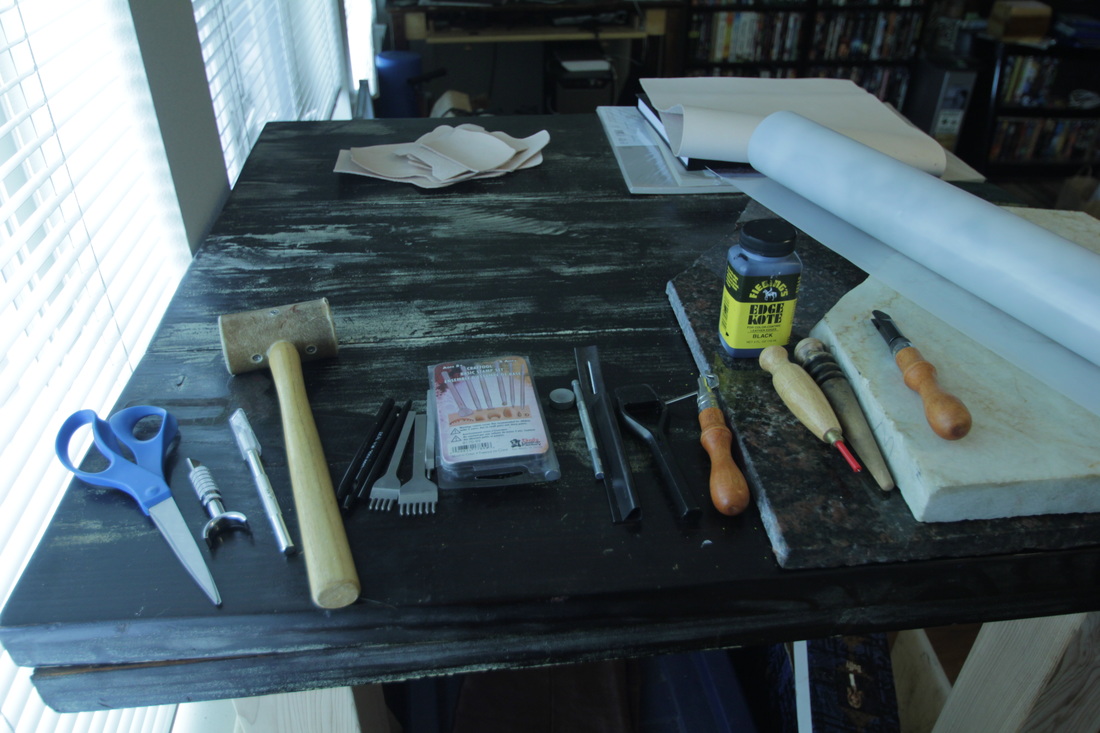 One of the hardest things to figure out when I first started working with leather was which tools to invest in. I wasn’t able to afford all of the things on this list all at once. I had to build my tool arsenal up slowly, in fact, I’m still building it. Knowing some of the basic tools that you’ll need and why, will help you feel more confident about investing your time into doing the leather work. I’m going to discuss ten basic tools and seven bonus tools that I find useful in my projects. 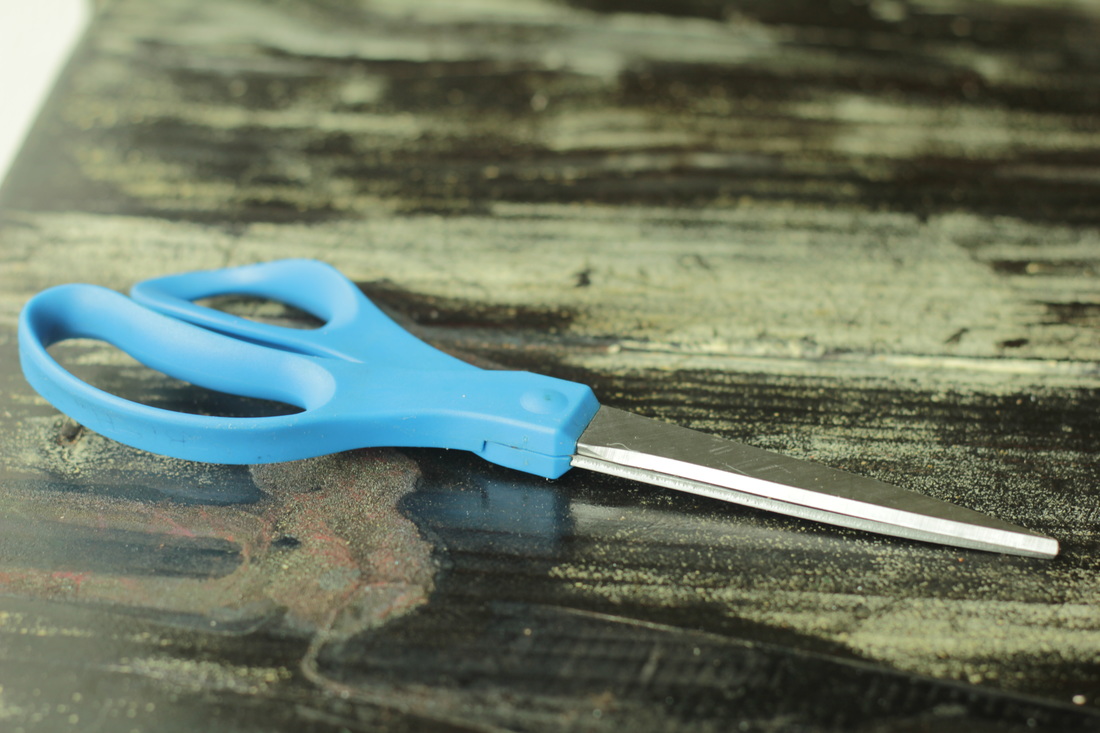 1) ScissorsI started with my everyday household scissors since I was cutting 2-4 oz leather. I find that as long as they are sharp they will work for the 1-5 oz leathers. I have Cutco scissors that will cut through a penny, but the blue handled office scissors work the best. Scissors are great for thinner leathers or trimming difficult edges. 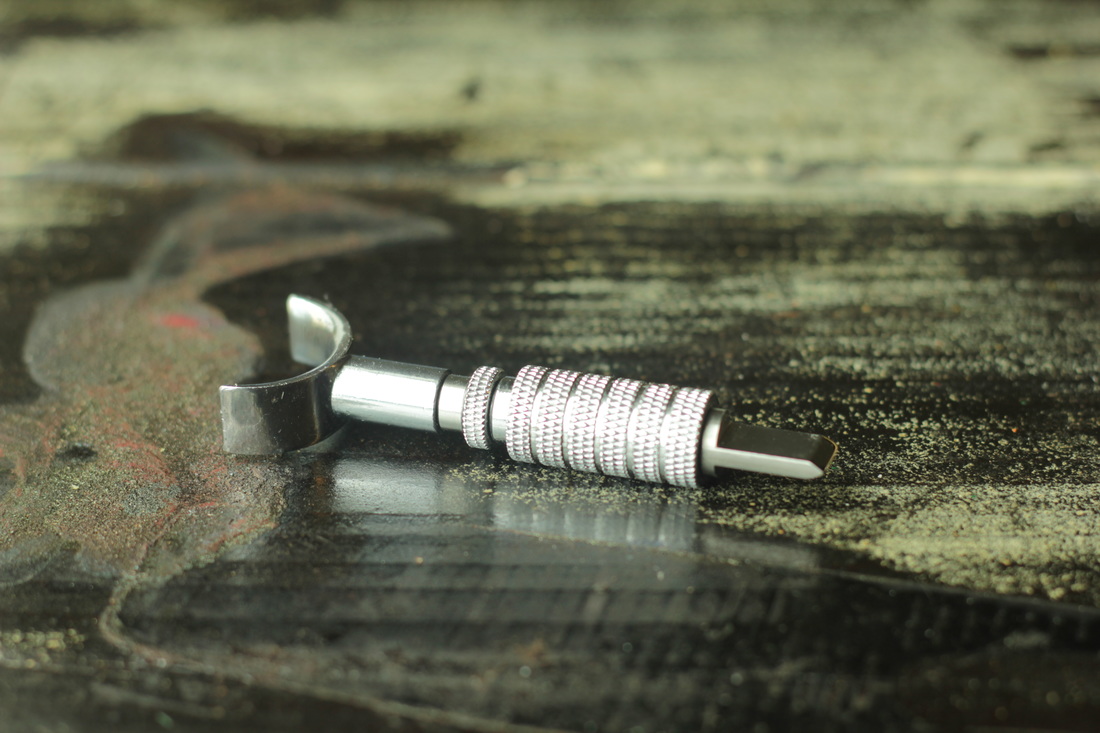 2) Swivel KnifeWhen you are using hides that are 6 oz or more you want something that will cut through thick layers. Some leather workers use a head knife, but I prefer the swivel knife. It is more versatile in that you can use it to cut large sections of leather such as a belt, or use it with detailed tooling designs. You can also keep it sharp by getting some jewelers rouge and using some cardboard or a scrap piece of leather to strop it each time you use it. 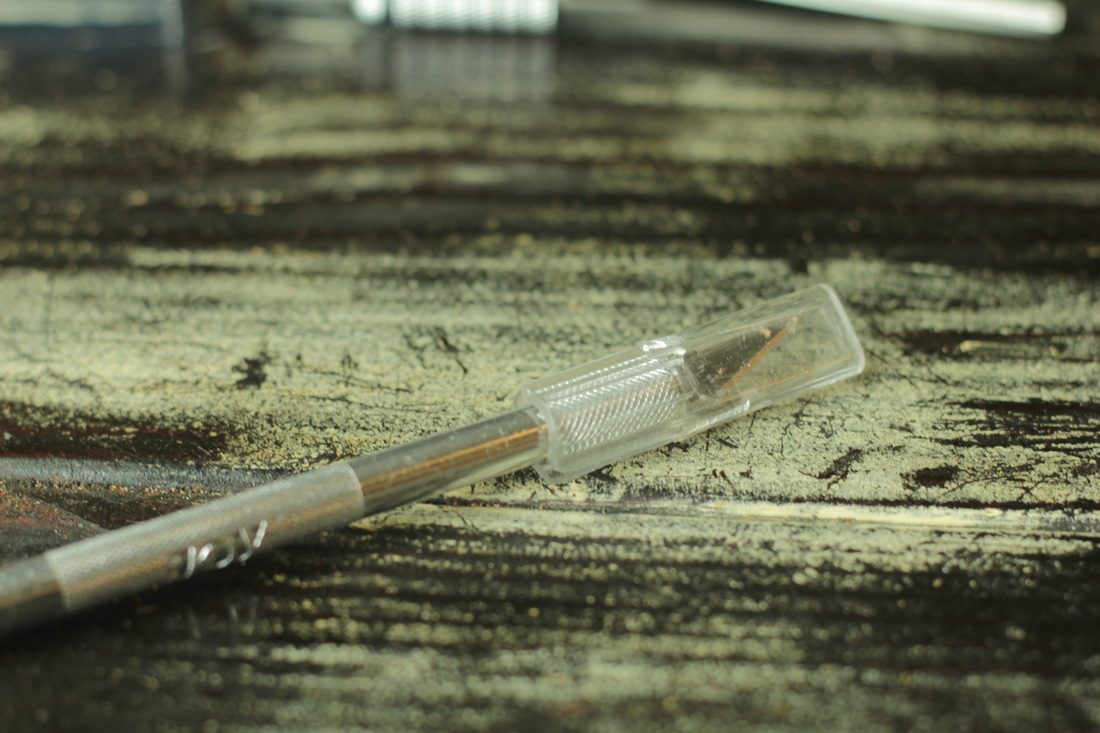 3) Exacto KnifeThis thin sharp blade can be very useful for small carving details. I find it extremely helpful in extracting corner cuts from a hide, leftover belt punches, or pretty much any time I have a limited amount of space but have to cut. 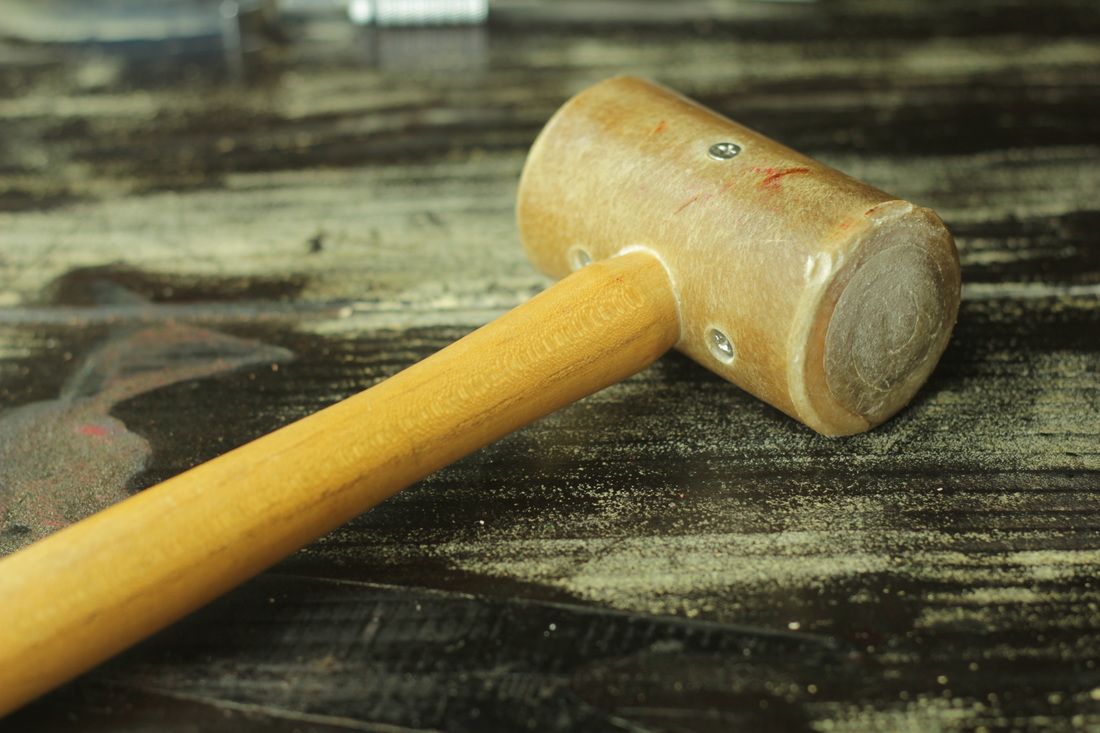 4) Raw Hide MalletSome people prefer poly headed mallets to the raw hide one, but as long as you don’t use a wood mallet or your household hammer you are good. The hammer is loud and will damage the ends of your stamps and other tools, and the wood mallet doesn’t provide enough weight to make nice rivets. I love the raw hide mallet because it isn’t too heavy but it gives a good solid pounding, and it doesn’t overly burden my elbow or wrist. 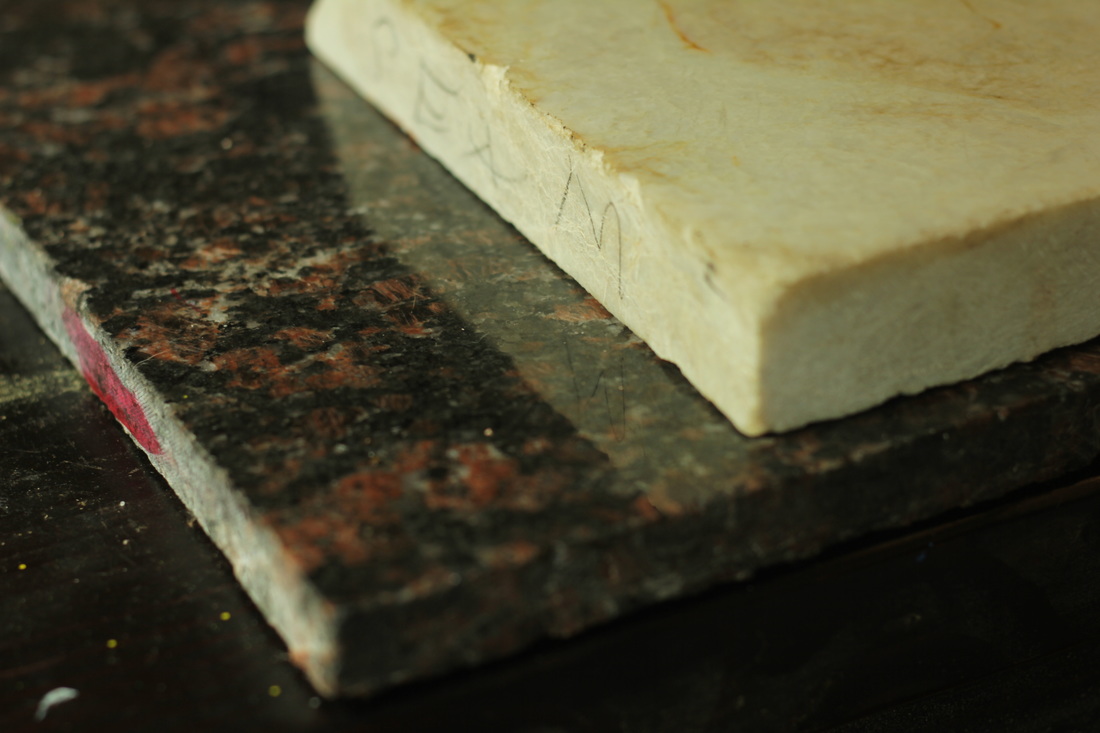 5) Stone SurfaceYou can purchase a granite slab, but I would recommend finding a place near you that cuts counter tops. They usually have scrap pieces for free or a reduced fee. Having a stone surface will give your rivets a more solid pounding. Using a wood or plastic surface by itself absorbs too much of the impact. 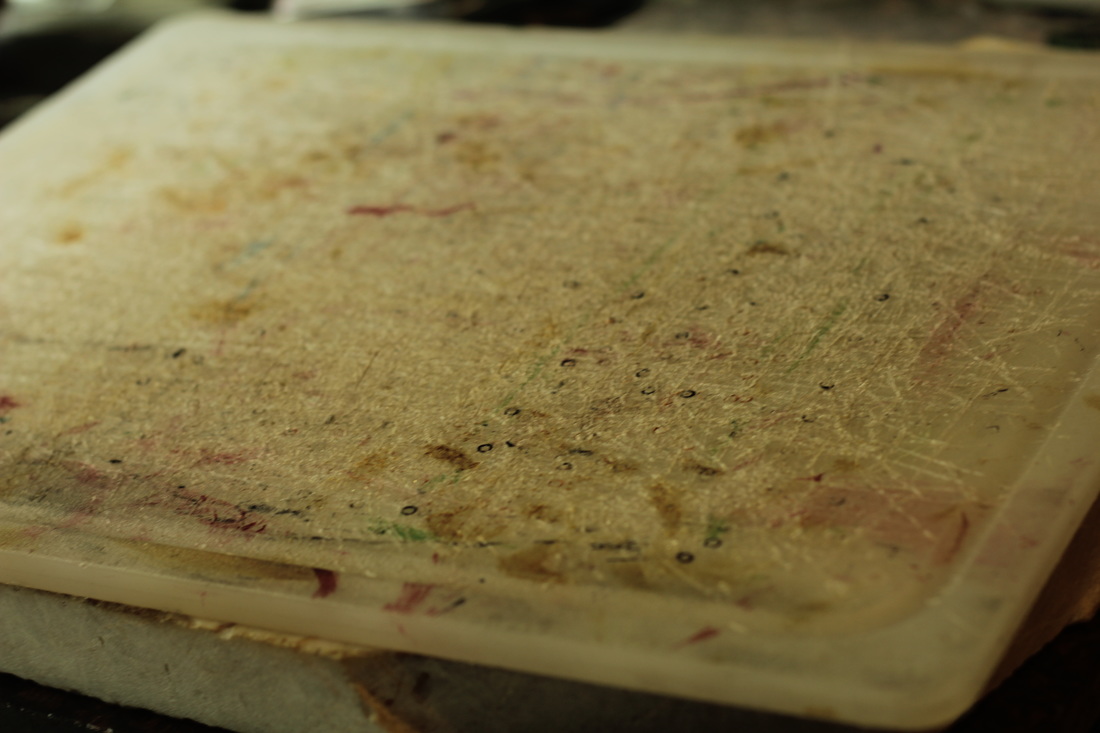 6) Cutting Mat6) Cutting Mat Having a surface to cut on that won’t dull your blade additionally is always good. You can use a self healing mat, poundo board, or a plastic cutting board. This can also come in handy when you are trying to decrease the amount of noise you are making while pounding. I place my cutting board between two pieces of granite to help absorb some of the sound without losing the solid surface that the stone provides. Note: don’t punch holes, cut, or have any sharp implements make contact with your stone surface, because it will dull your blade so fast it will make your head spin. 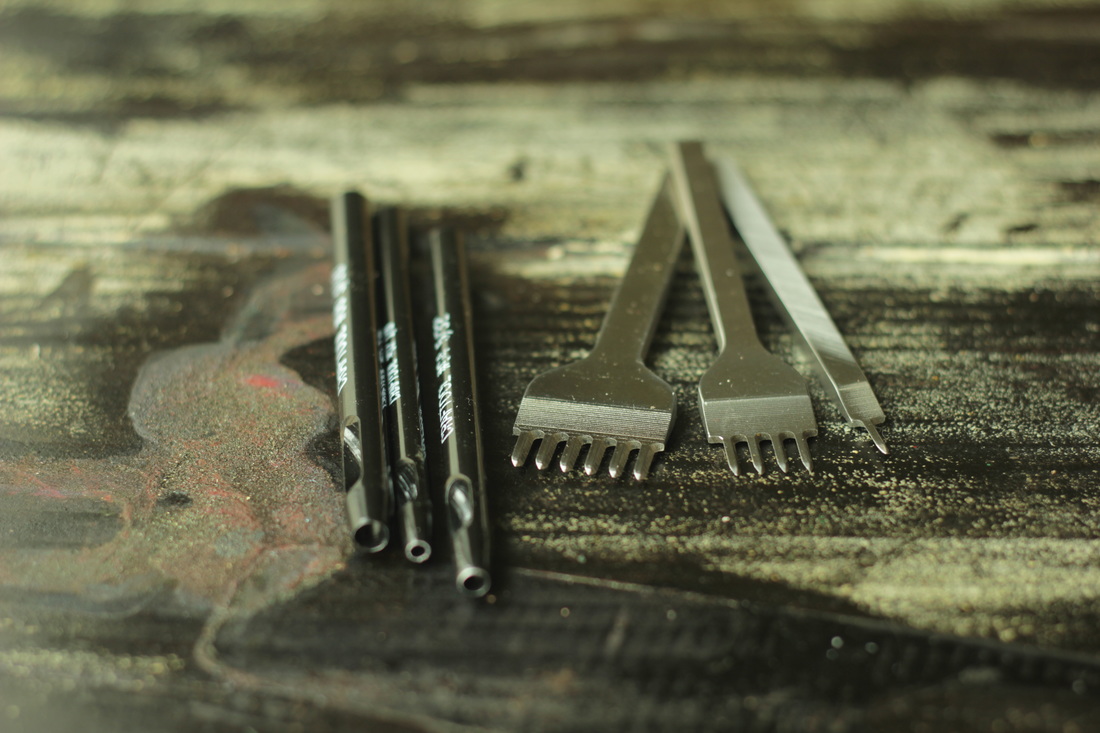 7) Hole Punch/Stitch Hole SetsIf you plan on using rivets or doing any stitching then both of these items are a good investment. I prefer the individual hollow punches for pounding a solid clean hole instead of the rotary ones. You can get more force behind the mallet swinging at the hollow hole punch than you can generate with just your one hand squeezing. The stitch hole punches usually come in sets of one, two, four and six punches and are very helpful for stitching through thick leathers. 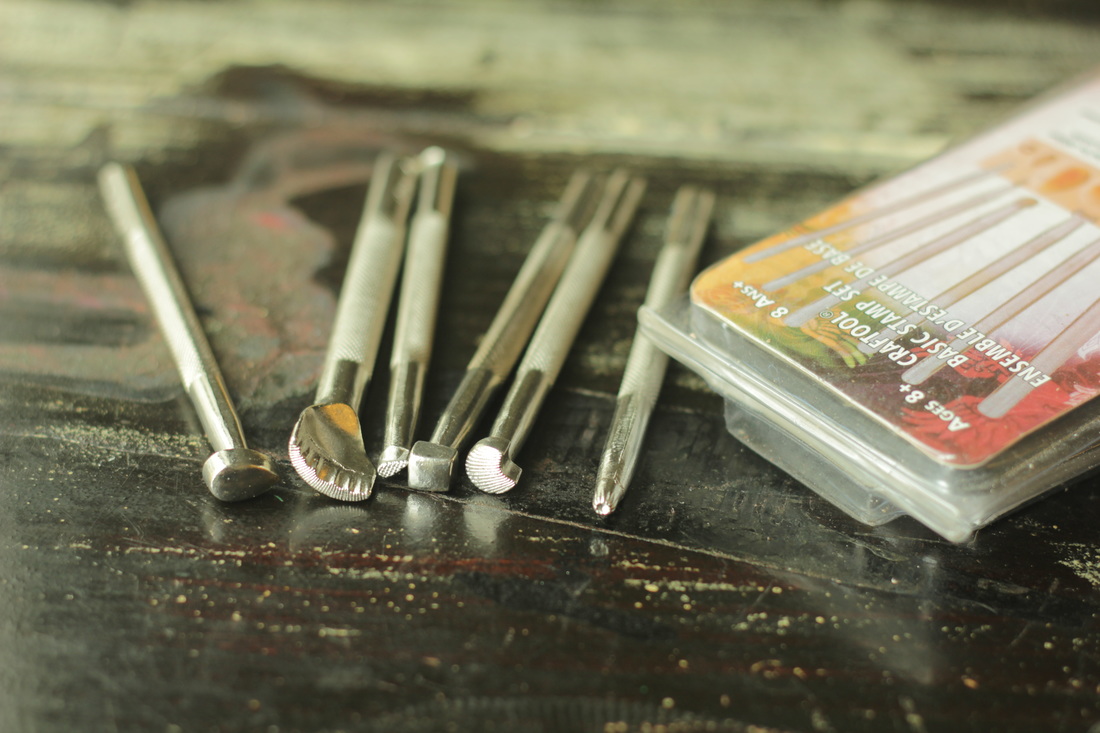 8) Six Piece Craftool Basic Stamp SetIf you plan to do any tooling you will definitely want to invest in a set. This one comes with a small sunburst circle, a background stamp shaped liked a tear, pear bevel, sea shell background, square bevel, and flower vein. You can actually use these six tools to create many beautiful designs. 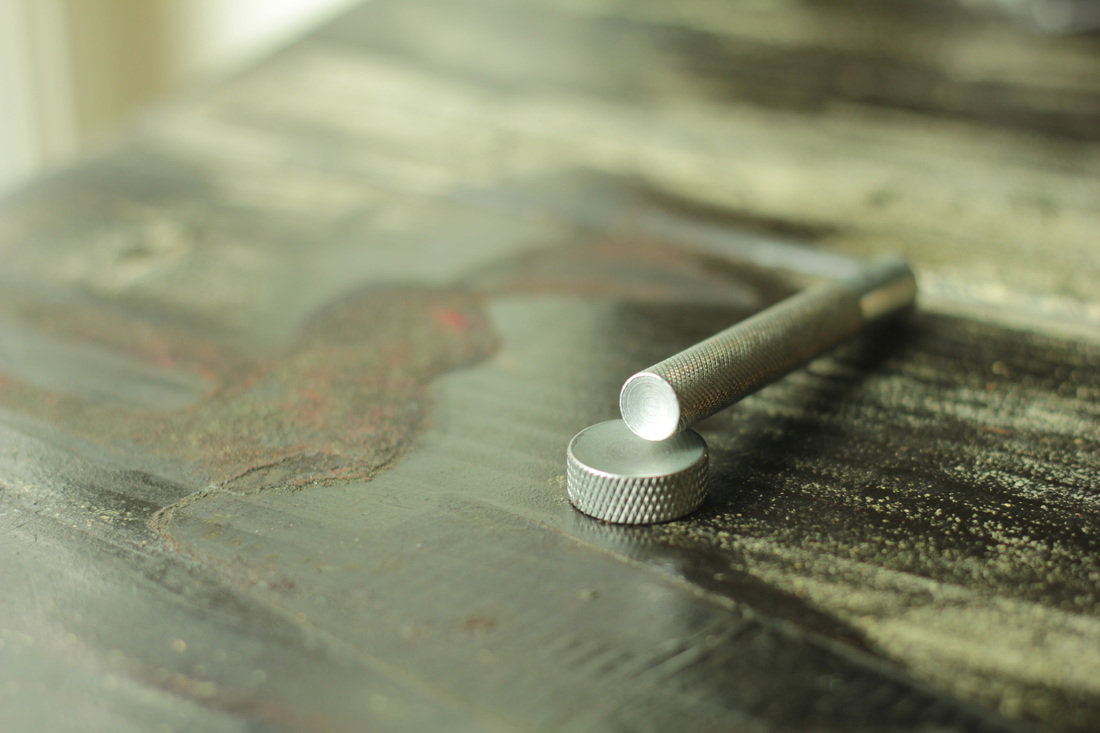 9) Rivet Setter & AnvilIf you plan to set any rivets you’ll need this set. The domed anvil helps you to keep the dome shape that some rivets have and the setter also has a domed side to give your rivet a nice tight fit. Using rivets can add shiny to your leather, as well as serve the function of holding pieces of leather together. 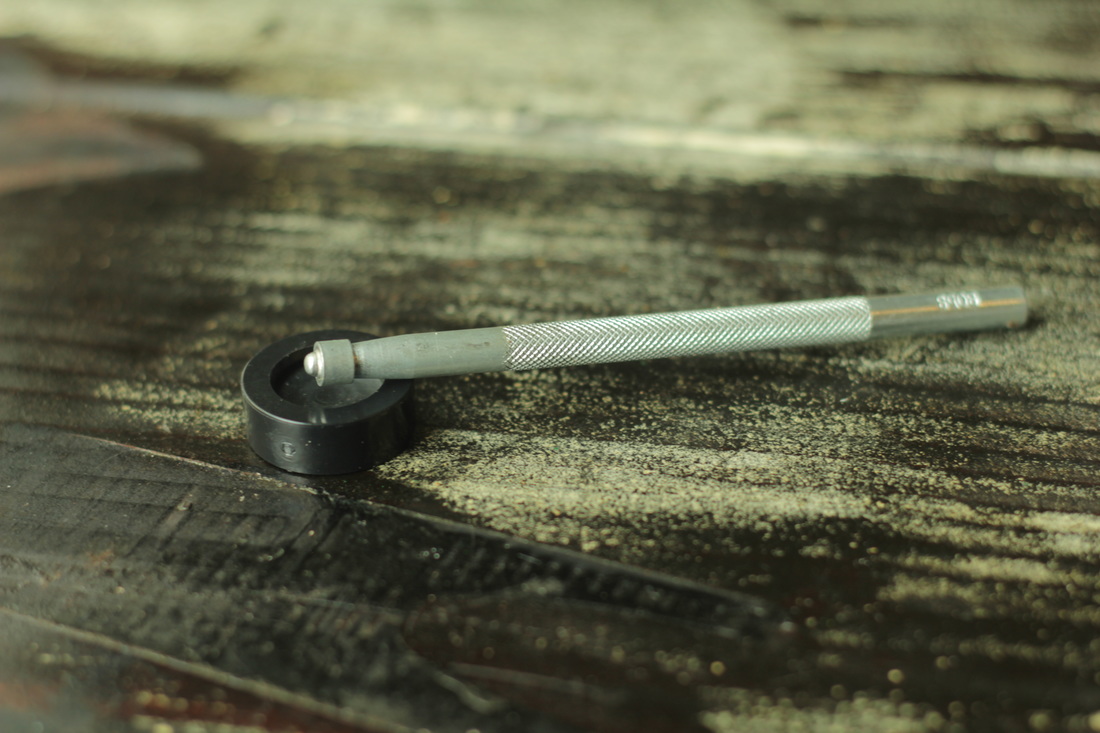 10) Snap SetterThere are several sizes of snaps and if you want the variety of different sizes then you should purchase a multi-size set. Otherwise, choose which size you like and be sure your tool and snaps match. Setting snaps can be tricky since you have to first pound down once or twice, then around in a circle to create a lip with the stem, then down again over the bed of the snap. However, they are extremely helpful for closing things such as bags, bracelets, and belts where you want to be able to showcase your buckle collection. Bonus Tools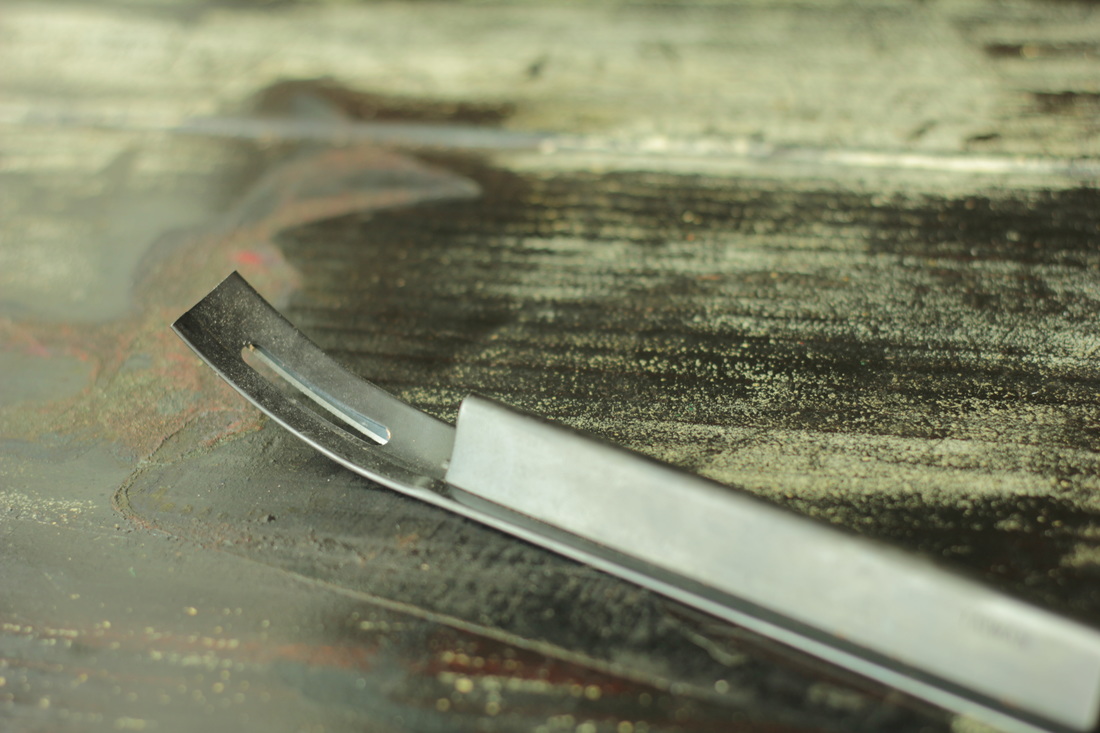 BevelerGetting the safety beveler was one of the best bonus tools to acquire. It’s shaped to prevent cutting leather too deeply and skives leather easily. You can also splice leather lace safely and with precision. I find it helps give belts, straps, bags and journals an extra nice edge. 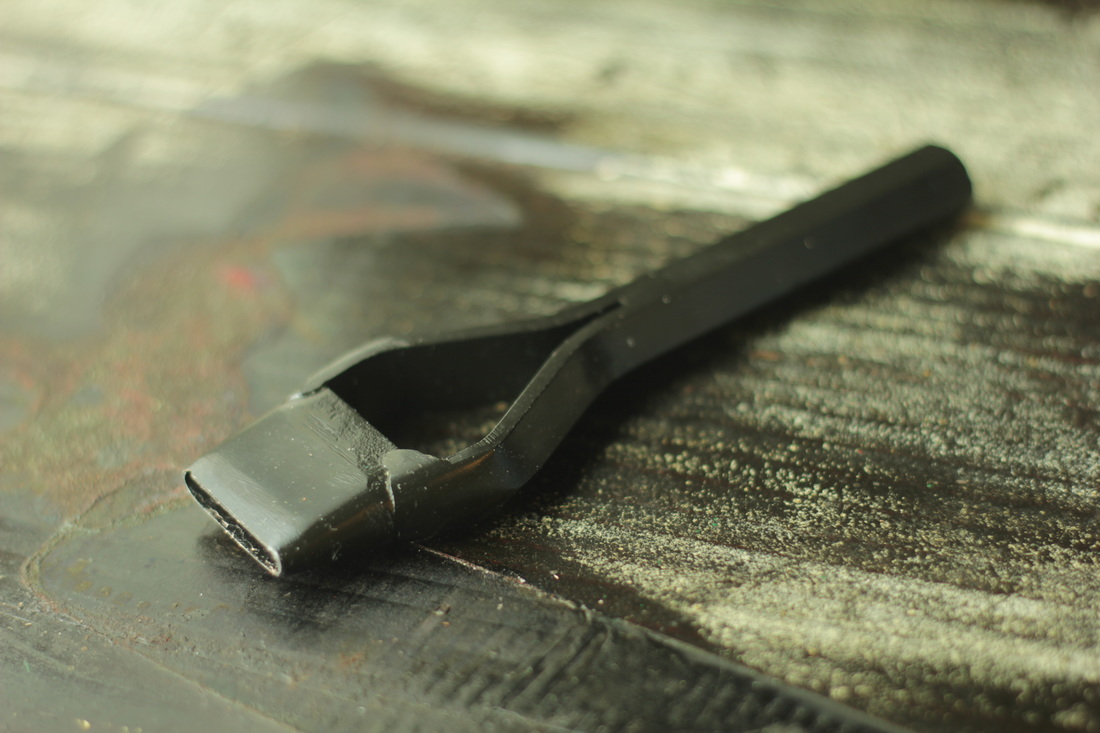 Oblong Hole PunchThis is used for making belts. I haven’t found another use for it yet, but it’s a time saver when creating belts. You can get various sizes, but I use the 1” one for various sized belts, preferring to just use the same punch more than once on the same belt when they are larger than 1” in width. 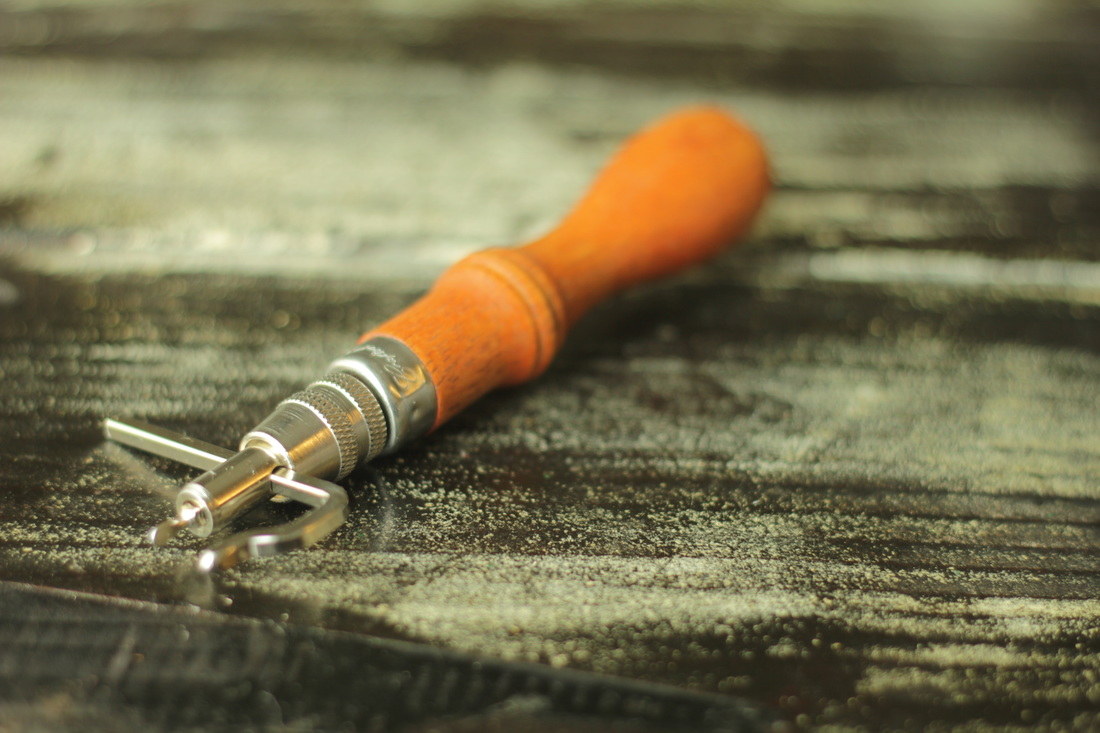 Stitch GrooverI love the stitch groover for two reasons. One, you can create straight stitch lines which really improves the end look of your stitch. Two, you can use it to create different width borders up to one and a half inches. This is great, especially around rounded edges where using a ruler isn’t possible. 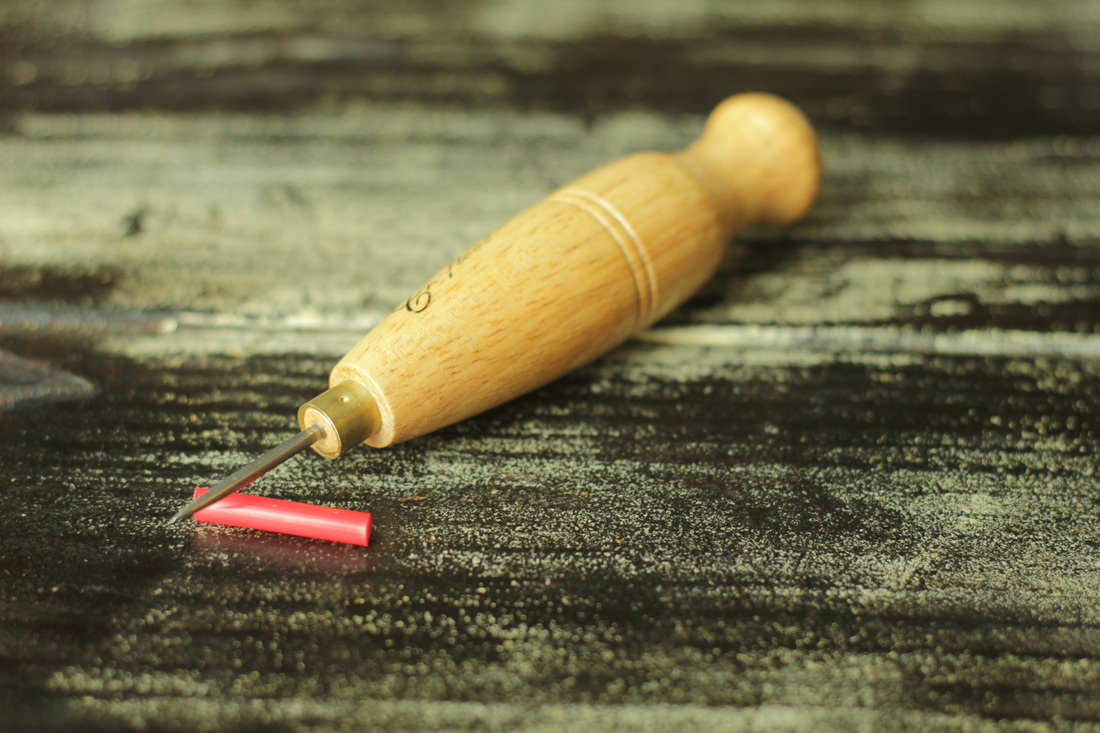 Stitch AwlBeing able to free hand poke holes into thinner leathers can save you time, broken needles, and finger soreness. Sometimes trying to get your dull thick leather needle through the layers of leather can be very difficult. Especially if you are using an oil tanned leather where the oiled hide will make your punch holes disappear. The stitching awl makes sewing easier and is worth the investment. 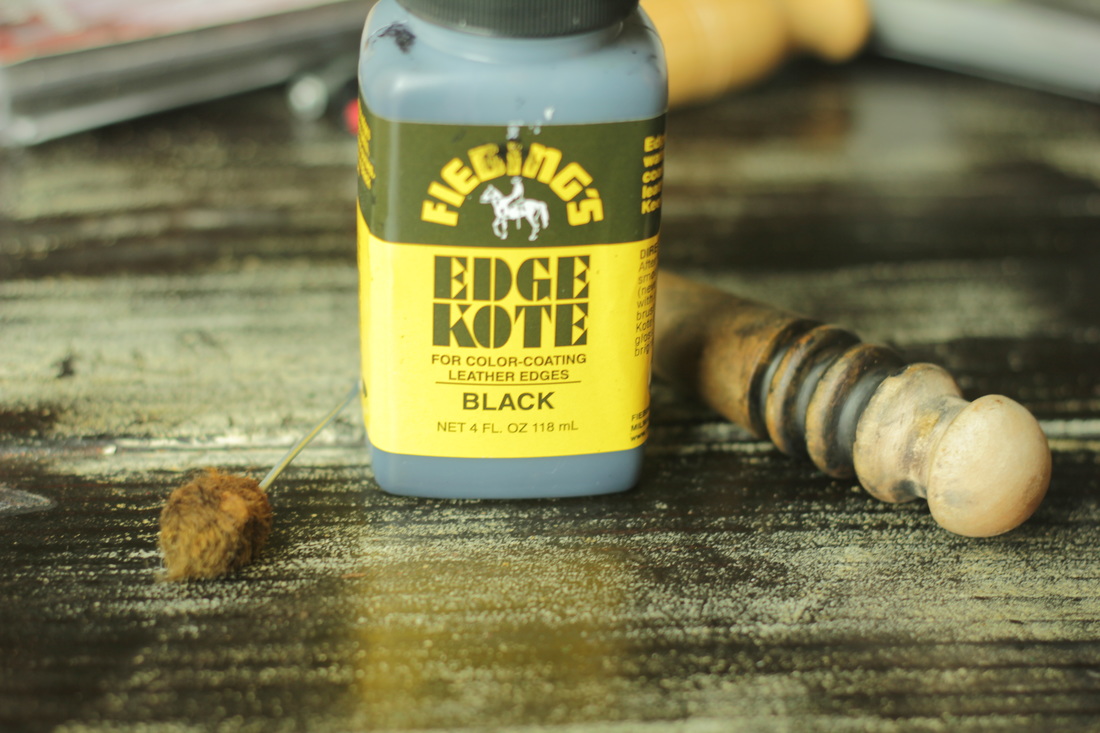 Wood BurnisherThis simple piece of rounded wood has various thicknesses for smoothing out the edges of leather. It takes some elbow grease to get the job done but it really makes your edges look rather smart. You’ll also want to get the Black or Brown Edge Coat with this tool. You will paint the edge with the edge coat and once it’s dry you’ll re-wet the edge with water, and then run the wood burnisher over the edge until you create a nice smooth finish. 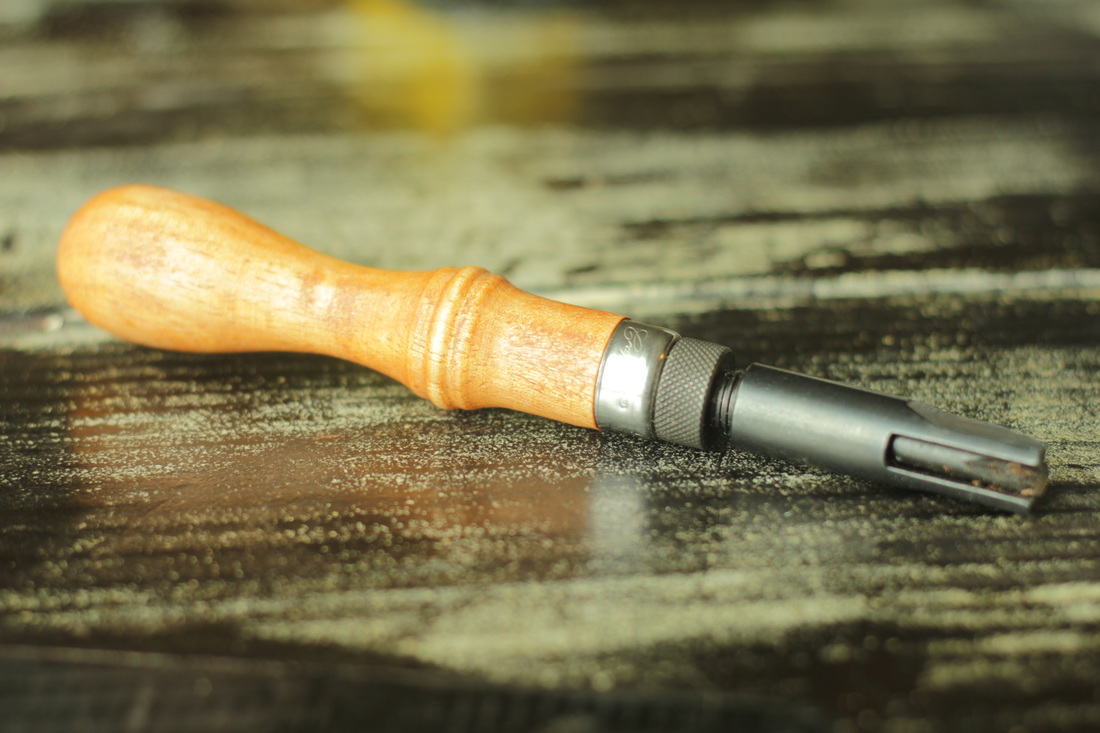 V-GougeThis tool makes the creating of belts easier. Usually a good belt is made with a 7-9 oz leather, and when you fold it over for the belt buckle the fold can be cumbersome, or create additional pressure on the rivets. The V-Gouge allows you to create a v-shaped channel where the belt buckle will fold so that the leather will set more flush together.  Stylus & Tracing PaperI put these two items together because they go hand and hand. While the stylus can be used without tracing paper. For example freelance drawing, marking holes to punch, and temporary marking where to use the V-Gouge, I mainly think of this tool as my tracing pen. Since neither of these two tools leave a lasting impact, it allows me to design with less mistakes.
by Willow Enright 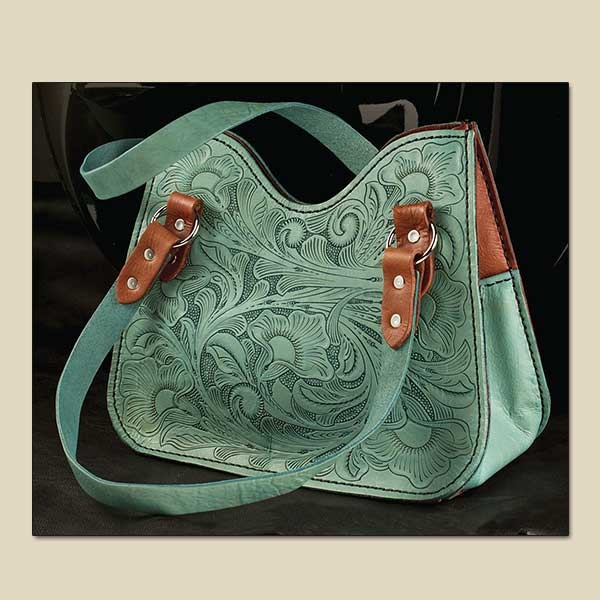 This is the Sophia Handbag Kit #44314-00 from Tandy. Don't be fooled into thinking you'll get the pattern for the bag layout, you will only get the tooling pattern for free. One thing that I have been asked for in the past few weeks is for patterns. “Where do you get your patterns?” “Can I have that pattern?” “Do you have a pattern for that?” Most of my patterns aren’t directly taken from one place or another, nor do I start off with a perfect pattern when I craft them myself. I will do more research on how to transfer my original cardboard patterns into digital copies that can be shared around the world, but for now I will share a few sites that have free downloadable patterns that you can start downloading and making, today! First and foremost Leather Craft Library, this site is brought to you by Tandy Leather. Most of their free downloads have to do with the tooling patterns that they show on an item, and aren’t a layout for how to construct the item. That being said they show you what tools it would take to duplicate the process, this means that in order to perfectly copy the pattern, you have to go out and buy a bunch of Tandy tools. I see what you’re doing Tandy. A.k.a. feeding my leather addiction, and creating new fuel for the fire that fills my soul and empties my pocket book.  This is the LC-521b pattern from Outside the Box Pattern. Outside the Box Patterns is a great way to look for free patterns. They tell you how large the image is, and what is the best item to place that tooling pattern on. You can open the pattern on a new tab on your browser then click the download button, it’s that easy. No wondering if that checkout chart will let you get away without paying a dime. There’s no tricking me into thinking that your messenger bag pattern was actually going to give me a layout pattern for said bag, only to give me the tooling pattern on that bag instead. What you see is what you get. I like this straight forward method of sharing. Elk Tracks is a nice one if you want to create buffalos and other western themed tooling patterns. I downloaded a few. I really like how they show you the pattern then the finished tooled product for a side by side comparison. I learn really well this way having to look and study at what’s happening and then experiment and try something, leaving me to figure it out on my own. I learn best this way, but this may not be the way you learn to each his own. 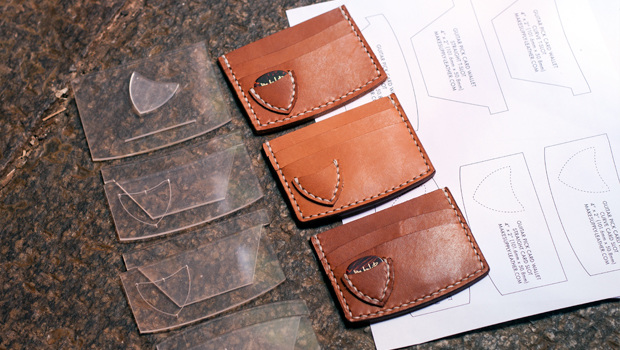 This is the Leather Guitar Pick Wallet template, pattern, and finished product from Make Supply. If you are a beginner Make Supply is a great place to start making wallets. Not only are the patterns free, but they have video tutorials that compliment those patterns. For those that want a more permanent template that will hold up to repeated use you can purchase the acrylic templates for a fee. One site that really caught my attention is Leather Craft Pattern, but this site isn’t the greatest if you’re only searching for free patterns. I went onto this site found many free patterns that I would like to look at with a more in depth eye, only to be asked for payment greater than $0.00 at check out. Meaning you have to buy something in order to get the free patterns.  A screen shot of Leatherworkers.net forum for free templates. I would stay away from pattern sharing forums like those on leatherworker.net. More than half of the links listed on this forum are so old they are dead ends. If you are up to challenge then this site is fine. I find it to be more frustrating than helpful. Don Gonzales Saddlery doesn’t have a great selection, I liked the skull pattern. This site is much like Outside the Box Pattern, with its straight forwardness.  This is a finished Glock 42 Avenger Holster Pattern from JLS Leather. If you are looking for patterns for your 2nd Amendment support piece, aka a gun then, JLS Leather is the site for you.
I hope that this list of resources is helpful to you, and will fuel your creativity. I look forward to seeing what you make with this knowledge and hope that you share by leaving a comment below. The inspiration for creativity should always be free, and leather crafters need to share their knowledge. |
Willow EnrightI started crafting out of leather in 2011, and now I am making it my life's work. I am writing this blog to help myself remember some of the small steps in past projects, sharing my triumphs and failures, as well as my love of leather. Archives
November 2017
Categories
All
|

|
Cosplay DIY (Blog) |


 RSS Feed
